Table of Contents
Advertisement
Quick Links
Advertisement
Table of Contents

Related Manuals for HP Cell Phone


Summary of Contents for HP Cell Phone
- Page 1 HP iPAQ Glisten User Manual...
- Page 2 © Copyright 2009 Hewlett-Packard Development Company, L.P. HP iPAQ Glisten products are powered by Microsoft Windows Mobile ® ® Professional with Messaging and Security Feature Pack. Microsoft Windows, the Windows logo, Outlook, Windows Mobile Device Center, and ActiveSync are trademarks of Microsoft Corporation in the U.S.
-
Page 3: Table Of Contents
Turn on your HP iPAQ Glisten ... 8 Configure your HP iPAQ Glisten ... 8 Transfer data from your old device (optional) ... 9 4 Getting started with your HP iPAQ Glisten ... 10 Start with the Today screen ... 12 Using your keyboard ... 14 Status icons ... - Page 4 Backup your phone using Sprite Backup ... 36 Update your phone using AT&T Updates ... 36 Battery saving tips ... 37 View hardware and software information about your HP iPAQ Glisten ... 37 8 Set up your email accounts ... 39 Overview ... 39 Set up IT managed corporate email ...
- Page 5 Reply to or forward a message ... 42 Add an attachment to a message ... 42 Open attachments ... 42 Respond to meeting requests ... 43 Create or change a signature ... 43 Keyboard shortcuts ... 43 10 Send and receive text messages and multimedia messages ... 44 Overview ...
- Page 6 Show the start and due dates in the task list ... 64 Mark a task as complete ... 64 15 Take notes ... 65 Overview ... 65 Write a note ... 65 Create a voice note ... 66 Create a copy of a note ... 67 Copy and paste content between notes ...
- Page 7 Enter a value or text in a cell ... 76 Edit a value or text in a cell ... 76 Enter a sequence of values automatically ... 76 Copy and paste data ... 77 Insert cells ... 78 Insert rows ... 78 Insert columns ...
- Page 8 Transfer your media files ... 98 HP Photosmart Mobile ... 99 View pictures and videos stored on your HP iPAQ Glisten or a storage card ... 99 Attach a voice note to a picture ... 99 Print pictures ... 100 View a slide show ...
- Page 9 Connect your HP iPAQ Glisten to your PC ... 120 Copy files between your HP iPAQ Glisten and computer ... 121 Copy data from your previous device to your HP iPAQ Glisten ... 122 Troubleshoot synchronization issues ... 122 24 Listen to music and watch videos ... 124 Windows Media Player ...
- Page 10 End a connection ... 132 27 Remote Desktop Mobile ... 133 28 Java Applications ... 134 29 Use your HP iPAQ Glisten as a wireless modem ... 135 Overview ... 135 Connect to a computer using the USB sync cable ... 135 Connect to a computer using Bluetooth ...
- Page 11 Audio and video ... 149 Battery ... 150 Bluetooth ... 152 Compatibility ... 154 Connections ... 158 34 Troubleshoot your HP iPAQ Glisten ... 159 Battery ... 159 Connection ... 160 Synchronization ... 163 Miscellaneous ... 164 35 Product Specifications ... 166 System specifications ...
-
Page 13: Welcome To Your Hp Ipaq Glisten
User Manual (this document)—Refer to this comprehensive User Manual for a more in-depth ● understanding of all the versatile and advanced features and functions available on your iPAQ. If you need information that you cannot find in this guide, please go to http://www.hp.com/support. -
Page 14: Product Registration
, tap Settings > System > Device Information. You can also find this iPAQ, press Start information on the product label on the box, or on the label underneath the battery on your iPAQ. NOTE: Registration is not supported in all countries or regions. Chapter 1 Welcome to your HP iPAQ Glisten... -
Page 15: What's In The Box
What's in the box? The following items are included in the box: HP iPAQ Glisten ● Rechargeable battery ● Power adapter ● NOTE: The power adapter shipped with your iPAQ might vary depending on the country/region. USB sync cable ●... -
Page 16: Set Up Your Hp Ipaq Glisten
NOTE: Placing the screen on hard surfaces can cause scratches to the screen. Remove battery cover Press and then pull down on the back of the phone to remove the battery cover. Chapter 3 Set up your HP iPAQ Glisten... -
Page 17: Insert Sim Card And Optional Microsd Card
Insert SIM card and optional microSD card Insert SIM card: With the gold SIM card contacts facing down, press gently on the SIM card as you slide it into the slot. NOTE: If the battery is already inserted, remove it before inserting the SIM card. Also, make sure that the metal contacts are facing down and the notched corner is in the correct position. -
Page 18: Insert The Battery
Insert the battery Once you have inserted the SIM card, insert the battery. With the HP logo facing out, push the top of the battery in first. Push the bottom of the battery into the phone. Replace battery cover Slide the battery cover to lock it in place. -
Page 19: Charge Your Hp Ipaq Glisten
Your iPAQ will fully charge in approximately 2–4 hours. Charging might take more time when your iPAQ is connected to a powered computer or non-HP accessories. To charge the battery: Plug the USB sync cable into the phone. -
Page 20: Turn On Your Hp Ipaq Glisten
The first time you turn on your phone, you are prompted to tap the screen. Next, use the stylus or your finger to align the screen. After you align your phone screen, it is ready to use! Chapter 3 Set up your HP iPAQ Glisten... -
Page 21: Transfer Data From Your Old Device (Optional)
Once synchronization is complete, you can disconnect your iPAQ from your computer. NOTE: If your old Windows phone supports Sprite Backup, you can copy data to your iPAQ. See Backup your phone using Sprite Backup on page Synchronize your HP iPAQ Glisten Transfer data from your old device (optional) -
Page 22: Getting Started With Your Hp Ipaq Glisten
Send Start Press to open the Start menu, where you can access programs and change your iPAQ settings. Chapter 4 Getting started with your HP iPAQ Glisten Earpiece Microphone Headset jack (3.5 mm) Micro-USB power/ sync connector Navigation ring Press up, down, left, and right to navigate. - Page 23 Power/sleep on/off Stylus Noise-canceling microphone Wi-Fi on/off Speaker Camera...
-
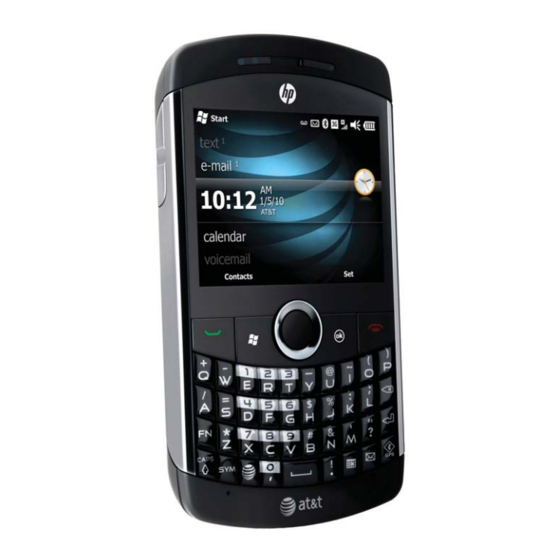
Page 24: Start With The Today Screen
Scroll left or right to browse through your pictures. ● music—Select to play your music. Tap Play All Songs to listen to all the music on your iPAQ. ● Scroll left or right to browse through your music collection. Chapter 4 Getting started with your HP iPAQ Glisten... - Page 25 getting started—Select and scroll left or right to get a list of frequently used tasks. Tap a task to ● learn more. phone—Select to view any missed calls. Tap to get a list of incoming and outgoing calls. ● Start with the Today screen...
-
Page 26: Using Your Keyboard
Alternatively, press after pressing a character to scroll through a list of alternate symbol choices. CAPS CAPS Lock FN Lock Chapter 4 Getting started with your HP iPAQ Glisten Spacebar Press to add a space. Press to launch Internet Explorer. -
Page 27: Status Icons
Status icons Your iPAQ displays icons on the screen to indicate different status information. The following table shows the common status icons and what they mean. Icon Status Voice call active Call on hold Missed call New voice mail Call forwarding New email message Speakerphone on Alarm reminder... -
Page 28: Pin Setup And Lock Screen
To lock your phone, press Start ▲ is displayed. Chapter 4 Getting started with your HP iPAQ Glisten , and then tap Settings > Lock. , and then tap Lock. After you lock your phone, the lock screen , and then the missed call, voicemail, email,... - Page 29 ▲ Tap the lock icon to see if you have a missed call, voicemail, email, or text message. To view a missed call, voicemail, email, or text message, tap and slide the corresponding icon. NOTE: When you unlock your iPAQ, you can use the keyboard or on-screen keypad to enter your PIN or password.
-
Page 30: Make And Receive Phone Calls
Make and receive phone calls Make a call Press Send If the Today screen is displayed, you do not need to press Send Use the keypad to dial a phone number, and then press Send To end the call, press End NOTE: On the Phone screen, when you enter a number or contact's name, your iPAQ searches Contacts, Call History, Speed Dial lists, and the SIM card to find a matching name and number. -
Page 31: Put A Call On Hold
Put a call on hold During a call, you can put the call on hold and dial another number or answer an incoming call. If you have more than one call on the line, you can switch between calls. To put a call on hold, tap Hold. ●... -
Page 32: Make A Call From Contacts
To add a Speed Dial number: Press Send From your contacts list, tap a contact to open it. Tap Menu, and then tap Add to Speed Dial. On the Speed Dial screen, in the Location box, select a speed dial number, and then tap OK. TIP: You can also assign speed dial numbers to web addresses and email addresses that are stored in the Contacts on your iPAQ. -
Page 33: Dial International Numbers
To dial a hyperlinked phone number from an email or text message: Tap the phone number. Verify that the number is correct and add an area code or country code if needed. Tap Call or press Send Dial international numbers Press Send On the dialer screen, using the keyboard, press and hold 0 until the plus (+) sign appears. -
Page 34: Set Up Call Forwarding
View call details Press Send Tap the phone number or contact name to view the call details. The date, time, and duration of the call are displayed. Change the call history view In the call history list, tap Menu > Filter, and then tap All Calls, Missed, Outgoing, or ▲... -
Page 35: Set Up Caller Id
In Block incoming calls, select one of the following: All calls ● When roaming ● ● In Block outgoing calls, select one of the following: All calls ● International ● International except to home country ● ● Tap OK, enter your call-barring password (provided by your service provider), and then tap OK again. -
Page 36: Voice Commander
Voice Commander Use the Voice Commander application to look up contacts, dial a contact by name, get calendar information, play and control your music, and to launch applications on your iPAQ. To start using Voice Commander, press Start Call a contact saved in the contact list Call the last number dialed Dial a number using speed dial Compose a message or email... -
Page 37: Customize Settings
Customize Settings Name your HP iPAQ Glisten Use the device name to identify your iPAQ in the following situations: When synchronizing with a computer. ● When connecting to a Wi-Fi network. ● ● To identify your iPAQ during Bluetooth pairing. -
Page 38: Set The Time
On the Options tab, select the type of information you want to display on the screen when you turn on your device, and then tap Identification information and/or Notes. Tap OK. Set the time In most situations, your phone clock will automatically synchronize with the cell network, even as you travel to different time zones. -
Page 39: Customize Your Screen
To change ring tone and ring type: Press Send , and then tap Menu > Options. Select a ring type from the Ring type list. Select a ring tone from the Ring tone list. NOTE: To play a ring tone, tap play Tap OK. -
Page 40: Customize Your Today Screen
To adjust the brightness of the display: Press Start Select the brightness level from the On Battery and On Power drop-down lists. Tap OK. NOTE: Setting the brightness level as Auto will turn on the light sensor. Your iPAQ will automatically adjust the screen brightness depending on the surrounding light conditions. -
Page 41: Change The Power Management Settings
To change the background screen: Press Start , and then tap Settings > Today. On the Appearance tab, select the Use this picture as the background check box. Tap Browse, and then select the picture you want to set as the background. Tap OK. -
Page 42: Remove Programs
Remove programs You may want to remove unused programs from your iPAQ to create more available storage space. Press Start Tap the program you want to remove, and then tap Remove. In the Remove Program warning dialog box, tap Yes. NOTE: You can remove only the programs that you have installed after you purchased your iPAQ. -
Page 43: Manage Your Hp Ipaq Glisten
Manage your HP iPAQ Glisten Secure your HP iPAQ Glisten Depending on your needs, you have several different security options available to you: SIM PIN prevents unauthorized use of your SIM card. When the SIM card is locked, the phone ●... -
Page 44: Lock The Keyboard
When you unlock your iPAQ, you can use the keyboard or on-screen keypad to enter your PIN or password. Lock your HP iPAQ Glisten using a PIN PIN setup and lock screen on page Chapter 7 Manage your HP iPAQ Glisten , tap Settings >... -
Page 45: File Explorer
File Explorer Use File Explorer to view, copy, move, or delete the files stored on your iPAQ or storage card. You can also create new folders to organize your files. To Open File Explorer and create a new folder: , and then tap File Explorer. The default folder, My Documents opens. Press Start NOTE: To navigate to a different top-level folder, tap My Documents at the top of the screen,... -
Page 46: Task Manager
TIP: If your iPAQ appears sluggish or slow, open the Task Manager and close applications not in use. Chapter 7 Manage your HP iPAQ Glisten , tap Tools > Task Manager. Do This… Tap the program, and then tap End Task. -
Page 47: Sim Manager
SIM Manager Using the SIM Manager, you can copy the SIM contacts to your phone or copy phone contacts to your SIM card, in addition to other tasks. To open the SIM Manager, press Start To… Create a contact View contact details Edit contact details Delete a contact Select all contacts... -
Page 48: Backup Your Phone Using Sprite Backup
This includes updates to the Windows Mobile operating system and applications installed on your phone. Press Start Tap Check. Chapter 7 Manage your HP iPAQ Glisten , and then tap Apps > Sprite Backup. , and then tap Settings > System > AT&T Updates. -
Page 49: Battery Saving Tips
View hardware and software information about your HP iPAQ Glisten Using the HP Device Information application, you can view your iPAQ serial number, operating system information, and other information about memory, display, system, camera, keyboard, Bluetooth, Wi- Fi, GSM, and GPS. - Page 50 NOTE: You can also view hardware and software information about your iPAQ here: press Start and then tap Settings > System > About. Chapter 7 Manage your HP iPAQ Glisten...
-
Page 51: Set Up Your Email Accounts
Set up your email accounts Overview Your phone is capable of accessing your personal email messages and your corporate email messages. You can set up multiple email accounts, all accessible from the Today screen email section. When you set up corporate email, you may need to talk to your company’s IT administrator to get setup information such as the Microsoft Exchange server name and settings. -
Page 52: Set Up Personal Email
NOTE: If your phone is lost or stolen, you or your IT department may initiate a remote wipe. When your phone is remotely wiped, any voice calls in progress will be terminated, except for an emergency call. Set up personal email You can set up your personal email using this standard process. -
Page 53: Send And Receive Email Messages
Send and receive email messages Overview Each messaging account has a set of folders with five default messaging folders: Deleted Items ● Drafts ● Inbox ● Outbox ● Sent Items ● The messages you receive and send through the account are stored in these folders. You can also create additional folders for each account. -
Page 54: Reply To Or Forward A Message
TIP: To set the email message priority, tap Menu > Message Options. In the Priority list, select Low, Normal, or High. NOTE: If you are working offline, email messages move to the Outbox folder and are sent the next time you connect. Reply to or forward a message Tap the message to open it, tap Menu >... -
Page 55: Respond To Meeting Requests
Respond to meeting requests In your email Inbox folder, tap the meeting request to open it. To accept the meeting request, tap Accept. To decline or accept the meeting tentatively, tap Menu, and then tap Decline or Tentative. Create or change a signature Press Start , tap E-mail, and then tap an email account. -
Page 56: Send And Receive Text Messages And Multimedia Messages
10 Send and receive text messages and multimedia messages Overview Each messaging account has a set of folders with five default messaging folders: Deleted Items ● Drafts ● Inbox ● Outbox ● Sent Items ● The messages you receive and send through the account are stored in these folders. You can also create additional folders for each account. -
Page 57: Send A Text Message
Send a text message Text messaging allows you to send short messages composed of text and numbers. When you open up or send a new text message, the message is in conversation view. This view is similar to instant messaging —you can see the messages you sent and the replies. -
Page 58: Send A Multimedia Message
Send a multimedia message A multimedia message is sent to and from a mobile phone, and includes a picture or video, sound clip, and a short text message. NOTE: You might incur extra costs when sending multimedia messages depending on your service plan. Press Start To add a picture or video, tap the Insert picture/video box, and then tap a... -
Page 59: 11 Manage Your Contacts
11 Manage your contacts Add contacts You can add contacts to your phone and/or to your SIM card. A SIM contact is usually limited to a name and one phone number. Outlook contacts can contain detailed contact information and multiple numbers. -
Page 60: Edit Contact Information
Edit contact information Press Start Tap the contact. Tap Menu > Edit, and then enter the changes. When finished, tap OK. Delete a contact Press Start Tap the contact. Tap Menu > Delete Contact or Delete SIM Contact. Tap Yes. Create and assign a category You can use categories to organize and group your contacts. -
Page 61: Make A Call From Contacts
You can use the following methods: In the Enter a name box, enter a partial name or phone number. To show all the contacts, tap ● the Enter a name box and clear the text. At the top of the contact list, tap the alphabetical index. ●... -
Page 62: Send A Contact's Information As A Vcard
Send a contact's information as a vCard From your contact list, you can send a contact's information to someone else using the vCard format via a multimedia message. The vCard is sent as an attachment, and can be opened in other email programs. Press Start Tap a contact, tap Menu >... -
Page 63: Create Email And Messaging Groups
Create email and messaging groups Create your own email or messaging group to easily send an email, text message, or multimedia message to a group of contacts. , tap Contacts, and then tap New. Press Start Tap E-mail Group or Messaging Group. In the Group name box, enter a name for your email or messaging group. -
Page 64: 12 Set Alarm Clock
12 Set alarm clock You can set up to three different alarms on your phone. With each alarm, you create your own description and choose the day or days of the week the alarm sounds. Also, you get to select a custom alarm sound and style. - Page 65 Tap the time to open a clock, and then tap and drag the clock hands or use the box below. Tap to change the alarm sound and style. In the Play sound list, select a sound. To activate the alarm, select the box on the left. NOTE: On the More tab, you can select Sound alarms even when the device is set to silent or vibrate.
- Page 66 To disable an alarm: On the Today screen, scroll to the clock, and then press the Center Select key. Clear the check box next to the alarm name, and then tap OK. Chapter 12 Set alarm clock...
-
Page 67: 13 Manage Your Calendar
13 Manage your calendar Overview Use your calendar to schedule appointments, including meetings and other events. You can also synchronize your work calendar with your iPAQ using Microsoft Exchange. If you do not sync to your work calendar, you can use the Microsoft MyPhone service to sync your calendar to the web. To access the calendar, from the Today screen, scroll to calendar, and then press the Center ▲... - Page 68 TIP: To attach your own notes to the appointment, tap the Notes tab. When you open the appointment on your calendar, your notes are displayed. You may want to assign a category to your appointment. This allows you to filter your calendar view by a specific category, such as business appointments only.
-
Page 69: View Your Appointments By Category
View your appointments by category When you create an appointment, you can add a category. You can choose from the default categories —Business, Holiday, Personal, and Seasonal—or create your own. Once you have added a category to your appointments, you can filter your calendar view by a specific category, such as business appointments. -
Page 70: Change Your Calendar View Based On Your Work Week
Change your calendar view based on your work week You can adjust your calendar to fit your work week schedule including number of days and the first day, in addition to choosing the default calendar view. From the Today screen, scroll to calendar, and then tap Today. Tap Menu >... -
Page 71: Change Calendar Options
Change calendar options You can change the reminder time before upcoming appointments and the default email account that is used when you send an appointment request. From the Today screen, scroll to calendar, and then tap Today. Tap Menu > Tools > Options > Appointments tab. Select the Set reminders for new items check box. -
Page 72: Update An Appointment
Update an appointment From the Today screen, scroll to calendar, and then tap Today. Tap the appointment to open it, and then tap Menu > Edit. NOTE: If the appointment is recurring, you can make changes to a single occurrence—the meeting you opened up—or to all occurrences. -
Page 73: 14 Create And Manage Tasks
14 Create and manage tasks Overview Tasks help you create an organized to-do list. For each task you can set a reminder and add it to a particular category, such as business or personal. You can view your tasks by category or sort your tasks based on status, priority, subject, start date, or due date. - Page 74 Tap Due, and in the calendar, tap a date. Add additional information to the task as needed. When you are finished, tap OK. TIP: To attach your own notes to the task, tap the Notes tab. When you open the task, your notes are displayed.
-
Page 75: View Your Tasks By Category
View your tasks by category When you create a task, you can add a category. You can choose from the default categories— Business, Holiday, Personal, and Seasonal—or create your own. Once you have added a category to your tasks, you can filter your task view by a specific category, such as business tasks. Add a category to a task: , and then tap Tools >... -
Page 76: Show The Start And Due Dates In The Task List
Show the start and due dates in the task list Press Start Tap Menu > Options. Select the Show start and due dates check box, and then tap OK. Mark a task as complete Press Start In the task list, select the check box next to the task. To mark a task as complete after you open the task: Tap Edit. -
Page 77: 15 Take Notes
Enter text using your keyboard or use the stylus to write text. When finished, tap OK. NOTE: To easily select a drawing or handwriting, turn off the draw option. Tap Menu > Draw. To select handwritten text, drag your finger or the stylus across the text. http://www.shopping.hp.com/ Overview... -
Page 78: Create A Voice Note
Create a voice note You can record and send audio notes or memos. You can create a stand-alone recording without text or you can add a recording to a written note. Create a stand-alone voice note: Press Start To open the recording toolbar, tap Menu > View Recording Toolbar. On the recording toolbar, tap record Speak into the microphone. -
Page 79: Create A Copy Of A Note
You can also create a voice note using the HP Photosmart program and attach the note to a picture. Attach a voice note to a picture on page Create a copy of a note , and then tap Tools >... -
Page 80: Take Notes During A Call
NOTE: To easily select a drawing or handwriting, turn off the draw option. Tap Menu > Draw. Tap Menu > Copy, and then tap OK to close the note. NOTE: To copy all content in the note, tap Menu > Select All, and then tap Menu > Copy. Open or create a new note, and then tap Paste. -
Page 81: 16 Use Productivity Tools
16 Use productivity tools Microsoft Office Mobile ® Your iPAQ includes the Microsoft Office Mobile suite which includes Microsoft Office Word Mobile, Microsoft Office Excel Mobile. You can create and edit Word and Excel files, and view PowerPoint files. Work with Office Mobile Documents Open a file There are several ways to open an item such as a Word Mobile document, an Excel Mobile workbook, a picture, a note, or a PowerPoint Mobile presentation:... -
Page 82: Create A File
Tap Find. Do one of the following: To find the next instance of the search text, tap Next. ● To replace text, tap Replace. ● Word and Excel select the first instance of the text in the document and display buttons that let you find the next instance or replace the text, as you want. -
Page 83: Create A Document Or Workbook By Using A Template
TIP: You can also create a new template by modifying an existing template and copying it to the Templates folder. Create a document or workbook by using a template Templates help you save time and ensure consistency by letting you focus on the content instead of the format of an item. -
Page 84: Rename A File
Rename a file Press Start From the program file list, tap the file that you want to rename. For Word and Excel, tap Menu > File > Rename/Move. In the Name box, enter the new name for the item. Tap OK. Locate a file Press Start From the program file list, do one of the following:... -
Page 85: Open And View A Word Document
NOTE: If you create your own template, you must save it in the Templates folder and in your device's main memory to make it available for selection as a default template. Open and view a Word document Press Start , tap Office Mobile > Word Mobile. In the program file list, tap the file that you want to open. -
Page 86: Align Text In A Document
Align text in a document You can center text, or align it to the right or left margin. Position the pointer in the text you want to align. Tap Menu > Format > Paragraph. In the Alignment box, tap Left, Right, or Center as you want. Tap OK to return to the document. -
Page 87: Work With Excel Mobile
TIP: To check the spelling of specific text, select it, tap and hold, and then tap Spelling. To add a new word to the spelling dictionary, tap Add in the menu that contains the list of suggested words. Work with Excel Mobile Overview You can view, create, and edit Excel workbooks and templates using your iPAQ. -
Page 88: Open And View An Excel Spreadsheet
Open and view an Excel spreadsheet Press Start In the program file list, tap the file that you want to open. NOTE: Excel Mobile does not fully support some features, such as formulas and cell comments. Some data and formatting may be lost when you save the workbook on your device. TIP: To change the size of the display, tap View >... -
Page 89: Copy And Paste Data
In Series type list, tap the type of series you want, Autofill, Date, or Number. If you selected Date or Number, in Step value, select the increment you want. Tap OK. TIP: To conserve memory, Fill is limited to an area of 127 rows by 31 columns. To copy information into more rows or columns, reduce the information being copied and perform the fill procedure multiple times. -
Page 90: Insert Cells
Insert cells Select the same number of cells as you want to insert and in the same pattern as you want the new cells to appear. For example, if you want to insert two side-by-side cells, select two side-by-side cells. Or, if you want to insert two stacked cells, select two stacked cells. -
Page 91: Insert Columns
Insert columns Select the column or columns immediately to the right of where you want to insert columns. Make sure that you: Select the same number of columns as you want to insert. ● Select whole columns by tapping a single column heading or dragging across multiple ●... -
Page 92: Adjust Column Widths And Row Heights
Do one of the following: On the Number tab, select a category and then specify the related formatting options. ● On the Font tab, select the text formatting you want. ● Tap OK. Adjust column widths and row heights Select the column or row you want to change. Do one or both of the following: If you selected a column or columns, adjust the width of the selected columns by dragging the ●... -
Page 93: Zoom In Or Out
Zoom in or out In Excel Mobile, you can zoom in to look more closely at a section of a document, or zoom out to see more of the document at a reduced magnification. Tap View > Zoom, and then change the zoom level as you want. ●... -
Page 94: Sort Data In A Worksheet
Sort data in a worksheet You can sort data in ascending order (A-Z, or 0-9) or descending order (Z to A, or 9 to 0). Select the range you want to sort. Tap Menu > Tools > Sort. In the Sort by list, select the first column you want to sort on. By default, the Ascending check box is selected. -
Page 95: Enter A Simple Formula
Enter a simple formula Simple formulas contain operators and constants. Operators are signs or symbols that specify the type of calculation to perform in an expression. Constants are values that are not calculated and do not change. For example, the number 210 is a constant. Here are some example formulas and what they do: =128+345 adds 128 and 345. -
Page 96: Work With Charts
Here are some example formulas with functions and what they do: =SUM(A:A) adds all numbers in column A. ● =AVERAGE(A1:B4) averages all numbers in the range from cell A1 to cell B4. ● Tap the cell in which you want to enter the formula. Tap Menu >... -
Page 97: Add Titles To A Chart
Add titles to a chart Tap View > Sheet, and then tap the chart. If the chart is in the open worksheet, go to step 2. Tap Menu > Format > Chart. On the Titles tab, do any of the following: To add a name for the chart, enter a name in the Chart box. -
Page 98: Delete A Chart
On the Scale tab, do any of the following: To use automatic minimum and maximum values for an axis, select the Auto check boxes for ● the axis. To change the number at which the axis value starts and ends, enter a different number in the ●... -
Page 99: Rename A Worksheet
Rename a worksheet By default, worksheets are named Sheet1, Sheet2, and so on. You can easily rename the worksheets with meaningful names. Tap Menu > Format > Modify Sheets. Select the worksheet you want to rename. Tap Rename, enter a name for the worksheet, and then tap OK. Tap OK to return to the workbook. -
Page 100: Set Slide Show Playback Options
TIP: To view the presentation in the orientation that best fits the size and shape of the device screen, tap Default. Set slide show playback options You can override some playback options stored in a PowerPoint presentation. Press Start In the presentation file list, tap the slide show you want to view. Tap the up arrow, and then tap Show Options. -
Page 101: Navigate Between Slides
Navigate between slides If a presentation is set up as a timed slide show, one slide will advance to the next automatically. However, if the presentation is not timed or you want to go to another slide out of sequence, you can do that easily. - Page 102 Use the scroll bars or the navigation keys to scroll through the file. To go to a specific page number: Tap Tools > Go To > Page Number. Enter the page number. Tap OK. To set the zoom level, tap Tools > Zoom and select one of the following options: In—Zoom in.
-
Page 103: Print Documents And Information With Jetcet Print
Print documents and information with JetCet Print Use JetCet Print to print information from your iPAQ to a compatible printer using Bluetooth, Wi-Fi, or USB. You can print .doc, .xls, .jpg, .bmp, and .html files. To configure a printer using Wi-Fi: NOTE: Make sure that Wi-Fi is on before configuring a network printer. -
Page 104: Msn® Money
To print using JetCet Print: Press Start Tap Menu > Go to. Tap the file type to print: Documents—Print documents stored on your iPAQ or the storage card. ● Pictures—Print pictures stored on your iPAQ or the storage card. ● Messages—Print messages received on your iPAQ. -
Page 105: 17 Take Photos And Video
17 Take photos and video Overview Using your built-in 3.1 megapixel camera, you can capture and send photos and video clips. Camera capture modes The built-in camera provides you with several capture modes: Photo: Capture standard photos. ● Timer: After you press the Center Select key, ●... -
Page 106: Camera Settings
To select a capture mode using the Navigation ring: To open the camera, press Start and hold NOTE: On the keyboard, you can also press and hold Tap the camera settings icon To select a mode, press up or down on the Navigation ring. Camera settings Using the camera settings, you can customize the photo capture process and how your photos and videos will appear. - Page 107 Tap the adjust icon Move the sliders on the screen to set the required brightness, saturation, sharpness, and contrast. Adjust white balance: To open the camera, press Start and hold Tap the settings icon Tap the white balance icon Tap the option you prefer to change. Set an effect: To open the camera, press Start and hold...
-
Page 108: Capture Photos
You will not be able to zoom in or out when the camera is configured for 3M resolution. The following options are available after you take a photo: View the image in HP Photosmart Mobile. ● Send the photo in an email or multimedia message. -
Page 109: Capture Videos
Capture videos You can use the built-in video recorder on your iPAQ to create short videos and share them with your friends and family. Make sure you set your capture mode to Video or MMS Video to record a video. MMS Video capture mode records a video that you can send in a multimedia message. -
Page 110: View Photos And Videos
If you prefer, select the Reduce sent photo size to check box, and then select the reduction in resolution. Chapter 17 Take photos and video , and then tap Apps > HP Photosmart Mobile. , and then tap E-mail > Text/MMS > Menu > New > MMS. , and then tap Apps > HP Photosmart Mobile. -
Page 111: Hp Photosmart Mobile
View pictures and videos stored on your HP iPAQ Glisten or a storage card You can view photos and videos stored on your iPAQ or storage card using HP Photosmart Mobile. Press Start , and then tap Apps > HP Photosmart Mobile. -
Page 112: Print Pictures
If you prefer, select the Reduce sent photo size to check box, and then select the reduction in resolution. 100 Chapter 17 Take photos and video on the sound toolbar. , and then tap Apps > HP Photosmart Mobile. , and then tap Apps > HP Photosmart Mobile. at the bottom of the screen. , previous , stop , and then tap Apps >... -
Page 113: Associate A Contact With A Picture
Enter other appropriate information, such as an email subject and message. Tap Send. Associate a contact with a picture , and then tap Apps > HP Photosmart Mobile. Press Start Tap the thumbnail you want to associate with a contact. -
Page 114: Enhance Documents
NOTE: If your iPAQ is inactive while it is connected to the computer with synchronization software running, HP Photosmart automatically displays the slide show that you selected. 102 Chapter 17 Take photos and video , and then tap Apps > HP Photosmart Mobile. -
Page 115: Organize Images
Use your iPAQ to manage or organize a set of images by moving, copying, or deleting a single image or a set of images. Move or copy images: , and then tap Apps > HP Photosmart Mobile. Press Start Tap Menu > Organize. -
Page 116: 18 Browse The Internet
18 Browse the Internet Internet Explorer Navigate Use Internet Explorer to view and download web pages. You can also add a website that you frequently visit to your Favorites list. TIP: Double-tap on a web page to zoom in or out. Press Start Tap in the address bar, enter a web address, and then tap the white arrow Navigate using your finger. -
Page 117: Add A Web Page To Your Favorites List
You can learn more about Internet Explorer. Press Start Browse the Web. Add a web page to your Favorites list In Internet Explorer, tap In the Favorites list, tap Enter a name for the website, and then tap Add. , and then tap Help > Contents > Internet Explorer 105... -
Page 118: Windows Live
Windows Live Overview You can use Windows Live on your phone to search information and check your emails. Use Windows Live for these tasks: Search information on the web. ● Send and receive emails. ● Access your Windows Live contacts. ●... -
Page 119: Search For Information
Search for information , and then tap Windows Live. Press Start Enter text in the search box, and then tap Check your email , and then tap Windows Live. Press Start Select the green arrows, and then press the Navigation key left or right until you see your email account. -
Page 120: 19 Use Wireless Manager
19 Use Wireless Manager Use Wireless Manager to turn the wireless connections for Wi-Fi, Bluetooth, and Phone (voice and data connection) off and on. NOTE: When the phone connection is turned off, you cannot receive or make a call, except for an emergency call. -
Page 121: 20 Connect To A Wi-Fi Network
20 Connect to a Wi-Fi network Overview The Wi-Fi feature in your iPAQ enables wireless Internet connectivity. Your iPAQ can connect to a Wi-Fi network or connect directly to other Wi-Fi-enabled devices. Use Wi-Fi to complete these tasks: Access the Internet. ●... -
Page 122: Open Wi-Fi Settings
Open Wi-Fi settings Access Wi-Fi settings to add, edit, and delete Wi-Fi connections on your iPAQ. Press Start Tap Menu > Wi-Fi Settings. Modify the settings you want to change. Tap OK. Connect to a Wi-Fi network When you turn on Wi-Fi, your iPAQ automatically detects Wi-Fi networks that are broadcasting their signal. -
Page 123: Find Your Ip Address
Tap Next. To use authentication, select an authentication method from the Authentication list. ● To use data encryption, select an encryption method from the Data Encryption list. ● To automatically use a network key, tap The key is automatically provided check box. ●... -
Page 124: 21 Use Bluetooth
21 Use Bluetooth Overview Bluetooth is a wireless technology that allows for communication with other Bluetooth-enabled devices. You can use Bluetooth to connect to a Bluetooth headset, computer, car kits, and other Bluetooth-enabled devices. Also, send and receive files from one device to another over Bluetooth within a range of 10 meters (about 30 feet). -
Page 125: Delete A Bluetooth Partnership
Press Start , tap Wireless Manager, and then tap Menu > Bluetooth Settings. On the Bluetooth screen in Settings, on the Devices tab, tap Add new device. Your iPAQ searches for other devices with Bluetooth capabilities and displays them in the list. Select the device from the list, and then tap Next. -
Page 126: Change The Display Name Of A Bluetooth Partnership
114 Chapter 21 Use Bluetooth , tap Wireless Manager, and then tap Menu > Bluetooth Settings. , tap Tools > ActiveSync. Use your HP iPAQ Glisten as a wireless modem on page , tap Wireless Manager, and then tap Menu > Bluetooth Settings. 135. -
Page 127: Turn Off Bluetooth
To limit communication on this COM port to only devices with which the iPAQ has a Bluetooth partnership, select the Secure Connection check box. Tap Finish. Turn off Bluetooth When you are done using Bluetooth, turn it off to free your iPAQ resources and conserve battery power. Press Start , tap Wireless Manager, and then tap Menu >... -
Page 128: Use At&T Navigator And Other Gps Applications
22 Use AT&T Navigator and other GPS Applications Login to AT&T Navigator AT&T Navigator provides the ability to always find your way with voice guided turn-by-turn GPS driving directions, real-time traffic alerts, automatic reroute, and full-color 3D moving maps. Using AT&T Navigator, you can search millions of business listings and points of interest (POI) including restaurants, banks and ATMs, hotels, Wi-Fi hotspots, the cheapest or closest gas station, and more—all from your iPAQ. -
Page 129: Get Directions
Enter your destination address, and then tap Done. On the Going To screen, tap Get Route. Global Positioning System (GPS) on your HP iPAQ Glisten Use your iPAQ to connect to GPS satellites and determine your exact location. You can also download maps from the Internet. -
Page 130: Identify The Com Port For Your Gps Receiver
To reduce the time to find your initial position, you can also make sure you have a clear view of the sky and you are stationary. NOTE: GPS Data downloads new data if the last downloaded data is expired. The expiration time on the data is set to 24 hours. -
Page 131: 23 Synchronize Your Hp Ipaq Glisten
23 Synchronize your HP iPAQ Glisten Overview You can synchronize your phone using two different methods—over the air, with a corporate email account (Microsoft Exchange Server) using your phone's data connection, or physically connecting your phone to your computer with the included USB sync cable. The following section covers connecting your phone to a computer to synchronize. -
Page 132: Install Synchronization Software On Your Pc
Microsoft ActiveSync or Windows Mobile Device Center must be installed on your computer before you connect your iPAQ to the computer. Connect your HP iPAQ Glisten to your PC After installing ActiveSync or Windows Mobile Device Center, connect your iPAQ to your computer. -
Page 133: Copy Files Between Your Hp Ipaq Glisten And Computer
On your computer, on the Tools menu, click Explore Pocket PC. Double-click My Windows Mobile-Based Device and then copy and paste files between your phone and computer. NOTE: You cannot copy pre-installed files or system files. Copy files between your HP iPAQ Glisten and computer 121... -
Page 134: Copy Data From Your Previous Device To Your Hp Ipaq Glisten
(the green ActiveSync on the lower right corner of your computer screen stops spinning and grays out). A firewall or other network protection software message box is displayed for ActiveSync to access ● the network or Internet. 122 Chapter 23 Synchronize your HP iPAQ Glisten... - Page 135 Go to http://www.windowsmobile.com/getstarted Mobile Device Center. NOTE: HP does not guarantee functionality of any third-party programs. If you are running ActiveSync 4.5 or later and personal firewall software on your computer, add ● ActiveSync to the firewall program's exception list.
-
Page 136: 24 Listen To Music And Watch Videos
24 Listen to music and watch videos Windows Media Player Using Windows Media Player, you can play audio and video files stored on your phone or the memory card installed in your phone. NOTE: Listening to personal stereo equipment at full volume for long periods can damage hearing. To reduce the risk of hearing loss, do not spend much time listening to personal stereo equipment at full volume. -
Page 137: Arcsoft Streaming Player
ArcSoft Streaming Player Use the ArcSoft Streaming Player to access streamed audio and video files from the Internet. With streaming, you can watch the video or listen to the audio while it is downloading instead of waiting until the entire file is downloaded. When you are browsing the web, you can tap an online video or audio link, and ArcSoft Streaming Player will automatically launch. -
Page 138: At&T Music
AT&T Music The AT&T Music folder on your phone contains several applications that help you shop for and download music, listen to streaming music, watch videos, identify music, and download additional music applications. Explore the applications below. NOTE: The services provided below require a data plan and additional charges may apply. Shop Music Browse, preview, and download songs directly to your iPAQ. -
Page 139: Mobile Video
Mobile Video Watch game highlights, the latest breaking news, music videos, and more on your iPAQ. , tap Mobile Video. Press Start ▲ NOTE: This service requires a data plan and additional charges may apply. Mobile Video 127... -
Page 140: Data Connection Types Over The Mobile Phone Network
25 Data connection types over the mobile phone network Overview Your iPAQ supports different types of 2G and 3G connection standards. The table below provides brief information about the connection standards supported by your iPAQ and the features each standard provides: Connection Standard HSDPA... -
Page 141: Differences Between Gsm And Gprs/Edge/Wcdma/Hsdpa Technology
Differences between GSM and GPRS/EDGE/WCDMA/ HSDPA technology GSM technology is typically used for voice calls and text messaging, whereas GPRS/EDGE/WCDMA/ HSDPA technology provides a data connection to the mobile phone network that can be used for web browsing, multimedia messages, or accessing your corporate network. NOTE: If data services are used, they are charged additionally to your standard mobile phone service. -
Page 142: Advanced Settings For Data Connections
26 Advanced settings for data connections Overview If your network is behind a firewall, please configure the advanced settings to connect to the Internet or to access secured intranet sites. Connect to intranet URLs To connect to intranet sites that have periods in their URLs (for example, intranet.companyname.com), add them to the Work URL Exceptions list. -
Page 143: Set Up An Automatic Choice For Connections
Set up an automatic choice for connections If you have already created more than one connection, you can set up your iPAQ to connect to the best available connection automatically. , tap Settings > Connections > Connections > Tasks tab. Press Start Under iPAQ WAP or My Work Network, tap Add a new modem connection to create a new connection. -
Page 144: End A Connection
If either of these circumstances applies, from the My VPN screen, tap Advanced and fill in the appropriate information. Tap OK to save the changes and return to the My VPN screen. End a connection Disconnect active connections on your iPAQ when it is not in use. This can save Internet connection charges and also conserve the battery. -
Page 145: 27 Remote Desktop Mobile
27 Remote Desktop Mobile Use Remote Desktop Mobile to log on to your PC from a remote location. When you connect to your PC, you can use all the programs installed on it. To connect to your PC: Press Start , tap Tools >... -
Page 146: 28 Java Applications
28 Java Applications Using your iPAQ, you can install and run Java applications, including games and business applications. The Java application manager included with your phone allows you to view Java applications that are installed on your phone and manage folders. The default folders are Game, Application, and Business. -
Page 147: Use Your Hp Ipaq Glisten As A Wireless Modem
29 Use your HP iPAQ Glisten as a wireless modem Overview You can connect your iPAQ to your computer and use it as a wireless modem to access the Internet. Before you set up the Internet connection, you need to make sure your phone service has a data plan and you may need a specific data plan that allows you to use your phone as a wireless modem. - Page 148 Under Network Tasks, click View Bluetooth network devices. In the Bluetooth Personal Area Network Devices dialog box, select your device, then click Connect. 136 Chapter 29 Use your HP iPAQ Glisten as a wireless modem , tap Tools > Internet Sharing.
-
Page 149: 30 Accessibility
30 Accessibility Turn on TTY Mode , tap Settings > Personal > Phone > HAC/TTY tab, and then tap TTY Mode. Press Start ▲ Turn on T-Coil mode (Hearing Aid Compliant) If you are using a hearing aid with a telecoil, you can turn on T-Coil mode to reduce interference between your hearing aid and iPAQ. -
Page 150: 31 Accessories
31 Accessories For the best performance from your iPAQ, HP recommends using accessories that have been designed together with your iPAQ. Non-compatible accessories may result in poor performance or not function. To purchase compatible accessories such as cases, wired headsets, and extended batteries for your new iPAQ, you can go to http://www.shopping.hp.com/accessories-store/handheld. - Page 151 Just plug the cable from your TTY device into one end of ● the HP iPAQ Glisten TTY Adapter, then plug the other end of the adapter into your iPAQ. In-car accessories The HP iPAQ Glisten Universal Car Cradle allows you to ●...
- Page 152 Keep a pack of three styli on hand to replace those that ● are lost or damaged. Use the HP iPAQ Glisten original stylus to preserve the ● look of your iPAQ screen and keep it scratch and fingerprint free.
-
Page 153: 32 Tips And Tricks
32 Tips and Tricks Lock the Keyboard , and then tap Lock. Press Start ▲ Start the Camera To start the camera, press and hold ▲ To change the camera mode, using the navigation ring, press left or right, and then pause on the ▲... -
Page 154: Use The Lock Screen
Use the Lock Screen When your phone is locked, you are able to answer incoming calls and view your next appointment. From the locked screen, you can tap the lock icon or text message icon is displayed. Tap and slide the icon to go directly to the missed call or message. To lock your phone, press Start ▲... -
Page 155: Customize The Start Menu
New voicemail New text message Customize the Start menu The icons on the Start menu can be reorganized to fit your preferences. Also, you can move icons from folders to the Start menu. When you do this, a shortcut is created on the Start menu and the original icon stays in the folder. -
Page 156: Add A Photo To A Contact
e-mail—Select to view your emails. Tap to set up your email or view the number of new emails. If ● you have multiple email accounts set up on your phone, you can scroll left or right to switch between accounts. calendar—Select and scroll left or right to view your upcoming appointments or create a new ●... -
Page 157: Change Wallpaper
Change wallpaper On the Today screen, scroll to pictures, and then scroll left or right. Tap a picture. Tap Menu > Set as Today Background. Control music playback To pause the music, press the Center Select key. ● To listen to the previous or next song, press left or right on the Navigation ring. ●... -
Page 158: 33 Frequently Asked Questions
33 Frequently asked questions Applications Is there built-in voice recognition on my iPAQ? Yes, there is built-in voice recognition on your iPAQ. Press Start Commander. Once the application is running, say the command you want processed. To see a list of applications, contacts, and music commands, tap Menu >... -
Page 159: Managed Programs
To enable or disable this option: press Start Reporting. Check the box if you wish to participate or uncheck the box if you do not wish to participate. What is Managed Programs? Managed Programs shows programs that have been installed on the device by your company via an Enterprise Server. - Page 160 To open Sprite Backup, press Start , and then tap Apps > Sprite Backup. NOTE: To get detailed information about how to use Sprite Backup, tap Menu > Help. 148 Chapter 33 Frequently asked questions...
-
Page 161: Audio And Video
Audio and video How do I update the library in Windows Media Player? In most cases, Windows Media Player automatically updates your libraries. However, you can manually update a library to ensure that it has links to files that you might have recently copied to your iPAQ or a removable storage card. -
Page 162: Battery
Battery How long should it take to charge my battery? It can take your battery up to three hours to fully charge using the AC charger. If you connect your iPAQ to a USB port, charging can take up to twice as long as with an AC adapter. I am having trouble turning on my iPAQ. - Page 163 Some third-party applications can cause unexpected battery drain. Uninstall third-party applications that consume extra battery power. , and then tap Settings > System > Remove Programs. Press Start Select the program to remove, and then tap Remove. Battery 151...
-
Page 164: Bluetooth
Bluetooth What Bluetooth profiles are supported by my device? ● Serial Port Profile (SPP) Headset Profile (HSP) ● Dial-up Networking Profile (DUN) – Edge, UMTS, HSDPA (For ACM compatibility) ● Object Push Profile (OPP) ● Audio Video Remote Control Profile (AVRCP) ●... - Page 165 Perform a reset by pulling the battery out then reinserting it. Turn on the device. ● Delete and recreate the Bluetooth partnership between the devices. ● Bluetooth 153...
-
Page 166: Compatibility
● ADATA 4 GB Class 6 microSD Card ADATA 8 GB Class 6 microSD Card ● Crucial 1 GB microSD Card ● HP 1 GB microSD Card ● HP 2 GB microSD Card ● Kingston 2 GB microSD Card ●... - Page 167 iLUV i913 ● iTECH Clip D Radio ● iTECH Clip Radio ● Jabra A320s ● Jabra BT8040 ● Jabra BT125 ● Jabra BT135 ● Jabra BT150 ● Jabra BT620s ● Jabra BT2010 ● Jabra BT2040 ● Jabra BT3010 ● Jabra BT3030 ●...
- Page 168 Motorola H780 ● Motorola MOTOROKR S9 ● Motorola HF820 ● Motorola HT820 ● Motorola HT820S ● Motorola HS850 ● Nokia BH208 ● Nokia BH501 ● Nokia BH604 ● Nokia BH701 ● Nokia BH900 ● Nokia HS 26W ● Plantronics Discovery 645 ●...
- Page 169 Sony DR BT50 ● Sony Ericsson HBH 608 ● Sony Ericsson HBH 662 ● Sony Ericsson HBH DS205 ● Sony Ericsson HBH DS220 ● Sony Ericsson HBH IV835 ● Sony Ericsson HBH PV740 ● Sony Ericsson HCB100E (Car Speakerphone) ● SoundID 200 ●...
-
Page 170: Connections
Connections What is the difference between GSM and GPRS/EDGE/WCDMA/HSDPA technology? GSM technology is typically used for voice calls and text messaging. GPRS/EDGE/WCDMA/HSDPA technology provides a data connection to the wireless phone network that can be used for web browsing, Multimedia Messaging Service (MMS), or accessing your corporate network. NOTE: Data Services or multimedia messaging may result in additional charges. -
Page 171: 34 Troubleshoot Your Hp Ipaq Glisten
I have trouble charging my battery. What should I do? Battery saving tips on page Operating environment on page Set up your HP iPAQ Glisten on page Set up your HP iPAQ 169. Battery 159... -
Page 172: Connection
For more information, see on page Why does the iPAQ sometimes drop calls? 160 Chapter 34 Troubleshoot your HP iPAQ Glisten Charge your HP iPAQ Glisten on page then your SIM card is probably inserted incorrectly. See... - Page 173 If you work around a lot of electronic equipment, try moving away from it, especially if that equipment also produces radio signals. Contact your cell phone carrier to ensure the following: ● The network has been correctly set up.
- Page 174 Ensure that advanced services are configured correctly on your device. You can check advanced ● services by pressing Start appropriate service, and then tap Get Settings. 162 Chapter 34 Troubleshoot your HP iPAQ Glisten , tap Settings > Personal > Phone > Services tab. Select the , tap Settings > System >...
-
Page 175: Synchronization
Why do I hear noises in the background during a phone call? You might hear noises in the background if you use your iPAQ near electronic equipment, such as ● microwave oven, speakers, or a television set. Avoid using your iPAQ near such items to prevent an adverse effect on the voice quality. -
Page 176: Miscellaneous
Or, remove the battery cover and insert a thin pin into the hole on the upper right next to the battery. ● 164 Chapter 34 Troubleshoot your HP iPAQ Glisten , tap Settings > System > , tap Tools >... - Page 177 The iPAQ restarts and turns on. If the factory restore is successful, you will see the words Clean boot when the HP logo appears. If your iPAQ cannot boot to the Windows Mobile operating system, you can also try another ●...
-
Page 178: 35 Product Specifications
35 Product Specifications System specifications NOTE: Not all models described are available in all countries/regions. For more information on specifications for your particular model, on your iPAQ, tap Start > Settings > System > Device Information. System Feature Processor Operating system Memory External power Display... - Page 179 System Feature Wi-Fi Camera Description IEEE 802.11b/g 3.1 megapixel ● ● Fixed focus 5x digital zoom ● Video recording with audio (max. QVGA) ● System specifications 167...
-
Page 180: Physical Specifications
Physical specifications Length Width Depth Weight 168 Chapter 35 Product Specifications Metric 112.8 mm 62.8 mm 13.4 mm 132 g U.S. 4.44 inches 2.47 inches 0.53 inches 4.66 oz... -
Page 181: Operating Environment
Operating environment Temperature Relative Humidity Supported frequency bands Your iPAQ has an integrated GSM/GPRS/EDGE feature that supports four different frequency bands (850/900/1800/1900) for international roaming. Your iPAQ also supports WCDMA/HSDPA in three different frequency bands (850/1900/2100). When traveling between countries and/or wireless network operators, this feature automatically changes the connection settings for frequency bands if the home band is unavailable. -
Page 182: Index
Acrobat Reader LE 89 ArcSoft Streaming Player 125 AT&T Music 126 AT&T Navigator 116 AT&T Updates 36 Excel Mobile 75 HP Photosmart Mobile 99 Internet Explorer 104 Java 134 Jetcet Print 91 Mobile Video 127 mobile video 127 MSN Money 92... - Page 183 (GPS) 116 hearing aid compliance (HAC) 137 history, calls 21 hold a call 19 HP Photosmart Mobile 99 hyperlink number 20 icons, about 15 image, copy/paste 103 Important Product Information 3 install programs 30 international numbers 21...
- Page 184 2, product specifications 166 productivity tools Acrobat Reader LE 89 connect to Wi-Fi network 109 Excel Mobile 75 HP Photosmart Mobile 99 Internet Explorer 104 JetCet Print 91 MSN Money 92 Office Mobile 69 OneNote Mobile 89...
- Page 185 power management 29 regional settings 26 ring tone 26 screen settings 27 Today screen 28 volume 26 setup instructions charge battery 7 configure 8 data transfer 9 insert battery 6 insert SIM card 5 remove battery cover 4 replace battery cover 6 transfer data 9 turn on 8 signatures 43...