Teac CR-H500NT Owner's Manual
Am/fm stereo cd receiver
Hide thumbs
Also See for CR-H500NT:
- Brochure & specs (14 pages) ,
- Setup information (2 pages) ,
- Compatibility chart (1 page)

Related Manuals for Teac CR-H500NT


Summary of Contents for Teac CR-H500NT
- Page 1 CQX1A1497Z CR-H500NT AM/FM Stereo CD Receiver OWNER’S MANUAL MODE D’EMPLOI MANUAL DEL USUARIO...
- Page 2 10) Protect the power cord from being walked on or pinched par ticularly at plugs, convenience receptacles, and the point where they exit from the apparatus. CAUTION: TO REDUCE THE RISK OF ELEC TRIC 11) Only use attachments/accessories specified by the SHOCK, DO NOT REMOVE COVER (OR BACK).
- Page 3 TO EXPOSE THE ELECTRONICS. NO USER SERVICEABLE PARTS ARE WITHIN! < IF YOU ARE EXPERIENCING PROBLEMS WITH THIS PRODUCT, CONTACT TEAC FOR A SERVICE REFERRAL. DO NOT USE THE PRODUCT UNTIL IT HAS BEEN REPAIRED. < U S E O F CO N T R O L S O R A DJ U S T M E N T S O R...
-
Page 4: Table Of Contents
Contents Before Use Thank you for choosing TEAC. Read this manual Read this before operations. carefully to get the best performance from this < When the unit is turned on, switching on the TV may unit. result in lines appearing on the TV screen, depending Before Use . -
Page 5: Discs
< Printable CD-R and CD-RW discs aren’t recommended, correctly in this player. If you use such discs in this unit, TEAC Corporation and its subsidiaries cannot be as the label side might be sticky and damage the unit. responsible for any consequences or guarantee the <... -
Page 6: Mp3 And Wma
Compatible iPod Software < Audio encoded at 128 kbps should sound close to In case your iPod will not work with the CR-H500NT regular audio CD quality. Although this player will play or with the remote control unit, software update may lower bit-rate MP3 files, the sound quality becomes solve the problem. -
Page 7: Connecting Antennas (Am/Fm)
Connecting Antennas (AM/FM) AM Indoor Loop Antenna FM Indoor Antenna The high-performance AM loop antenna provided with Connect the lead-type FM antenna to the FM 75Ω socket, this unit is sufficient for good reception in most areas. extend the lead and tune in your favourite station (see To stand the loop antenna on a surface, fix the claw to the page 30). -
Page 8: Speaker Connections
Speaker Connections SPEAKER LINE SUBWOOFER... - Page 9 For European customers Speaker Connections In accordance with European safety regulations, it CR-H500NT’s + (positive) terminals are red ( for the is not possible to connect banana plugs into the right speaker) and white (for the left speaker.) The _ speaker terminals on European models.
-
Page 10: Connections
Connections Cassette deck, CD recorder, etc. Turntable LINE LINE CAUTION < Turn off the power of all the equipment before making connections. < Read instructions of each component you intend to use with this unit. < Be sure to insert each plug securely. To prevent hum and noise, do not bundle the connection cables with the power cord or speaker cable. - Page 11 AUX 1 IN jacks of the CR-H500NT, connect the input jacks of the recorder to the AUX 1 OUT jacks of the CR-H500NT. < Be sure to insert each plug securely. To prevent...
-
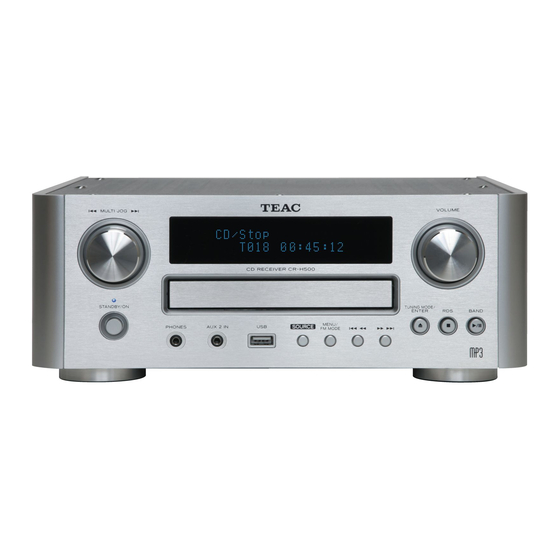
Page 12: Part Names (Main Unit)
Part Names (main unit) - Page 13 MULTI JOG Skip (.m/,/) In TUNER mode, use this knob to tune in stations or In CD/USB mode, use these buttons to skip tracks/files select the preset stations. during playback or in the stop mode of the CD or USB. In iPod mode, use this knob to scroll up and down the In iPod mode, use these buttons to skip songs during menu.
-
Page 14: Part Names (Remote Control Unit)
Part Names (remote control unit) STANDBY/ON Press this button to turn the unit on or standby. TUNER, CD, iPod/USB, AUX 1/2, PHONO Use these buttons to select a source. TIME SET Use this button to adjust the clock and to set a timer. TONE Use this button to adjust bass and treble together with scroll button (Á... - Page 15 Play/Pause (y/J) CLEAR In USB/iPod mode, use this button to start or pause Use this button to clear tracks/files in programme playback of the iPod or USB. mode. In CD mode, use this button to start or pause playback VOLUME of the CD.
-
Page 16: Remote Control Unit
Remote Control Unit The provided remote control unit allows the unit to be Precautions Concerning Batteries operated from a distance. < Be sure to insert the batteries with positive “+” and When operating the remote control unit, point it towards negative “_”... -
Page 17: Basic Operation
Basic Operation (1) Adjust the volume To protect the speakers from a sudden high-volume sound, gradually turn up the volume to the required level with the VOLUME knob. How to turn the unit on or off Press the STANDBY/ON switch to turn the unit on or off. -
Page 18: Disc Playback
Basic Operation (2) Disc Playback Listening through headphones Insert the headphone plug into the PHONES jack, and adjust the volume. The sound from speakers and subwoofer will be cut off. Press the STANDBY/ON button to turn the unit Standby/On indicator How to adjust the bass and treble sound You can change the bass and treble sound between “-10”... - Page 19 Press the play/pause button (y/J ) to start Place a disc on the tray with the printed label playback. facing up. Disc playback starts from the first track/file. Audio CD < The disc must be loaded centrally into the disc tray. If CD/Play the disc is not correctly loaded, it may not be possible T003...
-
Page 20: Usb Playback
USB Playback General Playback (disc/USB) You can play MP3/WMA files by connecting various To stop playback external USB storage devices such as USB flash memory. Press the stop button (H) to stop playback. Press the SOURCE button repeatedly to select “USB/iPod”. -
Page 21: Folder Search
Folder Search You can select a folder and a file during playback or when To skip to the next or a previous track/file stopped. Press the scroll buttons (Á/…) to select a folder. During playback , press the skip/scan but tons (.m/,/) repeatedly until the desired track/ file is found. -
Page 22: Programmed Playback
Programmed Playback Up to 32 tracks/files can be programmed in the desired Within 5 seconds, press the PROGRAM button. order. Press the PROGRAM button in the stop mode. When CD is selected P-01 T012 When CD is selected T016 72:00 P-00 T000 When USB is selected T016... - Page 23 To check the programmed order To delete a track/file from the programme In the stop mode, press the PROGRAM button repeatedly. The track/file number and programme In the stop mode, press the PROGRAM button number will be shown on the display. repeatedly until the programme number appears to be deleted on the display, then press the CLEAR To change or add a track/file to the...
-
Page 24: Shuffle Playback
Shuffle Playback Repeat Playback When the SHUFFLE button is pressed, the tracks/files on Every time the REPEAT 1/ALL button is pressed, the mode the disc or USB device will be played randomly. is changed as follows: When CD is selected RPT 1 (repeat one track/file) RPT Folder (repeat folder) CD/Random... -
Page 25: Display
< The iPod battery will be fully recharged when the iPod File Name is docked and the CR-H500NT is on. Title < When the iPod is connected to the CR-H500NT, the headphones jack of the iPod can not output the Artist Name sound. - Page 26 Listening to iPod (2) To pause playback Search for a part of a song During playback, press the play/pause but ton During playback, hold down the skip but tons (G/J ) to pause playback. Playback stops at the (.//) and release it when the part you want to current position.
- Page 27 Changing the display mode Repeat playback You can select the iPod screen or CR-H500NT display to show the menu. Every time the REPEAT 1/ALL button is pressed, the mode is changed as follows: When the iPod is connected, hold down the MENU...
-
Page 28: Before Recording
Do not disconnect the power cord during recording. Connect the external USB storage device to the It may cause damage to the products. USB port of the CR-H500NT. < Adjust the volume of the external audio source to Select a source to be recorded. -
Page 29: Deleting A File From Usb
Deleting a file from USB You can delete a file on the external USB storage device. Within 3 seconds, press the CLEAR button. In the stop mode, press the scroll buttons (Á/…) to select a folder. < The delete mode will be cancelled if you do not press the CLEAR button within 3 seconds. -
Page 30: Listening To Fm/Am
Listening to FM/AM Press the SOURCE button repeatedly to select Select the station you want to listen to. TUNER mode. Select FM or AM by pressing the BAND button repeatedly. Manual tuning mode Turn the MULTI JOG knob until the station you want to listen to is found. -
Page 31: Preset Tuning
Preset Tuning (1) FM Mode Presetting Automatically (FM/AM) You can select between Stereo and Mono by pressing You can store up to 30 FM, 30 AM. the FM MODE button when a stereo FM program is tuned in. Select FM or AM by pressing the TUNER button repeatedly. - Page 32 Preset Tuning (2) Presetting manually (AM/FM) Within 4 seconds, press the PROGRAM button. Select AM or FM by pressing the TUNER button repeatedly. The station is stored. < To store more stations, repeat steps < If you do not press the PROGRAM button within 4 Tune in the station you want to store.
-
Page 33: Rds
The Radio Data System (RDS) is a broadcasting service TRAFFIC ANNOUNCE which allows stations to send additional information When you select “TRAFFIC ANNOUNCE”, “TRAFFIC along with the regular radio programme signal. ANNOUNCE” will blink for 3 seconds and then the unit RDS works on the FM waveband in Europe only. -
Page 34: Pty Search
PTY Search You can search for stations by programme type. Turn the MULTI JOG knob within 3 seconds to This function is available only on RDS services of FM start searching. waveband in Europe. Se le c t FM by pre ssing t he BAN D but ton repeatedly. - Page 35 News: Finance: brief announcements, events, public opinion, reports, financial reports, commerce, trading. actual situations. Children’s Progs: Current Affairs: children’s programmes. a k i n d o f s u g g e s t i o n i n c l u d i n g p r a c t i c a l Social Affairs: announcements other than news, documents, social affairs.
-
Page 36: Internet Radio Initial Setup
Internet Radio Initial Setup Enter the correct password for the network if required. < See “How to input characters” below. Now the unit starts to connect to the Internet. When connection is established successfully, the internet radio menu is displayed. See the next page to select a station. -
Page 37: Listening To Internet Radio
Listening to Internet Radio (1) Select “Stations” for internet radio stations, or 3 3 4 4 5 5 6 6 7 “Podcasts” for Podcasts. Turn the MULTI JOG knob to select the item, and then press the ENTER button. 5 6 7 Listening to an internet radio station/ a podcast Select “Internet radio”... - Page 38 Listening to Internet Radio (2) If you have selected “Location”, “Genre” or Finding stations/Podcasts “Search stations” in step , search for the The internet radio menu contains various ways of channel you want. finding stations and Podcasts. Turn the MULTI JOG knob to select the item, and then press the ENTER button.
- Page 39 Changing the displayed information Storing the current station/Podcast as favourite Press and hold the PROGRAM button until “Favourite Added” is displayed. < Your favourite stations can be easily accessed from Each time the INFO button is pressed, information on the second line of the display changes. “My favourites”...
-
Page 40: Radio Portal
Input your own access code and log in. Checking the “access code” of your unit Each unit of CR-H500NT has its own “access code”. This code is required to log in the internet radio portal. Select “Internet radio” by pressing the BAND button repeatedly. -
Page 41: Setting Up Music Player
Setting up Music Player (1) Activate “Share my media to:”. About the Music Player function The CR-H500NT appears in the device list as “Unknown Using the Music Player function, you can play back the Device”. music files in your computers through the LAN. - Page 42 Check the user account name and its password. Check the user account name and its password. To access the computer from CR-H500NT, you need To access the computer from CR-H500NT, you need the user account name and the password of the the user account name and the password of the computer.
- Page 43 Preparations for Shared Folders (Mac OSX 10.2.1 to 10.4.11) Check the user account name and its password. To access the computer from CR-H500NT, you need the user account name and the password of the computer. In “System Preferences”, open “Sharing”.
- Page 44 (Mac OSX 10.5.0 or higher) (both Windows and Macintosh) Check the user account name and its password. To access the computer from CR-H500NT, you need Connect your CR-H500NT to the LAN. (page 10) the user account name and the password of the <...
-
Page 45: Listening To Music Player
Listening to Music Player (1) < If you turn off the unit or change the source while Media Sharing playing back the Music Player, “Music Playback Mode” 5 6 7 will be cancelled. Open the Music Player menu. Press the MENU button. 3 5 6 3 5 6 7 Select “Internet radio”... - Page 46 Listening to Music Player (2) Select a media library you want to listen to. File Sharing Turn the MULTI JOG knob to select the item, and then 3 5 6 7 press the ENTER button. 3 5 6 7 Select “Internet radio” by pressing the BAND button repeatedly.
- Page 47 Open the Music Player menu. Select the Domain or the Workgroup your c o m p u t e r b e l o n g s t o , t h e n s e l e c t yo u r Press the MENU button.
-
Page 48: Network Configuration
Network Configuration Software update Performing the setup wizard The software of the unit can be updated via the Internet If you have moved or modified your network connection, so that you are able to use the latest features environment, or if you have a problem connecting of the unit. -
Page 49: Setting The Clock
Setting the Clock The clock setting of this unit is automatically adjusted Press the ENTER button. according to the CLOCK TIME data of an RDS broadcasting. If you adjust the clock manually, follow the following steps. Press the TIME SET button. The “minute”... -
Page 50: Setting The Timer
Setting the Timer < Adjust the clock before setting the timer. Press the scroll buttons (Á/…) to set the minute value, and press the TIME SET button. < Select “Direct mode” before using the iPod for the “Off time” appears on the display, and the “hour” value timer;... -
Page 51: Timer Operation
Timer Operation Every time you press the TIMER button on the Timer Recording remote control unit, the timer mode changes as You can set the various external USB storage devices such follows. as USB flash memory to record programme at the desired time. -
Page 52: Sleep Timer
Sleep Timer Listening to an External Source You can listen to the sound from the external component connected to the PHONO, AUX 1 IN, or AUX 2 IN jacks. Press the SOURCE button to select “PHONO”, “AUX 1” or “AUX 2”. The power can be switched off after a specified amount of time. -
Page 53: Troubleshooting
Cannot listen to any station, or signal is too weak. Player. e Tune in the station properly. e Set your CR-H500NT as a “Unknown Device” in the e If a TV set is near the unit, turn it off. device list of Windows. (page 41) e Install the antenna again after locating the best e Select “Allow”... -
Page 54: Restoring Factory Settings
Troubleshooting (2) CD Player Maintenance Will not play. If the surface of the unit gets dirty, wipe with a soft cloth e Load a disc with label side up. or use diluted neutral cleaning liquid. Be sure to remove e If the disc is dirty, clean the surface of the disc. any fluid completely. -
Page 55: Specifications
Specifications AMPLIFIER Section Information for Users on Collection and Output Power ..40 W/ch (6 ohms, 0.5 %,1 kHz) Disposal of Old Equipment and used Batteries Input Sensitivity ....PHONO: 2.5 mV 47 kΩ AUX1, AUX2: 200 mV 47 kΩ...