
Related Manuals for Humminbird 561


Summary of Contents for Humminbird 561
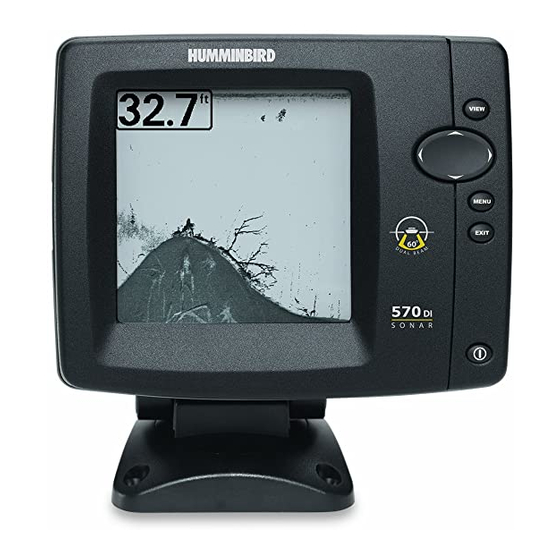
- Page 1 550, 560, 561, 570, and 570 DI 550, 560, 561, 570, and 570 DI Operations Manual Operations Manual 531716-4EN_A...
-
Page 2: Thank You
Your Humminbird® is designed for trouble-free use in even the harshest marine environment. In the unlikely event that your Humminbird® does require repairs, we offer an exclusive Service Policy - free of charge during the first year after purchase, and available at a reasonable rate after the one-year period. - Page 3 It must be disposed of and collected for recycling and recovery of waste EEE. Humminbird® will mark all EEE products in accordance with the WEEE Directive. It is our goal to comply in the collection, treatment, recovery, and environmentally sound disposal of those products;...
-
Page 4: Table Of Contents
Sonar View ......................19 Sonar Zoom View ....................20 Split Sonar View ..21 (DualBeam PLUS™ and Down Imaging™ models only [561, 570 DI]) Big Digits View ......................22 Down Imaging™ View ........23 (Down Imaging™ models only [570 DI]) Down Imaging™/Sonar Combo View... - Page 5 Table of Contents 4-WAY Cursor Control Key ......28 (LEFT, RIGHT, UP, or DOWN Cursor keys) EXIT Key........................28 The Menu System Start-Up Options Menu Normal........................30 Simulator ........................ 31 System Status ......................31 Self Test........................32 Accessory Test......................32 X-Press™...
- Page 6 Fish ID Sensitivity ....................55 Real Time Sonar (RTS™) Window ................55 Zoom Width......................56 83 kHz Sensitivity ......56 (Advanced, DualBeam PLUS™ Sonar only [561]) 455 kHz Sensitivity ........56 (Advanced, Down Imaging™ only [570 DI]) Depth Lines .................... 57...
- Page 7 U.S. by our authorized international distributors. To obtain a list of authorized international distributors, please visit our Web site at humminbird.com or contact our Customer Resource Center at (334) 687-6613. NOTE: Entries in this Table of Contents which list (with Temp/Speed only) require the purchase of separate accessories.
-
Page 8: Power On
Power On Follow the instructions below to power on your Humminbird® control head. 570 Title Screen 1. Press the POWER/LIGHT key. 2. When the Title screen is displayed, press the MENU key to access the Start-Up Options Menu. 3. Use the 4-WAY Cursor Control key to select Normal (if there is a transducer attached to the control head) or Simulator (if there isn’t a... -
Page 9: How Sonar Works
How Sonar Works Sonar technology is based on sound waves. The 500 Series™ Fishfinder uses sonar to locate and define structure, bottom contour and composition, as well as depth directly below the transducer. Your 500 Series™ Fishfinder sends a sound wave signal and determines distance by measuring the time between the transmission of the sound wave and when the sound wave is reflected off of an object;... - Page 10 When all the echoes are viewed side by side, an easy to interpret “graph“ of the bottom, fish, and structure appears. The sound pulses are transmitted at various frequencies depending on the application. Very high frequencies (455 kHz) are used for greatest definition but the operating depth is limited.
-
Page 11: Single Beam Sonar (550, 560)
Single Beam Sonar (550, 560) The 550 Fishfinder and 560 Fishfinder use a 200 kHz single beam sonar system with a 20° area of coverage. Depth capability is affected by such factors as boat speed, wave action, bottom hardness, water conditions, and transducer installation. -
Page 12: Dualbeam Sonar (570)
DualBeam PLUS™ Sonar (561) The 561 Fishfinder uses a 200/83 kHz DualBeam PLUS™ sonar system with a wide (60°) area of coverage. DualBeam PLUS™ sonar has a narrowly focused 20° center beam, surrounded by a second beam of 60°, expanding your coverage to an area equal to your depth. -
Page 13: Down Imaging™ Sonar
Down Imaging™ Sonar (570 DI) The 570 DI Fishfinder uses Down Imaging™ technology. The Down Imaging™ transducer scans the water with razor-thin, high- definition beams. The beams are wide (side 45° 800kHz to side) but very thin front to back. 75°... -
Page 14: What's On The Sonar Display
What’s on the Sonar Display The 500 Series™ Fishfinder can display a variety of useful information about Depth - (water depth) can be set to alarm when the water becomes too shallow. Temperature - Water surface temperature. Timer - Elapsed time with Temp/Speed Accessory. - Page 15 the area under your boat, including the following items: Bait Ball Hollow Fish Symbol (see Fish ID+™) Thermoclines - Layers of water with different temperatures that appear at different depths and different times of the year. A thermocline typically appears as a continuous band of gray levels moving across the display at the same depth.
-
Page 16: Understanding The Sonar Display
Understanding the Sonar Display It is important to understand the significance of the display. The display does not show a literal 3-dimensional representation of what is under the water. Each vertical band of data received by the control head and plotted on the display represents something that was detected by a sonar return at a particular time. -
Page 17: Switchfire
SwitchFire™ SwitchFire™ controls how the sonar returns are displayed in the Sonar Views. SwitchFire™ settings are available in the Sonar Menu Tab. To see the maximum sonar information available within the transducer beam so more fish arches and better jig tracking are shown, choose Max Mode. To see less clutter and more fish size accuracy interpreted from the transducer beam, choose Clear Mode. -
Page 18: Bottom Presentation
Bottom Presentation As the boat moves, the unit charts the changes in depth on the display to create a profile of the Bottom Contour. The type of bottom can be determined from the return charted on the display. A Hard Bottom such as compacted sediment or flat rock appears as a thinner line across the display. - Page 19 Inverse is a method where weak returns are shown with dark pixels and strong returns with lighter pixels. This has the benefit of ensuring that weak signals will be clearly visible on the display. Structure ID® represents weak returns as light pixels and strong returns as dark pixels.
-
Page 20: What's On The Down Imaging™ Display
What’s on the Down Imaging™ Display Down Imaging™ uses its unique transducer and sonar technology to provide profiling beams produce the detailed sonar data that you see on the display. interpret the structure and bottom contour, including the following items: Depth - (water depth) can be set to alarm when the water becomes too shallow. -
Page 21: (Down Imaging™ Models Only [570 Di])
(Down Imaging™ models only [570 DI]) information about the area directly below your boat. The razor-thin, high-definition Down Imaging™ reveals a variety of recognizable features so that you can Upper Range Structure Clouded Area may indicate a bait ball and White Streaks may indicate fish. -
Page 22: Understanding The Down Imaging™ Display
Understanding the Down Imaging™ Display The images you see on the Down Imaging™ display are produced using sonar technology. Each time the unit pings, a strip of data representing all the echoes received by the transducer are put together on the display to form the image that you see. -
Page 23: Down Imaging™ Sensitivity
Down Imaging™ Sensitivity Use Imaging Sensitivity to control how the sonar returns appear on the display. Increase the sensitivity to reveal weaker returns that may be of interest, especially in very clear water or greater depths. Decrease the Imaging Sensitivity to eliminate the clutter from the display that is sometimes present in murky or muddy water. -
Page 24: Views
There are many views available on your Fishfinder. • Default View: When you first power up the 550, 560, 561, or 570 control head, Sonar View will be the default view. When you first power up the 570 DI control head, Down Imaging™ View will be the default view. - Page 25 To customize your view rotation: You can choose which views are hidden or visible in your view rotation. 1. Press the MENU key twice to access the tabbed Main Menu, then press the RIGHT Cursor key until the Setup tab is selected. 2.
-
Page 26: Sonar View
Sonar View Sonar View presents a historical log of sonar returns. The most recent sonar returns are charted on the right side of the display. As new information is received, the historical information scrolls left across the display. • Upper and Lower Depth Range numbers indicate the distance from the surface of the water to a depth range sufficient to show the bottom. -
Page 27: Sonar Zoom View
Sonar Zoom View Sonar Zoom View provides a magnified view of the bottom and structure. The Sonar Zoom View makes it easier to see separate sonar returns that would usually be displayed close together, such as those caused by fish suspended close to the bottom or within structure. -
Page 28: Split Sonar View (Dualbeam Plus™ And Down Imaging™ Models Only [561, 570 Di])
You can use the Split Sonar View to make side by side comparisons between the sonar returns from both beams. • DualBeam PLUS™ models (561) display sonar returns from the 83 kHz wide beam on the left side of the screen and sonar returns from the 200 kHz narrow beam on the right side of the screen. -
Page 29: Big Digits View
Big Digits View Big Digits View provides digital data in a large, easy-to-see format. • Digital Readouts: Depth is always displayed. Readouts for temperature, speed, and Triplog information are displayed automatically if the appropriate accessory is connected to the Fishfinder. NOTE: The digital readouts in the Big Digits View cannot be customized. -
Page 30: Down Imaging™ View
Down Imaging™ View (Down Imaging™ models only [570 DI]) Down Imaging™ View uses the razor-thin, high-definition profiling beams to produce the detailed sonar data that you see on the display. Sonar returns are charted on the right side of the display. As new information is received, the historical information scrolls left across the display. -
Page 31: Down Imaging™/Sonar Combo View (Down Imaging™ Models Only [570 Di])
Down Imaging™/Sonar Combo View (Down Imaging™ models only [570 DI]) Down Imaging™/Sonar Combo View shows traditional Sonar information on the top and Down Imaging™ sonar information on the bottom of the view. • X-Press™ Menu: Press the MENU key once to access the Down Imaging™... -
Page 32: What's On The 500 Series™ Control Head
What’s on the 500 Series™ Control Head Your 500 Series™ Fishfinder interface is easy to use. A combination of keys and special features allows you to control what you see on the display. Refer to the following illustration, and see Key Functions for more information. Screen MENU key EXIT key... -
Page 33: Key Functions
Key Functions Your Fishfinder user interface consists of a set of easy-to-use keys that work with various on-screen views and menus to give you flexibility and control over your fishing experience. POWER/LIGHT Key The POWER/LIGHT key is used to power the Fishfinder on and off. You can also use the POWER/LIGHT key to adjust the backlight and contrast of the display. -
Page 34: View Key
VIEW Key The VIEW key is used to cycle through all available views. Press the VIEW key to advance to the next view. Repeatedly pressing VIEW cycles through all the available views. Views can be hidden to optimize the system to your fishing requirements (see Views or Setup Menu: Select Views). -
Page 35: 4-Way Cursor Control Key (Left, Right, Up, Or Down Cursor Keys)
4-WAY Cursor Control Key (LEFT, RIGHT, UP, or DOWN Cursor keys) Use the 4-WAY Cursor Control key to navigate the Menu System. • Menu Selection: Press the DOWN or UP Cursor keys to highlight a menu option, then press the RIGHT or LEFT Cursor keys to change a menu setting. -
Page 36: The Menu System
The Menu System The Menu System is divided into easy-to-use menu modules as follows: • Start-Up Options Menu: Press the MENU key during the power on sequence to view the Start-Up Options Menu. From the Start-Up Options Menu, you can choose the following Fishfinder Modes: Normal, Simulator, and System Status. -
Page 37: Start-Up Options Menu
Start-Up Options Menu Press the MENU key during the power on sequence to view the Start-Up Options Menu, and select one of the modes described on the following pages. Also, see Power On for additional information. Normal Use Normal for on-the-water operation with a transducer connected. If a functioning transducer is connected, Normal operation will be selected automatically at power up, and your Fishfinder can be used on the water. -
Page 38: Simulator
Simulator Use Simulator to learn how to use your Fishfinder before taking your boat on the water. The Simulator is a very powerful tool that provides a randomly-updated display which simulates on the water operation. Simulator We recommend going through this manual while using the Simulator, since all of the menus function and affect the display in the same way as... -
Page 39: Self Test
Self Test displays results from the internal diagnostic self test, including unit serial number, Printed Circuit Board (PCB) serial number, software revision, total hours of operation, and the input voltage. Self Test Screen Accessory Test lists the accessories connected to the system. System Status Accessory Test Screen NOTE: The speed accessory will be detected only if the paddlewheel has moved since your Fishfinder was powered up. -
Page 40: X-Press™ Menu
X-Press™ Menu The X-Press™ Menu provides a shortcut to your most frequently-used settings. The options provided on the X-Press™ Menu correspond with the current view. For example, if you are in a Sonar View and press the MENU key once, the Sonar X-Press™... -
Page 41: Main Menu
Main Menu The Main Menu provides the standard set of menu options, including the settings that are changed less frequently. The Main Menu is organized under the following tabs to help you find a specific menu item quickly: Alarms, Sonar, and Setup. NOTE: Menu options can be expanded or simplified by setting the User Mode to Advanced or Normal. -
Page 42: Quick Tips For The Main Menu
Quick Tips for the Main Menu • From any menu option on a menu tab, press the EXIT key to jump directly to the top of the tab. • From the bottom of a menu tab, press the DOWN Cursor key to jump directly to the top of the tab. -
Page 43: User Mode (Normal Or Advanced)
User Mode (Normal or Advanced) Menu options can be simplified or expanded by setting your Fishfinder User Mode to Normal or Advanced. Normal Mode is the default setting when you first power on your 500 Series™ Fishfinder. Normal mode is provided for users who want greater simplicity and fewer menu choices. - Page 44 570 DI Sonar Tab, Normal Mode 570 DI Sonar Tab, Advanced Mode Main Menu...
-
Page 45: (Sonar X-Press™ Menu
Sonar X-Press™ Menu (Sonar Views only) The Sonar X-Press™ Menu provides a shortcut to your most frequently-used settings. Press the MENU key once while in any of the Sonar Views to access the Sonar X-Press™ Menu. NOTE: Menu options can be expanded or simplified by setting the Fishfinder User Mode to Advanced or Normal. -
Page 46: Sensitivity
Sensitivity Settings: Low = 1, High = 20; Default = 10 Sensitivity controls how much detail is shown on the display and will adjust the sensitivity of all sonar frequencies. When operating in very clear water or greater depths, increase the sensitivity to see weaker returns that may be of interest. -
Page 47: Upper Range (Advanced: Sonar And Big Digits Views Only)
Upper Range (Advanced: Sonar and Big Digits Views only) Settings: 0 to 790 ft, 0 to 990 ft (561 only), or 0 to 257 m (International models only); Default = 0 ft Upper Range sets the shallowest depth range that will be displayed on the Sonar and Big Digits Views. -
Page 48: Chart Speed
Chart Speed Settings: 1-9, Ultra, where 1 = Slow, 9 = Fast, Ultra = Fastest; Default = 5 Chart Speed determines the speed at which the sonar information moves across the display, and consequently the amount of detail shown. A faster speed shows more information and is preferred by most anglers; however, the sonar information moves across the display quickly. -
Page 49: Down Imaging™ X-Press™ Menu
Down Imaging™ X-Press™ Menu (Down Imaging™ Views only [570 DI]) The Down Imaging™ X-Press™ Menu provides a shortcut to your most frequently-used settings. Press the MENU key once while in any of the Down Imaging™ Views to access the Down Imaging™ X-Press™ Menu. 570 DI NOTE: Menu options can be expanded or simplified Down Imaging™... -
Page 50: Imaging Sensitivity
Imaging Sensitivity Settings: Auto, 1 to 20, where Low = 1, High = 20; Default = 10 Imaging Sensitivity controls how the sonar returns are displayed on the Down Imaging™ Views. Increase the Imaging Sensitivity to reveal weaker returns that may be of interest, especially in very clear water or greater depths. -
Page 51: Lower Range
Lower Range Settings: Auto, 10 to 800 ft, 3 to 260 m (International models only); Default = Auto Lower Range sets the deepest depth range that will be displayed by the unit. Auto: The Lower Range will be adjusted by the unit to follow the bottom automatically. -
Page 52: Chart Speed
Chart Speed Settings: 1-9, Ultra, where 1 = Slow, 9 = Fast, Ultra = Fastest; Default = 5 Chart Speed determines the speed at which the sonar information moves across the display, and consequently, the amount of detail shown. A faster speed shows more information and is preferred by most anglers; however, the sonar information moves across the display quickly. -
Page 53: Alarms Menu Tab
Alarms Menu Tab From any view, press the MENU key twice to access the Main Menu. The Alarms tab will be the default selection. NOTE: When an alarm is triggered, you can silence it by pressing any key. The alarm will be silenced, and will not be triggered again until a new instance of the alarm condition is detected. -
Page 54: Depth Alarm
Depth Alarm Settings: Off, 1 to 100 ft, or 0.5 to 30 m (International models only); Default = Off Depth Alarm sounds when the depth becomes equal to or less than the menu setting. Fish ID Alarm Settings: Off, All, Large/Medium, Large; Default = Off Fish ID Alarm sounds when the Fishfinder detects fish that correspond to the alarm setting. -
Page 55: Temp. Alarm
Temp. Alarm Settings: Off, 33-120 (Fahrenheit), 0-50 (Celsius); Default = Off Temp. Alarm sounds when the water temperature detected by the Fishfinder reaches the Temp. Alarm setting, which is either set in degrees Fahrenheit or Celsius (international models only). For example, if the Temp. Alarm is set to 58 degrees Fahrenheit, and the water temperature falls from 60 degrees to 58 degrees, the Temp. -
Page 56: Sonar Menu Tab
NOTE: Menu options can be expanded or simplified by setting the User Mode to Advanced or Normal. See Main Menu: User Mode for details. NOTE: Menu options are determined by your Humminbird® model. See the following pages for full menu descriptions. 570 DI Sonar Menu, Advanced... -
Page 57: Beam Select (561 And 570 Di Only)
The available beam frequencies are determined by your Humminbird® model. DualBeam PLUS™ models (561) allow you to choose 200/83 kHz, 200 kHz, or 83 kHz. • When set to 200/83 kHz, the returns from both beams are blended by starting with the 83 kHz wide beam return, dimming it, and then overlaying it with the 200 kHz narrow beam return. - Page 58 The Down Imaging™ models (570 DI) allow you to choose 200 kHz or 455 kHz for conical sonar coverage in the traditional sonar views. • When set to 200 kHz, only the returns from the 200 kHz (25°) beam will be 45°...
-
Page 59: Imaging Frequency (Down Imaging™ Views Only [570 Di])
Imaging Frequency (Down Imaging™ Views only [570 DI]) Settings: 800 kHz or 455 kHz; Default = 455 kHz Imaging Frequency allows you to select which frequency to apply to the Down Imaging™ beams (455 kHz or 800 kHz). For the best overall image quality and depth, select 455 kHz. -
Page 60: Surface Clutter
Surface Clutter Settings: Low = 1 to High = 10; Default = 5 Surface Clutter adjusts the filter that removes surface clutter noise caused by algae and aeration. The lower the setting, the less surface clutter will be displayed. Surface Clutter Surface Clutter SwitchFire™... -
Page 61: Fish Id
• In Single Beam models (550, 560), targets detected in the 200 kHz beam are represented as shaded fish symbols. • In DualBeam models (570) and DualBeam PLUS™ models (561), targets detected in the 200 kHz narrow beam are represented as shaded fish symbols, and targets detected in the 83 kHz wide beam are represented as hollow fish symbols. -
Page 62: Fish Id Sensitivity
Transducer Cone and Fish Arches Fish ID Sensitivity Settings: Low = 1, High = 10; Default = 5 Fish ID Sensitivity adjusts the threshold of the Fish ID+™ detection algorithms. Selecting a higher setting allows weaker returns to be displayed as fish. This is useful for identifying smaller fish species or baitfish. -
Page 63: Zoom Width
See Views: Sonar Zoom View for more information. 83 kHz Sensitivity (Advanced, DualBeam PLUS™ Sonar only [561]) Settings: -10 to +10; Default = 0 83 kHz Sensitivity changes the sensitivity of the 83 kHz beam. Increasing the 83 kHz Sensitivity will display additional weak returns, and decreasing the 83 kHz Sensitivity will display fewer weak returns. -
Page 64: Depth Lines (Advanced)
Depth Lines (Advanced) Settings: Off, On; Default = On Depth Lines divide the display into four equal sections which are separated by three horizontal depth lines. The depth of each line is displayed along the depth scale. You can turn Depth Lines On or Off. Depth Lines Depth Lines Noise Filter... -
Page 65: Max Depth (Advanced)
Max Depth (Advanced) Settings: Auto, 10 to 800 ft, 10 to 1200 ft (561 only), or 3 to 260 m (International models only); Default = Auto Max Depth controls the maximum depth of operation. When Max Depth is set to Auto, the Fishfinder will acquire bottom readings as needed (within the capacity of the unit). -
Page 66: Setup Menu Tab
Setup Menu Tab From any view, press the MENU key twice to access the tabbed Main Menu, then press the RIGHT Cursor key until the Setup tab is selected. NOTE: Menu options will vary depending on which accessories are attached to the unit. NOTE: Menu options can be expanded or simplified by setting the User Mode to Advanced or Normal. -
Page 67: Units - Depth
Units - Depth Settings: Domestic Models: Feet, Fathoms; International Models: Meters; Default = Feet/Meters Units - Depth selects the units of measure for all depth-related readouts. Units - Temp (International models only) Settings: Celsius, Fahrenheit; Default = Celsius Units - Temp selects the units of measure for all temperature-related readouts. International models only. -
Page 68: User Mode
User Mode Settings: Normal, Advanced; Default = Normal User Mode sets the menu system to Normal or Advanced. When set to Normal (default setting), the basic set of menu options are shown in the menu system. When set to Advanced, additional menu options are added to the menu system. See Main Menu: User Mode for details. -
Page 69: Select Views (Advanced)
Select Views (Advanced) Settings: Visible, Hidden; Default = Visible Select Views allows you to set the available views to hidden or visible in the view rotation. The view will be removed from the view rotation if it is set to Hidden and will be displayed in the view rotation if it is set to Visible. -
Page 70: Depth Offset (Advanced)
NOTE: The availability of the digital readout information corresponds with the view selected and the accessory attached. Default Sonar View Sonar View with Select Readouts Depth Offset (Advanced) Settings: -10.0 to +10.0 ft or -3.0 to 3.0 m (International models only); Default = 0.0 ft Depth Offset will adjust the digital depth readout to indicate depth from the waterline or boat's keel. -
Page 71: Speed Calibration (Advanced, With Temp/Speed Only)
Speed Calibration (Advanced, with Temp/Speed only) Settings: -20% to +20%; Default = 0% Speed Calibration will adjust the speed readout by the percentage entered, and will appear in the menu if a Temp/Speed Accessory is connected and the paddlewheel has moved at least once. Digits Format (Advanced) Settings: Small tenths, Large tenths, No tenths;... -
Page 72: Troubleshooting
Troubleshooting Before contacting the Humminbird® Customer Resource Center, please read the following section. Taking the time to review these troubleshooting guidelines may allow you to solve a performance problem yourself, and therefore avoid sending your unit back for repair. Fishfinder Doesn’t Power Up If your Fishfinder doesn’t power up, use the Installation Guide that also comes... -
Page 73: Display Problems
Display Problems There are several main conditions or sources of possible interference that may cause problems with the quality of the information displayed on the control head. Look in the following table for some symptoms of display problems and possible solutions: Problem Possible Cause The control head loses... -
Page 74: Finding The Cause Of Noise
Finding the Cause of Noise Electrical noise usually affects the display with many black dots at high speeds, and high sensitivity readings. One or more of the following sources can cause noise or interference: Possible Source of Noise Isolation Turn off any nearby electronic devices to see if Other electronic devices the problem goes away, then turn them on one at a time to see if the noise re-appears. -
Page 75: 500 Series™ Fishfinder Accessories
AND a transducer with temperature built in is connected at the same time, the TS-W or TG-W accessory will override the temperature built into the transducer. Be sure to check out our Web site humminbird.com for additional new and exciting accessories to grow your Humminbird® Fishfinder! NOTE: Each accessory requires a separate purchase. -
Page 76: Specifications
IPX Rating... . IP67 Waterproof/Submersible @ 1 m for 30 minutes and dust tight NOTE: Humminbird® verifies maximum stated depth in saltwater conditions, but actual depth performance may vary due to transducer installation, water type, thermal layers, bottom composition and slope. - Page 77 Area of Coverage ... . 560 (Single Beam): 20° @ -10 dB in 200 kHz 561 (DualBeam PLUS™): 60° @ -10 dB in 83 kHz 20° @ -10 dB in 200 kHz Target Separation .
- Page 78 IPX Rating... . IP67 Waterproof/Submersible @ 1 m for 30 minutes and dust tight NOTE: Humminbird® verifies maximum stated depth in saltwater conditions, but actual depth performance may vary due to transducer installation, water type, thermal layers, bottom composition and slope.
- Page 79 IPX Rating... . IP67 Waterproof/Submersible @ 1 m for 30 minutes and dust tight NOTE: Humminbird® verifies maximum stated depth in saltwater conditions, but actual depth performance may vary due to transducer installation, water type, thermal layers, bottom composition and slope.
-
Page 80: Glossary
Fish and other objects close to the bottom that fall within the dead zone will probably not be visible in the sonar beam. Precision sonar beams, such as the Humminbird® 20° beam, have a smaller dead zone than wider sonar beams. - Page 81 Noise appears as random “dots“ on the display and is caused by a variety of sources. Many Humminbird® products have a Noise Filter menu setting that allows the user to clear the screen of noise that is difficult to eliminate (also, see Troubleshooting).
- Page 82 Many Humminbird® units operate at up to 40 times per second when in single frequency operation. Due to the limitation of the speed of sound in water, the update rate begins to slow as depth increases to deeper than 50 feet.
- Page 83 Thermoclines Water layer(s) of distinctly different temperatures that create a sonar reflection due to the density of the differing water temperatures. Typically a thermocline will appear as a continuous band across the display at some distance above the bottom contour. Thermoclines are of interest to anglers because fish will suspend above or below the thermocline as they seek the optimum temperature and oxygen levels.
-
Page 84: Contact Humminbird
Contact Humminbird® Contact the Humminbird® Customer Resource Center in any of the following ways: By Telephone: (Monday - Friday 8:00 a.m. to 4:30 p.m. Central Standard Time): 1-800-633-1468 By e-mail: (typically we respond to your e-mail within three business days): service@humminbird.com...