Table of Contents
Advertisement
Available languages
Available languages
Quick Links
Advertisement
Table of Contents

Related Manuals for PROEL PLLED185


Summary of Contents for PROEL PLLED185
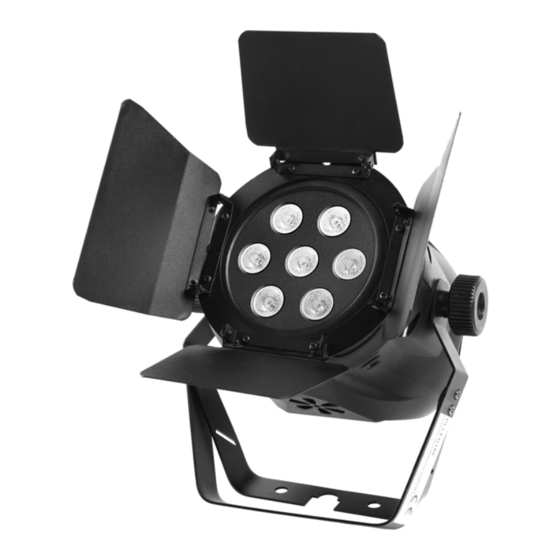
- Page 1 Mini Led Spot Full Color PLLED185 MANUALE UTENTE USER MANUAL Rev. 02-03/12...
-
Page 2: Table Of Contents
Indice 1. Introduzione 1.1 Contenuto della confezione 1.2 Istruzioni per l'apertura dell'imballo 1.3 Alimentazione 1.4 Istruzioni di sicurezza 2. Introduzione 2.1 Caratteristiche 2.2 Canali DMX 3. Setup 3.1 Sostituzione fusibile 3.2 Collegamento di più apparecchi 3.3 Conversione tra un connettore 3 poli e 5 poli 3.4 Creazione di una catena DMX 3.5 Collegamento Master / Slave 3.6 Installazione... - Page 3 Table of contents 1. Preface 1.1 Packing list 1.2 Unpacking instructions 1.3 AC Power 1.4 Safety instructions 2. Introduction 2.1 Features 2.2 DMX channel 3. Setup 3.1 Fuse replacement 3.2 Fixture linking 3.3 3-Pin to 5-Pin conversion chart 3.4 Setting up a DMX serial data link 3.5 Master/Slave fixture linking 3.6 Orientation 4.
-
Page 4: Introduzione
1. Introduzione 1.1 Contenuto della confezione Proiettore Alimentazione Manuale d’uso 1.2 Istruzioni per l’apertura dell’imballo Appena ricevuto il prodotto, rimuovere l’imballo e controllare il contenuto assicurandosi che tutto sia presente all’interno e che sia in buone condizioni. Informare il venditore o il corriere se alcune parti sono danneggiate o se il cartone presenta segni di manomissione. -
Page 5: Introduzione
al punto di uscita dall'apparecchio. Il proiettore va pulito secondo le indicazioni riportate dal costruttore (vedere il capitolo Pulizia). Il proiettore deve essere posizionato lontano da qualsiasi sorgente di calore, incluso gli amplificatori. L’apparecchio deve essere riparato da personale qualificato nei casi in cui: A. -
Page 6: Conversione Tra Un Connettore 3 Poli E 5 Poli
attraverso un controller DMX o un semplice collegamento master / slave. A seconda del numero di canali o del canale DMX assegnato, è possibile calcolare il numero massimo di proiettori collegabili. La lunghezza massima della catena DMX non deve superare i 500 m. Il numero massimo di proiettori raccomandati in ogni catena è... -
Page 7: Istruzioni Operative
4. Istruzioni operative 4.1 Pannello di controllo Accedere alle funzioni del pannello di controllo utilizzando i quattro pulsanti posti sotto al display. Quando è selezionata una funzione nel menù il display visualizzerà immediatamente la prima opzione disponibile. per selezionare premere <ENTER>. Premere il pulsante <MENU>... - Page 8 (Menu principale) (1° livello) |_____________ (2° livello) |_____________ Add (Indirizzo DMX) A.001 |_____________ …… |_____________ A.512 |_____________ FLAS (Impostazioni strobo) Frgb (regolazione della velocità strobo) |_____________ F0XX |_____________ FrXX (Regolazione intensità rosso) |_____________ FgXX (Regolazione intensità verde) |_____________ FbXX (Regolazione intensità blu) |_____________ FL0- (regolazione tempo dissolvenza) F0XX...
-
Page 9: Configurazione
0 - 255 Dissolvenza colori 0 - 255 Strobo 0 - 255 Modalità musicale 5. Dati tecnici MODEL PLLED185 Alimentazione 110V- 240V / 50-60Hz Potenza assorbita: 7 x 3W RGB full color Peso 3,5Kg Dimensioni 230(H) x 230(W) x 450(L) mm... -
Page 10: Preface
1. Preface 1.1 Packing list Par Light 1 pcs Power-line 1 base User Manual 1pcs 1.2 Unpacking instructions On receiving a fixture, carefully unpack the carton, check the contents to ensure that all parts are presented, and have been received in a good condition. Notify the shipper immediately and retain packing material for inspection if any parts appear damaged from shipping or the carton itself shows, sign of mishandling. -
Page 11: Introduction
Cleaning -The fixture should be cleaned only as recommended by the manufacturer. See Cleaning for details. Heat -The appliance should be situated away from heat sources such as radiators, heat registers, stoves, or other appliances (including amplifiers) that produce heat. The fixture should be serviced by qualified service personnel when: A. -
Page 12: 3-Pin To 5-Pin Conversion Chart
controller or to run synchronized on two or more fixtures set to a master/slave operating mode. The combined number of channels required by all the fixtures on a serial data link determines the number of fixtures the data link can support. Maximum recommended serial data link distance:500 meters(1640ft). -
Page 13: Operating Instructions
4. Operating instructions 4.1 Navigating the control panel Access control panel functions using the four panel buttons located directly under the Display. When a menu function is selected, the display will show immediately the first available option for the selected menu function. To select a menu item, press<ENTER>. Press the <MENU>... - Page 14 (Main menu) class option) |_____________ class option) |_____________ Add (Address code setting) A.001 |_____________ …… |_____________ A.512 |_____________ FLAS (Strobe setting) Frgb(the total speed of strobe to be adjusted) |_____________ F0XX |_____________ FrXX (To adjust red brightness seperately) |_____________ FgXX (To adjust green brightness seperately) |_____________ FbXX (To adjust blue brightness seperately) |_____________...
-
Page 15: User Configurations
0 - 255 Color shade 0 - 255 Strobe 0 - 255 Sound activated 5. Technical data Model PLLED185 Voltage 110V- 240V / 50-60Hz Power consumption: 7 x 3W RGB full color Weight 3,5Kgs Dimensions 230(H) x 230(W) x 450(L) mm... - Page 16 Proel S.p.A. Via alla Ruenia 37/43 64027 Sant'Omero (TE) ITALY Tel. +39 0861 81241 Fax. +39 0861 887862 Mail: info@proelgroup.com Web: www.proel.com...