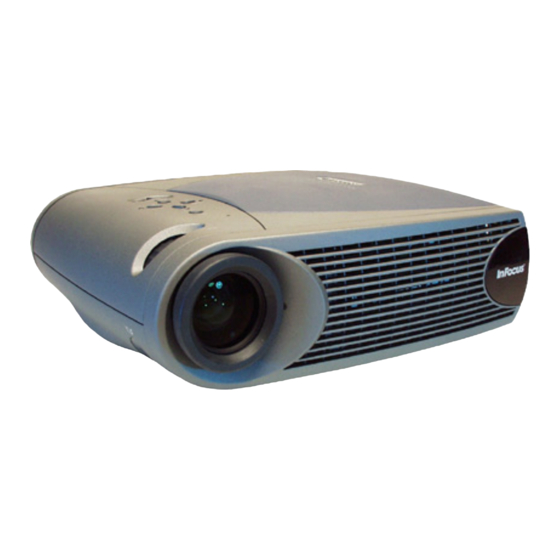
InFocus LP340B Service Manual
Hide thumbs
Also See for LP340B:
- Manual (62 pages) ,
- Reference manual (62 pages) ,
- Maintenance and troubleshooting manual (8 pages)
Table of Contents
Advertisement
Advertisement
Table of Contents

Related Manuals for InFocus LP340B


Summary of Contents for InFocus LP340B
- Page 1 Service Guide for the LP340 LP340B LP350...
-
Page 2: Safety Precaution
SAFETY PRECAUTION WARNING: Service should not be attempted by anyone unfamiliar with the necessary precautions on this projector. The following are the necessary precautions to be observed before servicing this chassis. 1 . An isolation Transformer should be connected in the power line between the projector and the AC Iine before any service is performed on the projector. -
Page 3: Table Of Contents
Special Handling for the DMD and Optical Engine.............61 Fasteners ........................67 Software Upgrade and DMD Bias Adjustment ............68 Upgrading the System Software for the LP350, LP340 and LP340B ......68 Updating the DMD Bias Setting .................75 Functional Tests ......................84 LP340/340B/350 Service Manual... - Page 4 Keypad Problems ......................100 Audio Problems ......................101 No Menu......................... 102 LP350 / LP340 / LP340B Block Diagram ................ 103 LP350 / LP340 / LP340B Controller ECA Voltages ............104 Parts Lists ........................105 Case Parts Exlploded View..................105 Components Exploded View ..................106 Optical Engine Exploded View .................107...
-
Page 5: Safety Precautions
SAFETY PRECAUTIONS WARNING: TO REDUCE THE RISK OF FIRE OR ELECTRIC SHOCK, DO NOT EXPOSE THIS APPLIANCE TO RAIN OR MOISTURE. DANGEROUS HIGH VOLTAGES ARE PRESENT INSIDETHE ENCLOSURE. DO NOT OPEN THE CABINET. REFER SERVICING TO QUALIRED PERSONNEL ONLY. CAUTION: Laser beam is emitted when the laser button of the remote control is pressed. -
Page 6: Important Safety Instructions
IMPORTANT SAFETY INSTRUCTIONS CAUTION: PLEASE READ AND OBSERVE 1. Read Owner's Manual 3. Source of Light ALLWARNINGS AND After unpacking this product, read the Do not look into the lens while the lamp INSTRUCTIONS GIVEN IN THIS owner's manual carefully, and follow all is on. - Page 7 IMPORTANT SAFETY INSTRUCTIONS Object and Liquid Entry 13. Stack Inhibited Accessories Never push objects of any kind into this Do not stack other equipment on this Do not place this product on an unstable product through openings as they may product or do not place this product on the cart, stand, tripod, bracket, or table.
-
Page 8: Introducing The Lp350, Lp340 And Lp340B
LP350. The LP350 The LP350, LP340 and LP340B are extremely easy to service. The number of boards in the projector has been reduced to one. Voltage and resistance testing is easy too. You need only to remove the bottom case to access test points. Nearly all the interior replaceable parts fasten to a magnesium chassis. You can pull everything out of the case by removing just a few screws. -
Page 9: Parts Replacement
Lamp fan (526-0058-xx) Speaker/fan bracket 505-0643-xx Controller ECA LP350: 510-1523-xx LP340: 510-1485-xx LP340B: 510-1573-xx Chassis 330-0602-xx Optical Engine Lamp module LP350: 530-0110-xx (SP-LAMP-LP3E) LP340/LP340B: 530-0111-xx... -
Page 10: Lamp Module And Lamp Door
Lamp Module and Lamp Door The lamp module (SP-LAMP-LP3F) consists of a reflector assembly and frame. The reflector assembly contains a metal halide arc and a reflector. A frame made of metal and plastic holds the reflector assembly in place inside the projector. The lamp door (505-0638-xx) covers the lamp module. - Page 11 Loosen the two captive screws that secure the lamp to the lamp housing. Grasp the tape in the middle of the lamp, then lift the module out of the projector. Assembly Notes The lamp must be seated properly and the lamp door must be in place for the lamp to ignite. Torque the two captive screws to 6 in.-lbs.
-
Page 12: Front Bezel And Focus Ring
The front bezel (LP340/350: 505-0638-xx; LP340B: 505-0636-xx) covers the front of the projector. It helps secure the top and bottom cases together. The front bezel fastens to the metal chassis inside the projector with one screw. - Page 13 Swing the front bezel away from the lens side so that the hinges under the IR lens disengage from the top and bottom cases. Assembly Notes Insert the two hinges on the front bezel into their matching slots on projector. Then swing the front bezel over the projection lens.
-
Page 14: Rear Bezel
InFocus nameplate (505-00668-xx) fastens to the rear bezel over the screw. Use a small bladed screwdriver to pry the InFocus nameplate off of the rear bezel. Use a T-10 Torx driver to remove the black M3x8 black Torx screw from beneath the nameplate. - Page 15 Assembly Notes Insert the two hinges on the left side of the bezel into their matching slots on projector. Then swing the bezel into place. Fasten the bezel to the projector with the black M3x8 screw. Tighten the screw to 4 in.-lbs. (.452 N m) Press the nameplate onto the rear bezel over the screw.
-
Page 16: Rubber Foot
Rubber Foot There is one rubber foot (Both: 328-0029-xx) attached to the bottom rear of the LP340/340B/350. The projector rests on this foot and the leveling foot in the rear and on the elevator in front. To replace a rubber foot, peel the protective paper off the bottom of the foot. Then press the foot into the oval recess in the bottom case. -
Page 17: Bottom Case
Bottom Case The bottom case (LP340/ LP350: 505-0635-xx; LP340B: 505-0928-xx) covers the bottom half of the half of the LP340/340B/350. Once you remove the bottom case, you have access to the parts inside the projector. The certification label (LP340: 020-0972-xx; LP340B: 020-1114-xx; LP350: 020-0973-xx) adheres to the bottom case. - Page 18 Lift the side of the bottom case opposite the I/O panel first. Then work the opening of the bottom case over the I/O connectors. CAUTION! Whenever you open the case on the projector, make sure you use proper ESD protection. If you’re replacing the bottom case with a new one, remove the Serial Number label from the lower left corner of the Certification label.
- Page 19 Assembly Notes Affix a new Certification label to the recessed area between the elevator and the lamp housing. Then affix the old Serial Number label to the lower left corner of the certification label. Affix a new model label to the recessed space above the leveling foot. LP340/340B/350 Service Manual...
-
Page 20: Leveling Foot
Leveling Foot The leveling foot (505-0777-xx) is located on the rear corner adjacent to the lamp housing. It allows the user to adjust the horizontal tilt of the projector. The leveling foot is comprised of a rubber foot, a shaft and a screw that fastens the two pieces together. NOTE If you need to replace only the foot itself, follow only steps two, three and four below. - Page 21 From the inside of the bottom case, use a Phillips screwdriver to remove the shaft. Assembly Note Note that the leveling foot and shaft fit together only one way. LP340/340B/350 Service Manual...
-
Page 22: Elevator
Elevator The elevator assembly (505-0076-xx) is comprised of three pieces: the elevator shaft, the elevator actuator, and a spring for the actuator. The elevator shaft includes the foot on which the projector rests in front. A tab on elevator housing prevents the shaft from dropping through the housing when it is fully extended. - Page 23 Withdraw the shaft from the outside of the bottom case. Assembly Notes To install the elevator assembly, do the following. If you’re installing a new elevator, insert the tab at the end of the actuator into the spring. Insert the end of the actuator with the spring into the elevator button opening. Seat the actuator end so that it goes through the elevator housing.
-
Page 24: Speaker/Fan Assembly
Speaker/fan assembly The speaker (526-0059-xx) and the 60 mm fan (526-0058-xx) fasten to the speaker/fan bracket, making one assembly (505-0643-xx). The assembly fits into the cavity in the top case between the optical engine and the rear bezel. Remove the bottom case (see page 17). Disconnect the speaker and fan cables from their connectors on the controller ECA. - Page 25 Lift the speaker/fan assembly out of the projector. NOTE If you’re removing the assembly to access another part, you can stop here. To replace the speaker, remove the M3x6 Torx screw that fastens the speaker to the bracket. LP340/340B/350 Service Manual...
- Page 26 To replace the 60 mm fan, remove the two M3x20 Phillips machine screws that fasten the fan to the bracket. Assembly Notes If you removed the 60 mm fan, position the fan on the speaker/fan bracket so the label on the fan faces outward when the fan is installed.
- Page 27 If you removed the speaker, position it so that the speaker cable aligns with the cable slot in the speaker/fan bracket. When you replace the assembly, slide the tab on the bottom right side of the speaker/fan bracket into the slot in the top case. Then replace the M3x6 screw near the speaker Make sure both cables are plugged in.
-
Page 28: Chassis And Attached Parts
Chassis and Attached Parts The interior design of the LP340/340B/350 allows quick access to many parts. To attain lightness and retain strength, the most delicate parts (such as the optical engine and power supplies) fasten directly to the magnesium chassis (330-0602-xx). You remove the chassis and these attached units from the top case as one piece. - Page 29 Use a T10 Torx driver to remove the six M3x8 Torx screws that fasten the chassis and attached parts to the top case. Carefully lift the chassis and parts out of the top case. LP340/340B/350 Service Manual...
- Page 30 To do this, lift the side opposite the I/O panel. As you lift, flex the top case next to the power switch. This allows the power switch and plug to clear the edge of the case. Once the power switch and plug clear the case edge, you can pull the lamp connector out of its recess in the top case.
- Page 31 Place the chassis and attached parts on a soft, ESD-protected surface. Go to the procedure for the part you want to remove. Assembly Notes CAUTION! Take special care not to scratch the surface of the top case when installing the chassis. The controller ECA, the optical engine, and the power supplies all have sharp edges that can damage the special finish on the case halves.
- Page 32 Align the AC receptacle with its opening in the top case first. Then lower the chassis into the top case, making sure the lamp connector emerges through its hole in the lamp housing. Seat the chassis on the posts in the top case. Then torque the six M3x8 Torx screws to 6 in.-lbs. (.678 N m).
- Page 33 Install the Speaker/fan assembly (see page 24). Install the Bottom case. (see page 17) Aligning the chassis holes with posts in the top case NOTE This is necessary only if controller and engine have been separated and you have trouble starting the screws.
-
Page 34: Power Supply
Power Supply The power supply (510-1486-xx) fastens directly to the magnesium chassis. It combines the high and low voltage circuits on one ECA. A paper insulator (120-0147-xx) sits between the chassis and the power supply. Remove the chassis and attached parts from the top case (see page 28). Place the chassis on a soft, ESD-protected work surface so that the controller is face down. - Page 35 Remove the eight M3x8 Torx screws that fasten the power supply to the chassis. Disengage the power supply/controller connector, then lift the power supply off of the chassis. To do this, gently lift the corner of low voltage power supply nearest to the front of the projection lens.
-
Page 36: Chassis
Chassis The magnesium chassis (330-0602-xx) provides the necessary rigidity for the projector’s internal components, yet it adds very little to the overall weight. Remove the following items: Chassis and attached parts from the top case (see page 28). Controller ECA (see page 40). Optical engine (see page 48). -
Page 37: Top Case
Top Case The top case (LP340: 505-0634-11; LP340B: 505-0926-xx; LP350: 505-0634-01) encloses the top half of the projector. When you replace the top case, you must first remove all the parts in the old case, then install them in the new top case. In the LP340/340B/350, you can remove most of the interior parts at once. -
Page 38: Keypad
Keypad The keypad (526-0050-xx) fastens to the inside of the top case. The assembly includes the keypad ECA, the key set, and the keypad cable. The individual pieces remain attached when you remove the keypad. When a button is pressed on the keypad, the keypad ECA receives the signal and passes it on to the controller ECA via the keypad cable. -
Page 39: I/O Emi Shield
I/O EMI Shield The I/O EMI shield (LP340/LP350: 330-0604-xx; LP340B: 330-0461-xx) covers the connectors on the side of the projector. Remove the bottom case (see page 17). Remove the two Phillips screws on either side of the CableWizard connector. Remove the two jack screws on either side of the M-1 connector. -
Page 40: Removing Thecontroller Eca
Removing the Controller ECA The controller ECA (LP340: 510-1508-xx; LP340B: 510-1573-xx; LP350 510-1524-xx) is the only signal processing board in the projector. It contains the circuitry that manages the major functions of the projector, including TV, video and computer signal processing. It also includes the Texas Instruments formatter circuitry that prepares the signal for the DMD. - Page 41 Remove the two 6-32x3/8 Phillips screws that fasten the DMD heat sink to the top of the controller ECA. Then lift the heat sink off of the top of the controller. Remove the DMD stiffener, the plastic DMD insulator (attached to the bottom of the DMD stiffener) and the two DMD EMI clips from the top of the controller ECA.
- Page 42 Remove the four M3x8 Torx screws that fasten the controller ECA to the chassis. LP340/340B/350 Service Manual...
- Page 43 Place one finger on the top of the DMD. While keeping your finger on the DMD, carefully lift the front of the controller ECA to disconnect the controller/power supply connector. Then remove the controller ECA. WARNING! Make sure you keep your finger on top of the DMD while lifting the controller ECA. The DMD can stick to the bottom of the controller, and then fall off once the board is lifted.
- Page 44 If you’re installing a new controller ECA, remove the I/O EMI shield (see page 39). WARNING! Once you remove the DMD stiffener and controller ECA from the projector, the DMD and elastomer float loose in the opening on top of the optical engine. Take extreme care not to dislodge the DMD or elastomer.
-
Page 45: Installing The Controller Eca
Installing the Controller ECA Take note of the DMD bias setting on the label affixed to the rear of the DMD. The label indicates the DMD bias setting. You need to know whether the DMD bias setting is A, B, C, D or E. The example below is E. - Page 46 Place the DMD stiffener over the DMD. Place the two EMI clips on opposite corners. Then fasten the pieces down with the four M3x10 Phillips screws in an ‘X’ fashion as indicated by the numbers in the illustration below. Torque the screws to 6 in.-lbs. (.678 N m). Install the DMD heat sink.
- Page 47 Install the four M3x8 screws that fasten the controller ECA to the chassis (shown below). Torque the screws to 6 in.-lbs. (.678 N m). Leave the other screw holes empty. The bottom case fastens in these holes. Attach the color wheel cable to its ZIF connector and the lamp fan and blower to their connectors. If you removed the controller while it was still in the bottom case, attach the keypad cable.
-
Page 48: Removing The Optical Engine
Removing the optical engine The optical engine assembly (LP340/340B: 530-0111-xx; LP350: 530-0110-xx) includes all the components in the light path with the exception of the lamp module. The lamp housing and the safety switch assembly are also available as replaceable parts. SPECIAL NOTE You must update the bias setting for the DMD any time you replace the controller ECA or the optical engine. - Page 49 Lift the chassis off of the optical engine. Note that the power supply remains attached to the chassis. CAUTION Do not tip the engine. The DMD may fall out. Install the DMD protective cover over the DMD. CAUTION! Do not remove the DMD from its location on the optical engine. Doing so can allow contamination of the prism and the DMD surface.
-
Page 50: Installing The Optical Engine
Installing the Optical Engine Place the engine on a soft, ESD-protected work surface. Remove the DMD protective cover. Carefully lower the chassis (and attached power supplies) into place over the engine. Make sure the DMD and elastomer align with the opening in the chassis. Check the condition of the elastomers on the DMD. - Page 51 Turn the chassis over and install the lamp power cable and the safety switch cable. Install the chassis and attached parts in the top case (see page 28). Install the speaker/fan assembly (see page 24). Install the bottom case (see page 17). Install the lamp module and lamp door (see page 10).
-
Page 52: 80 Mm Lamp Fan And Lamp Blower
80 mm lamp fan and lamp blower The 80 mm lamp fan (526-0057-xx) and lamp blower (526-0056-xx) fasten to the side of the lamp housing. The two fans work together to cool the lamp inside the lamp housing. Both fans are included with a new lamp housing or with a new optical engine. Both are also available separately. - Page 53 Remove the two M3x12 Torx screws that fasten the 60mm lamp fan to lamp housing. Then remove the fan. To remove the lamp blower Remove the two M3x12 Torx screws that fasten the blower to the lamp housing. Assembly Notes The side of the fan that includes the foil reflector faces inward.
- Page 54 Route the fan and blower cables so they emerge on between the color wheel housing and the lamp housing. Torque all screws to 4 in.-lbs. (.452 N m). LP340/340B/350 Service Manual...
-
Page 55: Lamp Housing
Lamp Housing The lamp housing (505-0632-xx) fastens to the optical engine at the metal condenser lens housing. The assembly also includes the safety switch set, the lamp blower with ducting and the 80 mm lamp fan. NOTE When you replace the optical engine, leave the lamp housing attached to it. A new optical engine includes a lamp housing, lamp module, safety switches, and fans. - Page 56 Assembly Notes When you install the lamp housing, route the fan and blower cables between the lamp housing and chassis. Torque the M3x8 Torx screws to 6 in.-lbs. (.678 N m). LP340/340B/350 Service Manual...
-
Page 57: Safety Switch Assembly
Safety Switch Assembly The safety switch assembly (526-0049-xx) contains two switches. The thermal switch shuts the projector down if the lamp becomes too hot. The interlock switch prevents the projector from operating when the lamp door is removed. The switches fasten to the top and side of the lamp housing. The assembly includes a cable that attaches to the high voltage power supply. - Page 58 Remove the thermal switch from the top of the lamp housing. To do this, use a small screwdriver to depress the plastic tabs in each screw hole on the thermal switch body. Then rotate the thermal switch clockwise. CAUTION Be extremely careful not to press the tabs too hard. They are easy to break. LP340/340B/350 Service Manual...
- Page 59 Remove the safety switch assembly from the projector. Note that you pull the interlock switch between the power supply and lamp housing. Assembly Notes When you install the safety switch assembly, begin with the thermal switch. This leaves room for you to rotate it into position without stretching the wires that lead to the interlock switch.
-
Page 60: Resetting The Lamp Timer
Resetting the Lamp Timer The lamp timer measures the number of hours a lamp is lit. Whenever you replace the lamp, you need to reset the timer. Plug the projector in and press the Power button above the I/O panel. The startup screen appears. -
Page 61: Special Handling For The Dmd And Optical Engine
Special Handling for the DMD and Optical Engine The LP340/340B/350 models differ from some other DLP projectors built by InFocus. To save space and weight, the Texas Instruments circuitry is located on the controller ECA instead of on a separate board. - Page 62 What to do when the DMD becomes dislodged from its location on the optical engine Regardless of the precautions you may take, you might find that the DMD becomes dislodged from the optical engine when you remove the controller ECA. Be careful if this happens. Improperly handling the DMD outside of the optical engine could result in replacing both parts.
- Page 63 To assemble the DMD, the DMD carrier and elastomers If the DMD comes out of its carrier or if the elastomers fall out, it must be reassembled properly. The DMD carrier and elastomers are available in the DMD elastomer kit (505-0779-xx). A new DMD is available only with a new optical engine.
- Page 64 Use a tweezers to place the elastomers into their slots in the DMD carrier. Do not touch them with your fingers. CAUTION Take extreme care that the DMD does not fall out of the carrier. LP340/340B/350 Service Manual...
- Page 65 To orient a DMD on the optical engine Place the DMD on the DMD opening in the optical engine. The rear and inside edge of the DMD is keyed to fit the engine housing. See the illustration below. Make sure the DMD fits into the opening in the proper orientation. The DMD should fit loosely into the opening, and the pins on opposite corners should fit into matching holes on the engine casting..
- Page 66 Before installing the controller ECA, clean the elastomers to ensure good contact between the DMD and controller ECA. To clean the elastomers, use a clean, new acid brush. Brush the elastomers gently from end to end. Complete the installation by installing the controller ECA. (see page 45) LP340/340B/350 Service Manual...
-
Page 67: Fasteners
Fasteners The fastener kit (802-0023-xx) contains a selection of each of the fasteners listed below. Torque settings for each fastener are listed in the parts replacement procedures. Size Used in M3x8 TORX SEM Keypad to top case (2); speaker/fan assembly (1); power supply to chassis (9);... -
Page 68: Software Upgrade And Dmd Bias Adjustment
You’ll also find out how to check and adjust the DMD bias setting on the controller ECA. You must check the bias setting whenever you replace an optical engine or controller ECA. Upgrading the System Software for the LP350, LP340 and LP340B To upgrade the software on the projector, you need to do the following: Download the software from the InFocus web site. - Page 69 In the Save As dialog box, navigate to the folder in which you want to store the file, then click NOTE Once you install the software files, you won’t need the .EXE file you download. You may want to save it in a temporary folder or in the Briefcase. The file downloads to your computer’s hard drive.
- Page 70 Install the Software on the Computer The software you download is bundled into one .EXE file. You open the .EXE file and install the upgrade software on the computer you plan to use to flash the projector. To transfer the file to another computer, place the .EXE file on a floppy disk.
- Page 71 Upgrading the Software You need the following cables: CableWizard2 serial download cable PN 210-0087-00 Connect the Projector to the Computer Turn the selector on the CableWizard until Mac appears in the CableWizard window. Plug the PS/2 end of the serial cable into the mouse connector on the CableWizard. Plug the other end of the serial cable into the Communication Port 1 (COM1) on the computer.
- Page 72 Upgrade the Software Open Windows Explorer, navigate to the batch file, then double-click the batch file (TI in this example). NOTE If you connected the serial cable to the COM2, use the Com2 batch file (T1C2 in the example above). The DOS window opens, displaying instructions and upgrade status.
- Page 73 Press a key, then watch for the circular timer to appear. The circular timer resembles a slash ( / ) that rotates. It is located next to the text, Synchronizing Comm link Press the power button on the projector within five seconds of the appearance of the timer. The upgrade files download to the projector.
- Page 74 Confirm the Software Upgrade On the projector keypad, press Menu to display the menus Use the remote control or the keypad buttons to open the Status window. The new software version number appears in the Status window. LP340/340B/350 Service Manual...
-
Page 75: Updating The Dmd Bias Setting
When the LP350, LP340 and LP340B are built, the output of the control signal from the controller ECA is adjusted to match the optimum bias setting of the particular DMD in the projector’s optical engine. - Page 76 Each DMD has its bias setting marked on a label that is affixed to the rear of the DMD case. The example below indicates a bias setting of E . For the LP340 and LP340B, the setting is A, B, C, or D. The setting is always listed at the end of the second line of numbers.
- Page 77 Download the Serial Utility from the InFocus Web Site In the LP340/340B/350 Projector Software page, click DMD Bias/Serial Interface Utility Version 1.04. The File Download dialog box appears. In the File Download box, select Save This Program To Disk option, then click OK.
- Page 78 NOTE Once you install the software files, you won’t need the .EXE file you download. You may want to save it in a temporary folder or in the Briefcase. The file downloads to your computer’s hard drive. Now you’re ready to install the utility on your computer. LP340/340B/350 Service Manual...
- Page 79 Install the Serial Interface Utility on the Computer In Windows Explorer, navigate to the folder in which you stored the file you downloaded from the InFocus web site, then double-click it to open it. The WinZip Self Extractor dialog box appears.
- Page 80 Now that the Serial Utility is installed on your computer, you’re ready to hook up the computer to the projector and check the bias setting. Connect the Computer and Projector You use the CableWizard and serial cable to connect the projector and computer. The connections are the same as that used to upgrade the software.
- Page 81 Check and Adjust the Bias Setting on the Controller ECA CAUTION If you are adjusting the bias on an LP350, make sure you read the note in step 2. Open the Serial Interface Utility on the computer. To do this, click the Start button, point to Programs, point to Serial Interface Utility. Then click Serial Interface Utility.
- Page 82 CAUTION The DMD bias indicator on the DMD label for the LP350 differs from that of the LP340/340B. Use the following table to determine the correct bias setting for the LP350. If the label on the LP350 DMD says... Set the bias to... Do one of the following: If the bias setting on the controller ECA correctly corresponds with the setting on the DMD label, you leave the setting as it is.
- Page 83 Click OK. The Bias Value changes to the letter you entered. Click the Quit button in the lower left corner of the Serial Utility window. You’ve now reset the DMD bias for the projector LP340/340B/350 Service Manual...
-
Page 84: Functional Tests
Make sure the video player has an S-video Out port and cables. The player should also have a Composite video output port (RCA). InFocus strongly suggests you use a DVD or laser disc player to test the video quality. DVD and laser disc players reproduce colors better Video player and project sharper images. - Page 85 Make sure the card has an M1 Digital Video Interface (DVI) output PC with digital video and sound port. The stereo audio card should have either a 3.5mm stereo audio card jack or RCA left and right output ports. Digital Video Interface (DVI) You'll need the M1-DA cable that comes with the projector.
- Page 86 Software Version / Standby / Reset All Verify software version. Press the Menu Verify the keys are not sticky. button. Navigate to Verify unit goes in and out of standby mode. the Status menu. Check the software version. Navigate to the Display menu.
- Page 87 Image #1: Focus Test Image Turn off any local light. Turn the zoom ring to make the smallest image. Focus the image so the middle icon is clearly focused. Verify that all four corner icons have clear resolution Focus the image on Verify that the white space is visible on all 5 bar/line icon areas (between the 4 green squares.
- Page 88 Image #4: SMPTE133 Project the SMPTE133 image. Verify that there are no noise, tint, duplicating columns, or other general image abnormalities present On the keypad, press Menu. Verify that the image synchronizes. On the Display menu, select Reset All. Power Down Verify unit is powered off before disconnecting cables.
-
Page 89: Troubleshooting
Troubleshooting This section includes: Troubleshooting trees that help you diagnose problems with the projector Power Problems (page 90) Image Problems (page 95) Remote Problems (page 99) Keypad Problems (page 100) Audio Problems (page 101) No Menu (page 102) A system/controller ECA block diagram (page 103) Voltage check points on the controller ECA (page 104) LP340/340B/350 Service Manual... -
Page 90: Power Problems
Power Problems The projector will not power up, only partially powers up, or will not remain powered up. What is the problem? Lamp or No signs of projector shuts No lamp. Fans power. off after running are running. No fans, no LED a short period of time. - Page 91 no sign of power No signs of power. No fans, no LED. Use a known good power cord. The lamp door interlock switch only causes the ballast to not light the lamp. Fans run and bootup occurs. Does the Replace Lamp enable voltage projector power power cord.
- Page 92 lampprojectorshuts Lamp or projector shuts down after running a short time. Note: This is a thermal issue due to one of the following: A fan is not running, causing the unit to Blower Replace overheat and shut down. visible fans fan voltage controller A component on the power supply or...
- Page 93 nolamp No Lamp A bad CableWizard (cable inter-connect device) can cause no 'lamp enable' signal, so use known good CableWizard or other connector. Confirm that the color wheel cable is connected. The lamp will not light if the color wheel is not spinning. Make sure lamp-door interlock switch is engaged.
- Page 94 No Lamp (continued) Does 'lamp enable' measure 5 volts? Bad ballast. (see Controller Replace Power Supply. Voltage Diagram) power supply Replace voltages good? Power Supply. (see Controller Voltage Diagram) Sub good fan Replace both visible (plug in the good Controller board. fans fan without running?*...
-
Page 95: Image Problems
Image Problems The image is not correct. The projector starts and runs normally. The menus are accessible. The lamp is lit. Flash or reflash the projector with the latest software. On the Display menu, choose Reset All Confirm that all image adjustments are set to the factory defaults. - Page 96 noimage No image. Vertical lines. Horizontal lines. Sparkly picture. Clusters of dark pixels. Check the DMD bias setting on the controller ECA Is the image correct? Note A misaligned DMD elastomer can cause image probllems. If the DMD has been Replace the distrurbed (either when controller ECA.
- Page 97 badtint Bad or missing tint or color. Missing startup screen, VGA, composite video or S-video. Distorted image, excess noise, rolling image, torn image, frozen image, 'plaid' image, repeated single image, or shifted image. Make sure cables are good. Is the image correct? Replace the controller ECA LP340/340B/350 Service Manual...
- Page 98 dimimage Dim image Substitute known good lamp. The lamp takes about 90 seconds to achieve full brightness. Is the image brighter? Substitute a known good controller ECA. Is the image brighter? Replace the optical engine. LP340/340B/350 Service Manual...
-
Page 99: Remote Problems
Remote Problems Infrared remote problem Use known good batteries in the remote. Does the remote work? Use a known good remote with the projector. Does the remote work? Replace the controller ECA. LP340/340B/350 Service Manual... -
Page 100: Keypad Problems
Keypad Problems Keypad does not respond to key presses. Is a known good Substitute a Substitute the keypad available for known good good keypad. substitution? controller ECA. Does the Does the Replace the Replace the projector respond projector respond controller ECA. keypad. -
Page 101: Audio Problems
Audio Problems No audio or sound is scratchy or distorted. Turn projector off. Check speaker resistance across J-500 on the controller ECA. See the Controller Voltage Diagram. Does If speaker sounds bad Measure it measure Replace it may be a bad speaker cone. less than 12 to 14 speaker. -
Page 102: No Menu
No Menu Menu does not appear onscreen. Startup screen and other images appear normal. Try pressing the Menu button on both the remote and keypad. If the remote works If the keypad works and the keypad and the remote Does the menu doesn't, go to doesn't, go to appear? -
Page 103: Lp350 / Lp340 / Lp340B Block Diagram
LP350 / LP340 / LP340B Block Diagram Safety interlock Power Supply Lamp HV Keypad Key scan Onboard Lamp Lamp Lamp keypad Keypad enable Microcontroller Key interrupt Thermal Switch Audio PS/Controller Computer Flash, SDRAM, Processor stereo input connector EEPROM Memory Stereo TV... -
Page 104: Lp350 / Lp340 / Lp340B Controller Eca Voltages
LP350 / LP340 / LP340B Controller ECA Voltages 3 volts TDP-T1 / LP340 Service Manual... -
Page 105: Parts Lists
Parts Lists Case Parts Exlploded View Top nameplate 020-0846-xx Top case LP340: 505-0634-11 LP340B: 505-0926-xx Rear bezel LP350: 0634-01 505-0637-xx) Rear Keypad assembly nameplate 526-0050-xx 505-0668-xx Speaker 526-0059-xx Also part of speaker/fan bracket assembly Leveling foot assembly 505-0777-xx Speaker/fan bracket... -
Page 106: Components Exploded View
Components Exploded View DMD heat sink Part of DMD mounting kit 505-0778-xx DMD stiffener Part of DMD mounting kit 505-0778-xx Controller ECA LP340: 510-1508-xx LP340B: 510-1573-xx LP350: 510-1524-xx Chassis 330-0602-xx Optical engine LP340/340B: 530-0111-xx LP350: 530-0110-xx Power supply * 510-1486-xx Top case ∗... -
Page 107: Optical Engine Exploded View
Optical Engine Exploded View All the parts in the illustration below are included in a new optical engine. They are also available separately. The lamp housing also includes the 80mm fan, the lamp blower and the safety switch cable. Lamp blower 526-0056-xx Lamp housing LP340: 505-0631-xx... -
Page 108: Frus By Alphabetic Listing
Also included with new optical engine and new lamp housing. Bottom case LP340, 505-0635-xx Includes the elevator assembly. Requires a certification LP350 label, and product label. Bottom case LP340B 505-0928-xx Includes the elevator assembly. Requires a certification label, and product label. Chassis 330-0602-xx Controller ECA LP350 510-1485-xx The 1485 and 1524 controllers are identical. - Page 109 Safety switches 526-0049-xx Includes thermal switch, interlock switch, and cable. w/cable Top case LP340 505-0634-11 InFocus name plate required for new top case. Top case LP340B 505-0926-xx InFocus name plate required for new top case. Top case LP350 505-0634-01 InFocus name plate required for new top case.
-
Page 110: Frus By Numeric Listing
Parts by numeric listing Below is a numerically arranged list of replaceable parts used in the LP340/340B/350 Part Number Projector Part Name 020-1027-xx LP340 Label, Cert LP340 020-1031-xx LP350 Label, Cert LP350 020-1038-xx LP340 Label, Side LP340 020-1042-xx LP350 Label, Side LP350 020-1046-xx LP350 Label, Top LP350... -
Page 111: Standard Accessories
Standard Accessories Accessory Projector Part Number Notes LP340, Quick Start Card 009-0485-xx LP350 LP340B, Quick Start Card 009-0571-xx LP350 LP340, User's Guide 010-0230-xx LP350 LP340B, User's Guide 010-0276-xx LP350 Soft Case 110-0299-xx Shipping Box 110-0300-xx M1-A Analog Computer 210-0185-xx Six feet (1.8 meters) in length.