
Related Manuals for Turtle Beach Ear Force PX5


Summary of Contents for Turtle Beach Ear Force PX5
- Page 1 Инструкция для Turtle Beach Ear Force PX5 Перейти в карточку товара 8 800 775 98 98...
- Page 2 USER GUIDE...
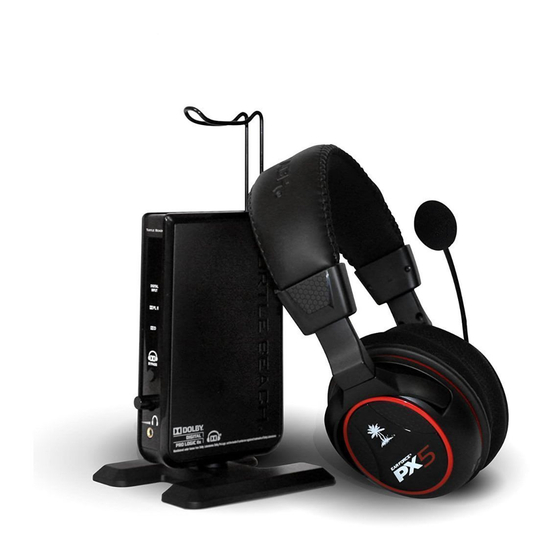
- Page 3 PX5 Headset with ® Xbox LIVE Removable Microphone USB Programming Cable (2) AA Batteries Talkback Cable PX5 Digital Wireless RF Transmitter USB Power Cable Digital Optical Cable Turtle Beach Sticker watch PX5 training videos at: product support and warranty information:...
-
Page 4: Table Of Contents
Table of Contents About the Ear Force PX5 pg 1 PX5 Headset Overview pg 3 PX5 Transmitter Overview pg 7 Using the Transmitter pg 9 Pairing the Headset and Transmitter pg 10 Setup Transmitter Setup — PS3 ™ , Xbox 360 ®... -
Page 5: About The Ear Force Px5
Wireless Digital RF Technology with Bluetooth The Ear Force PX5 headset provides wireless CD-quality game sound via digital RF (radio frequency) that communicates with the PX5 transmitter. In addition, the PX5 incorporates Bluetooth technology which is used for communicating on PlayStation ®... - Page 6 Xbox 360 Mobile Phone via Bluetooth* Game sound in Dolby Surround Game sound via via Digital RF digital optical cable Stream Music via Bluetooth* Xbox LIVE chat via Talkback Cable or op- tional XBA Bluetooth Chat Adapter** wired TRANSMITTER wireless Dolby Surround Sound The PX5 transmitter processes Dolby Digital surround sound from your PS3 or Xbox 360 and sends it to the headset via digital RF.
-
Page 7: Px5 Headset
PX5 Headset - Left Ear Cup Controls... - Page 8 1. Main Power Button with LED Powering ON: Press and hold until the headset announces “Powering On”. Powering OFF: Press and hold until the headset announces “Powering Off”. Automatic Power OFF: If the headset doesn’t detect any audio for more than 5 minutes, it will automatically shut down to conserve battery power.
- Page 9 PX5 Headset - Right Ear Cup Controls Be sure to insert batteries as shown.
- Page 10 7. Main (Main Preset Button) Press to toggle between the selected (alternate) preset and the main (default) preset. (See "Presets" on pg. 23 for further details) 8. Mic Mute Button Press to toggle between muting and unmuting the microphone. A high tone will sound when the mic is unmuted and a low tone will sound when the mic is muted.
-
Page 11: Px5 Transmitter
PX5 Transmitter Front View Rear View... - Page 12 1. Power/Pairing LED Indicator A solid LED indicates the transmitter is powered on and communicating with the headset. A pulsing LED indicates the transmitter can’t communicate with the headset because it is powered off, not paired, or out of range. If this occurs, please refer to “Pairing the PX5 Headset and Transmitter”...
-
Page 13: Using The Transmitter
Using the Transmitter Transmitter Range The transmitter sends game audio from your PS3 or Xbox 360 to the headset via digital radio frequency (RF) signal, so a direct line of sight is not required. When you’re out of range, you may hear popping or clicking sounds if the headset loses the RF signal. For best performance, place the transmitter in an open area that is unobstructed by objects that might absorb RF signals from the internal antenna. -
Page 14: Pairing The Headset And Transmitter
Using Wired Headphones The transmitter can only communicate with one wireless headset, so two wireless headsets cannot be used with the same transmitter. The headphone jack on the front of the transmitter can be used to connect a set of wired headphones for listening to the Dolby Surround Sound game sound being transmitted to the wireless headset. -
Page 15: Transmitter Setup - Xbox 360 (Original)
Pairing the PX5 and Transmitter The headset and transmitter in this package are “paired”, which means they’re synchronized to ensure they work together. When the headset and transmitter are communicating, the top LED on the front panel of the transmitter will be on solid. If this LED is instead slowly pulsing, it means the transmitter can’t communicate with the headset. -
Page 16: Setup
Setup ™ , Xbox 360 ® (Slim) Xbox 360 (Original)* 1. Connect the Digital Optical Cable 1. Connect the Digital Optical Cable (Requires Xbox 360 Audio Adapter, sold separately) NOTE: Remove the protective caps from each end of the optical cable before inserting it into the sockets. NOTE: Remove the protective caps from each end of the optical cable before inserting it into the sockets. - Page 17 Setup (con’t) Right Ear Cup: 3. Insert the Headset Batteries To remove the battery cover, slide downward NOTE: Be sure to insert batteries as shown. 4. Insert the Mic Boom 5. Turn on the headset by pressing and holding the power button until it turns solid, then release.
-
Page 18: Ps3 Chat Setup & Ps3 Settings
2. In the PS3 Menu, select “Settings” > “Sound Settings” > “Audio Output Settings” > Optical Digital > Dolby Digital 5.1 3. In the PS3 Menu, select “Settings” > “Accessory Settings” > “Audio Device Settings” > set the “Input” and “Output” to “TURTLE BEACH PX5”... -
Page 19: Xbox 360 (Slim)
® Xbox 360 Chat Setup Wired Chat Setup 1. With the headset powered on, place the PX5 in Xbox Mode by quickly pressing the power button twice. The headset will announce which mode it’s in. 2. Insert the right angle plug into the headphone jack on the Xbox 360 Controller Xbox 360 controller. - Page 20 Xbox 360 Wireless Chat Setup (Optional) Connecting the XBA Bluetooth ® Chat Adapter* 1. Place the headset in PS3 Mode** by quickly pressing the Power button twice. The headset will announce which mode it’s in. 2. Power on the Xbox 360 controller and plug the XBA into the controller headset jack.
-
Page 21: Pc/Mac Setup
USB Power Cable (included) 1. If your PC or Mac does not include a digital optical output, then you will need to purchase an “Optical S/PDIF Adapter”. Turtle Beach offers the “Audio Advantage ® Micro II” which is available on our website. - Page 22 3, 4 PC/Mac with Analog Audio Output and Bluetooth RCA Stereo Audio Splitter Cable (sold separately) USB Power Cable (included) Bluetooth Setup 1. Power on the PX5 and make the Bluetooth discoverable by pressing and holding the BT MFB for 5 seconds until the lashing LED changes from blue to red—then release the button.
-
Page 23: Home Theater Setup
Home Theater Setup Setting up the transmitter as illustrated below lets you listen to your console or TV with the PX5 headset. You can also hear your console on your home theater speakers without disconnecting the optical cable from the transmitter. The PX5 transmitter’s analog inputs connected to the TV will automatically shut off whenever your console is active, as indicated by the digital input LED on the transmitter front panel. -
Page 24: Dolby Processing
® Dolby Processing The PX5 uses Dolby Pro Logic IIx, Dolby Digital, and Dolby Headphone processing technologies – the industry-standard formats for encoding multi-channel game audio. Dolby Headphone processing recreates surround sound using the PX5 headset so you can hear the sound all around you, as if you were listening to an actual surround sound speaker system. -
Page 25: Digital Signal Processing
Digital Signal Processing The PX5 headset incorporates a Digital Signal Processor (DSP) to independently modify game, chat and microphone audio. The DSP settings are saved as presets, which are described in the next section. Connecting the PX5 headset to a PC with the included USB cable lets you create custom presets or replace the presets with different ones downloaded from our website. - Page 26 Noise Gates: Separate noise gates on the game, chat and microphone audio channels cut out background noise that’s below a threshold point, so rather than hearing static or other distracting sounds, you’ll hear total silence when there’s nothing going on. Sonic Lens: The game sound can be processed by band-limited dynamic range compression that focuses on speciic types of sounds in the game (e.g.
-
Page 27: Presets
Presets The PX5 has a total of 18 presets that are grouped in two sets of 9. The irst set is optimized for PS3 mode and the second set of is optimized for Xbox 360 mode. Pressing the power button twice quickly will switch between wireless and wired modes and the headset announces which mode is active. - Page 28 Customizing Presets The 18 default presets can be replaced with custom presets by downloading new ones from the Turtle Beach webstie. You can also create your own custom presets by downloading the PX5 Advanced Sound Editor software. For more information, visit www.turtlebeach.com/customize.
-
Page 29: Pairing A Bluetooth-Enabled Device
2. On your Bluetooth enabled device, activate the Bluetooth mode and search for Bluetooth devices as described in its user manual. 3. When your device is inished scanning, select “TURTLE BEACH PX5” from the list and follow the prompts to connect. -
Page 30: Making Phone Calls
Making Calls Once the PX5 is successfully paired with your mobile phone, you can use it to make and receive calls. The PX5 can be used with voice dialing if your phone supports this function. 1. Using voice dialing* – Press the BT MFB button for 3 seconds until you hear a tone—then release. The voice recognition prompt in your phone will now be activated. -
Page 31: Px5 Technical Speciications
PX5 Technical Speciications Headset · 50mm diameter speakers · Game audio frequency response: 20Hz - 20kHz, >120dB SPL @ 1kHz · Condenser microphone frequency response: 50Hz - 15kHz · Game audio digital 2.4GHz RF wireless reception · Bluetooth radio with dual-pairing mode and A2DP compatibility ·... -
Page 32: Troubleshooting Tips
Troubleshooting Tips No sound • Check that the transmitter and headset volume controls are both turned up. • Check that the transmitter power and optical cables are properly connected. • Check that the headset is powered on. The LED on the left ear cup should be lashing. •... - Page 33 Troubleshooting Tips (con’t) PS3 Pairing Issues • If the PS3 cannot locate your PX5, make sure that it is in pairing mode before you starting scanning, as indicated by the lashing red/blue LED. • If the PX5 is missing from the device menu list after you re-start your PS3, please repeat the pairing process. •...
-
Page 34: Important Safety Information
WARRANTY SERVICE In the USA and CANADA Warranty Service is provided by our TURTLE BEACH OFFICEs and in all other Countries it is provided by our local International Distributors. VTB does not warrant uninterrupted or error-free operation of the Product and is under no obligation to support the Product for all computer operating systems or future versions of such operating systems. - Page 35 (18) months following the purchase of the Product. EXCLUSIONS FROM LIMITED WARRANTY: This Limited Warranty shall not apply and VTB has no liability under this Limited Warranty if the Turtle Beach Product: • is used for commercial purposes such as "LAN Centers" (including rental or lease);...
- Page 36 WARNING: Changes or modiications made to this equipment not expressly approved by VOYETRA TURTLE BEACH, INC. may void user’s authority to operate this equipment.
- Page 37 Model Number(s): TBS-2180-01 Year of Manufacture: 2011 We, Voyetra Turtle Beach, Inc. of Elmsford, New York, declare under our own responsibility that the above-referenced product complies with the following directives and standards: Low Voltage Directive 2006/95/EC EN 50332-2:2003 EN 60950-1:2006+A11:2009 Electromagnetic Compatibility Directive 1999/5/EC R&TTE...
- Page 38 No. 710 Yihua Building, Futian District, Shenzhen, China 518040 Tel: +86-755-29451282 Fax: 86-755-83709189 Web: ebotek.cn The technical documentation required by this Directive is maintained at the corporate headquarters of Voyetra Turtle Beach, 150 Clearbrook Road. Suite 162, Elmsford, New York, 10562. Authorized Person: 10/5/11...
- Page 39 For more products, accessories and general product information, please visit TurtleBeach.com For warranty information and product support, please visit TurtleBeach.com/support...
- Page 40 Copyright © 2012 Voyetra Turtle Beach, Inc. (VTB, Inc.) All rights reserved. No part of this guide may be reproduced without permission. Turtle Beach, the Turtle Beach Logo, Voyetra, Ear Force, Chat Boost, Engineered For Gaming, the Digital RF logo and the DSP logo are either trademarks or registered trademarks of VTB, Inc.
- Page 41 ENGINEERED FOR GAMING™...
- Page 42 Turtle Beach Ear Force PX5 Описание...