Table of Contents
Advertisement
Quick Links
Advertisement
Table of Contents

Related Manuals for JVC CU-VD3 AA


Summary of Contents for JVC CU-VD3 AA
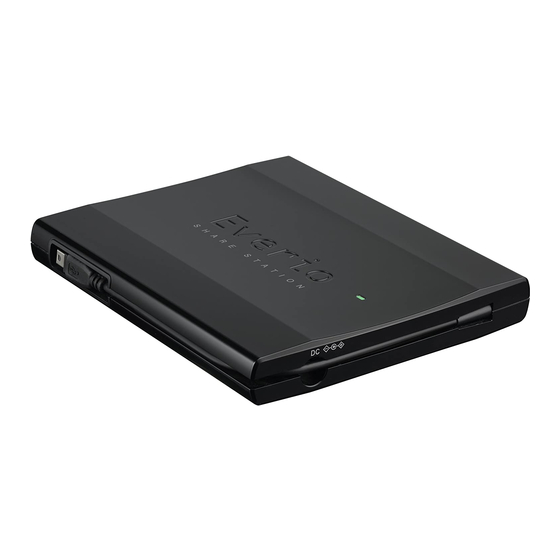
- Page 1 CU-VD3 ENGLISH AA/AG/AC/TW/KR DVD Burner INSTRUCTIONS...
-
Page 2: Basic Guide
Use DVD-R, DVD-RW or DVD-R DL disc of the brands listed below. DVD+R, DVD+RW and DVD-RAM cannot be used. DVD-R DVD-RW DVD-R DL (Single-sided double layer) JVC, TDK, Verbatim, JVC, Verbatim Brand SONY Use a commercially available cleaning cloth to wipe the disc gently if there are any Caution fingerprints or dirt. - Page 3 Open the tray and insert the disc 1) Press the eject 2) Pull out completely. button. 3) Insert firmly into place. Close the tray Open the LCD monitor Push in until the tray The Everio camera turns on. snaps in. Turn the Everio off and on again if the following display remains unchanged.
-
Page 4: Safety Precautions
This burner enables DVDs of videos ATTENTION: recorded with the JVC Hard Disk Camera to This unit contains microcomputers. External electronic be created without using a PC. noise or interference could cause malfunctioning. In • If you want to edit videos recorded with the camera... - Page 5 Take sufficient care when changing the code. kitchen counter or beside a humidifier • Unstable location Disclaimer • Bathroom JVC accepts no liability whatsoever for loss of data • Dusty places resulting from inappropriate connections or handling. • Slanted location Copyrights...
-
Page 6: Table Of Contents
Contents Basic Guide......................2 Safety Precautions ....................4 Getting Started......................7 Taking out the USB Cable ..................7 Placing the Burner ....................7 Copying to DVD ....................... 8 3 Copy Options......................8 Playing Back Copied Images................... 8 Copying All Files to the DVD ................... 9 Copying by Date .................... -
Page 7: Getting Started
Getting Started Taking out the USB Cable Hook the protruding tip with your finger and pull it towards you Take out the USB cable • Can be connected to the USB extension cable. Placing the Burner Horizontal orientation Take note of the top and bottom of the burner and place it in the horizontal orientation. -
Page 8: Copying To Dvd
Copying to DVD 3 Copy Options o Copying All Files to the DVD ..............P. 9 o Copying by Date ..................P. 10 o Copying by Event ..................P. 12 Playing Back Copied Images To AV jack AV cable (supplied with Everio) USB cable To USB jack Use the AC adapter to power on the Everio... -
Page 9: Copying All Files To The Dvd
Copying All Files to the DVD If the operation and display of your Everio camera differs from the following Caution procedures, refer to the instruction manual of your Everio camera. For some Everio cameras, still images cannot be copied. Connect CU-VD3 to the Everio camera according to the procedures on Preparations P. -
Page 10: Copying By Date
Copying by Date If the operation and display of your Everio camera differs from the following Caution procedures, refer to the instruction manual of your Everio camera. For some Everio cameras, still images cannot be copied. Connect CU-VD3 to the Everio camera according to the procedures on Preparations P. - Page 11 Select “EXECUTE” and press READY TO CREATE DVD-R EXECUTE RETURN QUIT The “CREATING NOW” screen CREATING NOW appears and copying starts ELAPSED: 3 min To cancel, select “STOP” and press Do not turn off the power or remove the STOP USB cable while the “CREATING NOW”...
-
Page 12: Copying By Event
Copying by Event If the operation and display of your Everio camera differs from the following Caution procedures, refer to the instruction manual of your Everio camera. For some Everio cameras, still images cannot be copied. Register images to events beforehand. Preparations For details, refer to the instruction manual of the Everio camera. - Page 13 Select “ALL” and press DVD CREATION LIST DVD1 DVD2 DVD3 CHECK QUIT Select “EXECUTE” and press READY TO CREATE DVD-R EXECUTE RETURN QUIT The “CREATING NOW” screen CREATING NOW appears and copying starts ELAPSED: 3 min To cancel, select “STOP” and press Do not turn off the power or remove the STOP USB cable while the “CREATING NOW”...
-
Page 14: Creating Data Dvd From A Pc
Creating Data DVD from a PC This burner can be used as a DVD burner by connecting it to a PC. Data DVD can be created by using the supplied disc writing software. To power supply outlet Power cord CU-VD3 AC adapter USB cable USB extension cable for PC... -
Page 15: Computers That Can Be Used
• To get customer support and to register the software, you need the following product key (CD-Key): PXNVM-NWE4G-XQD9Q-CU9DX-3FQFN-NAKUS • Power2Go 5.5 Lite does not support conversion of audio files to MP3 format. • When the “Enter Activation Key” screen appears while using Power2Go 5.5 Lite, close the screen without entering the activation key. - Page 16 Click “Next”. • The “License Agreement” screen appears. Confirm the contents and then click “Yes”. • The “Customer Information” screen appears. Enter the “User Name” and “Company Name” and then click “Next”. Follow the on-screen instructions. • Installation starts. The “InstallShield Wizard Complete” screen appears. Click “Finish”.
-
Page 17: Cyberlink Power2Go 5.5 Lite Contact Information
Click “Finish”. • The “CyberLink Power2Go 5.5” Readme screen appears. Read the contents of the Readme. CyberLink Power2Go 5.5 Lite Contact Information ............................For information on CyberLink Power2Go 5.5 Lite or other products, use the following contact information. o Telephone/fax support Location Language Office hours... -
Page 18: Troubleshooting
Troubleshooting Trouble Action CU-VD3 Make sure the AC adapter and power cord are connected Cannot turn the power properly. This is not a malfunction. The burner and AC If the burner is abnormally hot, remove the AC adapter and adapter is hot. consult your authorised dealer. - Page 19 Trouble Action Everio Make sure the USB cable is connected properly. Cannot be recognised Remove and insert the USB cable again. by the Everio camera. Remove and insert the AC adapter of CU-VD3. Unable to play DVD Connect CU-VD3 to the Everio camera and play back using video created on this the playback function of the Everio camera.
-
Page 20: Specifications
For CD: output) 785 nm, 0.6 mW Recommended discs DVD-R JVC, TDK, Verbatim, SONY DVD-R DL JVC, Verbatim DVD-RW Optimal performance of the burner may not be possible depending on the disc used. Using discs of manufacturers for which compatibility has been confirmed is recommended. - Page 21 When connected to a PC Interface USB2.0 Interface cable USB extension cable for PC Windows XP Home Edition, Windows XP Professional Supported operating Windows Vista Home Basic, Windows Vista Home Premium systems (Macintosh is not supported.) Data buffer capacity 2 MB Writing : DVD-R : Maximum 8x DVD-R DL : Maximum 4x...
- Page 22 Printed in Malaysia © 2007 Victor Company of Japan, Limited 1107MNH-SW-VM...