Brookstone u-Control Instruction Manual
Silver bullet rc helicopter
Hide thumbs
Also See for u-Control:
- Instructions manual (20 pages) ,
- Instruction manual (16 pages) ,
- User manual (20 pages)

Related Manuals for Brookstone u-Control


Summary of Contents for Brookstone u-Control
- Page 1 u • Control SIlver Bullet rC HelICOPter eASy-tO-fly INDOOr COPter AGeS This product may contain small parts which may pose a choking hazard to children. AND uP...
-
Page 2: Table Of Contents
Table of conTenTs Location of Parts and Controls ......... . . 2-3 Installing the Batteries . -
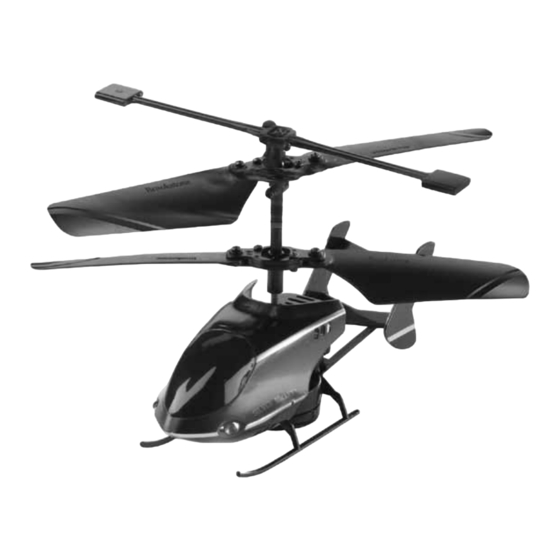
Page 3: Location Of Parts And Controls
locaTion of parTs Main Housing Landing Gear 2. Stabilizer Bar 8. Lights 3. Main Rotors 9. On/Off Switch 4. Main Rotor Screw 10. Charging Outlet 5. Tail Section 11. Channel Indicator 6. Main Rotor Mechanism... -
Page 4: Location Of Controls
locaTion of conTrols Remote Control 6. On/Off Switch and Indicator Light 2. Charging Plug Compartment Infrared Light 3. Charge Indicator Light 8. Right/Left Turn Control 4. Channel Switch (A, B, C) 9. Stabilizing Trim Toggle Button 5. Throttle 10. Charging Plug... -
Page 5: Installing The Batteries
INStAllING tHe BAtterIeS 1. Turn the REMOTE CONTROL over to access the battery compartment on the back. 2. Remove SCREW and remove the BATTERY COMPARTMENT COVER (see below). Battery Compartment Cover Screw 3. Insert 6 AA batteries according to the polarity indicators inside the compartment. 4. -
Page 6: Charging Your Helicopter
CHArGING yOur HelICOPter 1. Make sure the ON/OFF SWITCH on the helicopter is set to the OFF position. 2. Slide CHARGING PLUG COMPARTMENT cover on the front of remote control to the open position to access the CHARGING PLUG. 3. Connect the CHARGING PLUG on the controller to the CHARGING SOCKET on the helicopter, making sure the prongs match the plug holes (see Figure 1). -
Page 7: Flight Check
flIGHt CHeCk 1. Make sure the CHANNEL SWITCH on your REMOTE matches the CHANNEL INDICATOR on the nose of your helicopter. Example: If you have an “A” label on the nose of the helicopter—move the CHANNEL SWITCH to A. 2. Move the helicopter’s ON/OFF SWITCH on the helicopter’s MAIN HOUSING to ON and make sure the THROTTLE is in the down position. -
Page 8: Troubleshooting
HelPful HINtS Spinning? You may experience the helicopter wanting to spin in one direction or the other. This is normal and just requires slight trim adjustment to correct. If the helicopter rotates clockwise, hold down the left side of the STABILIZER TRIM BUTTON until it stops rotating. - Page 9 Helicopter displaying erratic behavior? 1. It is possible that the MAIN ROTOR itself has some debris caught in the mechanism. Check for lint, dust or hair, clear the mechanism gently and try again. 2. If your helicopter isn’t lifting off correctly, the problem may be a torn or damaged MAIN ROTOR or STABILIZER BAR.
-
Page 10: Care And Maintenance
care and MainTenance • Turn both the helicopter and the remote off before cleaning. • Wipe helicopter housing clean with a soft, dry cloth. • Ensure there are no hairs or lint caught between the rotor and the drive shaft. Clean carefully with your fingers or a pair of tweezers. cauTion •... -
Page 11: Fcc Information
fcc inforMaTion This device complies with Part 15 of the FCC Rules. Operation is subject to the following two conditions: 1) This device may not cause harmful interference. 2) This device must accept any interference received including interference that may cause undesired operation. WArNING: Changes or modifications to this unit not expressly approved by the party responsible for compliance could void the user’s authority to operate the equipment. -
Page 12: Battery Precautions
baTTerY precauTions • Dispose of the old batteries properly. Do not dispose of the old batteries in a fire. • Do not leave the batteries where a child or pet could play with or swallow them. If the batteries are swallowed, contact a physician immediately. •... -
Page 14: Warranty
(“Warranty Period”). If a defect arises and a valid claim is received within the Warranty Period, at its option, Brookstone will either 1) repair the defect at no charge, using new or refurbished replacement parts, or 2) replace the product with a new product that is at least functionally equivalent to the original product, or 3) provide a store credit in the amount of the purchase price of the original product. - Page 15 Brookstone, in so far as permitted by law, provides these products “as is. ” This warranty does not apply to: a) damage caused by failure to follow instructions relating to product’s use or the installation of components; b) damage caused by accident, abuse, misuse, fire, floods, earthquake or other external causes;...
- Page 16 Merrimack, New Hampshire USA 03054 • 800-846-3000 • www.Brookstone.com 627067...