Table of Contents
Advertisement
Quick Links
Advertisement
Table of Contents

Related Manuals for Minolta SR-1


Summary of Contents for Minolta SR-1
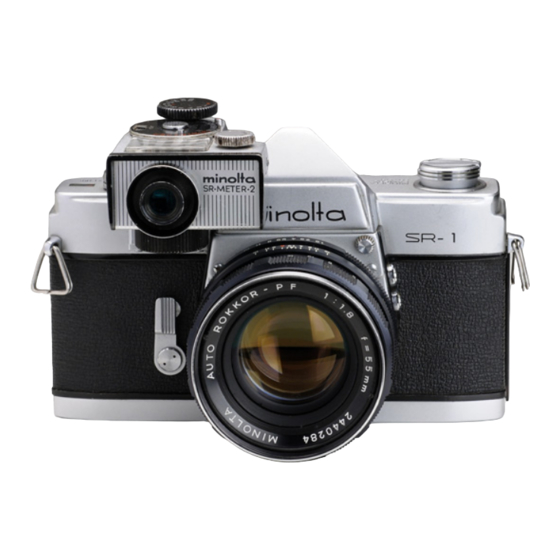
- Page 3 The camera contains an extremely bright penta prism viewing system and a completely automatic pre-set diaphragm. Please read this manual carefully so that you may effectively utilize the full potential of your new Minolta SR-1. (All illustrations used in this booklet are with the Fl.S...
- Page 4 conrenrfT S p e c i f i c a t i o n s . ' ..1 H o w t o u s e t h e M i n o l t a S R m e t e r ....l g 6 s t e p s t o p e r f e c t p i c t u r e s .
- Page 5 Minoltn SR- t Specificntions F i l m R e w i n d a n d Back Opening Knob P e n t a P r i s m V i e w f i n d e r F i l m A d v a n c e a n d S h u t t e r C o c k Shutter Release Shutter SPeed Dial...
- Page 6 F i l m P r e s s u r e P l a t e Take-up Spool Sprocket Gear Shutter Curtain Rewind Shaft Rewind Release Button Viewer Tripod Socket...
- Page 7 6 steps to perfect piclr.lr l. Loacl f il m Adv a nc e le ve r www.orphancameras.com...
- Page 8 5. Focus and Frame ( E o c h s t e p i s e x p l o i n e d i n d e t q i l o n 4. Set Aperture 6. Press shutter t h e f o l l o w i n g p o g e s .
- Page 9 Fil m lo adi" rV, t To open the camera back, pull the rewind knob until it stops. Then w i t h a s l i g h t e x t r a p u l l , t h e b a c k will snap open.
- Page 10 Film loading or unloading should be done in shade. When loading the film, be sure not to touch the shutter curtain. 4 Turn the knurled base 5 Insert f i lm leader 6 Advance the f i lm lever of the f i lm take-up into...
- Page 11 7 Please make sure the film stops window f ilm counter 8 Advance the lever until parallel camera body shutter. indicates when f irst f ilm then release and you f rame is in position ready to be bef ore c losing the camera back.
- Page 12 Emutsion speed indiccrr"V c onv e n ient remi nder, the indicator se t located n u m b e r o f y o u r f i l m s p e e d . F o r c o l o r f i l m u s e...
- Page 13 Advnncing rhe film The shutter cannot be released until the film advancing lever is completely wound. If, after advancing the lever, the shutter release is still locked, advance the lever again until it stops. When winding the film advance lever, wi ll f eel some...
- Page 14 shutter ro""o{rn is markecl with f igures 1 shutter speed dial to 500 plus B and X. T h e f i g u r e s l , 2 , 4 , B , 1 5 , e t c . , i n d i c a t e s h u t t e r speeds of second , I 12...
- Page 15 sertins the dioph."r{t through the lens. For example, &t f 16 the diaphragm diaphragm ring has aperture f igures f rom is closed down to a pin-point opening; at f 1.8 the lens to 16. Turn the diaphragm ring so that the desired aperture figure coincides with the white dot.
- Page 16 Whor is q completely qutomqtic pre-set dicphrcgm? One of the superb f eatures of the Minolta SR- 1 is the shuttter is released. Consequently, focusing can be automatic pre-set diaphragm. completely quickly determined through the extra bright viewfinder conventional single lens reflex camera, when the lens no matter what aperture you have preselected.
- Page 17 Depth of ,,",{r, The depth of fielcl of a lens range clistance w i t h i n w h i c h a l l s u b j e c t s relatively sharp f ocus. This varies range with aperture opening.
- Page 18 The principles goyerning depth of field D e p t h B o c k g r o u n d F o r e g r o u n e p t h o f f i e l d 1 .
- Page 19 How ro use rhe pre-view ,,r*o{t, You may pre-view depth of you wish by f ield, if pressing the pre-view button which manually closes the diaphragm its pre-set aperture. When do this can inspect through the viewer precise effect of depth of field. www.orphancameras.com...
- Page 20 Deprh of field r.o,fr. The arrow mark A on the scale indicates the distance detween camera and focused subject. The two sets of f igures on both sides mark are aperture stops of the arrow and the distance f ramed by the two same figures shows the depth of field.
- Page 21 Toble of Depth of ,r"Nf' 2 . 5 L . 7 5 3 . 5 2 . 7 5 2 . 2 5 ( F ) (r'9') (2'6',) (3'6',) (2'g',) (2'3',) X ' n o 8r4' z5' 6', 13/ 10' 3' ,tA' 2'ss/+o 6 ' 9 '...
- Page 22 Hishry erccurqre cds rishr merervt Your Minolta SR-l should be used with the highly receiving angle is only 30o. Hence, you measure the accurate detachable CdS light meter. It's powered l ight ref lected subj ect only. Extraneous mercury battery...
- Page 23 How to use the Minoltcl SR -"r"rJrn give you are two I ight-measuring scales on the top lJsed correctly, this CdS light meter will There of the meter. One is for general outdoor photography, measures outdoor correct exposure every time. the other is for dimly situations.
- Page 24 Attqching the mefer to rhe cqmerVn the bottom side of the meter, you'l I c am era , o ne on the m eter) to th e s a me s pee ds . fh en, pin. fitting Insert the pin into meter shoe...
- Page 25 Immediately after loading film, set the ASA film speed rating on the top of the meter. Rotate the aperture dial (A) until the speed rating of the film you are using lines up with the ASA mark (B). DIN speed ratings are also marked on the dial. (C) (D)...Battery checking mark.
- Page 26 Selecting shuffer speed or qperlure You may set either shutter speed or aperture first. If you set shutter speed first, measure the light and the meter needle will indicate the correct aperture for that speed. If you set aperture first, adjust the s h u t t e r d i a l , w h i l e m e a s u r i n g t h e l i g h t , u n t i l t h e m e t e r n e e d l e c o i n c i d e s with the aperture you have pre-selected.
- Page 27 Reodins rhe -"n"rlru When determining aperture setting, read along the g u i d e l i n e o f t h e l i g h t m e t e r s c a l e . T h e m e t e r n e e d l e w i l l i n d i c a t e t h e c o r r e c t d i a p h r a g m o p e n i n g .
- Page 28 Operqting rhe light meter positions on the light There are four meter dial---Checl<, H, O F F a n d L . he average I ife of the mercury battery is two years. During use, howerer, yolr may test battery power by turning the meter position.
- Page 29 swrrc"v, Low sENsrrvrrY When the meter needle does not register use the due to inadequate light, Rotate the dial sensitivity shift dial. ((L" position. This shifts the to the meter to low sensitivity light and gives a correct exposure reading even under some adverse lighting conditions.
- Page 30 Determlnlng reflected lighl Bcckllghtlng Photogrophing People Londscope Photogrophlng In the case of backlighting, move When photographing a person, the landscape photographing, the light close to the subject reflected and measure subject subject, course cannot light reflected the light ref lected from approched exposure must be background...
- Page 31 Replacing the bq*e rY years. When The average life of the mercury battery is two the meter does not respond to light, battery dead and must be replaced. This conventional mercury battery available throughout the world. Remove the battery cover bottom meter turning the cover counter-clockwise.
- Page 32 Focusins qnd frqmi"r!* Look through the viewf inder and rotate the f ocusing between subject, background and foreground and the r i n g o n t h e l e n s b a r r e l . Y o u r s u b j e c t w i l l b e c o m e a c t u a l c o l o r c o n d i t i o n w h e n u s i n g f i l t e r s "...
- Page 33 Inf rcrred film indiccltor If you use infrared film, focus as you would ordinarily. Then move the distance scale to correspond with the red letter R which ap- pears on the depth of field scale. For example, if your focus scale tells you the subject is 15 feet from the camera, move the focsu-...
- Page 34 cer me rei - Re le q si "rVu [l":il:r*" T h e c a m e r a m a y h e l d h o r i z o n t a l l y v e r t i c a l l y . i s b e s t t o p r ess t h e...
- Page 35 Using slow shutter speeds best to use a cable release release button. It . When se co n d using shutter spee c ls o f I ll5 whenever you use a triPocl. is advisabl e t rip o d a nd cab le sl ow er...
- Page 36 Untocrdins fitmV, W h e n y o u h o v e f i n i s h e d t h e f i l m r o l l , y o u q b l e t o w i l l n o t b e o d v o n c e t h e l e v e r o n y f u r t h e r .
- Page 37 Note:Load ing unloadinB p l e o s e W h e n e v e r r e w i n d i n g f i l m , f il m should be done in d o n o t p u l l u p t h e r e w i n d k n o b .
- Page 38 Senlng the self-tr-"rvrn The self-timer allows you to get yourself into the picture. (It can also be used to minimize blur at slow shutter speeds. ) self-timer has a built-in automatic bypass. If , after setting the timer, don't want to use it, simply press the shutter release button and the timer will operate.
- Page 39 , " E P " outdoors, and for filling shaded areas. Your T h e " X " for focal plane flash bulbs. is gearecl f or Minolta SR- I both electronic f lash ancl ordinary f lash bulbs" Be sure to insert Flcrsh...
- Page 40 Attcrchins ftcrsh equipme"Vuo attach f lash equipment to your cam e ra , & D a cc es s or y s hoe p rov id ec l (a va ilab le at y ou r loc a l c a me ra store) which fits over the penta p r l s m vie wf in d er .
- Page 41 flclsh photogrqphy speeds Shutter (The speed shown by oblique lines are the speeds you can use.) l s c c . F P c l bul b c l a s s b u l b s c l a s s b u l b s S p e e d l i g h exposure...
- Page 42 Minolta automatic preset lenses remove the lens, push down attach the lens, insert it into can be changed even after advanc- Iens lock button ancl turn bayonet mount by lining len s lever ancl stil I maintain barrel counterclockwise...
- Page 43 www.orphancameras.com...
- Page 44 Minolrcr SR phot" ."rr"r{n*...
- Page 45 fields view witli Relqtive Minoltcr interchongecrble lenses d i + t t , E roo%, 3 5 % ' www.orphancameras.com...
- Page 46 oo%, 2 0 0 % ,...
- Page 47 I n t e r c h o n g e o b l c I e n t c r f o r S R . F o c a l M a x i m u m l e n g t h D i a m e t e r o f f i l t e r M i n i m u m D i s t a n c e...
- Page 48 Ultro-wide Angle W Rokkor SG-F P q n o r e r m q h e c r d Minolta panorama With head, extensive 3 . 5 / 2 8 m m . range can be photographed in segments and printed...
- Page 49 Meicro Rokkor F 3 . 5 5 0 m m , A n g l e F i l t e r S c r e w M o u n t 5 5 m m general photography, also only good ancl macrophoto-...
- Page 50 R o k k o r T C , F 4 , l 3 5 m m A versatile lens for nature photo- graphy, animals and plants. With the Minolta Extension Bellows II , Rokkor TC can be used from infinity to close up-l : 1 .
- Page 51 S mal I er d i a p h r a g m ligh te r weig ht th an a ny This is the new Minolta Rokkor com - other zoom lens Zoom lens that...
- Page 52 Extension bellows versatile device extreme close-ups as the phtoography of animals and plants, for example. There are Minolta sets-type I and type II ( d e l u x e ) . T y p " f o l d i n g c o m p a c t t y p e .
- Page 53 Copylng steind Microscope cdopter With the camera held rigidly on a suitable support, This adapter is used between the microscope and printing matter, most close-up work, copying the camera body when taking microphotos. with accomplished. Combined etc., easily easily take micropictures moving will expand...
- Page 54 Angle finder The angle finder att- aches to the eyepie- ce mount and permits you to view the sub- j e c t a t r i g h t a n g l e s . p h o t o U r i r i v e r s o l m i c r o s c o F e s y s t e m This equipment is designed to record faithfully and...
- Page 55 ww qffiw% Eyepiece correclion lenses Five different lenses designed for individual diopter of far-sighted eyes are useful for easier focusing. Mcrgnifier Accessory clip magnif ier used precise focusing telephotography, copying, ultra close-ups Withe SR accessory clip you can attach a flash microphotography.
- Page 56 Filters mor e c lram atic F i l ters us ec l obtain true r r e s u l t s i n t h e p r i n t o r t o s e c u r e o t h e r s p e c i a l e f f e c t s .
- Page 57 It can also be used to darken the sky v e r y d r a m a t i c a l l y . Minolta polarizing filters are: for 55mm f 1.8 or f 2 and 53mm f 2 standard lens 100mm f 3.5...
- Page 58 Excrklcr mounr fype Leiccr mount fype odopter Preikficcr mounr fype qdqpter odopter this adapter, oDy lens fitted this adapter, Praktica lenses With With the Leica mount type adapter, With with Exakta bayonet mount can be can be used with the SR-7. Leica mount type lenses are f itted the SR from the nearest to the SR.
- Page 59 Pholo oscilloscope unif As a result of the remarkable developments in the electronics industry and research work, the use of cathode ray tube oscilloscopes has increased at a rapid pace. This unit can be used for accurate photography of images in electronics testing and research. Extension tubesel usecl Five...
- Page 60 rabte or depth o, ,,"Jlf,* 2 . 2 5 3 . 5 2 . 7 5 2 . 5 L . 7 5 (3'6',> (2'!',) (2'g',) (2'6',) ( L ' g ' ) 8r4' 2'5r4' g ' 5 0 6 ' g n 2,TL,4' 24',L00 4 ' 1 0 0...