JVC KW-XC410 Instructions Manual
Cd/cassette receiver
Hide thumbs
Also See for KW-XC410:
- Instruction manual (98 pages) ,
- Installation & connection manual (4 pages) ,
- Instructions manual (72 pages)
Table of Contents
Advertisement
CD/CASSETTE RECEIVER
RECEPTOR CON CD/CASSETTE KW-XC410/KW-XC400
RECEPTEUR CD/CASSETTE
For canceling the display demonstration, see page 8.
Para cancelar la demostración en pantalla, consulte la página 8.
Pour annuler la démonstration des affichages, référez-vous à la page 8.
For installation and connections, refer to the separate manual.
Para la instalación y las conexiones, refiérase al manual separado.
Pour l'installation et les raccordements, se référer au manuel séparé.
INSTRUCTIONS
MANUAL DE INSTRUCCIONES
MANUEL D'INSTRUCTIONS
KW-XC410/KW-XC400
KW-XC410/KW-XC400
For customer Use:
Enter below the Model
No. and Serial No. which
are located on the top or
bottom of the cabinet.
Retain this information
for future reference.
Model No.
Serial No.
GET0320-001B
[J]
Advertisement
Table of Contents

Related Manuals for JVC KW-XC410


Summary of Contents for JVC KW-XC410
- Page 1 CD/CASSETTE RECEIVER KW-XC410/KW-XC400 RECEPTOR CON CD/CASSETTE KW-XC410/KW-XC400 RECEPTEUR CD/CASSETTE KW-XC410/KW-XC400 For canceling the display demonstration, see page 8. Para cancelar la demostración en pantalla, consulte la página 8. Pour annuler la démonstration des affichages, référez-vous à la page 8. For installation and connections, refer to the separate manual.
-
Page 2: How To Reset Your Unit
Thank you for purchasing a JVC product. Please read all instructions carefully before operation, to ensure your complete understanding and to obtain the best possible performance from the unit. INFORMATION (For U.S.A.) This equipment has been tested and found to comply with the limits for a Class B digital device, pursuant to Part 15 of the FCC Rules. -
Page 3: Table Of Contents
How to use the MODE button ....Other convenient tape functions .... 17 Control panel — Sound adjustments ....18 ....5 KW-XC410/KW-XC400 Selecting preset sound modes Parts identification ......... (EQ: equalizer) ......... 18 Adjusting the sound ....... 18 Remote controller —... -
Page 4: How To Read This Manual
How to read this manual How to use the MODE button The following methods are used to make the Press MODE repeatedly to select the different explanations simple and easy-to-understand: functions available during play. • Some related tips and notes are explained in “More about this unit”... -
Page 5: Control Panel
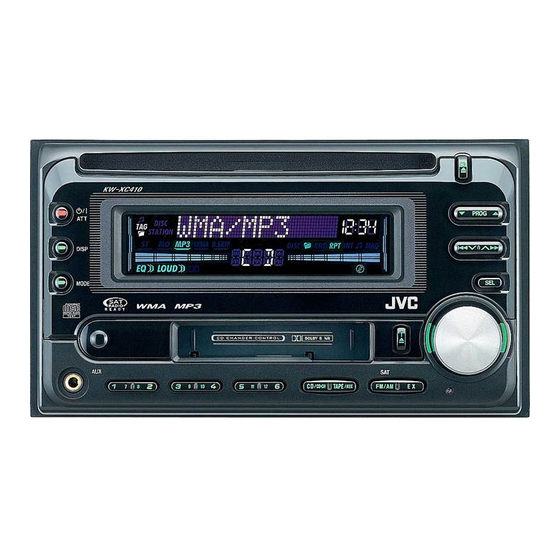
Control panel — KW-XC410/KW-XC400 Parts identification Display window Display window 1 Loading slot (standby/on attenuator) button i Tuner reception indicators—ST (stereo), 3 DISP (display) button MO (monaural) 4 MODE button o Disc information indicators— 5 Cassette compartment (track/file), TAG (ID3 Tag),... -
Page 6: Remote Controller
Remote controller — RM-RK50 Installing the lithium coin battery Main elements and features (CR2025) (standby/on/attenuator) button • Turns the power on if pressed briefly or attenuates the sound when the power is on. • Turns the power off if pressed and held. U (up) / D (down) buttons •... -
Page 7: Getting Started
For TAPE/AUX Turn on the power. • Sele ct “CD-CH” when using an Apple ® iPod or a JVC D. player (see page 23). iPod is a trademark of Apple Ÿ Computer, Inc., registered in the U.S. For FM/AM tuner and other countries. -
Page 8: Canceling The Display Demonstrations
To drop the volume in a moment (ATT) Finish the procedure. To restore the sound, press it again. To turn off the power To activate the display demonstration In step 3 above... Canceling the display demonstrations Setting the clock If no operations are done for about 20 seconds, display demonstration starts. -
Page 9: Radio Operations
Radio operations 2 Select the desired station frequencies. Listening to the radio When an FM stereo broadcast is hard to receive Lights up when monaural mode is activated. Lights up when receiving an FM stereo broadcast with sufficient signal strength. Reception improves, but stereo effect will be lost. -
Page 10: Listening To A Preset Station
Listening to a preset station Select the preset station (1 – 6) you want. “SSM” flashes, then disappears when automatic presetting is over. Local FM stations with the strongest signals are searched and stored automatically in the FM band. Manual presetting Ex.: Storing FM station of 92.5 MHz into the preset number 4 of the FM1 band. -
Page 11: Assigning Titles To The Stations
Finish the procedure. Assigning titles to the stations You can assign titles to 30 station frequencies (including both FM and AM). Each station name can be assigned up to 10 characters. However, you cannot assign title to the station To erase the entire title frequency stored in the EX button. -
Page 12: Disc Operations
Disc operations • When inserting an audio CD or a CD Text Playing a disc in the unit disc: Total track number Total playing time of the inserted disc of the inserted disc CD Text: Disc title/performer Track title appears automatically (see page 15). -
Page 13: Playing Discs In The Cd Changer
Ÿ About the CD changer Select a disc. It is recommended to use a JVC MP3- For disc number from 01 – 06: compatible CD changer with your unit. • You can also connect other CH-X series CD changers (except CH-X99 and CH-X100). - Page 14 To fast-forward or reverse the track • When the current disc is an MP3 disc: To go to the next or previous tracks Folder name To go to the next or previous folders for MP3 and WMA discs Disc information appears (For MP3/WMA automatically (see page 15).
-
Page 15: Other Main Functions
Other main functions Changing the display information Skipping a track quickly during play While playing an audio CD or a CD Only possible on JVC Text MP3-compatible CD changer • For MP3 or WMA disc, you can skip a track within the same folder. -
Page 16: Selecting The Playback Modes
Selecting the playback modes You can use only one of the following playback modes at a time. Select your desired playback mode. Mode Plays repeatedly Repeat play TRACK RPT : The current track. • RPT and light up. FOLDER RPT* : All tracks of the current folder. -
Page 17: Tape Operations
Tape operations Playing a tape Finding the beginning of a tune Multi Music Scan (MMS) allows you to automatically start playback from the beginning of a specified tune. Specify the tune you want to locate (how many tunes ahead of or before the current tune) When the beginning of the specified tune is... -
Page 18: Sound Adjustments
Sound adjustments Selecting preset sound modes Adjusting the sound (EQ: equalizer) You can adjust the sound characteristics to your preference. Indication Range You can select a preset sound mode suitable to FADER* the music genre. R06 (Rear only) Adjust the front and rear speaker balance. -
Page 19: Storing Your Own Sound Adjustments
Adjust the selected sound elements Storing your own sound while the indication on step adjustments shown. You can adjust the sound modes and store your own adjustments in memory. Preset values Indication HIGH LEVEL –06 –06 –06 Select one of the sound mode to (min.) to (min.) to (min.) to... -
Page 20: General Settings - Psm
General settings — PSM Adjust the PSM item selected. Basic procedure You can change PSM (Preferred Setting Mode) items (except “SID”) listed in the table that follows. Repeat steps to adjust the other PSM items if necessary. Finish the procedure. Select a PSM item. - Page 21 Indications Selectable settings, [reference page] CLK ADJ* AUTO : [Initial]; The built-in clock is automatically adjusted using Clock the clock data provided via the satellite radio channel. adjustment : Cancels. T-ZONE* Select your residential area from one of the following time zones for clock Time zone adjustment.
- Page 22 Indications Selectable settings, [reference page] EXT INPUT* CHANGER : [Initial]; To use a JVC CD changer, [13], an Apple iPod External input or a JVC D. player, [23], a JVC compatible satellite (SIRIUS/XM) tuner, [24]. EXT INPUT : To use another external component, [23].
-
Page 23: External Component Operations
External component operations This unit is ready for operating an Apple For selecting the external ® iPod or a JVC D. player from the control component connected to..panel. • AUX input jack • For details, refer also to the manual supplied with the interface adapter ®... -
Page 24: Satellite Radio Operations
SIRIUS channels. Satellite Radio Inc., and XM Satellite Radio, Inc. Once completed, JVC DLP tunes in to the preset channel, CH184. Listening to the satellite radio Connect either one of the following (separately Check your SIRIUS ID, see page 21. -
Page 25: Listening To The Sirius Satellite Radio
Selecting a particular category (SPORTS, ENTERTAINMENT, etc.) allows you to enjoy only the channels from the selected category. Select a channel for listening. Holding the button changes the channels XMDirect™ Universal Tuner Box starts rapidly. updating all the XM channels. “Channel 1” is tuned in automatically. -
Page 26: Storing Channels In Memory
Select a category (Category Search). Storing channels in memory You can preset six channels for each band. Ex.: Storing a channel into preset number 4. Select a channel for listening. Tune in to a channel you want. Current channel number Preset number flashes for a while. -
Page 27: Maintenance
Maintenance Do not use the following discs: Handling discs Warped Moisture condensation disc Moisture may condense on the lens inside the Sticker Sticker CD player in the following cases: residue • After starting the heater in the car. • If it becomes very humid inside the car. Stick-on Should this occur, the CD player may label... -
Page 28: More About This Unit
More about this unit Basic operations Disc operations Turning on the power Caution for DualDisc playback • By pressing the source buttons on the unit, • The Non-DVD side of a “DualDisc” does you can also turn on the power. If the source not comply with the “Compact Disc Digital is ready, playback also starts. - Page 29 Playing a CD-R or CD-RW • This unit can play back MP3/WMA files meeting the conditions below: • Use only “finalized” CD-Rs or CD-RWs. – Bit rate: 8 kbps — 320 kbps • This unit can play back only files of the same –...
-
Page 30: General Settings—Psm
(very quiet parts) or non-recorded portions. Satellite radio operations – Tapes with short non-recorded sections. • You can also connect the JVC SIRIUS radio – Tapes with high level noise or humming PnP (Plug and Play), using the JVC SIRIUS between tunes. -
Page 31: Troubleshooting
Troubleshooting What appears to be trouble is not always serious. Check the following points before calling a service center. Symptoms Remedies/Causes • Sound cannot be heard from the • Adjust the volume to the optimum level. speakers. • Check the cords and connections. •... - Page 32 Symptoms Remedies/Causes • “NO DISC” appears on the display. Insert a disc into the magazine. • “NO MAG” appears on the display. Insert the magazine. • “RESET 8” appears on the display. Connect this unit and the CD changer correctly and press the reset button of the CD changer.
-
Page 33: Specifications
Specifications CD PLAYER SECTION AUDIO AMPLIFIER SECTION Type: Compact disc player Power Output: Signal Detection System: Non-contact optical 18 W RMS × 4 Channels at 4 Ω pickup (semiconductor laser) and ≤ 1% THD+N Number of Channels: 2 channels (stereo) Signal to Noise Ratio: Frequency Response: 5 Hz to 20 000 Hz 80 dBA (reference: 1 W into 4 Ω) - Page 34 Having TROUBLE with operation? Please reset your unit Refer to page of How to reset your unit Still having trouble?? USA ONLY Call 1-800-252-5722 http://www.jvc.com We can help you! EN, SP, FR © 2005 Victor Company of Japan, Limited 1105DTSMDTJEIN...