Table of Contents
Advertisement
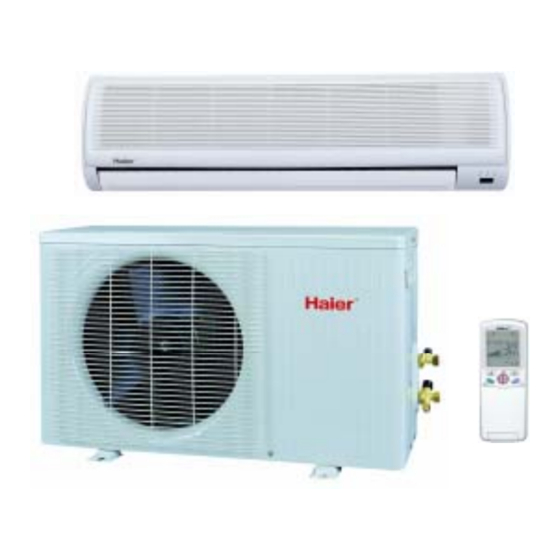
SERVICE MANUAL
Air Conditioners
THIS MANUAL IS USED BY
QUALIFIED APPLIANCE
TECHNICIANS ONLY. HAIER
DOES NOT ASSUME ANY
RESPONSIBILITY FOR PROPERTY
DAMAGE OR PERSONAL INJURY
FOR IMPROPER SERVICE
PROCEDURES DONE BY ONE
UNQUALIFIED PERSON.
Air Conditioner
CAUTION
READ THIS MANUAL CAREFULLY TO
DIAGNOSE TROUBLE CORRECTLY
BEFORE OFFERING SERVICE .
MODEL: HSU-12HD03/R2
MODEL: HSU-
Edition:2006/1/10
REVISION 0
Advertisement
Chapters
Table of Contents
Troubleshooting

Related Manuals for Haier HSU--12HD03/R2


Summary of Contents for Haier HSU--12HD03/R2
-
Page 1: Service Manual
BEFORE OFFERING SERVICE . SERVICE MANUAL Air Conditioners MODEL: HSU- MODEL: HSU-12HD03/R2 THIS MANUAL IS USED BY QUALIFIED APPLIANCE TECHNICIANS ONLY. HAIER DOES NOT ASSUME ANY RESPONSIBILITY FOR PROPERTY DAMAGE OR PERSONAL INJURY FOR IMPROPER SERVICE PROCEDURES DONE BY ONE UNQUALIFIED PERSON. -
Page 2: Important Information
Air Conditioner Air Conditioner Air Conditioner Edition:2006/1/10 Edition:2006/1/10 Edition:2006/1/10 MODEL: HSU-12HD03/R2 IMPORTANT INFORMATION Features Comfortable: wide-angle airflow health air purifying quiet operation super energy efficient Main Specification 3500W Cooling Capacity 1090W/5.2A Rated Power/Current(cooling) EER: 3.21 3650W Heating Capacity Rated Power/Current(heating): 1010W/5.0A COP: 3.61 Air Volume(Indoor): 500m Power: 1PH 220-230V~ 50 Hz... -
Page 3: Safety Information
Haier urges you read and follow all safety precautions and warnings contained in this manual. Failure to comply with safety information may result in severe personal injury or death. -
Page 4: Table Of Contents
Air Conditioner Edition:2006/1/10 CONTENTS 1.SPECIFICATION................1 2.ACCESSORIES ................3 4.OPERATION..................5 5.ELECTRI CAL CONTROLL............. 21 6.TROUBLE SHOOTING..............28 7. INSTALLA TION................33 8. CIRCUIT AND WIRING DIAGRAM..........42,44... -
Page 5: Specification
Edition:2006/1/10 Air Conditioner SPECIFICATION... -
Page 6: Air Conditioner
Air Conditioner Edition:2006/1/10 ----- HSU-12HD03/R2 Model Brand Mark 3500W 50Hz Cooling Capacity Frequency Range 1090W/5.2A 220-230V~ 50 Hz Rated Power/Current Power Cooling 1620W/8.3A -------- Max Power/Current Model×Sectional Area 3.21 Power Cord 3650W Heating Capacity Refer. No. -------- Compressor 1010W/5.0A SANYO/CRV113 Rated Power/Current Heating manufacturer/Type... -
Page 7: Accessories
Air Conditioner Edition:2006/1/10 ACCESSORIES... - Page 8 Edition:2006/1/10 Air Conditioner HSU-12HD03/R2 Failure Number Name Refer No. Description Quality Remark Rate(%) remote 0010413791 None controller battery 001A4600001 None Fix mounting plate mounting according to 0010101275 plate installation position and pipe direction Choose the place that can drain drain pipe 001A0900011 water and connect pipe easily...
-
Page 9: Operation
Edition:2006/1/10 Air Conditioner OPERRATION... - Page 10 Edition:2006/1/10 Air Conditioner Contents Cautions Parts and functions Operation 5-12 Maintenance 13-14 Trouble shooting...
-
Page 11: Cautions
Edition:2006/1/10 Air Conditioner Cautions The machine is adaptive in following situation I. Applicable ambient temperature range: Maximum: D.B / W.B C/23 Indoor Minimum: D.B / W.B C/14 Cooling Maximum: D.B C/26 Outdoor Minimum: D.B Maximum: D.B Indoor Minimum: D.B Heating Maximum: D.B / W.B C/18 Outdoor... -
Page 12: Parts And Functions
Edition:2006/1/10 Air Conditioner Parts and Functions Indoor Unit Test running switch(manual) Used only for test running in cooling when room temp. is below 16 Inlet grille Don't use it in normal operation. Emergency switch(manual) Used when remote controller is lost or defective. -
Page 13: Clock Set
Edition:2006/1/10 Air Conditioner Parts and Functions Operation Buttons and display of the remote controller. 1. Mode display AUTO COOL HEAT 2. SWING display AUTO 3. FAN SPEED display 4. SLEEP display 5. LOCK display 6. SIGNAL SENDING 7. TIMER OFF display 8. -
Page 14: Operation......................................................................................5
Edition:2006/1/10 Air Conditioner Parts and Functions Operation Buttons and display of the remote controller. If the unit which you purchased has healthy function, Remote controller should like the following figure: 1. Mode display AUTO COOL HEAT 2. SWING display 3. FAN SPEED display AUTO 4. -
Page 15: Operation
Edition:2006/1/10 Air Conditioner Operation Remote controller's operation When in use, put the signal transmission head directly to the receiver hole on the indoor unit. The distance between the signal transmission head and the receiver hole should be within 7m without any obstacle as well. Don't throw the controller, prevent it from being damaged. - Page 16 Edition:2006/1/10 Air Conditioner Operation Auto run, Fan operation Enjoy yourself by just a gentle press. (1) Unit start Press ON/OFF button, unit starts. Previous operation status appears on display. (Not Timer setting) Power indicator on indoor unit lights up. (2) Select operation mode ON/OFF TEMP Press MODE button.
-
Page 17: Cool,Heat And Dry Operation
Edition:2006/1/10 Air Conditioner Operation COOL,HEAT and DRY operation Recommendations: Use COOL in summer. Use HEAT in winter Use DRY in spring, autumn and in damp climate. (1) Unit start Press ON/OFF button, unit starts. Previous operation status appears on display. (Not Timer setting) Power indicator on indoor unit lights up. - Page 18 Edition:2006/1/10 Air Conditioner Operation (5) Air flow direction adjustment After operation mode is selected, vertical flap will open automatically according to the mode. Referring to the Fig. COOL HEAT About 10 About 60 Up and down (Use remote controller) Left and right air flow adjustment (manual) Press SWING button, vertical flap will move within Move the horizontal blade by a knob on air...
-
Page 19: Timer Operation
Edition:2006/1/10 Air Conditioner Operation TIMER Operation Set Clock correctly before starting Timer operation You can let unit start or stop automatically at following times: Before you wake up in the morning, or get back from outside or after you fall asleep at night. TIMER ON/OFF (1)After unit start, select your desired operation mode. - Page 20 Edition:2006/1/10 Air Conditioner Operation TIMER ON-OFF TIMER ON-OFF (1)After unit start, select your desired operation mode Operation mode will be displayed on LCD. Power indicator on indoor unit lights up. (2) Press TIMER button to change TIMER mode. Every time the button is pressed, display changes as follows: blank TIMER ON TIMER OFF...
-
Page 21: Emergency Operation
Edition:2006/1/10 Air Conditioner Operation Emergency operation and test operation Emergency Operation: Carry out this operation only when the remote controller is defective or lost. When the emergency operation switch is pressed, a" Pi "sound starts once, which means the start of this operation. In this operation, it is not possible to change the settings of temperature and air flow speed, it is also impossible to do an operation by the timer. -
Page 22: Operation
Edition:2006/1/10 Air Conditioner Operation Comfortable SLEEP Before going to bed at night, you can simply press the SLEEP button and unit will bring you a sound sleep in selected mode. ON/OFF TEMP In COOL mode MODE One hour after SLEEP mode starts, temp. will become 1 C higher than temp. -
Page 23: Maintenance
Edition:2006/1/10 Air Conditioner Maintenance Different models have different appearance Cleaning of unit casing Cut off power supply before cleaning unit casing with soft cloth. In case of heavy stain, clean it with neutral detergent. squeeze water in the cloth, wipe off the detergent on unit casing completely. -
Page 24: Maintenance
Edition:2006/1/10 Air Conditioner Maintenance Better use of air conditioner Proper room temperature. Cleaning of the air filter. Once every two weeks Proper temperature Effective use of the timer. Closing of doors and windows during operation Curtains or blinds for windows Avoid time-wasteful operation Never fail to observe the followings... -
Page 25: Electrical Controll
Air Conditioner Edition:2005/11/18 ELECTRICAL CONTROLL... -
Page 26: Trouble Shooting
Air Conditioner Edition:2006/1/10 Description of function Function Cooling Set temperature 16¡æ 30¡ææ Drying Set temperature 16¡æ-30¡æ¡æ Heating (heat pump type) Set temperature 16¡æ -30¡æ¡æ Over 23¡æ¡æ cooling and set 26¡æ¡æ £ ¡ æ » less 23¡æ heating and set 23¡æ¡ æ Emergency run Set force cooling Test run... - Page 27 Air Conditioner Edition:2006/1/10 Introduction to electrical control function Including brief introduction to air conditioners of series models and electric control function. Brief introduction to electric control function (1) Automatic running (applicable to fan-coil model) When the running mode is turned to automation after starting the system, the system will first determine the running mode according to the current room temperature and then will run according to the determined mode.
- Page 28 Air Conditioner Edition:2006/1/10 State1 State2 State3 T s+3 T s-1 T s+2 (4) Warm start (preventing cold wind when heating running begins, applicable to fan-coil model)) When heating running begins, indoor fan will conduct the following fan control: a.If the temperature of indoor coil pipe is >23 C, start lower wind speed;...
- Page 29 Air Conditioner Edition:2006/1/10 Note: Sequence of defrosting actions: 9(or 7)minutes Compressor Four-way value Outdoor fan 1min 1min (7) Freezing prevention function Under refrigerating and dehumidifying state, the air conditioner will control the outdoor fan as per the temperature Tp of the indoor coil pipe according to the following conditions: Zone of return deference Compressor,outdoor fan OFF after 5 minutes...
- Page 30 Air Conditioner Edition:2006/1/10 Note: 1. Function setting: Pressing the SLEEP button on the remote control unit for 10 times within 5 seconds until hearing 4 sounds from the buzzer on the panel. 2. Memory content: Running mode, setting wind speed, setting temperature, sleep state, flap state.
- Page 31 Air Conditioner Edition:2006/1/10 As shown in the above diagram,after running for 1 hour under refrigerating mode and dehumidification mode,the setting temperature will increase 1 o C;after another 1 hour,it will increase 1 o C again,and after 6hours,it will cease;after running for 1 hour under heating mode, the setting temperature will decrease 2 o C, after another 1 hour,it will decrease the 2 o C again,and after 3 hours,it will increase 1 o C,and after other 3 hours,it will cease.
-
Page 32: Trouble Shooting
Air Conditioner Edition:2006/1/10 TROUBLE SHOOTING... - Page 33 Air Conditioner Edition:2006/1/10...
- Page 34 Air Conditioner Edition:2006/1/10 Abnormality Diagnosing Trouble Parts that may appear problems Prepared parts Applicable Number Description phenomenon and the Cause and tools machine 7805,transformer, piezo Use the resistance, fuse,remote controller, 7805,transfor remote receiver. If it can be booted by mer, fuse, controller to using manual emergency switch, piezo...
- Page 35 Air Conditioner Edition:2006/1/10 Drain pan, drain hose. Check Oriented whether the indoor unit is installed wind panel horizontal, drain hose of indoor invariable Indoor unit or drain drain pan, unit is leveled off ,the hole is over frequency make water pan makes drain hose high...
- Page 36 Air Conditioner Edition:2006/1/10 Outdoor P.C. Board 4 way valve coil 4 way valve body. Examine The air the CN204 at Outdoor P.C. Board Outdoor P.C. conditioner and watch if there is 220V Board 4way Little split Don’t make voltage .If there doesn’t have we valve coil unit of heat...
-
Page 37: Installation
Air Conditioner Edition:2006/1/10 INSTALLATION... - Page 38 Air Conditioner Edition:2006/1/10 Installation Manual of Room Air Conditioner Read this manual before installation Explain sufficiently the operating means to the user according to this manual. Necessary Tools for Installation 1.Driver 5.Torque wrench(17mm,22mm,26mm) 9.Nipper 12.Reamer 2.Hacksaw 6.Pipe cutter 10.Gas leakage detector or 3.Hole core drill 7.Flaring tool soap-and-water solution...
-
Page 39: Indoor Unit
Air Conditioner Edition:2006/1/10 113.5 113.5 113.5 113.5 Floor fixing dimensions Floor fixing dimensions Floor fixing dimensions Floor fixing dimensions of the outdoor unit of the outdoor unit of the outdoor unit of the outdoor unit (Unit:mm) (Unit:mm) (Unit:mm) (Unit:mm) HSU-07HC03/R2 HSU-07HE03/R2 HSU-12HC03/R2 HSU-22HD03/R2... - Page 40 Air Conditioner Edition:2006/1/10 Indoor unit 1.Fitting of the Mounting Plate and Positioning of the wall Hole When the mounting plate is first fixed 1.Carry out, based on the neighboring pillars or lintels, a proper leveling for the plate to be fixed against the wall, then temporarily fasten the plate with one steel nail.
-
Page 41: Installation Of The Indoor Unit
Air Conditioner Edition:2006/1/10 Indoor unit 3.Installation of the Indoor Unit Drawing of pipe Rear piping Draw pipes and the drain hose, then fasten them with the adhesive tape Left Left-rear piping In case of left side piping, cut away, with a nipper, the lid for left piping. In case of left-rear piping, bend the pipes according to the piping direction to the mark of hole for left-rear piping which is marked on heat insulation materials. -
Page 42: When Connecting The Cable Before Installing The Indoor Unit
Air Conditioner Edition:2006/1/10 Indoor unit When connecting the cable after installing the indoor unit 1. Insert from outside the room cable into left side of the wall hole, in which the pipe has already existed. 2. Pull out the cable on the front side, and connect the cable making a loop. When connecting the cable before installing the indoor unit Insert the cable from the back side of the unit, then pull it out on the front side. -
Page 43: Installation Of Outdoor Unit
Air Conditioner Edition:2006/1/10 Outdoor unit 1.Installation of Outdoor Unit Drawing for the installation of indoor and outdoor units Install according to 2.Connection of pipes To bend a pipe, give the roundness as large as possible not to crush the pipe ,and the bending radius should be 30 to 40 mm or longer. - Page 44 Air Conditioner Edition:2006/1/10 Outdoor unit 5.Purging Method:To use vacuum pump Liquid Side Gas Side 6.35mm(1/4") 9.52mm(3/8") 12.7mm(1/2") 3-way valve 2-way valve Detach the service port's cap of 3-way valve, the valve rod's cap for 2-way valve and 3-way's, connect Gaugemanifold(for R410A) the service port into the projection of charge hose Anti countercurrent joint (low) for gaugemanifold.
- Page 45 Air Conditioner Edition:2006/1/10 1.Power Source Installation The power source must be exclusively used for air conditioner. (Over I0A) In the case of installing an air conditioner in a moist place, please install an earth leakage breaker. For installation in other places, use a circuit breaker as far as possible. 2.Cutting and Flaring Work of Piping Pipe cutting is carried out with a pipe cutter and burs must be removed.
-
Page 46: Circuit And Wiring Diagram
Air Conditioner Edition:2006/1/10 CIRCUIT DIAGRAM... - Page 47 Air Conditioner Edition:2006/1/10 HSU-12HD03/R2 +12V 7805 9012 4007 Vout 4007 4007 104/250V 4007 1000UF/25V 220UF/16V TRANS 4007 9013 R7 4.7K 4148 4.7K 50HZ R2 1K 4148 HEAT 220UF/16V R3 10K +12V 4148 R1 390 4148 100UF/16V A057R 4148 4007 PIPE PIPE HEAT +12V...
-
Page 48: Wiring Diagram
Air Conditioner Edition:2006/1/10 Wiring diagram... - Page 49 Air Conditioner Edition:2006/1/10 WIRING DIAGRAM FOR INDOOR UNIT:(HSU-12HD03/R2)
- Page 50 Air Conditioner Edition:2006/1/10 WIRING DIAGRAM FOR OUTDOOR UNIT:(HSU-12HD03/R2) 0010545416 WIRING DIAGRAM OF SPLIT UNIT,OUTDOOR TERMINAL BLOCK,OUTDOOR 4-WAY O.L.P. CAPACITOR VALVE FAN MOTOR COMPRESSOR BL:BLUE CAPACITOR COMPRESSOR BLACK TERMINAL WHITE BROWN YELLOW/GREEN REMOVAL OF LOCKING TERMINAL CONTACT Terminal contact ( mark in the above wiring diagram ) comes...
- Page 51 Air Conditioner Edition:2006/1/10 Sincere Forever Haier Group Haier Industrial Park, No.1, Haier Road 266101, Qingdao, China http://www.haier.com...