
Related Manuals for First Alert 1501


Summary of Contents for First Alert 1501
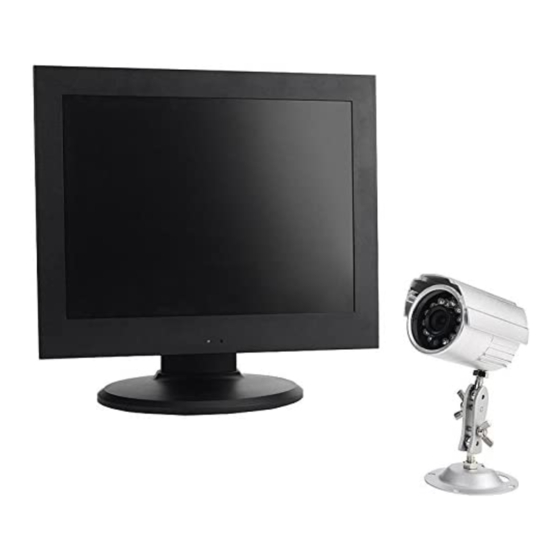
- Page 1 Indoor/Outdoor Analog Wired Cameras with 15" LCD Monitor and Built-In DVR Model 1501 USER'S MANUAL...
- Page 2 ©2010 Lehigh Consumer Products, LLC All rights reserved. Distributed by Lehigh Consumer Products, LLC, Macungie, PA 18062. Due to continuing product development, the product inside the packaging may look slightly different than the one on the package. Lehigh Consumer Products, LLC is a subsidiary of Jarden Corporation (NYSE: JAH). To obtain warranty service, contact the Consumer Affairs Division at 1-800-323-9005, Monday through Friday, 7:30 a.m.
-
Page 3: Table Of Contents
Safety ... 1 Safety Precautions ... 1 FCC Compliance ... 1 Disposal ... 2 Getting to Know Your Model 1501 System ... 3 Check Package Contents... 3 Features... 4 About the Monitor-DVR... 4 Front Panel... 4 Rear Panel ... 5 About the Remote Control... - Page 4 Download and Install ActiveX... 35 User login ... 35 Login... 35 Live ... 36 Playback... 37 Setup ... 37 Technical Information ... 41 Warranty... 43 Product Limited Warranty... 43 Warranty Exclusions ... 43 Obtaining Service ... 44 Table of Contents Model 1501 User's Manual...
-
Page 5: Safety
AFETY RECAUTIONS Do not drop, puncture, or disassemble the camera. Never tug on the power adapter. Use the plug to remove it from the wall. Do not expose the camera to high temperatures. For your own safety, avoid using the camera when there is a storm or lightning. ... -
Page 6: Disposal
Safety Model 1501 User's Manual ISPOSAL These symbols indicate that it is prohibited to dispose of these batteries in the household waste. You can take spent batteries that can no longer be charged to the designated collection points in your community. -
Page 7: Getting To Know Your Model 1501 System
Congratulations on purchasing your First Alert Security Camera product. First Alert has been helping families and businesses stay safe for over 50 years. By having a First Alert Security Camera, you’re taking the first step in protecting your home or business from damage or theft. -
Page 8: Features
Includes 12 infrared LEDs for night vision Indoor/outdoor cameras Includes 60 ft BNC cables -DVR BOUT THE ONITOR RONT ANEL 15" high-definition, digital LCD (1027x768, RGB) LCD panel power indicator Getting to Know Your 1501 System Model 1501 User's Manual base... -
Page 9: Rear Panel
Getting to Know Your 1501 System Model 1501 User's Manual ANEL ① Audio Output ② Video Output ③ Audio Input (1–4) ④ Video Input (1–4) ⑤ DC 12V Power Socket ⑥ USB Ports ⑦ Alarm Input (1-4) GND: Ground NO/COM: Alarm Output... -
Page 10: About The Remote Control
Open system information dialog box Turn system audio output ON/OFF Clear system alarm history information Play/Pause Select rewind speed (1x, 2x, 3x, or 4x) Select forward speed (1x, 2x, 3x, or 4x) * Cameras supplied with 1501 system are not equipped with PTZ feature. -
Page 11: About The Cameras And Mounting Kits
Getting to Know Your 1501 System Model 1501 User's Manual BOUT THE AMERAS AND The Model 1501 security system includes four wired-indoor/outdoor color CCD security cameras, four camera stands, mounting kits and 60 ft of BNC cables for each camera. IR LEDs camera lens... -
Page 12: Setting Up Your Model 1501 System
The POWER indicator light on the front panel will light when power is applied. When system initialization (boot up) is complete, the image from each active camera will display on the quad-screen monitor. Your Model 1501 System - DVR ONITOR Setting Up... -
Page 13: Installing And Connecting The Cameras
Setting Up Your Model 1501 System Model 1501 User's Manual NSTALLING AND ONNECTING THE Select the position for the camera and install a mounting bracket (supplied). Screws and anchors are supplied. Use an appropriate screw type for the mounting surface. -
Page 14: Connecting The Monitor-Dvr To An External Connection
ONITOR XTERNAL The Model 1501 system has an internal SATA 500GB HDD (hard disk drive), which can be expanded with an external SATA HDD to 1TB by setting the jumper on SATA I, limit to 1.5GB/s operation mode. Connect the HDD using the available USB port on the bottom of the monitor-DVR. - Page 15 Setting Up Your Model 1501 System Model 1501 User's Manual Normal-Close Connection Normal-Open Connection Alarm Output Connection...
-
Page 16: Mouse Operations
In addition to operating the system by using the buttons on the remote control, the system can be operated using a mouse. This chapter provides a quick start overview of the operating commands available using the mouse functions. For detailed descriptions of the menu options, see the next chapter Operating Menus. -
Page 17: Mouse Menus
The user has only the right to enter the record search menu; the administrator has rights to all operations. See the next chapter for instructions to set/change a password. * Cameras supplied with 1501 system are not equipped with PTZ feature. -
Page 18: Ptz Control (Option)
The PTZ is an optional feature available on some cameras. This feature is not available on the cameras supplied with the Model 1501 system, but the system software is PTZ-ready. Click right key on the surveillance interface to open the Shortcut menu. Choose PTZ to enter the PTZ control interface. -
Page 19: Operating Menus
This chapter provides information about the menu screens displayed on the LCD monitor. The menus are used to control the various functions of the DVR system. The user selects options from a series of menus and executes the actions by using the keypad on the DVR or the remote control. -
Page 20: Search
Click right key on the surveillance interface to open the Shortcut menu. Choose RECORD to search and playback the recording. Note: Green means normal recording. Red means alarm recording. No color means no recording. Model 1501 User's Manual Operating Menus... -
Page 21: File List
Operating Menus Model 1501 User's Manual Choose a date from the Record Search menu and select the FILE LIST to show a detailed list of videos for that date. Select the channel (CHN SWITCH) and type of video to focus the search. - Page 22 Operating Menus Model 1501 User's Manual To backup a file: 1. Select a video file (check in box). 2. Click BACKUP to start backup via USB to storage device. 3. Prompt box shows backup progress.
-
Page 23: Log Search
Operating Menus Model 1501 User's Manual EARCH Choose a date from the Record Search menu and select LOG SEARCH. Choose the log date and type. Click SEARCH to check the recording logs. ECORD Access the Record Search menu from the Main Menu. - Page 24 Use the Schedule menu to set specific recording times and durations. Select the channel (1, 2, 3, 4, or all). Click the box corresponding to the recording time and type (blank means no recording, green means normal recording mode and red means alarm recording mode or motion detection). Model 1501 User's Manual Operating Menus...
-
Page 25: Hdd Management
Operating Menus Model 1501 User's Manual HDD M ANAGEMENT Access the HDD Management menu from the Main Menu. Use this menu to check hard drive status, capacity, free space, and usage. The system is equipped with a 500GB hard drive, but can support up to a 1000GB hard drive. - Page 26 Click to format device attached to USB (e.g., flash USB FORMAT drive) Click to apply factory-set parameters DEFAULT Click to save setup parameters and return to Main APPLY Menu Click keep existing setup parameters and return to EXIT Main Menu Model 1501 User's Manual Operating Menus...
-
Page 27: Basic
Operating Menus Model 1501 User's Manual ASIC Access the Basic Setup menu from the Main Menu. Use this menu to set the system language, date and time, password, display parameters, and video and audio parameters. -
Page 28: Language
Click the DATE/TIME icon on the Basic Setup Menu to display the time setup menu. Use this menu to set the date, date format (MM/DD/YY), time, time format (12 hours or 24 hours), and time zone, including Daylight Saving Time option. Click APPLY to save the new parameters. Model 1501 User's Manual Operating Menus... -
Page 29: Password
Operating Menus Model 1501 User's Manual ASSWORD Click the PASSWORD icon on the Basic Setup Menu to display the password security setup menu. Click APPLY to save the new parameters. When Password is set to DISABLE, a login password is not required to use the system. -
Page 30: Video/Audio
OFF means the channel is not allowed. ON means time/date information is placed in live- mode view, OFF means time/date is not placed. ON means time/date information is placed in record-mode view, OFF means time/date is not placed. NTSC Operating Menus Model 1501 User's Manual... -
Page 31: Advance
Access the Advanced Setup menu from the Main Menu. Use this menu to view system information, set the system alarm and email notification parameters, and set motion detect, mobile, system maintenance, PTZ* and network parameters. * Cameras supplied with 1501 system are not equipped with PTZ feature. -
Page 32: Alarm
60 seconds. (Alarm output contact closed time. NO and COM contacts). Select buzzer calling time option when alarm is triggered: 0, 10, 20, 40, or 60 seconds. Select recording time option: 30 seconds, 1 minute, 2 minutes, or 5 minutes. Operating Menus Model 1501 User's Manual... -
Page 33: System Information
Operating Menus Model 1501 User's Manual E-MAIL Setup The system can send an email notification with a JPEG snapshot for triggered events on the system. Use the E-mail Setup menu to set the system parameters. Click APPLY to save the new parameters. -
Page 34: Motion Detect
Set motion detect for each channel Select motion detect ON or OFF Select sensitivity: 1–4 (low–high) Select the motion detect area. Each channel has 12x15 small panes. Red area means activated motion detection; transparent block means not activated. Operating Menus Model 1501 User's Manual... -
Page 35: Mobile
Operating Menus Model 1501 User's Manual OBILE Click the MOBILE icon on the Advanced Setup to display the set up screen. Select the mobile network option: 2.5, 2.75G, or 3G. The transport speed in 2.5G mobile network is 3 fps and the picture resolution is 160 x 120. The transport speed in 2.75G is 10 fps in 3G is 15 fps. -
Page 36: Ptz Setup (Option)
The PTZ is an optional feature available on some cameras. This feature is not available on the cameras supplied with the Model 1501 system, but the system software is PTZ-ready. Click the PTZ icon on the Advanced Setup screen to display the PTZ setup screen. The parameters for each channel are set separately. -
Page 37: Network Setup
Operating Menus Model 1501 User's Manual STOP BIT Select stop bit: 1 or 2 (default setting is 1) VERIFY Select verify: None, Odd, Even, Mark, or Space (default setting is None) Enter PTZ code; refer to PTZ camera instruction manual... - Page 38 The DVR can be accessed remotely via a network browser, if DDNS service is used. Set the DNS network router number in the Network Setup menu and then click DDNS Setup to turn on and set the required DDNS parameters. Model 1501 DVR supports three DDNS services: 3322, dyndns, and perfecteyes.
-
Page 39: Ie Operation
This chapter describes the browser software that can be installed on a PC and used to record, playback, and search video segments. OWNLOAD AND NSTALL Input the DVR IP and port (for example: http://172.18.6.202:8080/) in IE address blank and click ENTER to connect the DVR. The PC will download and install ActiveX automatically Note: If ActiveX download is not successful, check the IE Security Level and Firewall Setting. -
Page 40: Live
The PTZ is an optional feature available on some cameras. This feature is not available on the cameras supplied with the Model 1501 system, but the system software is PTZ-ready. Control the camera PTZ: up/down/left/right move, 360-degree automatic rotation, zoom, focus, and aperture. -
Page 41: Playback
Click SETUP to access the setup interface. Use this screen to access the Record, Alarm, PTZ*, Network, Setting, and System Information menus. The setup method is the same as the host menu setup method. * Cameras supplied with 1501 system are not equipped with PTZ feature. - Page 42 DVR. Alarm Click ALARM to access the setup interface. Check the parameter settings in the user interface DVR. Click PTZ to access the PTZ setup interface. * Cameras supplied with 1501 system are not equipped with PTZ feature.
- Page 43 IE Operation Model 1501 User's Manual Network Click NETWORK to access the network setup interface. Setting Click NETWORK to access the network setup interface. Set the bandwidth in kbps (128k, 192k, 256k, 384k, 512k, or 1024k) to match the Internet traffic. This bandwidth does not include audio.
- Page 44 IE Operation Model 1501 User's Manual Host Info Click HOST INFO to access the Host Info interface. Use this screen to check the HDD status, remaining record time, firmware version, and MAC Address.
-
Page 45: Technical Information
Video Compression Total Resource Live Picture Resolution Playback Resolution Input Output Video Standard Recording Record to Video Record to Log Storage and Backup HDD Volume Backup Network Protocol Internet Viewing Mobile Surveillance Alarm Input Alarm Output RS485 RS232 Technical Information H.264 120 frame (30 fps/ch) D1 (704×480) - Page 46 15”HD LCD display 1024 x 768 RGB DC 12V, 5A 420 TV lines NTSC: 510(H) x 492(V) 32 - 122°F 3.6mm/6.0mm Automatic > 48 dB Automatic Automatic 60/40 degrees Both Up to 50 ft Technical Information Model 1501 User's Manual...
-
Page 47: Warranty
IMITED ARRANTY BRK Brands, Inc., (“BRK”) the maker of First Alert® brand products warrants that for a period of one year from the date of purchase (the “Warranty Period”), this product will be free from defects in material and workmanship. BRK, at its sole option, will repair or replace this product or any component of the product found to be defective during the Warranty Period. -
Page 48: Obtaining Service
Warranty Model 1501 User's Manual software via its website. This warranty does not cover any alteration or damage to any other software that may be or may become resident on the users system as a result of installing the software provided. This warranty is in lieu of other warranties, expressed or implied, and BRK neither assumes nor authorizes any person to assume for it any other obligation or liability in connection with the sale or service of the product.