Table of Contents
Troubleshooting

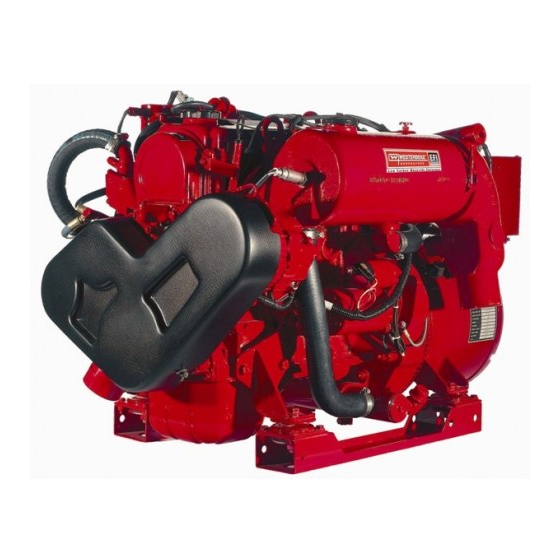
Related Manuals for Westerbeke 8.0KW-60Hz SBEG


Summary of Contents for Westerbeke 8.0KW-60Hz SBEG
- Page 1 SINCE 19'l OPERATORS MANUAL B.OKW ·60Hz SBEG /6.4KW • 50 Hz SBEG 1 O.OKW • 60Hz SBEG B.OKW • 50 Hz SBEG 12.5KW • 60Hz SBEG /1 O.OKW • 50 Hz SBEG 14.0KW • 60Hz SBEG /11.6KW • 50 Hz SBEG MARINE G E GENERATORS OCTOBER 2012...
- Page 2 GET OUT INTO THE FRESH AIR IMMEDIATELY. If symptoms persist, seek medical attention. Shut down the unit and do not restart until it has been inspected and repaired. A WARNING DECAL is provided by WESTERBEKE and should be fixed to a bulkhead near your engine or generator.
- Page 3 Gasoline with an ETHANOL content higher than 10% (E10) is not allowed and may void warranty. Engines & Generators...
- Page 4 SAFETY INSTRUCTIONS INTRODUCTION PREVENT BURNS - FIRE Read this safety manual carefuUy. Most accidents are caused by failure to foUow fundamental rules and WARNING: Fire can cause injury or death! precautions. Know when dangerous conditions exist and take the necessary precautions to protect yourself, your •...
- Page 5 SAFETY INSTRUCTIONS ACCIDENTAL STARTING TOXIC EXHAUST GASES WARNING: Accidental starting can cause injury WARNING: Carbon monoxide (CO) is deadly gas! or death! • Ensure that the exhaust system is adequate to expel gases • Disconnect the battery cables before servicing the engine/ discharged from the engine.
- Page 6 SAFETY INSTRUCTIONS • Do not wear loose clothing or jewelry when servicing ABYC, NFPA AND USCG PUBLICATIONS FOR equipment; tie back long hair and avoid wearing loose INSTALLING DIESEL ENGINES jackets, shirts, sleeves, rings, necklaces or bracelets that Read the following ABYC, NFPA and USCG publications could caught in moving parts.
- Page 7 INSTALLATION When installing WESTERBEKE engines and generators it is important that strict attention be paid to the following information: CODES AND REGULATIONS Strict federal regulations, ABYC guidelines, and safety codes must be complied with when installing engines and generators in a marine environment.
-
Page 8: Table Of Contents
TABLE OF CONTENTS Parts Identification ..........Engine Troubleshooting Guide ......Introduction ............Electrical Troubleshooting Guide ..... Warranty Procedure ........3 System Monitoring Software ......Serial Number Location ....... .4 Data Logging (Troubleshooting) ......Fuel, Engine Oil and Engine Coolant ....5 DC Electrical System ........ -
Page 9: Parts Identification
PARTS IDENTIFICATION . CIRCUIT BREAKER SENSOR 1 FRONT HEAT EXCHANGER. SPIN-ON OIL FILTER RIGHT SIDE 20A CIRCUIT BREAKER RESET MOUNT LEFT SIDE Engines Generators &... -
Page 10: Introduction
INTRODUCTION This WESTERBEKE Generator is a product of WESTERBEKE customers should also keep in mind the time WESTERBEKE'S long years of experience and advanced span between printings of WESTERBEKE product software technology. We take great pride in the superior durability and the unavoidable existence of earlier WESTERBEKE and dependable performance of our engines and generators. - Page 11 NOTE: A carbon monoxide warning decal has been provided are verticle in-line, and the engine's cylinder head has an by WESTERBEKE. Affix this decal in a visable location in overhead caiTishaft which is chain-driven. The engine utilizes the engine room.
-
Page 12: Fuel, Engine Oil And Engine Coolant
FUEL, ENGINE OIL AND ENGINE COOLANT ENGINE COOLANT GASOLINE WESTERBEKE recommends a mixture of 50% antifreeze and 50% distilled water. Distilled water is free from the chemicals CAUTION: Use unleaded 89 Octane gasoline or that can corrode internal engine surfaces. -
Page 13: Preparations For Initial Start-Up
PREPARATIONS FOR INITIAL START-UP PRESTART INSPECTION • Visually examine the unit. Look for loose or missing parts, disconnected wires, unattached hoses, and check Before starting your generator for the first time or after a pro- threaded connections. Search for any gasoline leaks. longed layoff, check the following items: Check load leads for con·ect connections as specified in Check the engine oil level: add oil to maintain the level at... -
Page 14: Starting/Stopping Procedure
STARTING/STOPPING PROCED GENERATOR CONTROL PANEL AC CIRCUIT ---~1 BREAKER CONNECTIONS FIREBOY, CO DETECTOR AND/OR AUXILIARY STOP CONNECTION Starting REMOTE START/STOP PANEL Simply press the START switch and the generator will start. The components on the panel are: . A green light will glow indicating the generator is running. 1. - Page 15 SYSTEM instructions in this manual. switch must be momentarily depressed. This remote panel is a plug-in accessory and is available with a 15' to 100' wiring harness. fW{WESTERBEKE CAUTION: Repeated crank cycles without a start can result .l~cP~J o ~~l in the engine's exhaust system filling with raw water.
-
Page 16: Break-In Procedure/Daily Operation
BREAK-IN PROCEDURE/THE DAILY OPERATION BREAK-IN PROCEDURE NOTE: Some unstable running may occur in a cold engine. This condition should lessen as normal operating temperature After the generator has been started, check for proper is reached and loads are applied. operation and then encourage a fast warm-up. Run the generator between 20% and 60% of full-load for the first 10 hours. - Page 17 SAFETY SHUTDOWN SWITCHES DESCRIPTION The engine/generator is protected by switches and sensors that send signals to the ECU that it interprets as a fault and automatically shuts down the generator drive engine. When an automatic shutdown occurs, one of the control panel fault LED lights will illuminate indicating what fault caused the engine to shutdown.
-
Page 18: Maintenance Schedule
MAINTENANCE SCHEDULE WARNING: Never attempt to perform any service while the engine is running. Wear the proper safety equipment such as goggles and gloves, and use the correct tools for each job. Disconnect the battery terminals when servicing any of the engine's DC electrical equipment. ISAEElMaintenance items that are very important to the proper operation of "Safe generators. -
Page 19: Measuring Exhaust Back Pressure
Inspect every 1000 hours. Replace every 2000 hours. Oxygen Sensor CO in Exhaust Sample with CO analyzer. *WESTERBEKE recommends this service be performed by an authorized mechanic. MEASURING EXHAUST BACK PRESSURE GAUGE Exhaust systems normally produce resistance to the flow of exhaust gases, causing back-pressure. -
Page 20: Fuel System
2. Thread on the replacement inlet filter and connect the impurities. WESTERBEKE oAr:J•T.-.::=r fuel supply line. Use care when connecting and . NUMBER (49602) tightening the fuel supply line so as not to distort the inlet filter. -
Page 21: Bleeding The Fuel System
FUEL SYSTEM BLEEDING THE FUEL SYSTEM is not 1. Insure that the fuel cell connected to the wiring harness, and that the lift pump connected. 2. Attach Snap On MT337B, OTC 7211 or equivalent fuel pressure gauge set to the Schrader valve on fuel cell. CAUTION: Follow manufacturer's instructions for "SNAP-ON-TOOL"... -
Page 22: Electronic Fuel Injection (Efi)
ELECTRONIC FUEL INJECTION NOTE: When changing the generator frequency, tum OFF the DC 20 amp breaker before moving the dipswich. The vacant program connector is used by the factory to input the operating program into the ECU. This connector can be used with software to monitor the operation of the Safe CO system. -
Page 23: Cooling System
COOLING SYSTEM FRESH WATER CIRCUIT CHANGING COOLANT The engine's coolant must be changed according to the NOTE: Refer to ENGINE COOLANT section for the recom- MAINTENANCE SCHEDULE. If the coolant is allowed to mended antifreeze and water mixture to be used as the fresh become contaminated, it can lead to overheating problems. -
Page 24: Thermostat
COOLING SYSTEM HEAT EXCHANGER If the zinc anodes need replacement, hold the hex boss into which the zinc anode is threaded with a wrench while Cool raw water flows through the inner tubes of the heat loosening the anode with another wrench. This prevents the exchanger. -
Page 25: Raw Water Pump
COOLING SYSTEM RAW WATER PUMP(#42026) RAW WATER INTAKE STRAINER The raw water pump is a self-priming, rotary pump with a NOTE: Always install the strainer at or below the waterline so non-ferrous housing and a neoprene impeller. The impeller has the strainer will always be self-priming. -
Page 26: Engine Lubrication Oil
SCHEDULE in this manual. and a plastic bag around the filter when unscrewing it to catch Westerbeke Corporation does not approve or disapprove any oil that's in the filter. Inspect the old oil filter as it is the use of synthetic oils. If synthetic oils are used, engine removed to make sure that the rubber sealing gasket comes break-in MUST be performed using conventional oil. -
Page 27: Remote Oil Filter
Contact your WESTERBEKE dealer for more infonnation an engine room bulkhead. NOTE: NOTE: Westerbeke is not responsible for engine failure due to Refer to ENGINE OIL CHANGE in this manual for incorrect installation of the Remote Oil Filta instructions on removing the oil filta CAUTION: It is vital to install the oil lines cor·... -
Page 28: Throttle Body Assembly
THROTTLE BODY ASSEMBLY FUEL INJECTOR FUEL PRESSURE REGULATOR SCHRADER VALVE PVC VALVE STEPPER MOTOR MAP SENSOR FROM THE THERMOSTAT ASSEMBLY c:-i" DESCRIPTION The injector is a solenoid operated pintle valve that meters The above illustration shows the throttle body assembly fuel into the intake manifold depending on engine operating attached to the intake manifold. -
Page 29: Engine Adjustments
ENGINE ADJUSTMENTS SPARK PLUGS DRIVE BELT ADJUSTMENT The spark plugs should be cleaned and regapped after the The drive belts must be properly tensioned. Excessive drive first 50 hour break-in period, then inspected every 250 hours belt tension can cause rapid wear of the belts and reduce the thereafter and replaced as needed. -
Page 30: Engine Compression Test
ENGINE ADJUSTMENTS NOTE: WESTERBEKE recommends that the following engine adjust- ments be performed by a competent engine mechanic. The information below is provided to assist the mechanic. ENGINE COMPRESSION TEST IGNITION TIMING To check the engine's compression pressure, warm up the engine then shut it down. -
Page 31: Valve Clearance
ENGINE ADJUSTMENTS NOTE: WESTERBEKE recommends that the following engine adjustments be peiformed by a competent engine mechanic. The information below is provided to assist the mechanic. VALVE CLEARANCE AND ADJUSTMENT Start the engine and allow it to warm up until the engine coolant reaches operating temperature. -
Page 32: Timing Belt Inspection And Replacement
ENGINE ADJUSTMENTS NOTE: WESTERBEKE recommends that the following engine adjustments be peJformed by a competent engine mechanic. The information below is provided to assist the mechanic. TIMING BELT INSPECTION AND REPLACEMENT CAUTION: TIMING BELT ASSEMBLY Water or oil on the timing belt severly reduces the service life of the belt. - Page 33 ENGINE ADJUSTMENTS NOTE: WESTERBEKE recommends that the following engine adjustments be peiformed by a competent engine mechanic. The infonnation below is provided to assist the mechanic. Timing Belt Inspection Belt Tensioner Inspection Replace the belt if any of the following conditions exist: Replace the belt tensioner if it binds, rattles, or is noisy when turned.
- Page 34 ENGINE ADJUSTMENTS NOTE: WESTERBEKE recommends that the following engine adjustments be peiformed by a competent engine mechanic. The infonnation below is provided to assist the mechanic. Timing Belt Installation ----1--l:l,.._~ CAMSHAFT SPROCKET ALIGN THE TIMING MARK 1. Align the camshaft timing mark with the timing mark on the cylinder head.
- Page 35 ENGINE TROUBLESHOOTING The following troubleshooting tables are based upon certain NOTE: The engines control system (electrical system) is engine problem indicators and the most likely causes of the protected by a 8 Ampere manual fuse located on the control problems. panel.
- Page 36 ENGINE TROUBLESHOOTING PROBLEM PROBABLE CAUSE PROBLEM PROBABLE CAUSE Engine backfires. Spark plug wires are connected Faulty connections to No DC charge to the wrong. battery charging control. starting battery. Incorrect timing. Faulty battery charging control. Engine is flooded. Faulty bridge rectifier. 4.
-
Page 37: Electrical Troubleshooting Guide
ELECTRICAL TROUBLESHOOTING GUIDE The following test procedures will require the use of a multimeter and the engine's wiring diagram (in this manual). Also refer to the relay testing page. WESTERBEKE recommends that these tests be performed by a qualified technician. PROBLEM... -
Page 38: System Monitoring Software
ELECTRICAL TROUBLESHOOTING CHART The following test procedures will require the use of a multimeter and the engine's wiring diagram (in this manual). Also refer to the relay testing page. WESTERBEKE recommends that these tests be perfonned by a qualified technician. PROBLEM... -
Page 39: Data Logging (Troubleshooting)
Simple enough, this is the speed that the engine is running. If the genset is set up to operate at Hz, then the engine needs to run at 1800 rpm (belt driven units may be different). If the unitis sp~ed . setup for 50 Hz operation than the engine will be 1500 rpm. WESTERBEKE Engines & Generators... - Page 40 DATA LOGGING (TROUBLESHOOTING AID) When a genset is governing properly you should see reading slightly above and below the little~ desired speed. Even a well tuned engine will vary a The point is you should see readings above and below the desired speed. If you see speed readings remain more than 20 rpm above or below the desired speed for a prolonged period of time, there could be a problem, especially if this is noticed with no AC load applied ..
- Page 41 DATA LOGGING (TROUBLESHOOTING AID) Lambda Lambda represents the ratio of the amount of oxygen actually present in a combustion chamber "perfect~' compared to the amount that should have been present in order to obtain combustion. Thus, when a mixture contains exactly the amount of oxygen required to burn the amount of fuel present, the ratio will be one to one and lambda will equall.OOO.
- Page 42 DATA LOGGING (TROUBLESHOOTING AID) Stepper Pos (steps) The throttle shaft is controlled by a stepper motor. The value displayed is in steps. Zero steps being the closed position. Most units will run at no load in the steps rllnge. These values will vary from engine to engine.
-
Page 43: Dc Electrical System
DC ELECTRICAL SYSTEM ALTERNATOR Start the engine. 2. After the engine has run for a few minutes, measure the starting battery voltage at the battety terminals using a multimeter set on DC volts. a. If the voltage is increasing toward 14 volts, the alterna- tor is working;... -
Page 44: Battery Care
DC ELECTRICAL SYSTEM 7. Now check the voltage between the alternator ou1put ter- Checking the Service Battery minal (B+) and ground. If the circuit is good, the voltage at Check the voltage of the service battery. This battery should the alternator will be the same as the battery, or if an isola- have a voltage between 13 and 14 volts when the engine is tor is in the circuit the alternator voltage will be zero. -
Page 45: Wiring Schematic #49167
WIRING SCHEMATC #49167 -=-- r - - • 1ln' • : lllt!l/lllii1111M·D l}lfll111/111•·tl n10/1111/114M·Dl lfllll/11111/liiii•Ol 0111•11 O!A·tl oooon111t: oooooou 0 0 0 0 0 0' 0 0 0 0 0 •... - Page 46 REMOTE STOP/START PANEL WIRING DIAGRAM DISPLAY BOARD SCHEMATIC #18 ORG #18 GRN #18 WHT/BLK/BLU Ci)+-- #20 WHT/BLK/BRN 4l-+--f___J ~4-~~~~~~--~----------K{D Li-----J VIEWED FROM WIRE SIDE #18 WHT/BLK/RED lo.S. E.T. W.T.,O.P., #20 WHT/BLK/GRY #20 WHT/BLK/GRN D.P. W.T. E.T. O.S. POSITION STOP START INDICATOR START/STOP CENTER OFF...
-
Page 47: Starter Motor
STARTER MOTOR DESCRIPTION No-Load Test The starter can be roughly divided into the following sections: 1. Connect the ammeter, voltmeter, and battery to the starter • A motor section which generates a drive power. as illustrated. • An overrunning clutch section which transmits an arma- 2. - Page 48 STARTER MOTOR Return test:. With a battery connected to the solenoid ter- minal M (-)and to the starter body, manually pull out the pinion fully. The pinion must return to its original position ATTRACTION TEST when released from holding by hand. Holding test.
-
Page 49: Generator Information
Required Operating Speed CIRCUIT BREAKER Run the generator first with no load applied, then at half the A circuit breaker is installed on all WESTERBEKE generator's capacity, and finally loaded to its full capacity as generators. This circuit breaker will automatically disconnect indicted on the generator's data plate. -
Page 50: Ac Voltage Regulator (Current Models)
The trouble.shooting booklet for the BE style generator will help you · . determine the cause of a generator AC voltage output issue by the VOLT DRY CELL AC voltage f?und bein? p:oduced by the generator and the reaction WESTERBEKE of the generatiOn to excrtatwn. Engines & Generators... - Page 51 AC VOLTAGE REGULATOR (CURRENT MODELS) #054596 ~ ~ ·o -~ -~ ~ ~ w ... t:'- > ORANGE ~ 3: :i ? BLACK · 0 120/240V 60Hz TERMINAL BLOCK GREEN OR GRAY ORANGE WHEN WIRING 120V/60HZ, BLACK A JUMPER IS REQUIRED . BETVVEEN LOAD CONNECTIONS 120V 60Hz ...J...
- Page 52 THE BE GENERATOR (EARLY MODELS) WITH VOLTAGE REGULATOR #046446 DESCRIPTION Voltage Adjustments This generator is a four-pole, brushless, self-excited This potentiometer is used to adjust output voltage. At proper generator which requires only the driving force of the engine engine operating speed the output voltage should be held at ±...
- Page 53 BE GENERATOR VOLTAGE CONNECTIONS AC VOLTAGE CONNECTIONS 120V 60Hz The frame ground wire (green) must be properly positioned when changing the AC output configuration of the AC terminal block. For making connections- to the AC terminal block, use terminal ends for 1/4 inch studs that will accept multi strand copper wire sized for, the amperage rating from the hot lead connection.
-
Page 54: Ac Voltage Connections
AC VOLTAGE CONNECTIONS BE GENERATORS EARLY MODELS wARNING: ,..,..::::>; ::::> ' iii ;d'~ 'iii ...,. ..!!! ...J ::::> ..2..J RED (small) ...J . (.!) >- ·C: (.!) BLACK (small) c: c: w· ::::> (.!) ...J GENERATOR VOLTAGE REGULATOR #046446 ub vU. -
Page 55: Ac Voltage Regulator (Early Models)
AC VOLTAGE REGULATOR #046446 VOLTAGE POTENTIOMETER UNDER FREQUENCY The output voltage of the generator can be adjusted using the With the generator running at rated speed and producing potentiometer with the generator running at its selected speed desired voltage, reduce the engine speed using the (frequency) by turning the adjustment until the desired mechanical governor by 4 hertz. - Page 56 BE TROUBLESHOOTING NOTE: AC GENERATOR TROUBLESHOOTING MUST BE PERFORMED WITH ENGINE OPERATING AT 60 HERTZ PROBLEM PROBABLE CAUSE No AC voltage output at no load. 1. Short or open in the 4. Open in exciter main stator winding. stator winding. 2.
-
Page 57: Be Generator (Troubleshooting)
WESTERBEKE 8.0/6.4KW TO 14/11.6KW SBEG ENGINE SPECIFICATIONS · . ENGINE SPECIFICATIONS •. · IGNITION SYSTEM . · r ., Engine Type Gasoline, four-cycle, four-cylinder, General Battery ignition 12V negative ground. fresh water-cooled, Vertical, in-line Distributor with ignition module and igniter. -
Page 58: Shore Power Transfer Switch
SHORE POWER TRANSFER SWITCH CONNECTIONS SHORE POWER CONNECTIONS (60 HERTZ) 120 VOLT/60HZ THREE WIRE CONFIGURATION Notice the repositioning of the white wire ground load on the Generator NOTE: Diagram shows connections '!''a two- terminal block to the generator case. wire.120·Voltsystem. Forathree-wue system t'----u-se dotted lines ror leg. -
Page 59: Lay-Up And Recommissioning
LAY-UP & RECOMMISSIONING GENERAL Fuel System [Gasoline] Many owners rely on their boatyards to prepare their craft, Top off your fuel tanks with unleaded gasoline of 89 octane including engines and generators, for lay-up during the or higher. A fuel conditioner such as Marine Sta-Bil gasoline off-season or for long periods of inactivity. - Page 60 Lay-up time provides a good opportunity to inspect your if access to the starter permits its easy removal. Make sure the Westerbeke engine to see if external items such as drive belts battery connections are shut off before attempting to remove or coolant hoses need replacement.
- Page 61 Parts per Million Responses Westerbeke's exhaust system installation instructions dated on or after February 2004 must be adhered to. Permissible exposure level, no NOTE: apparent toxic symptoms.
- Page 62 Zellwgwer Analytics, Industrial Scientific Corp, GFG, TPI, The other location is the boat's exhaust outlet, which Teledyne and others. Westerbeke recommends analyzers with . ·contains entrained cooling water (except dry stack exhaust a probe connected to the analyzer by a length of transparent systems).
- Page 63 EMISSIONS You should carefully review operator (Owner) Installation This genset meets the requirements of California's Exhaust and other manuals and information you receive with your Emissions Standards as stated on the nameplate. genset. If you are unsure that the installation, use, . California users of this genset should be aware that maintenance or service of your genset is authorized, you unauthorized modifications or replacement of fuel, exhaust,...
-
Page 64: Metric Conversions
ENGLISH TO METRIC CONVERSION CHART To qet equivalent number of: Multiply Temperature ("F-32) Dearee Celsius Dearee Fahrenheit (°F) To qet equivalent number of: Multiply Acceleration FooVsecond (ft/sec 0.3048 Meter/second (m/s lnch/second {in./sec 0.0254 Meter/second (m/s 2 ). Multiply Toraue To get equivalent number of: Newton-meters (N·m) Pound-inch (lb·in.) 1298... -
Page 65: Suggested Spare Parts
SUGGESTED SPARE PARTS WESTERBEKE MARINE GASOLINE GENERATORS CONTACT YOUR WESTERBEKE DEALER FOR SUGGESTIONS AND ADDITIONAL INFORMATION RAW WATER IMPEUERJGASKET FUEL FILTERS DISTRIBUTER CAP AND WIRES MOLDED. HOSE KIT INA CANVAS· CARRYING~~~ WESTERBEKE RECOMMENDS CARRYING ENOUGH SPARE ENGINE OIL (YOUR BRAND) FOR AN OIL CHANGE (5 QTS.) AND A GALLON OF PREMIXED COOLANT. - Page 67 WESTERBEKE CORPORATION • 150 JOHN HANCOCK ROAD MYLES STANDISH INDUSTRIAL PARK • TAUNTON MA 02780 WEBSITE: WWW.WESTERBEKE.COM 1175-10 2012...