
Related Manuals for Toshiba Excite 10SE


Summary of Contents for Toshiba Excite 10SE
- Page 1 User’s Guide If you need assistance: ❖ Toshiba’s Support Web site tabletsupport.toshiba.com For more information, see “If Something Goes Wrong” on page 98 in this guide. GMAD00340011 07/13...
-
Page 2: Regulatory Information
LOST DUE TO ANY TROUBLE, FAILURE OR MALFUNCTION OF THE HARD DISK DRIVE OR OTHER STORAGE DEVICES AND THE DATA CANNOT BE RECOVERED, TOSHIBA SHALL NOT BE LIABLE FOR ANY DAMAGE OR LOSS OF DATA, OR ANY OTHER DAMAGE RESULTING THEREFROM. WHEN COPYING OR... - Page 3 Only Peripherals complying with the FCC Class B limits may be attached to this equipment. Operation with noncompliant peripherals or peripherals not recommended by Toshiba is likely to result in interference to radio and TV reception. Shielded cables must be used between the external devices and the device's ports.
- Page 4 Cet appareil numérique de la classe B est conformé à la norme NMB-003 du Canada. Wireless Interoperability The Toshiba Wireless LAN Card products are designed to be interoperable with any wireless LAN product that is based on Direct Sequence Spread Spectrum (DSSS) radio technology, and is compliant to: ❖...
- Page 5 Wireless LAN device prior to turning on the equipment. Exposure to Radio Frequency Radiation The radiated output power of the Toshiba Wireless LAN Card is far below the FCC radio frequency exposure limits. Nevertheless, the Toshiba Wireless LAN Card shall be used in such a manner that the potential for human contact during normal operation is minimized.
- Page 6 ® ® Turn Wi-Fi , Bluetooth , and Wireless WAN Functionalities off for Cardiac Pacemakers ❖ ® ® Turn Wi-Fi , Bluetooth , and Wireless WAN functionality off when you are near a person who may have a cardiac pacemaker implant or other medical electric device.
- Page 7 Europe—Restrictions for use of 2.4 GHz Frequencies in European Community Countries België/ For private usage outside buildings across public grounds over less than 300m no special registration with IBPT/BIPT is required. Registration to Belgique: IBPT/BIPT is required for private usage outside buildings across public grounds over more than 300m.
-
Page 8: Bluetooth Wireless Technology Interoperability
® Always use Bluetooth cards from Toshiba in order to enable wireless networks over two or more (up to a total of seven) Toshiba portable computers using these cards. Please contact Toshiba product support on Web site http://www.toshiba-europe.com/computers/tnt/bluetooth.htm in Europe or tabletsupport.toshiba.com in the United States for more information. - Page 9 The radiated output power of the Bluetooth Card from Toshiba is far below ® the FCC radio frequency exposure limits. Nevertheless, the Bluetooth Card from Toshiba shall be used in such a manner that the potential for human contact during normal operation is minimized.
- Page 10 Copyright This guide is copyrighted by Toshiba America Information Systems, Inc. with all rights reserved. Under the copyright laws, this guide cannot be reproduced in any form without the prior written permission of Toshiba. No patent liability is assumed, however, with respect to the use of the information contained herein.
- Page 11 America Information Systems, Inc. and/or Toshiba Corporation. Bluetooth word mark and logos are owned by the Bluetooth SIG, Inc. and any use of such marks by Toshiba is under license. Other trademarks and trade names are those of their respective owners.
-
Page 12: Table Of Contents
Other icons used..........19 Your device’s features and specifications ..19 Other documentation ..........19 Service options ............20 Precautions............20 File management tips ..........21 Toshiba’s online resources ........21 Chapter 1: Getting Started............22 Features and components........22 Front ..............23 Back ..............23 Left side ............24 Right side............24 Top ..............24... - Page 13 ® Setting up Wi-Fi and Bluetooth connections ..........37 Registering your Toshiba device ......38 Backing up your data ..........38 Backing up data using TOSHIBA File Manager............39 Backing up data using your Google™ Account............39 Restoring your data using your Google™ Account............39 Navigation and features ..........40 Home screen.............41...
- Page 14 Contents Moving an item from the Home screen.....48 Removing an item from a Home screen....48 Creating, naming, and removing folders ...48 Changing the wallpaper........51 Turning off the device ..........51 Options for turning off the device .....51 Using Shut down mode ........52 Using Sleep mode..........53 Managing your accounts.........54 Add an account ..........54...
- Page 15 Contents Chapter 3: Working with Apps..........79 Downloading Toshiba Apps ........79 TOSHIBA Media Player ........79 Apps ...............80 Downloading from Google Play™ Store ....80 Preinstalled Apps on your tablet .......81 Uninstalling Apps on your tablet .......81 Chapter 4: Exploring the Features on your Device....82 Using the onscreen keyboard........82...
- Page 16 Power and the batteries ........100 Display problems ..........100 Sound system problems ........101 Wireless networking problems......101 If you need further assistance.......102 Before you contact Toshiba ......102 Contacting Toshiba .........103 Other Toshiba Internet Web sites......103 Toshiba’s worldwide offices........103 Appendix A: Power Cord/Cable Connectors......105 Glossary..................106...
-
Page 17: Introduction
Toshiba’s Web site at tabletsupport.toshiba.com. While Toshiba has made every effort at the time of publication to ensure the accuracy of the information provided herein, product specifications, configurations, prices, system/component/options availability are all subject to change without notice. -
Page 18: This Guide
Introduction This guide This guide This guide introduces the features on your device as well as some basic procedures needed to perform tasks on your tablet, which are powered by the Android™ 4.1, Jelly Bean. This product brings new features and performance enhancements to your device. You can: ❖... -
Page 19: Other Icons Used
Your device comes with the following documentation: ❖ A Legal/Safety/Regulatory document ❖ A Quick Start document ❖ A standard limited warranty ❖ It may also contain guides for other programs that may come with your system. For accessory information, visit Toshiba’s Web site at accessories.toshiba.com. -
Page 20: Service Options
To stay current on the most recent applications, application updates, and hardware options for your device, as well as other product information, be sure to regularly check the Toshiba Web site at tabletsupport.toshiba.com. If you have a problem or need to contact Toshiba, see “If Something... -
Page 21: File Management Tips
Internet. Toshiba’s online resources Toshiba maintains a number of online sites to which you can connect. These sites provide information about Toshiba products, give help with technical questions and keep you up to date with future upgrades. -
Page 22: Chapter 1: Getting Started
Chapter 1 Getting Started This chapter provides tips for using your device effectively, summarizes how to connect components, and explains what to do the first time you use your device. Please read and adhere to all safety information carefully and make sure you fully understand the instructions before you attempt to use your device in order to avoid potential hazards that could cause bodily injury, property damage, or damage the device. -
Page 23: Front
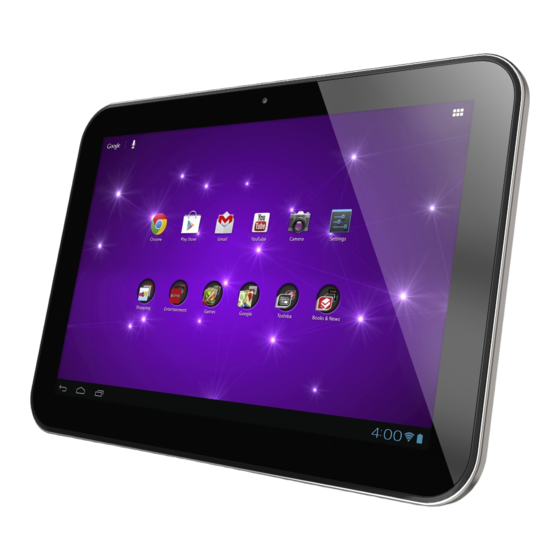
Getting Started Features and components Front Camera HD display (Sample Illustration) Front view ❖ Camera—Allows you to take still photos (includes flash settings) or record videos. Back Camera (Sample Illustration) Back view ❖ Camera—Allows you to take still photos and videos. For more information, see “Using the cameras”... -
Page 24: Left Side
Getting Started Features and components Left side Headphone/Microphone Micro USB port microSD™ slot Volume control button (Sample Illustration) Left side view ❖ Headphone/Microphone Line-In jack—Allows you to listen to or record sounds onto your device. For more information, “Using external speakers or headphones” on page ❖... -
Page 25: Bottom
Always use the Toshiba USB/AC adaptor that was provided with your device, or use USB/AC adaptors specified by Toshiba to avoid any risk of fire or other damage to the device. Use of an incompatible USB/AC adaptor could cause fire or damage to the device possibly resulting in serious injury. -
Page 26: Battery Notice
The battery life cited in the product specifications is only achieved on the select models and configurations tested by Toshiba under the specific test settings at the time of publication and is not an estimate of a system’s battery life under any conditions other than the... -
Page 27: Charging The Battery
Getting Started Charging the battery Recharge time varies depending on usage. The battery may not charge while the device is consuming full power. After a period of time, the battery will lose its ability to perform at maximum capacity and will need to be replaced. This is normal for all batteries. -
Page 28: Taking Care Of Your Battery
❖ Other unusual event during use, such as abnormal sound Do not turn on the device's power again until an authorized Toshiba service provider has checked it for safety. Continued use could cause a fire or rupture possibly resulting in serious injury or device failure including but not limited to the loss of data. -
Page 29: Maintaining Your Battery
Disposal of this product may be regulated due to environmental considerations. For disposal, reuse or recycling information, please contact your local government. In addition, Toshiba’s recycling initiatives include recycling programs, events, and consumer promotions. For details, please visit us.toshiba.com/green. Notice regarding CR coin cell batteries, applicable to California, U.S.A. -
Page 30: Using The Device For The First Time
This is also an intrinsic characteristic of the screen technology. Setting up your device NOTE To take full advantage of features for your device, Toshiba ® recommends that you have access to a Wi-Fi network and a Google™... -
Page 31: Setting Up Your Wi-Fi Connection
Getting Started Using the device for the first time The first time you power on your tablet the “Welcome” screen appears and you will be asked to choose a language. (Sample Image) Welcome screen Select the language you want, and then touch Start to continue. -
Page 32: Got Google
Getting Started Using the device for the first time ® Touch the Wi-Fi network you want to use and enter the key or password. Click on Connect. Got Google™? The “Got Google?” screen appears displaying two options: ❖ Yes to sign in with an existing Google account and then follow the on screen instructions. -
Page 33: Make It Google
Getting Started Using the device for the first time Enter your existing Google Account information, and then touch the Arrow key. The “Signing in” screen appears. NOTE This may take several minutes. If your screen times-out and goes blank/dark, press the Power button to turn on the screen again. Make it Google™... -
Page 34: Use Google™ Location
Getting Started Using the device for the first time Use Google™ Location The “Use Google location” screen appears displaying two options: ❖ Select the check box “Allow Google’s location service to collect anonymous location data. Some data may be stored on your device. -
Page 35: Setting The Date And Time
Getting Started Using the device for the first time Setting the date and time The “Date and time” screen appears. NOTE If you have not set up an Internet connection, this screen appears. (Sample Image) Set date and time screen Select a preferred time zone, or set the current date and time. - Page 36 Getting Started Using the device for the first time There are two options in the “This tablet belongs to…” screen: ❖ Enter your information into the First and Last name fields, and then touch Next. ❖ Touch Next to continue (without entering the information). The “Google Services”...
-
Page 37: Waking The Tablet
Getting Started Using the device for the first time NOTE The setup may take several minutes to complete. If your screen times out and goes blank/dark, press the Power button to turn on the screen again. Waking the tablet If the screen times-out: Press the Power button. -
Page 38: Registering Your Toshiba Device
Register ( ) icon. Failure to complete Product Registration will not diminish your rights under the Toshiba Standard Limited Warranty. Backing up your data Back up the data you create in case something happens to your device. -
Page 39: Backing Up Data Using Toshiba File Manager
Getting Started Backing up your data Backing up data using TOSHIBA File Manager Using the TOSHIBA File Manager, you can back up your data to a microSD™ Card. For more information, see “TOSHIBA File Manager Utility” on page Backing up data using your Google™ Account You can also back up your settings as well as your data using your Google Account. -
Page 40: Navigation And Features
Getting Started Navigation and features Navigation and features Your device exemplifies the innovative blending of touch-screen technology and intuitive application design making the most of your tablet device. Google™ Search bar Voice recognition Apps button Home screens System Time Notification icons Status icons (Sample Image) Central Home screen Icons and buttons you may find on your display screen. -
Page 41: Home Screen
Getting Started Navigation and features Icon Name Description Voice recognition Touch to perform a voice-enabled search. button Google Search bar Touch to perform a search using the keyboard. Settings icon Touch to open the Settings menu. Home screen The total number of available Home screens is five. Move between screens by swiping your finger to the left or right. -
Page 42: Touch Screen Navigation
Getting Started Navigation and features Touch screen navigation Use your finger to manipulate the onscreen icons, buttons, menu items, onscreen keyboard, and other items on the touchscreen. You can also change the screen’s orientation. The screen is made of glass so avoid contact with sharp, rough, or abrasive objects or substances as screen may break or scratch if not handled properly. -
Page 43: Navigating The Home Screen
Getting Started Navigation and features Navigating the Home screen When the setup process is complete, the Home screen appears. This is your starting point for all features used on your tablet. You can add shortcuts for apps, widgets, and other features to all five of your Home screens. - Page 44 Getting Started Navigation and features Touch the Time display to view the Status Details panel. For more information, see “Securing your tablet” on page After your Google™ Account is set up, the Network Status icons are blue when connected to Google services. This indicates that the tablet is ready to sync your Gmail™, Calendar, and contacts, and to back up your settings.
-
Page 45: Securing Your Tablet
Toshiba is not responsible for any losses that may occur, as a result of the inability to access your device. When you initially turn on or wake the tablet, the lock screen requires you to drag the Lock ( ) icon to unlock the screen, see “Waking the tablet”... - Page 46 Getting Started Navigation and features You can also encrypt the data on your tablet, so you must enter a numeric PIN or a password to decrypt it each time you power it on. Touch the Time ( ) display in the System bar, touch the time in the Status Details panel, and then touch the Settings ( ) icon at the bottom of the Quick Settings screen.
- Page 47 Getting Started Navigation and features You can encrypt all the data on your tablet: Google™ Accounts, application data, music and other media, downloaded information, etc. If you do, you must enter a numeric PIN or password each time you power on your tablet. ❖...
-
Page 48: Customizing Your Home Screens
Getting Started Customizing your Home screens Customizing your Home screens You can add Apps icons, Widgets, Bookmark shortcuts, and other items to any available free space on any Home screen. You can also change the Wallpaper. For more information on the Home screens, see “Navigation and features”... - Page 49 Getting Started Customizing your Home screens Touch, hold, and drag the second app to the first app. (Sample Image) Dragging an app Release the second app, and its icon appears in the circle, behind the icon of the first app. (Sample Image) Unnamed folder The folder is now created with an automatic generic name (such as “Unnamed folder”).
- Page 50 Getting Started Customizing your Home screens Name/rename a created folder Touch and hold the folder you want to name/rename. (Sample Image) Naming a folder The name of the folder turns into a field you can type into. Type the desired name. The folder is now renamed. (Sample Image) Named folder Removing a folder To remove folders from your Home screen:...
-
Page 51: Changing The Wallpaper
Getting Started Turning off the device Touch, hold, and drag all apps from the folder (on the Home screen or in the app list) to the Home screen. Release the apps on the Home screen. When the last app is removed, its folder is automatically removed. -
Page 52: Using Shut Down Mode
Getting Started Turning off the device TECHNICAL NOTE: Before using the shut down option to turn off your device, backup your data. If you change your mind and decide to continue working after all, wait a few seconds before turning the device on again. NOTE If you do not intend to use your device for a long period of time, turn off the device, disconnect the power plug from the plug socket, and... -
Page 53: Using Sleep Mode
Getting Started Turning off the device In the pop-up window, touch Power off. A pop-up screen appears, asking you to confirm the shut down. (Sample Image) Shut down pop-up confirmation screen In the pop-up window, touch OK to completely shut down the tablet. -
Page 54: Managing Your Accounts
Getting Started Managing your accounts ❖ When starting up again, the device returns to the screen last viewed. If you place the device in Sleep mode and the battery discharges fully, your unsaved data will be lost. Be sure to backup your data first. -
Page 55: Remove An Account
Getting Started Managing your accounts Follow the onscreen instructions to enter the required account information. Configure the account settings. For more information, see “Accounts settings” on page The account is added to the list in the Accounts settings. Remove an account To remove an account and all the associated information, including email, contacts, settings, etc.: Touch the Settings (... -
Page 56: Navigation, Maps, Local, And Latitude
Getting Started Navigation, Maps, Local, and Latitude Touch Remove account from the dialog box to continue. The “Remove account?” confirmation screen appears. (Sample Image) Removing an account confirmation Touch Remove account to continue. The account and the associated information is removed from the Accounts settings. -
Page 57: Managing Downloads
Getting Started Managing downloads Latitude: Locate points-of-interest directly on a street map or satellite image. Some areas support street-level views of businesses and neighborhoods. View your friends’ locations on your maps and share your location and other information with them, using Google Latitude. -
Page 58: Caring For Your Device
Getting Started Caring for your device Before restoring the device to the out of box state, back up all data to external media. You can use your Google™ account to back up all data and apps settings. To perform this process: Touch the Settings ( ) icon. -
Page 59: Chapter 2: Settings
Customizing your device’s settings You can customize the settings for the various functions on your Toshiba tablet, such as screen orientation, or sound settings. Apps and Settings menus This menu contains most of the tools you will need to customize and configure your tablet. - Page 60 Settings Customizing your device’s settings The Apps menu appears. (Sample Image) Apps menu screen The following are some of the icons you may find in the Apps menu. Icon Name Description Settings Touch to open the Settings menu. Browser Touch to open and view Web sites. Chrome Touch to open and view Google™...
- Page 61 Downloads Touch to view the Downloads application, see “Managing downloads” on page Media Player Touch to open the multimedia player, see “TOSHIBA Media Player” on page Play Books Touch to view the books that have been downloaded to your tablet.
- Page 62 Settings Customizing your device’s settings The following are some of the icons you may find in the Settings menu. Icon Name Description ® Wi-Fi Configure and manage connections to networks and ® devices via Wi-Fi , see “Wireless and networks settings” on page Sound Configure the Sound settings to set the audio for media...
- Page 63 Settings Customizing your device’s settings Access Settings from the Quick Settings menu You can open the Quick Settings menu to view and control the tablet settings you most often use, as well as access the Settings menu. Touch the Time ( ) display in the lower-right corner of the screen in the System bar.
-
Page 64: Wireless And Networks Settings
Settings Customizing your device’s settings Touch the Settings ( ) icon to open the Settings menu, and then select the setting you wish to change. The following are some of the icons you may find in the Quick Settings menu. Icon Name Description... - Page 65 Settings Customizing your device’s settings Below are some of the categories to choose from: ❖ ® ® Wi-Fi—Select to turn on Wi-Fi so you can connect to Wi-Fi networks. For more information, see “Setting up Wi-Fi® and Bluetooth® connections” on page In addition to the information described in this section, you can access the Advanced settings.
-
Page 66: Sound Settings
Settings Customizing your device’s settings Sound settings The Sound settings can be configured to set the audio for media playback, notifications, and alarms with the desired volume level and notification sounds. You can also set audible feedback when touching or locking and unlocking the screen. To change the Sound settings: Touch the Settings ( ) icon. -
Page 67: Display Settings
Settings Customizing your device’s settings Display settings You can change the Display settings for various things, such as orientation of the display or brightness level for energy conservation. To change the Display settings: Touch the Settings ( ) icon. The Settings menu appears. Touch the Display ( ) icon. -
Page 68: Location Services Settings
Settings Customizing your device’s settings ❖ Wallpaper—Select to change the wallpaper. ❖ Sleep—Displays a list of time interval settings that indicate the amount of time it takes for the screen to time-out. Using the shortest time-out period extends the battery life between charges. -
Page 69: Security Settings
Toshiba is not responsible for any losses that may occur, as a result of the inability to access your device. ❖... -
Page 70: Apps Settings
Settings Customizing your device’s settings ❖ Device administrators—Under Device administration, touch open a screen with a list of the applications you have authorized to be administrators for your tablet. This is typically an email, calendar, or other enterprise application that you granted this authority to, when you added an account hosted by an enterprise service that requires the ability to implement security policies on any devices that connect to it. -
Page 71: Accounts Settings
Settings Customizing your device’s settings (Sample Image) Apps Settings menu screen Touch item you want to change in the Apps menu. Below are some of the categories you can choose from: ❖ Downloaded—Displays a list of the applications and other software downloaded on your tablet. -
Page 72: Backup & Reset Settings
Settings Customizing your device’s settings (Sample Image) Accounts menu screen Touch the item you want to change in the Accounts menu. Below are some of the categories you can choose from: ❖ Calendar—Touch to sync your calendar with your device. ❖... - Page 73 Settings Customizing your device’s settings (Sample Image) Backup & reset menu screen Touch the item you wish to change in the Backup & reset menu. Below are some of the categories you can choose from: ❖ Back up my data—Select to back up your personal data ®...
-
Page 74: Storage Settings
Settings Customizing your device’s settings The recovery process deletes all data, restoring the tablet to its out-of-box state. Be sure to save your data to external media before executing the recovery), see “Backing up your data” on page 38.) NOTE Any system updates already installed are retained on your device. - Page 75 Settings Customizing your device’s settings (Sample Image) Language & input menu screen Touch the item you wish to change in the Language & input menu. Below are some of the categories you can choose from: ❖ Language—Select to open the Language screen, and then select your preferred language for use on your tablet.
-
Page 76: Accessibility Settings
Settings Customizing your device’s settings Accessibility settings Use the Accessibility settings to configure any plug-ins that are installed on the tablet. To change the Accessibility settings: Touch the Settings ( ) icon. The Settings menu appears. Touch the Accessibility ( ) icon. The Accessibility menu appears. - Page 77 Settings Customizing your device’s settings (Sample Image) Date & time menu screen Below are some of the categories you can choose from: ❖ Automatic date & time—Clear the selection to set the date and time manually. ❖ Automatic date & time settings—Clear the selection to set the time zone manually.
-
Page 78: About Tablet
Touch the item you wish to view in the About tablet menu. Below are some of the categories you can choose from: ❖ System updates—Select to open the Toshiba Service Station that lists the availability of operating system software updates. ❖... -
Page 79: Chapter 3: Working With Apps
Chapter 3 Working with Apps Downloading Toshiba Apps You can download Toshiba apps from the Toshiba App Place™ by touching the App Place icon. NOTE To download apps, you must be connected to the Internet. TOSHIBA Media Player The TOSHIBA Media Player is a multimedia player that allows users to experience outstanding multimedia viewing enjoyment. -
Page 80: Apps
Working with Apps Apps On the Media Player’s main screen, touch the Menu ( ) button. (Sample Image) Toshiba Media Player Settings menu screen The menu may display the following options: ❖ Playback device—Opens the list of available playback devices ❖... -
Page 81: Preinstalled Apps On Your Tablet
“Moving an item from the Home screen” on page You can install many more apps, widgets, games, etc. by visiting the Toshiba App Place™ or Google Play™ Store. Uninstalling Apps on your tablet To uninstall applications from your tablet. -
Page 82: Chapter 4: Exploring The Features On Your Device
Chapter 4 Exploring the Features on your Device Using the onscreen keyboard Your tablet comes with an onscreen keyboard. (Sample Image) Onscreen keyboard Enter text using the onscreen keyboard. Some applications open a text field that when touched, opens the onscreen keyboard allowing you to enter text. -
Page 83: Type To Enter Text
Exploring the Features on your Device Using the onscreen keyboard Type to enter text To begin typing, touch the text field in the application you are using to open the onscreen keyboard. (Sample Image) Touching a text field to type An insertion point tab ( ) appears where you touch the text field. - Page 84 Exploring the Features on your Device Using the onscreen keyboard Touch Cut ( ) or Copy ( ) in the Application bar. Touching Cut removes the selected text from the text field, but it can be pasted into another text field. Place the cursor in the text field where you want to place the text.
-
Page 85: Speak To Enter Text
Exploring the Features on your Device Using the built-in speakers ❖ Touch the Close Keyboard ( ) button when you are finished. You can change the language you want to use by touching the Input Method ( ) button, or by going to the Settings menu, see “Language &... -
Page 86: Recording Sounds
Using a microSD™ Card For detailed information regarding supported media, see the detailed specifications for your device at tabletsupport.toshiba.com. The microSD™ Card slot supports the use of microSD™ (SD™) media. This media can be used with a variety of digital products: digital music players, cellular phones, PDAs, digital cameras, digital video camcorders, etc. -
Page 87: Inserting Memory Media
Exploring the Features on your Device Using a microSD™ Card Inserting memory media When inserting memory media, do not touch the metal contacts. You could expose the storage area to static electricity, which can destroy data. To insert a microSD™ Card: Turn the media so that the contacts (metal areas) are face down. -
Page 88: Adding Optional External Devices
Exploring the Features on your Device Adding optional external devices Adding optional external devices After starting your device for the first time you may want to: ❖ ® Connect an external keyboard via the available Bluetooth settings (see “Using an external keyboard” on page 88 “Setting up Wi-Fi®... -
Page 89: Chapter 5: Utilities
NOTE The utilities described in this chapter, and the icons shown in the sample images are applicable only if the related utility is available on your system. ❖ TOSHIBA Service Station ❖ TOSHIBA File Manager Utility ❖ TOSHIBA Adaptive display... -
Page 90: Toshiba Service Station
The first time TOSHIBA Service Station is run, you will be prompted to accept the access agreement. This agreement authorizes the app to collect certain basic information about your device and send it to the Toshiba servers as part of the process of obtaining updates. -
Page 91: Check For Application Updates
Touch the Accept button (recommended) to accept the agreement or touch the Decline button to decline. NOTE The TOSHIBA Service Station app will not be able to notify you of new software and application updates if you choose to decline the agreement. -
Page 92: Downloading Updates
NOTE Connect the USB/AC adaptor before updating. Downloading updates NOTE Toshiba strongly recommends that you back up your data and settings before downloading updates. Touch the TOSHIBA Service Station ( ) icon in the Status bar when an update becomes available to display additional information about that item. -
Page 93: Toshiba File Manager Utility
Utilities TOSHIBA File Manager Utility TOSHIBA File Manager Utility Using the TOSHIBA File Manager, you can back up your data to a microSD™ Card. Insert a microSD™ Card into the microSD™ Card slot on your tablet. For more information, see “Using a microSD™... - Page 94 (Sample Image) TOSHIBA File Manager - files checked At this time you can touch individual files and folders with the grayed-out checkmarks to select them.
-
Page 95: File Browsing Screen
Utilities TOSHIBA File Manager Utility File browsing screen The available options in the File browsing screen are: ❖ Device—Internal storage and microSD™ Card are displayed. ❖ Path—The device name is displayed on the left side of the screen, and the relative path is displayed on the right. - Page 96 Utilities TOSHIBA File Manager Utility Rename files/folders To rename a file/folder: Touch and hold a file or folder to enter selecting mode. Touch the Menu ( ) icon. Select Rename from the drop-down menu. Type in the new name for the folder and touch OK.
-
Page 97: Toshiba Adaptive Display
Utilities TOSHIBA Adaptive display TOSHIBA Adaptive display The Toshiba Adaptive display provides an enhanced visual experience in varying locations and conditions. It automatically adjusts the display brightness and gamma based on ambient light. It also automatically adjusts locally stored pictures and video content... -
Page 98: Chapter 6: If Something Goes Wrong
This chapter aims to help you solve many problems by yourself. It covers the problems you are most likely to encounter. If all else fails, contact Toshiba. You will find information on Toshiba’s support services at the end of this chapter. -
Page 99: The Operating System Is Not Working
If Something Goes Wrong The operating system is not working The operating system is not working Once you are familiar with the Home screens and used to the way the operating system responds, you can easily detect if the it is not working correctly. -
Page 100: Power And The Batteries
If Something Goes Wrong Power and the batteries Power and the batteries Your device receives its power through the USB/AC adaptor and USB/power cable or from the system battery. Power problems are interrelated. For example, a faulty USB/AC adaptor or USB/power cable will neither power the device nor recharge the batteries. -
Page 101: Sound System Problems
The terms and concepts used assume a basic understanding of networks, and may be for more advanced users. If you need assistance or if you are not familiar with the terminology, please contact Toshiba. ❖ ® Your device is equipped with an internal Wi-Fi adapter. -
Page 102: If You Need Further Assistance
Before you contact Toshiba Since some problems may be related to the operating system or the program you are using, it is important to investigate other sources of assistance first. Try the following before you contact Toshiba: ❖ Review the troubleshooting information. ❖... -
Page 103: Contacting Toshiba
Toshiba’s Technical Support Web site For technical support, or to stay current on the most recent software and hardware options for your device, and for other product information, be sure to regularly check the Toshiba Web site at tabletsupport.toshiba.com Other Toshiba Internet Web sites toshiba.com... - Page 104 Spain United States The Rest of Europe Toshiba America Information Toshiba Europe (I.E.) GmbH Systems, Inc. Hammfelddamm 8 9740 Irvine Boulevard D-4-1460 Neuss Irvine, California 92618 Germany United States For more information on additional Toshiba worldwide locations, please visit: www.toshiba.co.jp/index.htm.
-
Page 105: Appendix A: Power Cord/Cable Connectors
Appendix A Power Cord/Cable Connectors Your device ships with the correct power supply for the country of purchase. This appendix shows the shapes of the typical AC power cord/cable connectors for various parts of the world. Canada UL approved CSA approved United Kingdom Europe VDA approved... -
Page 106: Glossary
Glossary TECHNICAL NOTE: Some features defined in this glossary may not be available on your device. Acronyms The following acronyms may appear in this User’s Guide. Alternating Current Apps Applications bits per second Central Processing Unit Direct Current Dots Per Inch EPROM Erasable Programmable Read-Only Memory Federal Communications Commission... - Page 107 Glossary IEEE Institute of Electrical and Electronics Engineers Input/Output interrupt request Internet Service Provider kilobyte Liquid Crystal Display Light Emitting Diode megabyte Random Access Memory Radio Frequency Interference Read-Only Memory Real-Time Clock Secure Digital Thin Film Transistor Universal Serial Bus Uniform Resource Locator Wide Area Network World Wide Web...
- Page 108 Glossary adapter—A device that provides a compatible connection between two units. For example, the tablet’s internal display adapter receives information from the software and translates it into images on the screen. An adapter can take a number of forms, from a microprocessor to a simple connector.
- Page 109 Glossary bus—An electrical circuit that connects the central processing unit (CPU) with other parts of the tablet, such as the video adapter, disk drives, and ports. It is the pathway through which data flows from one device to another. See also bus speed, frontside bus. bus speed—The speed at which the central processing unit (CPU) communicates with the other parts of the tablet.
- Page 110 Glossary cursor—An onscreen symbol (usually a flashing vertical line) that indicates the position where characters will appear when you enter data. default—The setting selected by a program when the user does not specify an alternative setting. device—A component attached to the tablet. Devices may be external (outside the tablet’s case) or internal (inside the tablet’s case).
- Page 111 Glossary extension—See file extension. external device—See device. file—A collection of related information, saved on disk with a unique name. A file may be a program, information used by a program, or a document. See also document. file name—A set of characters that uniquely identifies a file within a particular folder.
- Page 112 Glossary icon—A small image displayed on the screen that represents a function, file, or program. interlaced—A method of refreshing the display screen, in which only every other line of pixels is refreshed. Interlaced screens take two passes to create a complete screen image. Compare non-interlaced. internal device—See device.
- Page 113 Glossary network—A collection of computers and associated devices that are connected by communications facilities. A network allows you to share data and peripheral devices, such as printers, with other users and to exchange electronic mail. non-interlaced—A method of refreshing the tablet screen, in which each pixel of every line is refreshed as the electron beam scans across and down the screen.
- Page 114 Glossary Read-Only Memory—See ROM. reboot—See boot, restart. removable disk—A disk that can be removed from a disk drive. A Flash drive is one example of a removable disk. resolution—A measure of the sharpness of the images that can be produced by a printer or displayed on a screen. For a printer, resolution is expressed in dots per inch (dpi).
- Page 115 Glossary Transfer—To move files or data from one location to another. unmount—To prepare the external storage media for removal from the device. upload—To send a file to another computer through a modem or network. See also download. utility—A computer program designed to perform a narrowly focused operation or solve a specific problem.
-
Page 116: Index
86 add an account 54 backing up data 21 managing 54 Google™ Account 39 remove an account 55 TOSHIBA File Manager 39 Accounts settings 71 Backup & reset settings 72 adding automatic restore 73 optional external devices 88... - Page 117 Index care 28 backing up 21 charging 27 restoring 39 maintaining 29 date & time optimizing battery life 28 settings 76 safety precautions 28 date & time settings taking care of 28 automatic date & time 77 Bluetooth® Select date format 77 wireless &...
- Page 118 Index keyboard 88 adding items 48 mouse 88 icons 41 ports 88 moving items 48 external headphones removing items 48 using 85 Home screens external speakers customizing 48 using 85 icon factory data reset 57 Battery status 40 features 19 Browser 60 features and components 22 Calculator app 61...
- Page 119 44 GPS 68 viewing new 45 location for Google 68 settings 68 online resources wireless networks 68 Toshiba 21 onscreen keyboard maintaining your battery 29 speak to text 85 Make passwords visible typing 83 security 69 using 82...
- Page 120 Make passwords visible 69 recording sounds 86 owner info 69 recovery Screen lock 69 factory data reset 57 settings 69 registering your Toshiba device 38 Select date format Removing date & time settings 77 Folders 48 select language restoring your data 39 language &...
- Page 121 53 downloading apps 79 waking the tablet 37 Toshiba Apps Place sound Media Player 79 settings 66 TOSHIBA File Manager Utility sound settings create folders 96 Default notification 66 file browsing 95 Screen lock sound 66 files/folders 95 Touch sounds 66...
- Page 122 Index Touch & hold delay TOSHIBA Service Station 90 Accessibility settings 76 touch screen navigation Voice Search onscreen 42 language & input settings 75 Touch sounds volume sound settings 66 sound settings 66 troubleshooting 100 bookmarked site not found 99...