Jabra PRO 930 User Manual
Headphones
Hide thumbs
Also See for PRO 930:
- Quick start manual (35 pages) ,
- User manual (30 pages) ,
- Application notes (12 pages)
Table of Contents
Advertisement
Advertisement
Table of Contents

Related Manuals for Jabra PRO 930


Summary of Contents for Jabra PRO 930
- Page 1 Jabra PRO™ 930 User Manual User Manual www.jabra.com www.jabra.com...
-
Page 2: Table Of Contents
CONNECT POWER SUPPLY TO BASE ..................12 DOCK THE HEADSET ........................13 JabRa PC sUIte ................... 14 INSTALL JABRA PC SUITE .......................14 SET JABRA PRO 930 AS SPEAKER AND mICROPHONE ..........14 FIRmWARE UPDATES ........................14 JabRa PRo 930 FeatURes .............. 15 HEADSET mULTI-FUNCTION BUTTON .................15 HEADSET SPEAKER VOLUmE BUTTONS ................15... - Page 3 LISTENING TO mUSIC ........................22 HOW TO CHANGE ADVANCED SETTINGS .................23 HOW TO RESET ADVANCED SETTINGS ................24 COPY SETTINGS TO mULTIPLE JABRA PRO 930 BASES ..........25 7.10 FORCED PAIRING (PAIRING A NEW PRImARY HEADSET) .........25 sUPPoRt ....................26 FAQS AND TROUBLESHOOTING ....................26 teChnICaL sPeCIFICatIons ............
-
Page 4: Welcome
1. WELCOmE Congratulations on purchasing your new Jabra PRo 930. We are sure you will enjoy its wide range of features, and find the headset comfortable to wear and easy to use. Jabra PRO 930 headset features • Compatible with PC and Mac. -
Page 5: Product Overview
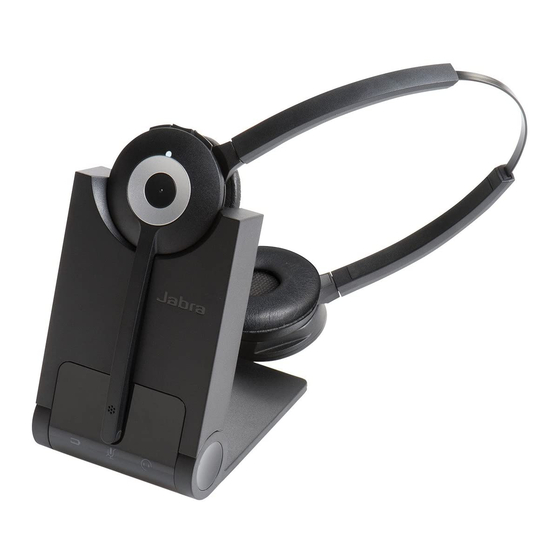
2. PRODUCT OVERVIEW 2.1 PACKAGE CONTENTS headset Power adapter base Usb cable headband attachment earhook attachment (not supplied in all regions) -
Page 6: Headset Overview
2.2 HEADSET OVERVIEW speaker volume up button Mute button speaker volume down button LeD indicator Multi-function button Microphone boom arm speaker Mount for wearing-style attachments Recharge contact noise-cancelling microphone... -
Page 7: Headset Attachments
Jabra PRo 930 headset can be worn in three different wearing-styles: headband, earhook or neckband. the headband and earhook attachments (earhook not supplied in all regions) are included with the Jabra PRo 930. the neckband attachment can be purchased separately. - Page 8 Attaching the neckband (optional accessory) CLICK...
-
Page 9: Base Overview
2.4 BASE OVERVIEW headset cradle headset recharge contact audio link indicator Foldable base stand Mute indicator battery indicator speaker Usb port Power adapter port... -
Page 10: Optional Accessories
2.5 OPTIONAL ACCESSORIES the following Jabra PRo accessories are available separately. Visit jabra.com for full accessory overview. Replacement headband attachment neckband attachment Replacement earhook, with earbuds Replacement ear cushions... -
Page 11: Connecting To A Pc
Refer to the Warning and Declaration guide for important safety instructions prior to installation and use of the Jabra PRo 930. 3.1 FOLDABLE BASE STAND the Jabra PRo 930 base stand can be folded into three positions: open, closed and standing position, as illustrated. CLICK... -
Page 12: Connect To Pc
3.2 CONNECT TO PC 1. Plug the Usb cable to the port marked on the base. 2. Connect the Usb cable to any free Usb port on the PC. 3.3 CONNECT POWER SUPPLY TO BASE 1. Plug the power adapter into the port marked on the base. -
Page 13: Dock The Headset
3.4 DOCK THE HEADSET Dock the headset with the base Dock the headset. When docked correctly the headset battery will begin charging, if needed. Charge for 20 minutes or until the battery indicator on the base is steady green. -
Page 14: Jabra Pc Suite
4.2 SET JABRA PRO 930 AS SPEAKER AND mICROPHONE before first time use of the Jabra PRo 930, it is important to set the Jabra PRo 930 as speaker and microphone in the audio configuration section of your softphone software (e.g. skype). Refer to specific softphone documentation for assistance in setting audio configurations. -
Page 15: Jabra Pro 930 Features
5. JABRA PRO 930 FEATURES 5.1 HEADSET mULTI-FUNCTION BUTTON the multi-function button can answer calls and end calls using a combination of taps, double-taps or presses. Multi-function button Press and Double- Function hold (1-3 seconds) answer incoming call ... -
Page 16: Headset Mute Button
5.3 HEADSET mUTE BUTTON the mute button mutes or un-mutes the headset microphone. Mute button 5.4 HEADSET LED INDICATOR the LeD indicator indicates call status. Led indicator LED sample LED sample Headset state Headset state (click to view) (click to view) headset docked in Connected base... -
Page 17: Headset Audio Indicators
5.5 HEADSET AUDIO INDICATORS the headset plays a variety of voice announcements and audio tones to indicate headset status and actions. Audio Sample Audio sample Audio tones Audio tones (click to listen) (click to listen) Microphone Power on muted Power off Call ended button tap battery low... -
Page 18: Base Visual Indicators
5.6 BASE VISUAL INDICATORS the Jabra PRo 930 base has three LeDs to indicate battery level, call status and events. Icon Event battery charging (slow flash) Full battery Medium battery Low battery Very low battery (fast flash) sleep mode (slow flash) -
Page 19: Basic Call Management
6. BASIC CALL mANAGEmENT 6.1 mAKING CALLS, ANSWERING CALLS AND ENDING CALLS (SUPPORTED SOFTPHONES ONLY) Action 1. Lift headset from docking cradle, or tap the multi-function button. Make call 2. Dial number using softphone application. Lift headset from docking cradle, or tap the multi-function answer call button. -
Page 20: Conference Call With Multiple Headsets
6.3 CONFERENCE CALL WITH mULTIPLE HEADSETS the Jabra PRo 930 is able to pair with four headsets in total for conferencing: one primary and three secondary headsets (narrowband only). Connect secondary headset 1. While the primary headset is undocked and on a call, dock the secondary headset with the base hosting the call. -
Page 21: Advanced Jabra Pro 930 Features
If the headset remains out of range of the base for more than an hour, the headset will power down to conserve battery. 7.3 CHANGE RINGTONE the Jabra PRo 930 has 5 ringtones to select from. the ringtones will play in the headset and the base. to change ringtone see section 7.7. -
Page 22: Power Management
Auto sleep mode auto sleep mode can be enabled using the Jabra PRo 930 base (see section 7.7). auto sleep mode is off by default. When enabled, the Jabra PRo 930 will automatically enter sleep mode after 8 hours of inactivity, as indicated by the battery indicator slow flashing blue. -
Page 23: How To Change Advanced Settings
7.7 HOW TO CHANGE ADVANCED SETTINGS six advanced settings can be configured using the base. Voice prompts indicate the current setting and value. the six settings are: • Mute reminder tone. • Ringtone. • base ringtone volume. • audio protection. • Wireless range. • auto sleep mode. 1 Start setup mode setUP • Put on the headset. - Page 24 high Medium (default) base ringtone volume flash x3 Peakstop (default) audio protection Peakstop and flash x4 Intellitone normal range (default) Wireless Range Low range flash x5 Very low range off (default) auto sleep mode flash x6 3 End setup mode GooDbYe When finished, simultaneously press and hold both headset volume buttons until the voice...
-
Page 25: How To Reset Advanced Settings
LeD flashes and then release. 7.10 FORCED PAIRING (PAIRING A NEW PRImARY HEADSET) It is possible to force the Jabra PRo 930 to pair with a new headset, even when it is currently paired with another headset. 1. Dock the new headset in the base. -
Page 26: Support
Q Why can I not hear sound or listen to music from my PC in my headset? a Check the following • ensure the Jabra PRo 930 is set as the current audio device in Windows sound and audio Devices control panel, and in your softphone software. - Page 27 Q What is the range on the Jabra PRO 930? a Jabra PRo 930 supports a maximum range of up to 120 m (base to headset). Range will vary depending on the environment the headset is used.
-
Page 28: Technical Specifications
(Cat - iq) european DeCt and U.s. DeCt. DECT range: For european DeCt; up to 120 meters from Jabra PRo 930 base to headset. For U.s. DeCt; up to 350 feet from Jabra PRo 930 base to headset. DECT frequencies: Us DeCt: 1.92 - 1.93 Ghz. -
Page 29: Headset Battery
9.2 HEADSET BATTERY Battery type: Lithium Ion-polymer. Battery capacity: 295 ma/h, typical. Battery talk time: Up to 8 hours. Battery lifetime: Minimum 1000 charge cycles. Battery standby time: at least 36 hours. Operating temperature range: -20˚C to +60˚C. the headset features a temperature-dependant charging algorithm that prevents the battery from being charged during extreme temperatures (below 0˚... -
Page 30: Jabra Pro 930 Base
9.4 JABRA PRO 930 BASE the Jabra PRo 930 base meets the following specifications. Dimensions: 118 mm x 76 mm x 29 mm. Wireless standard: (Cat - iq) european DeCt and U.s. DeCt. Operating environment: 0˚C to +40˚C; Up to 95% Rh non-condensing. -
Page 31: Certifications And Safety Approvals
Users are not permitted to make changes or modify the device in any way. Changes or modifications not expressly approved by Jabra will void the user’s authority to operate the equipment. this equipment has been tested and found to comply with the limits for a Class b digital device, pursuant to part 15 of the FCC Rules. - Page 32 Industry Canada operation is subject to the following two conditions: (1) this device may not cause interference and (2) this device must accept any interference, including interference that may cause undesired operation of the device. the term “IC:” before the certification/registration number only signifies that registration was performed based on a Declaration of Conformity indicating that Industry Canada technical specifications were met.
- Page 33 © 2013 Gn netcom a/s. all rights reserved. Jabra is a registered ® trademark of Gn netcom a/s. all other trademarks included herein are the property of their respective owners. (Design and specifications subject to change without notice). MaDe In ChIna type: Whb003 www.jabra.com...