Advertisement
Model No. HRCR28720
Serial No.
The serial number can be found in
the location shown below. Write the
serial number in the space above.
Serial
Number
Decal
QUESTIONS?
We are committed to providing
complete customer satisfac-
tion. If you have questions, or
if there are missing parts, we
will guarantee complete satis-
faction through direct assis-
tance from our factory.
TO AVOID DELAYS, PLEASE
CALL DIRECT TO OUR TOLL-
FREE CUSTOMER HOT LINE.
The trained technicians on our
customer hot line will provide
immediate assistance, free of
charge to you.
CUSTOMER HOT LINE:
1-800-999-3756
Mon.–Fri., 6 a.m.–6 p.m. MST
CAUTION
Read all precautions and instruc-
tions in this manual before
using this equipment. Save this
manual for future reference.
USER'S MANUAL
Visit our website at
www.healthrider.com
new products, prizes,
fitness tips, and much more!
Patent Pending
Advertisement
Table of Contents

Related Manuals for Healthrider HRCR28720


Summary of Contents for Healthrider HRCR28720
- Page 1 Model No. HRCR28720 Serial No. The serial number can be found in the location shown below. Write the serial number in the space above. Serial Number Decal QUESTIONS? We are committed to providing complete customer satisfac- tion. If you have questions, or...
-
Page 2: Table Of Contents
IMPORTANT PRECAUTIONS WARNING: To reduce the risk of serious injury, read the following important precau- tions before using the HealthRider 1. Read all instructions in this manual before using the AEROBIC RIDER 2. 2. It is the responsibility of the owner to ensure that all users of the AEROBIC RIDER 2 are adequately informed of all precautions. -
Page 3: Before You Begin
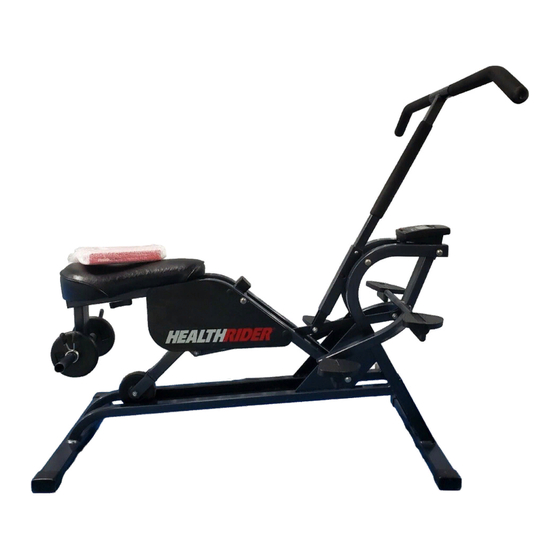
The model number is HRCR28720. The serial number can be found on a decal attached to the AEROBIC RIDER 2 (see the front cover of this manual). -
Page 4: Assembly
ASSEMBLY Before beginning assembly, carefully read the following information and instructions: • Assembly requires two persons. • Place all parts in a cleared area and remove the packing materials; do not dispose of the packing materials until assembly is completed. •... - Page 5 1. Before beginning assembly, make sure that you have read and understand the information on page 4. Attach one of the Stabilizers (31) to the Main Frame (1) with two M6 x 60mm Bolts (53), two M6 Flat Washers (55), and two M6 Hex Nuts (54). 2.
- Page 6 5. Push the Magnet Bracket (36) into the hole in the Pedal Frame (4). Lubricate a Frame Axle (13). Attach the Pedal Frame (4) to the Main Frame (1) with the Frame Axle (13), two Rubber Washers (51), and two Axle Fasteners (56).
- Page 7 9. Depress the two buttons on the sides of the Handlebar Assembly (6) with your thumb and fore- finger. Insert the Handlebar Assembly (6) into the Handlebar Swing Arm (5). Make sure that the but- tons protrude through one of the two sets of holes in the Handlebar Swing Arm.
-
Page 8: Adjustment And Operation
ADJUSTMENT AND OPERATION DESCRIPTION OF THE MONITOR The monitor offers four modes to provide you with instant exercise feedback: • Reps/Min—This mode displays your current pace, in repeti- tions per minute. • Time—This mode displays the length of time you have exercised. - Page 9 PROPER EXERCISE FORM The following tips are provided to help you get the most from your exercise routine: • Always start each exercise session in the standard workout position to warm up. • You should be able to feel yourself pivot or bend from the hip, not from the back.
- Page 10 TOES STRAIGHT Place the ball of each foot in the middle of each pedal. Push with your toes pointed forward, then pull your feet back with toes up and heels down. This tones the lower legs. Start with just a few minutes per session and gradual- ly increase with each workout.
-
Page 11: Maintenance And Trouble-Shooting
MAINTENANCE AND TROUBLE-SHOOTING Inspect and tighten all parts of the AEROBIC RIDER 2 regularly. The AEROBIC RIDER 2 can be cleaned with a soft, damp cloth; do not use solvents. To prevent damage to the monitor, keep liquid away from the monitor and keep the monitor out of direct sunlight. -
Page 12: Conditioning Guidelines
CONDITIONING GUIDELINES The following general guidelines will help you to plan your exercise program. Remember that proper nutri- tion and adequate rest are essential for successful results. WARNING: Before beginning this or any exercise program, consult your physi- cian. This is especially important for persons over the age of 35 or persons with pre-exist- ing health problems. - Page 13 Training zone exercise, consisting of 20 to 30 min- utes of exercising with your heart rate in your training zone. (See the chart on page 12 to find your training zone.) A cool-down, with 5 to 10 minutes of stretching. Thorough stretching offsets muscle contractions and other problems caused when you stop exercising sud- denly.
-
Page 16: How To Order Replacement Parts
• The PART NUMBER of the PART (see pages 14 and 15) • The DESCRIPTION of the PART (see pages 14 and 15) HealthRider is a registered trademark of ICON Health & Fitness, Inc. ICON Health & Fitness, Inc. (ICON), warrants this product to be free from defects in workmanship and material, under normal use and service conditions, for a period of ninety (90) days from the date of pur- chase.