Table of Contents
Advertisement
Quick Links
For model:
AV-61S902
PROJECTION TELEVISION
USER'S GUIDE
IMPORTANT NOTE TO THE CUSTOMER
In the space below, enter the serial number for your television (located at the rear of the
television cabinet). Staple your sales receipt or invoice to the inside cover of this guide.
Keep this user's guide in a convenient place for future reference. Keep the carton and original
packaging for future use.
Serial Number
Advertisement
Table of Contents

Related Manuals for JVC AV-61S902


Summary of Contents for JVC AV-61S902
- Page 1 For model: AV-61S902 PROJECTION TELEVISION USER'S GUIDE IMPORTANT NOTE TO THE CUSTOMER In the space below, enter the serial number for your television (located at the rear of the television cabinet). Staple your sales receipt or invoice to the inside cover of this guide.
-
Page 2: Important Safety Precautions
AV-61S902(E) 1/12/01 3:15 PM Page 2 IMPORTANT SAFETY PRECAUTIONS IMPORTANT SAFEGUARDS CAUTION RISK OF ELECTRIC SHOCK CAUTION: DO NOT OPEN Please read and retain for your safety. CAUTION:To reduce the risk of electric shock. Do not remove cover (or back). - Page 3 AV-61S902(E) 1/12/01 3:15 PM Page 3 6 If an outside antenna is connected to the TV set, be sure the 13 For added protection of the TV set during a lightning storm or antenna system is grounded so as to provide some protection when the TV set is to be left unattended for an extended peri- against voltage surges and built-up static charges.
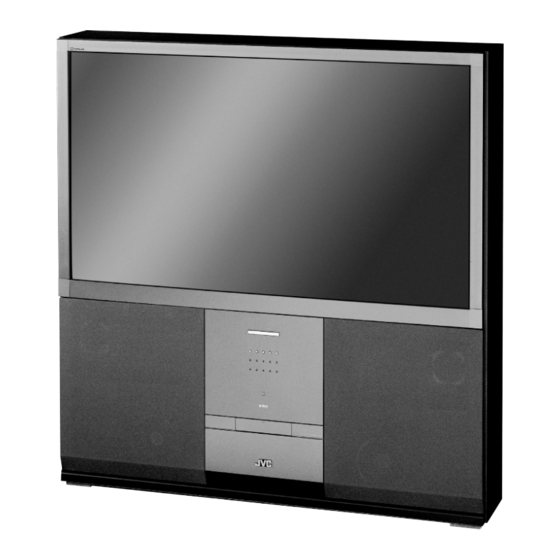
- Page 4 AV-61S902(E) 1/12/01 3:15 PM Page 4 Welcome... Thank you for purchasing JVC’s model AV-61S902 “D’Ahlia” HDTV-ready projection television which uses the high-quality D-ILA projection system. The D’Ahlia is one of the highest quality and most technologically advanced televisions available today.
- Page 5 AV-61S902(E) 1/12/01 3:15 PM Page 5 3. The lamp is a consumable item Replace the lamp when it has blown or when the pictures becomes dark. The lamp is a user-replaceable item. The lamp must be recycled. For a detailed explanation of how to recycle the lamp, refer to Appendix B and the instruction that are included with the replacement lamp kit.
-
Page 6: Table Of Contents
AV-61S902(E) 1/12/01 3:15 PM Page 6 Table of Contents Introduction..8 Menu Functions (Continued) Notes About Untrated Programs ..35 Watching television ..........9 Warning Message ......35 Connections Set Lock Code ........35 Connections Checklist ........10 Initial Setup 2 Audio/Video Connectors ........10... - Page 7 AV-61S902(E) 1/12/01 3:15 PM Page 7 Table of Contents Button Functions Split ..............50 Swap ..............50 Freeze ..............50 Menu ..............51 Exit ..............51 Display ..............51 Sleep Timer ............51 BBE ..............52 Sound ..............52 Muting ..............52 Video Status ............52 Natural Cinema ..........52 Aspect ..............52 Number Buttons-10 Key Pad ......53...
-
Page 8: Introduction
AV-61S902(E) 1/12/01 3:15 PM Page 8 Introduction After removing the product from the box, use the following procedure to prepare the television. 1 Check the accessories Check that nothing is missing. Television Remote Control Two AA Batteries 2 Prepare the remote control 1) Refer to page 21 and insert the batteries. -
Page 9: Watching Television
AV-61S902(E) 1/12/01 3:15 PM Page 9 Introduction Watching television ON TIMER POWER POWER MENU - VOLUME + - CHANNEL + OPERATE Ten LED POWER ON (STARTING UP) In order to control the television with the remote control, set the TV/CATV switch to TV.Press the P button. -
Page 10: Connections
Read the jack panels, they are all labeled. 6) The AV Compu Link Cable is supplied with certain JVC devices. If you have a JVC Compu Link VCR or other piece of equipment, but don’t have an AV Compu Link cable, contact your local JVC dealer. -
Page 11: Front Panel Diagram
AV-61S902(E) 1/12/01 3:15 PM Page 11 Connections Front Panel Diagram How to open the Front door OVER S-VIDEO AUDIO VIDEO L / MONO INPUT4 Rear Panel Diagram INPUT-5 DIGITAL IN S-VIDEO INPUT OVER OVER OVER VIDEO SPLIT MONO MONO MONO... -
Page 12: Cable And Vcr Connections
Diagram #3. Please note: In the following diagrams, only the portion of the AV-61S902’s rear panel jacks that will be used for the connection described will be shown. For an illustration of the complete rear panel, please see page 11. -
Page 13: S-Video Connection
AV-61S902(E) 1/12/01 3:15 PM Page 13 Connections Diagram #2 INPUT SPLIT Yellow INPUT White ( VHF / UHF ) S-VIDEO OVER OVER OVER VIDEO MONO MONO MONO AUDIO INPUT 3 INPUT 2 INPUT 1 1) Connect a coaxial cable out from the cable TV wall outlet or external antenna into the RF Input A. - Page 14 AV-61S902(E) 1/12/01 3:15 PM Page 14 Connections Diagram #3 CABLE INPUT SPLIT Yellow INPUT White ( VHF / UHF ) S-VIDEO OVER OVER OVER VIDEO MONO MONO MONO AUDIO INPUT 3 INPUT 2 INPUT 1 1) Connect a coaxial cable out from the cable TV wall outlet or external antenna into the RF Input A.
-
Page 15: Dtv Decoder Connection
(Audio or Video) before starting the other to avoid accidentally switching the cables. * Notes About HDTV Operation The AV-61S902 can display 480p, 480i and 1080i signal formats using the Component Video Inputs. It cannot display either 720p or 1080p signals. - Page 16 AV-61S902(E) 1/12/01 3:15 PM Page 16 Connections DTV Decoder Connection <When connecting a DTV decoder which has a copy-protect Digital-Out terminal> By inputting a High-band with Digital Content Protection high-definition picture source to the Digital-In terminal of this television, high-definition pictures can be displayed on the screen in their digital form. (This terminal is for use in the future when High-band with Digital Content Protection DTV decoders and DVD players and D-VHS are put on the market.)
-
Page 17: Dvd Player Connection
AV-61S902(E) 1/12/01 3:15 PM Page 17 Connections DVD Player Connection You can use the Component Video input jacks to connect a DVD player to your television. To connect a DVD play- er, please follow the steps listed below. S-VIDEO OVER... -
Page 18: Av Compu Link
• AV COMPU LINK EX is compatible with the following receivers: RX-664V, RX-665V, RX-668VBK, RX-774V, RX-778VBK, RX-884V, RX-888VBK, RX-1024V, RX-1028VBK, and later receiver models. • The AV-61S902 can also receive Compu-Link signals from a DVD player. For details on operating a DVD player with AV Compu Link, please see your DVD player’s owners manual. -
Page 19: Front Panel Inputs
Front Panel Inputs A set of inputs (Input-4) are provided for your convenience on the front panel of the AV-61S902. The inputs are located behind the door at the center of the front panel below the indicator lights. These inputs are designed for the easy connection of devices like camcorders or game consoles which are not permanent parts of your home entertainment center. -
Page 20: Home Theater
Home Theater The AV-61S902 is designed to be the center of a home theater system. The AV-61S902 features a 50 Watt built-in amplifier with output jacks for up to four speakers (2 front, 2 rear-surround). The diagram below shows the con- nections and general speaker placement for a typical Surround-Sound home theater connection. -
Page 21: Remote Control
BBE VIDEO STATUS SOUND LIGHT RM-C308 - To move rapidly through the channels using JVC’s Hyperscan feature, press and hold MUTING V CHIP + or C –. The channels will zip by at a rate of five channels per second. -
Page 22: Remote Programming
AV-61S902(E) 1/12/01 3:23 PM Page 22 Remote Programming Setting the CATV, VCR and DVD Codes You can program your remote to operate your cable box, satellite receiver, VCR or DVD player by using the instructions and codes listed below. If the equipment does not respond to any of the codes listed below or to the code search function, use the remote control supplied by the manufacturer. -
Page 23: Vcr Setup
AV-61S902(E) 1/12/01 3:23 PM Page 23 Remote Programming VCR setup The remote control is programmed with VCR codes for power on, power off, play, stop, fast-forward, rewind, pause, record, channel up, and channel down operation. 1) Find the VCR brand from the list of codes shown below. -
Page 24: Dvd Setup
AV-61S902(E) 1/12/01 3:23 PM Page 24 Remote Programming DVD setup The remote control is programmed with DVD codes for power on, power off, play, stop, fast-forward, rewind, previous chapter, next chapter, tray open/close, and still/pause operation. 1) Find the DVD player brand from the list of codes shown below. -
Page 25: Search Codes
AV-61S902(E) 1/12/01 3:23 PM Page 25 Remote Programming Search Codes Cable/Satellite Search Codes Function: 1) Slide the 2-Way Mode Selector switch to CATV. 2) Press the TV P and R + buttons. Hold for at least three seconds and release. -
Page 26: Onscreen Menus
Onscreen Menus The Onscreen Menu System The AV-61S902 comes with JVC’s Onscreen Menu System. The Onscreen Menus let you make adjustments to your television’s operation simply and quickly. Examples of the Onscreen Menus are shown below and on the next page. Detailed explanations on using each menu follow later in this guide. -
Page 27: Using The Onscreen Menus
AV-61S902(E) 1/12/01 3:23 PM Page 27 Onscreen Menus INITIAL SETUP INITIAL SETUP PREVIOUS PREVIOUS LANGUAGE FRE SPA AUTO TUNER SETUP CLOSED CAPTION ANTENNA INPUT-A INPUT-B VERTICAL POSITION CHANNEL SUMMARY V-CHIP SET LOCK CODE NEXT PAGE NEXT PAGE SELECT EXIT BY... -
Page 28: Plug In Menu
AV-61S902(E) 1/12/01 3:23 PM Page 28 Plug In Menu Plug In Menu The first time you turn on your television, you will see the PLUG IN MENU. This menu is designed to help you get your television ready to watch right away. This menu includes some of the most important settings for the operation of your television, including onscreen display language, AUTO TUNER SETUP and setting the internal clock. -
Page 29: Auto Tuner Setup
The AV-61S902 has two RF signal inputs with can be setup independent of each other. For example, you can set one input up to receive signals from an antenna and the other to receive signals from a satellite dish. -
Page 30: Set Clock
SET CLOCK The AV-61S902 is equipped with its own internal clock. The clock is used to run the televisions timer features. The clock MUST be set before you can use any of the timer features. Your television features the XDS AUTO CLOCK set feature which makes setting the correct time simple. -
Page 31: Initial Setup
AV-61S902(E) 1/12/01 3:27 PM Page 31 Initial Setup Initial Setup Menu While the PLUG IN MENU will help you get your television ready to watch right away, the INITIAL SETUP menu gives you access to many built-in functions to help you customize your television to meet your personal viewing tastes. -
Page 32: Channel Summary
AV-61S902(E) 1/12/01 4:54 PM Page 32 Initial Setup CHANNEL SUMMARY CHANNEL SUMMARY lets you customize the list of channels set after you run AUTO TUNER SETUP. You may delete unwanted channels or add channels that are new, or were not picked up by AUTO TUNER SETUP because of weak signals. -
Page 33: V-Chip
AV-61S902(E) 1/12/01 4:03 PM Page 33 V-Chip V-Chip Your TV is equipped with V-Chip technology which enables TV Parental Guideline and Movie (MPAA) Guideline controls. V-Chip technology allows you to program your TV to receive, or not to receive, programs based on content according to the guidelines. -
Page 34: Set Ratings Guidelines
AV-61S902(E) 1/12/01 4:03 PM Page 34 V-Chip Set Ratings Guidelines You can set your V-Chip to automatically block programming above a certain level using either the television or motion picture ratings systems, or both. If a program contains a rating above the levels you set, it will auto- matically be blocked from viewing unless the four-digit lock code is entered. -
Page 35: Unrated Programs
AV-61S902(E) 1/12/01 4:03 PM Page 35 V-Chip Unrated Programs You have the choice of allowing programs without a rating signal to be shown or to have unrated programs 5∞ arrows to move to UNRATED in the V-CHIP menu. Use the blocked. -
Page 36: Initial Setup
AV-61S902(E) 1/12/01 4:03 PM Page 36 Initial Setup Initial Setup 2 This menu lets you set up some of the functions of the television to meet your personal tastes and needs. You may select one of three languages for onscreen displays, turn closed captioning ON or OFF, adjust an image’s vertical position, automatically enhance the picture quality of certain broadcasts, or adjust the size of... -
Page 37: Vertical Position
AV-61S902(E) 1/12/01 4:03 PM Page 37 Initial Setup Closed Caption - Continued A new CLOSED CAPTION menu will now appear. The Mode option CLOSED CAPTION will be highlighted. This lets you set the operating mode for the CLOSED CAPTION feature. You can set it to: CLOSED CAPTION -... -
Page 38: Picture Adjust
AV-61S902(E) 1/12/01 4:03 PM Page 38 Picture Adjust Picture Adjust The PICTURE ADJUST menu lets make precise adjustments to the television’s picture. You can make adjust- ments to the picture’s tint, color, contrast, brightness, and level of detail. By adjusting these levels individually, the overall picture quality can be changed. -
Page 39: Picture
AV-61S902(E) 1/12/01 4:03 PM Page 39 Picture Adjust Picture Adjust - Continued PICTURE The PICTURE level adjusts the contrast, or range between black and white in the picture. Press decrease the range between the blacks and whites in the picture. Press to increase the range. -
Page 40: Ynr
AV-61S902(E) 1/12/01 4:03 PM Page 40 Picture Adjust Picture Adjust 2 The second PICTURE ADJUST menu lets make further adjustments to the television’s picture and display quali- ties. The YNR and DNR noise filters will help improve image quality, noise muting will eliminate static from channels with weak signals or that are not broadcasting, and SET VIDEO STATUS will allow you to program a set of image adjustments that meet your own personal tastes. -
Page 41: Noise Muting
AV-61S902(E) 1/12/01 2:11 PM Page 41 Picture Adjust NOISE MUTING The NOISE MUTING setting inserts a blue screen over any channels that are not broadcasting or have signals to weak to have clear signals. Press the arrows to turn NOISE MUTING on or OFF. -
Page 42: Sound Adjust
AV-61S902(E) 1/12/01 4:06 PM Page 42 Sound Adjust Sound Adjust The SOUND ADJUST menu lets you tailor the television’s sound to suit your personal taste. You can adjust the television’s bass and treble output, as well as the speaker balance. You can also choose to receive broadcasts either stereo or mono sound, or listen to a Second Audio Program (SAP), if one is broadcast. -
Page 43: Mts (Multi-Channel Tv Sound)
AV-61S902(E) 1/12/01 4:06 PM Page 43 Sound Adjust Sound Adjust - Continued STEREO MONO Many broadcasts today contain more than one audio signal. In addition to stereo and mono soundtracks, some broadcasts also contain a second soundtrack in a different language. Use MTS to select the audio signal you wish to listen to. -
Page 44: Initial Setup
AV-61S902(E) 1/12/01 4:06 PM Page 44 Initial Setup INITIAL SETUP PREVIOUS SUPER BASS HIGH TV SPEAKER NEXT PAGE SELECT EXIT BY OPERATE BY EXIT INITIAL SETUP Menu Access the onscreen menus by pressing M on your remote control. You may then either use the up and down arrows 5∞... -
Page 45: Audio Settings
Audio Settings Sound Mode The sound system of the AV-61S902 lets you customize the audio output of the television for optimal performance with your home theater system. All AV-61S902 feature Dolby Surround and Dolby Pro Logic technology for unparalleled sound quality. - Page 46 AV-61S902(E) 1/12/01 4:06 PM Page 46 Audio Settings Settings for when 2 additional speakers are used to enjoy Dolby Surround sound (Only the surround speakers are connected) Use the 5 and∞ arrows in the sound mode menu to select Dolby Pro Logic. Press the arrow to display the Dolby Pro Logic second menu.
-
Page 47: Pro Logic 3D-Phonic
AV-61S902(E) 1/12/01 4:06 PM Page 47 Audio Settings Pro Logic 3D-Phonic You can enjoy the atmosphere of Dolby Surround programs without external speakers. Use the 5 and∞ arrows in the sound mode menu to select PRO LOGIC 3D-PHONIC. Press the arrow to display the Pro Logic 3D-Phonic second menu. -
Page 48: Clock/Timers
AV-61S902(E) 1/12/01 4:06 PM Page 48 CLOCK/TIMERS CLOCK/TIMERS This CLOCK/TIMERS menu can be used to set the time of the built-in clock and set the ON/OFF TIMER func- tion. Access the on-screen menus by pressing the MENU button on CLOCK/TIMERS your remote control. -
Page 49: Aspect
Your television can display images in one of four aspect ratios. The aspect ratio is the ratio of image width to height as displayed on the screen. The AV-61S902 has a “wide screen” with an aspect ratio of 16:9. A traditional television picture has an aspect ratio of 4:3. Since you will likely view programs from several different ratios, this feature will help you adjust your picture image to match, giving you the best possible picture quality. -
Page 50: Button Functions
AV-61S902(E) 1/12/01 4:06 PM Page 50 Button Functions Split Activate the Split-Screen option by pressing S on the remote control. PLIT MAIN CHANNEL SPLIT-SCREEN PICTURE PICTURE SPLIT-SCREEN Mode Two channels (or input) will now appear onscreen. The channel (or input) you were watching before pressing will appear on the left, the new channel will appear on the right. -
Page 51: Menu
AV-61S902(E) 1/12/01 2:22 PM Page 51 Button Functions Menu The M button allows you to access JVC’s onscreen menu system. Press M to activate the onscreen menu system. • See individual topics (like “Picture Adjust”) for specific information on using those menu screens. -
Page 52: Bbe
AV-61S902(E) 1/12/01 2:13 PM Page 52 Button Functions BBE high definition audio adds natural, clear, extraordinary sound quality to any program. Use the BBE button to turn the BBE high definition audio filter ON or OFF. Sound Press the S button to access the Dolby Sound settings menu. -
Page 53: Number Buttons-10 Key Pad
AV-61S902(E) 1/12/01 4:10 PM Page 53 Button Functions Number Buttons - 10 Key Pad Use the number buttons on the remote control to move directly to a specific channel. For example, to move to channel 7: 0 (Zero) 7 (Seven) 100+ Button Use the 100+ button to directly access channels above Channel 99. -
Page 54: Input
AV-61S902(E) 1/12/01 4:10 PM Page 54 Button Functions Input The AV-61S902 can receive signals from a variety of sources. Use the I button NPUT INPUT to select the signal source: Antenna (for signals from the RF coaxial cable) or A 01 VIDEO 1 through VIDEO 4 (for signals from an audio/video device like a DVD player or VCR) or DIGITAL-IN. -
Page 55: Vcr Buttons
TV /VCR, power on, and power off. Move the selector switch to VCR to operate. • The remote is preset with the code 000 to control JVC-brand VCR’s. For any other manufacturer’s brand VCR, please see the code chart and instructions on page 23. -
Page 56: Troubleshooting
AV-61S902(E) 1/12/01 4:10 PM Page 56 Troubleshooting PROBLEMS CHECK There is no power - See if the power cord became unplugged. - Check for a blown fuse or circuit breaker or a power outage. - Are the POWER LED and/or the ON TIMER LED on the front panel of the television blinking? If these LED indicators are blinking, there is a problem with the television. - Page 57 If the POWER LED and/or the ON TIMER LED on the front panel of the television are blinking, there is a problem with the television. Refer to the table below to check the condition. If you think that there is a problem, contact the JVC Service Center where you purchased the television.
-
Page 58: Appendix A - Cleaning The Filters
Cleaning the Filters The lamp and internal circuits of the AV-61S902 are cooled by a fan which draws in cool air through a pair of intakes. The air intakes are located behind the speaker covers on the front of the television and contain air fil- ters which need periodic cleaning. -
Page 59: Appendix A - Caring For The Cabinet
Caring for the Screen The screen of the AV-61S902 is treated with an electrostatic-proof coating. When it gets dirty, wipe it gently with a soft cloth. If the screen is very dirty, wipe it down with a cloth dipped in a diluted kitchen cleaner and thoroughly wrung-out. -
Page 60: Appendix B - Changing The Lamp
The AV-61S902 uses a 200 Watt high-pressure mercury lamp to project images onto the television screen. When the lamp nears the end of its operating life, you may notice the picture becoming dark. When the picture begins to darken, the lamp burns out, it is time to replace the lamp. -
Page 61: Appendix B - Replacement Lamp
AV-61S902(E) 1/12/01 4:16 PM Page 61 Appendix B 2) Unplug the television. Disconnect the television’s power cord from the AC outlet. Make sure the 10 LED lights have stopped blinking before you unplug the television. Never attempt to replace the lamp with the television plugged in. - Page 62 AV-61S902(E) 1/12/01 4:16 PM Page 62 Appendix B Replacing the Lamp - continued Please read these instructions fully before attempting to replace the lamp. Please observe all safety warnings. 6) Removing the lamp unit. Handle Using the hex wrench included with the replacement lamp, loosen the two hex screws fastening the lamp unit.
-
Page 63: Appendix B - Warning Messages
AV-61S902(E) 1/12/01 4:16 PM Page 63 Appendix B Warning Messages If the lamp replacement was successful, the television will operate normally. If there was a problem with the instal- lation, one of several messages may display on the front panel LED lights. -
Page 64: Appendix C - Led Display
AV-61S902(E) 1/12/01 4:16 PM Page 64 Appendix C LED Display The front panel of the AV-61S902 features ten LED lights located under the television screen. These lights are used to display information about the operation of your television. Starting Up The projection lamp of the AV-61S902 requires time to warm up to its proper operating temperature. -
Page 65: Limited Warranty
1. Products which have been subject to abuse, accident, alteration, modification, tampering, negligence, misuse, faulty installation, lack of reason- able care, or if repaired or serviced by anyone other than a service facility authorized by JVC to render such service, or if affixed to any attach- ment not provided with the products, or if the model or serial number has been altered, tampered with, defaced or removed. -
Page 66: Authorized Service Centers
To prevent electrical shock, do not open the cabinet. There are no user serviceable parts inside. Please refer to qualified service personnel for repairs. Accessories To purchase accessories for your JVC product, please call toll free:1 (800)882-2345 or on the web at www.JVC.com For service in Canada... -
Page 67: Specifications
AV-61S902(E) 1/12/01 4:16 PM Page 67 Specifications MODEL AV-61S902 Type D-ILA Hologram Device Projection Television Reception Format NTSC, BTSC System (Multi-Channel Sound) 1080i DTV digital broadcast ready Reception Range VHF 2 to 13, UHF 14 to 69 Sub Mid, Super, Hyper and Ultra bands... - Page 68 AV-61S902(E) 1/12/01 4:16 PM Page 68 JVC COMPANY OF AMERICA JVC CANADA, INC. Division of JVC Americas Corp. 21 Finchdene Square 1700 Valley Road Scarborough, Ontario Wayne, New Jersey, 07470 Canada, M1X 1A7 LCT0942-001A 0101-TN-CR-IWAI...