Schwinn 810 User Manual
Hide thumbs
Also See for 810:
- Assembly manual / owner's manual (48 pages) ,
- Service manual (147 pages)
Table of Contents
Advertisement
810 GPS watch User Manual (Preliminary)
Ref: UI-10487-04
Introduction
Thank you for purchasing the GPS watch. This GPS watch is packed with personal Training
features like speed, trip time, laps, etc. GPS navigation features were integrated in various
modes like Run mode and Waypoint mode. GPS can display your current location in an
electronic map. It has also an Altimeter function based on GPS. Watch features include
12/24H Time format, Chronograph, World time, 5 daily Alarms, Data, and Set modes. This
watch can communicate with a PC to store and review your performance. This watch also
has a power saving mode to increase operating hours. It uses a rechargeable battery that
can be charged through USB port of your PC. It also uses HRM belt (optional unit) with 5.3
KHz technology to monitor your heart rate for all your HR related information.
Caring for your GPS watch:
Clean your GPS watch and heart rate monitor with a dampened cloth preferably with mild
detergent solution. Wipe dry using a dry cloth. Do not use chemical cleaners and solvents
that may damage plastic components.
Do not store your GPS watch to prolonged exposure to extreme temperatures as this may
result to permanent damage to your unit.
About GPS:
Global Positioning System (GPS) is a satellite- based navigation system made up of a
network of 24 or more satellites. GPS works best in clear weather condition, anywhere in the
world, 24 hours a day. Tall buildings may interfere with GPS accuracy. When 3 satellite
signals are received, the watch will have 2D GPS fixed (Latitude and Longitude). When 4 or
more satellite signals are received, the watch will have 3D GPS Fixed (Latitude, Longitude,
and Altitude).
Water immersion:
This GPS watch is designed to be water resistant up to 3 ATM. It can resist water pressure
up to 30 meters. After submersion to water, please make sure to wipe dry and air dry the unit
before using or charging.
Caution: This unit is not intended to be used while swimming. Prolonged water submersion
may cause electronic shorting in the unit which may cause minor skin burn or irritation.
Getting Started
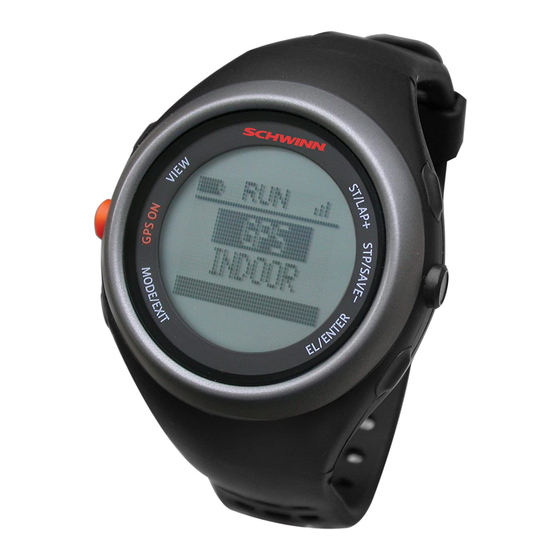
Step 1) Know your watch:
Push button location:
Push button Function:
S1 – Start/ Lap/ Increase adjust/ Fast increase adjust
S3 – View /OK
S5 – Stop / Save/ Clear/ Decrease adjust/ Fast decrease
adjust
S7 – Mode/ Exit
S9 – GPS ON/ hold 5-6 seconds to turn OFF GPS
S11 – EL back light
Note: Actual color of the watch and artwork may vary from style to style.
BD26
Advertisement
Table of Contents

Related Manuals for Schwinn 810


Summary of Contents for Schwinn 810
-
Page 1: Getting Started
810 GPS watch User Manual (Preliminary) Getting Started Ref: UI-10487-04 Step 1) Know your watch: Push button location: Introduction Thank you for purchasing the GPS watch. This GPS watch is packed with personal Training features like speed, trip time, laps, etc. GPS navigation features were integrated in various modes like Run mode and Waypoint mode. -
Page 2: Step 2) Charging The Battery
2.3) Connect the charging clip securely to the watch. Power Saving Screen: This watch has a power saving feature to prolong battery life. When GPS is OFF, HRM is not linked, and no key operation for 1 minute, the display will auto go to Power saving screen. In power saving Screen, Press S7 to go to Run mode. -
Page 3: Step 4) Acquire Satellite Signals
Battery low condition: You cannot turn on the GPS when the battery is low. The watch will display BATT LOW GPS OFF and proceed to Run mode. The battery icon will also blink. The GPS signal icon will blink into low battery icon alternately. You need to recharge the battery in order to use the GPS again. - Page 4 Step 5) Using your Heart Rate monitor: (HRM belt is optional and is 5.5) If the heart rate will not be displayed, or you have an erratic heart rate data, follow the following tips : sold separately) 5.5.1. Make sure the HR belt is snugly fit to your body 5.5.2.
-
Page 5: General Operations
6.2.6) Press S1 to START or TAKE LAP. If auto lap function is set, the watch will take General Operations lap automatically based on auto lap setting. 6.2.7) Press S5 to STOP after you complete your exercise. 6.2.8) Press S5 again to save your exercise. The watch has the following main modes: Time, Run, Run Data, Waypoint, and Set modes. - Page 6 this manual for the complete list of city codes and corresponding GMT differential From any view in TIME mode, press S5 (if EL is ON) or double press S5 (if EL is OFF) to time. enter the time sub modes. In these sub modes, you can set the ALARM, TIME 1, TIME 2, View 4 Time 1, Date of Time 1, Time 2, Date of Time 2, GPS relative signal strength.
-
Page 7: Exercise Modes
The procedure in setting time 2 is the same with time 1 setting. View 2 Exercise Time/ Distance View 3 HR/ %Max HR/ Speed View 4 PACE/ Calorie View 5 Exercise time/ Distance/ HR Display FORMAT setting: View 6 Exercise time/ Distance/ Clock View 7 Exercise time/ Distance / Speed You can select 12H or 24H format. - Page 8 If you press S11 to change views, the watch start searching for HR signal and display views with HR. After 2 minutes without HR signal, it will automatically change to Chronograph view w/out HR. RUN Sub-modes: While in RUN, GOTO waypoint, GO BACK, and GOTO modes, press S3 (if EL is ON) or double press S3 (if EL is OFF) to enter the sub modes.
-
Page 9: Waypoint Mode
ALERT Sub mode: WAYPOINT mode Press S5 to enter ALERT function. When alert is set to ON, there will be a beep sound during taking auto lap. When it is set to OFF, there is no beep sound. Default is ON. Press S7 from Run Data mode to enter Waypoint mode. - Page 10 Press S1/S5 to scroll thru the list. At the lower right side of the screen, there is an icon to signify you are in GOTO function, or Press S3 to enter the selected data file. Press S7 to exit. you have exceeded or going away from your destination. Press S1/S5 to view the details of the data file.
-
Page 11: Set Mode
When you arrived at your destination, the watch will display ‘ARRIVED DEST”. GO BACK sub mode GOTO sub mode GO BACK function means going from current location to the first point of the selected data track. User cannot use this function if GPS is OFF. The same procedure GO BACK sub mode except you are going from your current location to the last point of the Track data. - Page 12 SET TIME: The procedure in setting the time is the same in time setting in TIME mode except the last step is going back to SET TIME sub menu instead of going back to TIME mode. Setting the SYSTEM: Press S3 when System is highlighted. Parameters to set under System are: Contrast, Key tone, and Night mode.
- Page 13 GPS watch troubleshooting guide: PROBLEM/ QUESTION SOLUTION/ ANSWER Press and hold S9 for 5-6 seconds from any view to turn How to turn off the GPS OFF the GPS. Take your GPS watch outdoors and away from tress and I cannot get a GPS signal tall buildings.
- Page 14 BD26...
- Page 15 City code Table: CITY CITY CITY Differential CODE CITY Differential CODE CITY Differential CODE CITY Following is the list of city codes used in DETROIT AMSTERDAM DHAKA view 3 of Time mode and the corresponding differential time with respect to GMT: BOSTON VIENNA COLOMBO...
- Page 16 and the software will prompt you to check the cable. Repeat the downloading after MIO GPS System PC software checking the cable. Ref version: 1.0.9 Your GPS watch comes with PC software. This software is compatible with the following operating system: Windows 7 Windows XP SP 1, 2, 3 After downloading the data, the software will prompt you to delete all data in the...
- Page 17 7.2. ROUTE Tab: In this tab you can view the route of your exercise if you perform unit of the PC software is Miles. If you download a data from GPS watch with the exercise with GPS ON. If GPS is OFF, the route or map will not be shown. KM units, the data will be downloaded with KM units.
- Page 18 Sample screenshot of DATA tab: I receive an error prompt: The USB connector was not properly connected to your “Check the connection of the watch. Please check for any contamination between the USB plug” contact pins of the plug and the contacts at the back of the watch.