
Related Manuals for Sanyo VPC-E1600TP


Summary of Contents for Sanyo VPC-E1600TP
- Page 1 VPC-E1600TP INSTRUCTION MANUAL Digital Camera 14 Mega Pixels Please read these instructions carefully before using the camera. Keep this manual in a safe place for later reference.
-
Page 2: Table Of Contents
Table of Contents Preface ....................4 About this Manual ................4 Safety and Handling Precautions............5 FCC Information.................8 Declaration of Conformity..............9 Canadian ICES-003 Information............9 Trademark Information ...............9 Read this First..................9 NOTES ON USING TOUCH PANEL ............10 Battery Information ................10 CAUTION..................10 Symbols Used in this Manual ............. - Page 3 Setting the Zoom Control ..............32 Using Flash ..................33 Setting the Focus Mode ..............34 Setting the Drive Mode ..............35 Setting the AF Area Face tracking Touch Shot ........36 Using the Record Menu..............37 Setting the Scene Mode ..............38 Using Voice REC ................
- Page 4 Zooming images................67 Playing Videos.................. 68 Playing Voice Recording ..............68 Playing Voice Memo................69 Volume Control ................69 Playback Menu ................. 70 Using the Setup Menu ................84 Setting Sounds................. 84 Setting Power Save................85 Setting LCD Save................85 Setting Date &...
-
Page 5: Preface
Preface About this Manual This manual is designed to assist you in using your new digital camera. All information presented is as accurate as possible but is subject to change without notice. Copyright This manual contains proprietary information protected by copyright. All rights are reserved. No part of this manual may be reproduced by any mechanical, electronic or other means, in any form, without prior written permission of the manufacturer. -
Page 6: Safety And Handling Precautions
Declaration of Conformity This device complies with Part 15 of the FCC rules. Operation is subject to the following conditions: • This device may not cause harmful interference. • This device must accept any interference received, including interference that may cause undesired operation. - Page 7 Caution Insert the batteries paying careful attention to the polarity (+ or -) of the terminals. Inserting the batteries with its polarities inverted might cause fire and injury, or damage to the surrounding areas due to the batteries rupturing or leaking. Do not fire the flash close to anyone’s eyes.
- Page 8 For American Users The following advisory is included in accordance with the laws of the State of California (USA): WARNING: This product contains a chemical known to the State of California to cause cancer, birth defects or other reproductive harm. •...
-
Page 9: Fcc Information
The symbol mark and recycling systems described below apply to EU countries and do not apply to countries in other areas of the world. Your SANYO product is designed and manufactured with high quality materials and components which can be recycled and/or reused. -
Page 10: Declaration Of Conformity
Declaration of Conformity Model number: VPC-E1600TP Trade name: SANYO Responsible party: SANYO FISHER COMPANY Address: 21605 Plummer Street, Chatsworth, California 91311 Telephone No.: (818) 998-7322 This device complies with Part 15 of the FCC Rules. Operation is subject to the following 2 conditions:... -
Page 11: Notes On Using Touch Panel
• Risk of explosion if battery is replaced by an incorrect type. Dispose of used batteries according to the instructions. CAUTION • Danger of explosion if battery is incorrectly replaced. • Replace only with the same or equivalent type. - SANYO Li-ion Battery, 3.7V, 700mAh, 2.6Wh 10 ... -
Page 12: Symbols Used In This Manual
Before capturing those important shots, be sure to first take a test shot to confirm that your camera is set up and ready to go. • Sanyo Electric shall not be held responsible for any problems resulting from the use of this camera. -
Page 13: Introduction
Introduction Congratulations on your purchase of the new digital camera. Capturing high-quality digital images is fast and easy with this state-of-the-art smart camera. System Requirements In order to get the most out of your camera, your computer must meet the following system requirements: For Windows: •... -
Page 14: Package Contents
Package Contents Please check the contents of your camera package. It should contain: Digital camera Rechargeable battery x 1 pcs USB-AC-Adapter Camera strap USB cable AV cable (optional) CD-ROM Quick Start Guide 13 ... -
Page 15: Camera Views
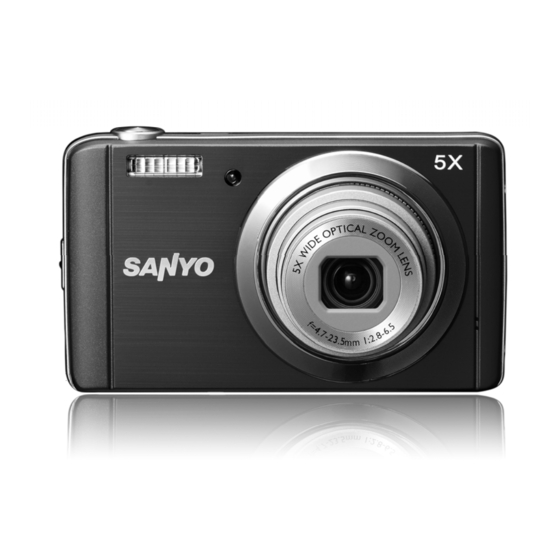
Camera Views Front View Flash Self-timer LED/ AF Assist Lamp Lens Microphone Back View LCD Screen Zoom Button LED indicator Playback Button 14 ... -
Page 16: Bottom View
Top View 9. ON/OFF (Power button) 10. Shutter button Bottom View 11. Battery/ Memory compartment 12. Speaker 13. Tripod screw hole Left/Right View 14. USB/TV Out 15. Strap ring 15 ... -
Page 17: Camera Buttons
Camera Buttons Your camera is equipped with different buttons for ease of use Button Description Power Press the Power button to turn the power on/off. Shutter Press to capture an image or start/stop recording video or audio clip. In Record mode, press the "W" button to zoom out, or "T" button to zoom in. Zoom buttons In Playback mode, press to zoom in to magnify image or zoom out enter 9-image/calendar thumbnails. -
Page 18: Camera Memory
Delete Tap to delete the file. Previous file Tap to view the previous file. Next file Tap to view the next file. Exit Tap to exit the menu. Return Tap to return main menu or last screen. Tap to apply the setting. Camera Memory Internal memory Your camera is equipped with 32MB of internal memory. -
Page 19: Getting Started
Getting Started Attach the Camera Strap Inserting the Battery Follow these instructions to insert the rechargeable battery into the battery/memory card compartment. Please read "Battery Information" on page 10 before inserting/removing batteries. 1. Make sure the power is off before inserting the battery. -
Page 20: Inserting An Sd/Sdhc Memory Card
4. Close and lock the Battery/memory card compartment Inserting an SD/SDHC Memory Card Expand your camera’s storage by using SD or SDHC memory cards. 1. Unlock and open the Battery/memory card compartment at the bottom of the camera. 2. Insert the SD/SDHC card into the memory card slot with the metallic part facing the back side of the camera. -
Page 21: Charging The Battery By Usb
Charging the Battery by USB In other way charging the battery, you can use the USB cable to connect the camera with PC or USB adapter. 1. Connect the camera with the USB cable as shown. 2. Connect the other end with the USB adapter and plug it into a power outlet or with the USB port of PC directly for charging. -
Page 22: Turning The Power On And Off
Turning the Power On and Off Press the Power button to turn on the camera. There are two ways to turn on the camera: • The startup image displays briefly and the startup sound plays if enabled. The zoom lens extends and the camera is turned on in Record mode. -
Page 23: Modes
Setting the Date & Time 1. Tap MM/DD/YY to select the time format. 2. Tap the screen to select Year/Month/Date or Hour/Minute. 3. Tap to change the value for the date and time. 4. Tap to apply. If necessary, tap to return the language menu. -
Page 24: Using The Touch Screen
Using the Touch Screen The touch screen shows all important information regarding camera settings as well as the visual image of your image or video. It also provides all kinds of touch buttons to control the settings for the camera. The display on the touch screen is called the On Screen Display or OSD. Touch screen Layout Photo Mode Screen Layout Item... - Page 25 Quality Displays quality settings. Sharpness Displays sharpness settings. Metering Displays metering settings. White balance Displays white balance settings. Contrast Displays contrast settings. Saturation Displays saturation settings. Exposure Displays exposure settings. Displays ISO settings. Shutter speed Displays shutter speed settings. Aperture value Displays aperture settings.
- Page 26 Scene Mode - Movie Mode Screen Layout Standby layout Recording Layout Item Description Touch button - Record mode Tap to launch the scene mode menu. Zoom indicator Displays zoom. Time remaining Indicates the remaining time of video available. Battery Indicates battery level. Storage media Indicates current storage media in use.
- Page 27 Playback Mode Screen Layout The Playback mode display varies depending on the type of image being viewed. Playback mode display of still images: Item Description Indicates the file number over the total number of files in the storage File no./Total no. card.
- Page 28 Recording mode Indicates recording mode. Image Size Displays the image size settings. Touch button - Menu Tap to launch playback menu. Voice memo Tap to record an attached voice memo for the image. Touch button - Previous file Tap to view the previous file. DPOF Indicates the file is marked for printing.
- Page 29 Playback mode of videos: Playback layout Playing Layout Item Description Indicates the file number over the total number of files in the File no./Total no. storage card. Battery Indicates battery level. Storage media Indicates used storage memory. Touch button - Next file Tap to view the next file.
- Page 30 Playback mode of audio clips: Playback layout Playing Layout Item Description Indicates the file number over the total number of files in the File no./Total no. storage card. Battery Indicates battery level. Storage media Indicates used storage memory. Touch button - Next file Tap to view the next file.
-
Page 31: Changing The Lcd Monitor Display
Changing the LCD Monitor Display The type of information displayed on the LCD monitor can be changed taping the onscreen display button. Tap the button repeatedly to change the LCD display from one type to another. In Photo/Movie Mode, the LCD display can be changed into any of the following: •... -
Page 32: Recording Images, Videos And Voices
Recording Images, Videos and Voices Taking Images Now that you are familiar with your camera, you are now ready to take your images. Taking images with your camera is very simple. 1. Turn on the camera by pressing the Power button. 2. -
Page 33: Setting The Zoom Control
Setting the Zoom Control Using a combination of 5 times optical zoom and 5 times digital zoom permits zoom photography at up to 25 times magnification. While the digital zoom can be a useful feature, the more an image is enlarged (zoomed), the more pixelated (grainier) the image will appear. -
Page 34: Using Flash
Using Flash When taking pictures in difficult lighting conditions, use the onscreen Flash button to get correct exposure. This function cannot be activated in recording videos or continuous shooting. To activate Flash: • Tap the onscreen Flash button to display the popup flash menu and tap desired flash mode icon. -
Page 35: Setting The Focus Mode
Setting the Focus Mode This function allows users to define the type of focus when recording a still image or a video clip. To set the Focus mode: • Tap the onscreen Macro button to display popup macro menu and tap the desired icon. Your camera supports the four focus modes: Icon Item... -
Page 36: Setting The Drive Mode
Setting the Drive Mode Your camera features a Self-timer and Burst which can be set in the Drive mode function on the screen. The Self-timer allows you to take images after a pre-defined delay. While burst lets you take consecutive shots. This function is only available in recording still images. The Drive mode setting is automatically set to off when you turn off the camera. -
Page 37: Setting The Af Area / Face Tracking / Touch Shot
Setting the AF Area Face tracking Touch Shot AF stands for Automatic Focus. This feature determines the area on which the camera focuses. To set AF Area: • Tap the onscreen AF Area button to AF Area display the popup menu and tap the desired icon. -
Page 38: Using The Record Menu
The table below shows the available AF Area settings. Icon Item Description Wide The camera automatically selects focus area within the wide frame. Center The focus area is fixed on the center. Face Tracking The focus area traces human face automatically. Touch Shot The focus area is controlled by finger and performs AF and shooting. -
Page 39: Setting The Scene Mode
Setting the Scene Mode By simply selecting one of the following 32 modes, you can capture the image with the most appropriate settings. 1. From the Record Menu, press to select Scene Mode. Or, tap onscreen Record mode button (light green color) to enter scene mode. - Page 40 This feature is used to capture the image of a backlight object by Backlight changing the metering. Kids This feature is used to capture still images of moving kids. Night Scene This feature is used to capture images with night scenery background. This feature is used to capture images with over-saturated colors, LOMO off-kilter exposure or blurring.
- Page 41 This feature enhances the black and white contrast normally used when Text capturing text images. Foliage This feature boosts the saturation of greens to give a rich color to foliage. This feature combines up to 4 shots into a single image and provides 4 Auction patterns to select for usage of auction.
- Page 42 Using Intelligent Scene This feature is most useful for novice users to capture great images even without basic knowledge of photography. Simply frame the shot with the help of Intelligent Scene Mode, the camera automatically recognizes 11 kinds of scenes - Portrait, Landscape, Sunset, Macro, Text, Snow, Backlight, Backlight Portrait, Night Scene, Night Portrait and Foliage - and selects the ideal settings.
- Page 43 Using Kids Mode Tactically, kids are the most difficult to photograph. They tend to be highly animated and can be a real challenge to make them pay attention for more than just a second or two. To capture a great moment for your kids, just keep the camera in kid mode.
- Page 44 Using Food Mode How to share your dining experiences and comments of interesting widgets on your blog by close-up images? Just get the camera and set the scene with food mode. This mode features on macro focus and auto flash designed for close-up photography.
- Page 45 Using Auction Mode It’s hard and wastes a lot of time to combine several images by software. Select Auction mode and choose a pattern, then take a few shots from different angles. The camera composes a combined image in lower resolution suited to online posting. 1.
- Page 46 8. Repeat step 4 to 6, until the pattern is filled in images. 9. Tap Save image button to save the composed image. 10. Or, tap Cancel button to go back last shot. 11. The image can be transferred to PC via USB cable (Please refer to "Connecting the Camera to a PC"...
-
Page 47: Using Blink Detection Mode
Using Smile Capture Mode When facing camera, especially kids, smiles are always short and hard to seize by manual shutter. Smile capture mode detects every smile all the time and performs Automatic Focus (AF) to capture an image without pressing shutter button. Follow the instructions to get a Happy image by Smile Capture Mode: 1. - Page 48 Using Pre-composition Mode When asking someone else to take images for you, but the images always don’t come up right? Pre-composition helps you get the background you want, even if you need to ask someone else to record the image for you. Basically, Pre-composition is a two-step process •...
- Page 49 Using Love Portrait Want to take a good image when there are just two of you? All you have to do is hold the camera and show your smiles together. If over two faces had been recognized, the camera performs 2-second countdown with a beep notice then take a shot without pressing the Shutter button.
- Page 50 Using Photo Stitch Mode Use this feature to create a panoramic photo from multiple shots. You can combine up to 2 or 3 shots into one single and seamless image quickly and easily. To stitch the still image Enter Photo Stitch mode and press the Shutter 2.
- Page 51 4. After taking the second shot, the yellow block Once the icon overlaps the yellow block, moves to the end of the guidance bar, and the you can get another shot without pressing the button appears as well. You can tap shutter button.
-
Page 52: Using Voice Rec
Using Voice REC 1. From the Scene Mode menu, select Voice REC. The Voice REC screen layout is displayed on the LCD monitor. 2. Press the Shutter button to start recording. 3. Press the Shutter button again to stop recording. Setting Photo Size The Photo Size function is used to set the resolution before you capture the image. -
Page 53: Setting Quality
Setting Quality The Quality sets the quality (compression) at which the image is captured. The quality determines the amount of compression applied to your images. Fine quality would give you the best images with sharper details and less compression. However, the higher the quality, the more memory space is required in your memory card. -
Page 54: Setting Iso
Icon Item Description Auto The camera automatically adjusts the white balance. Daylight Ideally used for bright sunny conditions. Cloudy Ideally used for cloudy conditions. Ideally used for indoor images with tungsten or halogen lighting without Tungsten a flash. Ideally used for indoor images with reddish fluorescent lighting Fluorescent 1 conditions. -
Page 55: Setting Metering
Setting Metering This sets the metering method for calculating the exposure. Icon Item Description The entire area of the screen is measured, and the exposure is Multi calculated. Averages the light metered from the entire frame, but gives greater Center weight to the subject matter at the center. -
Page 56: Setting Af Area
Setting AF area To set AF Area: 1. From the Record menu, tap AF Area. 2. Tap the desired option button to apply. For more information, please refer to "Setting the AF Area/Face tracking/Touch Shot" on page 36. Setting AF Lamp The AF Lamp function allows you to record images even low light conditions. -
Page 57: Setting Saturation
Setting Saturation The Saturation function lets you adjust the color saturation in your images. Use a higher saturation setting for rich colors and a lower saturation setting for more natural tones. To set Saturation 1. From the Record menu, tap Saturation. 2. -
Page 58: Setting Contrast
Setting Contrast This function allows you to adjust the contrast of your images. To set Contrast 1. From the Record menu, tap Contrast. 2. Tap the desired option button to apply. Icon Item Description High Enhance the contrast Normal Normal contrast Reduce the contrast Setting Flash To set Flash:... -
Page 59: Setting Color Mode
Setting Color Mode The Color Mode function applies different colors or tones for a more artistic effect on the still images or videos. • Present the adjusting results on screen synchronously when change options by tapping in loop. Icon Item Description Normal The camera records normally. -
Page 60: Setting The Digital Zoom
Setting the Digital Zoom This feature controls the digital zoom mode of your camera. Your camera enlarges an image using the optical zoom first. When the zoom scale exceeds 5x, the camera uses digital zoom. To set Digital Zoom 1. From the Record menu, tap Digital Zoom. 2. -
Page 61: Setting The Date Stamp
Setting the Date Stamp The date of recording can be printed directly on the still images. This function must be activated before the image is captured. Once date and time are stamped on an image, they can no longer be edited or deleted. Limitations of Date Stamp functions are as follows: •... -
Page 62: Recording Videos
Setting Stabilizer This function allows you to prevent blurred images caused by shaking. 1. Enable the Stabilizer under the Record Menu. 2. Tap On/Off to enable/disable Stabilizer. • When Stabilizer is enabled, the shutter sound may be delayed if the exposure time is greater than (or equal to) 0.4 second. -
Page 63: Movie Size
Settings of Recording Videos Tap the onscreen Menu button to launch video menu and configure the settings before recording a video. Movie Size The Movie Size function appears only in Movie mode. Use this function to adjust the resolution and quality of movie clips. - Page 64 Internet Mode The Internet Mode allows you to record videos with predefined video settings for easy upload to the Internet website. The Internet supports two file upload standards: • Single File Uploader. The maximum video file size is up to 100 MB. •...
-
Page 65: Playback
Playback You can playback the still images, videos and audio clips on the LCD monitor. File Navigation There are 4 playback modes for file navigation in this camera: • Single navigation • Photo Steam • Thumbnail • Calendar Viewing in Single Navigation Mode The single navigation mode displays the image one by one on the LCD monitor. -
Page 66: Viewing In Photo Stream Mode
Viewing in Photo Stream Mode The photo stream mode displays files side-by-side and supports finger motions allows you to browse files with ease. To use photo stream navigation: • Switch from single navigation by tapping any part of the screen, except onscreen buttons. •... -
Page 67: Viewing In Thumbnail Mode
Viewing in Thumbnail Mode This function allows you to view 9-thumbnail images on the screen and it also supports finger motions as photo stream mode. To set thumbnail mode 1. Set the camera to Playback – Single Navigation or Photo Stream mode. 2. -
Page 68: Zooming Images
Thumbnail icons: In playback mode some images may contain icons. These icons indicate the type of file or recording. Icon Type Description Voice Record Indicates a voice recording file. File Error Indicates an error file. Zooming images The zoom view function works with still images only. -
Page 69: Playing Videos
Playing Videos 1. Set the camera to Playback mode 2. Tap the onscreen Play button to play a video clip. 3. During playback, tap the button on the control panel to fast forward or rewind the video. The camera supports forward and rewind speed of 4x. 4. -
Page 70: Playing Voice Memo
Playing Voice Memo Voice memo is separately recorded and attached to a captured image. See "Voice Memo" on page 78 on how to record voice memo. 1. Set the camera to Playback mode 2. Tap the button to play the voice recording. 3. -
Page 71: Playback Menu
Playback Menu The Playback menu allows you to edit images, record voice memo, and setup playback settings. To go to Playback Menu: 1. Set the camera to Playback mode 2. Tap the onscreen Menu button to launch the Playback Menu. 3. - Page 72 To delete a single file: 1. Tap Single button in the delete submenu to popup confirm menu. 2. Tap Yes to delete the file, Cancel to abort. To delete attached voice memo: 1. Locate an image with voice memo attached in single navigation.
- Page 73 Search Photos Built-in search engine list files in the specific conditions: • By Favorite • By Scene • By Date To use the search function: 1. Select Search Photos by tapping it in the playback menu. Or, tap onscreen button from photo stream mode.
-
Page 74: Slide Show
• Search by Date: All date groups will be listed in captured order. Tap the group button to display all files of the scene in single navigation mode. The files of each group have a group icon in front of filename and display a specific Playback icon: Slide Show The slide show function enables you to playback all your still images automatically in order one image... -
Page 75: Quick Retouch
Favorite Arrange your files by sorting them to the built-in 10 favorite groups. The feature makes it easier to locate the desired image/video/voice recording among numerous files with the function "Search Photos". To add/remove files to Favorite groups: 1. Set the camera to Playback mode and locate the desired file by single navigation or photo steam mode. -
Page 76: Perspective Control
Red-eye Correction The function is used to reduce red eye in captured images. This function is only available for still images. Red eye correction can be applied to an image several times, but the quality may gradually deteriorate. To activate Red Eye Correction: 1. -
Page 77: Color Mode
Radial Blur The Radial Blur is an effect creates blurs around a point, simulating the result of a zooming or rotating camera. To set Radial blur for an image: 1. Set the camera to Playback mode and locate the desired image by single navigation. 2. - Page 78 Painter Use your imagination and this Painter application to create exclusive images with the touch screen. Painter is an easy drawing toolbox which contains color pen, eraser, stamp and image frame. To use the Painter for an image: 1. Set the camera to Playback mode and locate the desired image by single navigation or photo stream mode.
- Page 79 Voice Memo A maximum of 30 seconds of audio can be recorded as a memo for captured still images. To record voice memo: 1. Set the camera to Playback mode and locate the desired image by single navigation. 2. Tap the onscreen Menu button to launch playback menu and tap Voice Memo.
- Page 80 To protect/unprotect a single file: 1. Select Single in the protect submenu. 2. Tap buttons to scroll the display. 3. When the desired file is displayed on the LCD monitor, tap the onscreen Lock/Unlock button to protect/unprotect it. 4. Tap button anytime to exit the protect screen and return single navigation mode.
- Page 81 Trim The Trim function allows you to trim an image to another image size. This function is only available for still images. To trim an image: 1. Set the camera to Playback mode and locate the desired image by single navigation mode. 2.
- Page 82 Resize Resizes a previously saved image and only resizing to a smaller size is available. To resize an image: 1. Set the camera to Playback mode and locate the desired image by single navigation mode. 2. Tap the onscreen Menu button to launch playback menu and tap Resize.
- Page 83 Startup Image You can specify the startup image from the captured images for camera. To set startup image: 1. Set the camera to Playback mode and tap the onscreen Menu button to launch playback menu and tap Startup Image 2. Tap the button to switch startup image options as follow: •...
-
Page 84: Active Display
To set DPOF on a single image/all images: 1. Tap to select Single or All on the DPOF submenu. 2. For single image, tap the button to scroll and select an image to mark for printing. 3. Specify the number of copies for single image or all images. -
Page 85: Using The Setup Menu
Using the Setup Menu You can access the Setup menu whether you are in Record or Playback mode. The Setup menu allows you to configure general camera settings. To go to Setup Menu: 1. Tap the onscreen Menu button to launch the Record/Playback Menu. -
Page 86: Setting Power Save
Setting Power Save The Power Save function allows you to set an idle time after which the camera automatically sets to sleep mode to save power. After a minute of being in sleep mode, the camera eventually turns off power. Available setting: 1 min., 3 min., 5 min., Off. -
Page 87: Setting Language
Setting Language Specify in which language menus and messages are to be displayed on the LCD monitor. Please refer to "Initial Settings" on page 21 to know about how to configure the settings. Setting File Numbering This function allows you to select the method in which to assign file numbers to images. Available settings are: •... -
Page 88: Setting Lcd Brightness
Setting LCD Brightness Select a brightness level for the LCD monitor. Available settings are: • Auto • Bright • Normal Setting Memory Kit This utility formats the internal memory (or memory card) and erases all stored images and data. Available settings are: •... -
Page 89: Auto Rotation
Auto Rotation Use Auto Rotation to rotate still images to the direction you prefer. This function is only applicable to still images in Single Navigation. Video and audio files are not supported. Set the Auto Rotation menu to Off, the rotated image will resume to the original direction, and this function will be also disabled. - Page 90 To zoom in/zoom out the rotated image View the still images in Thumbnail View (left) or Single Navigation (right) as below. Press the button right (T) to zoom in or the button left (W) to zoom out. • The function of rotating images is only applicable to still images in Single Navigation.
-
Page 91: Making Connections
Making Connections You can connect your camera to: TV, computer, or a printer. Connecting the Camera to a TV You can play back your images on a TV screen. Before connecting to any video devices, make sure to select NTSC/PAL to match the broadcast standard of the video equipment you are going to connect to the camera. - Page 92 4. The USB mode menu appears on the screen. Tap to select the onscreen "Computer" button. 5. The PC starts to detect the connection while the LCD monitor appears "Connecting…". 6. Connection established after "PC MODE" appeared on the LCD monitor 7.
-
Page 93: Connecting The Camera To A Printer
Connecting the Camera to a Printer You can print your images directly using a PictBridge compatible printer. 1. Turn on your Printer. Check that the printer is turned on, there is paper in the printer, and there are no printer error messages. 2. -
Page 94: Setting The Print Mode Menu
Setting the Print Mode Menu Print Mode menu appears on the screen after the connection between a printer and your camera is established. Print Mode includes three major settings: • Select. An image can then be selected to print. • All. Prints all images. •... -
Page 95: Appendix
Appendix About Folder and File Names Your camera automatically creates specific directory of folder in the internal memory cards to organize captured images, videos and audio files. File Naming SANY File names begin with " " and followed by a 4-digit number that increases in sequence. File numbering starts from 0001 when a new folder is created. -
Page 96: Specifications
LCD monitor displays The memory card is protected. Remove the card and slide the "Card locked". write-protect switch to its unlock position. LCD monitor displays The card may be damaged. You can either change the card or wipe to "Format error". clean the connected points. - Page 97 Auto/Movie/Program/Intelligent Scene/Portrait/Landscape/Sunset/ Backlight/Kids/Night Scene/LOMO/Fireworks/Snow/Sports/Party/ Scene Mode Candlelight/Night Portrait/Soft Skin/Flowing Water/Food/Building/Text/ Foliage/Auction/Smile Capture/Blink Detection/Pre-Composition/ Love Portrait/Self Portrait/D-Lighting/Fisheye Lens/Photo Stitch/Voice REC Auto, 100, 200, 400, 800, 1600, 3200 (3M, 16:9 <2M>, VGA), ISO Equivalent 6400 (3M, 16:9 <2M>, VGA) Auto White Balance, Daylight, Cloudy, Tungsten, Fluorescent 1, Fluorescent 2, White Balance Custom +2.0EV/+1.7EV/+1.3EV/+1.0EV/+0.7EV/+0.3EV/0EV/-0.3EV/-0.7EV/...
-
Page 98: Battery Life
Battery Life Maximum recording time 160 images: CIPA standard (when a SanDisk 2 GB SD Memory Card is used) Maximum playback time 170 minutes: LCD monitor on, continuous playback • Until battery pack runs out when using a fully charged battery pack at a 25 ºC (77 ºF) ambient temperature. -
Page 99: Safety Manual
SAFETY MANUAL Do not use during a storm ■ • To avoid the risk of being struck by lightning, do not use the USING YOUR DIGITAL CAMERA devices during a thunderstorm. SAFELY AND CORRECTLY In particular, if used in an open field, you have an increased •... -
Page 100: The Camera
Do not place on an CAUTIONS CONCERNING THE ■ unstable surface CAMERA • The camera may fall, resulting in damage to the camera or injury. WARNING • If the camera has fallen or has Do not use while driving ■ been trampled on, and its body •... - Page 101 Operating environment: CAUTION • Temperature 0 to 40°C (32 to 104°F) (operation) Cautions when carrying the –20 to 60°C (–4 to 140°F) (storage) ■ camera • Humidity 30 to 90% (operation, no condensation) 10 to 90% (storage, no condensation) • Do not walk around with the camera suspended from your Do not hold the hot part for ■...
-
Page 102: Power Cord
CAUTIONS CONCERNING THE DOCKING STATION AND AC ADAPTOR/ CHARGER DANGER WARNING Do not recharge a Cautions when plugging ■ ■ battery pack other than in the power cord the specified battery • Securely plug the power cord all the way into the power pack outlet. -
Page 103: Other Cautions
damage the power cord and CAUTION cause a fire or electric shock. Do not hold the hot part ■ • If the power cord is for a long time damaged, or if it does not • The device(s) may become plug properly into the warm during use. - Page 104 Cautions during use and Cautions when handling the ■ ■ storage cards • Do not use, leave or store close • The cards are precision devices. to a heat source (a stove or Do not bend, drop, or subject heater), in a car exposed to them to strong forces or shocks.
-
Page 105: Safety Precautions
Use only batteries manufactured ■ by SANYO • Do not use batteries other than the specified model numbers from SANYO. Especially for safety purposes, do not DANGER — use imitation products. If dry-cell batteries or other rechargeable batteries... - Page 106 Do not transform, take apart, or ■ modify • Any modification, by transforming, DANGER WARNING disassembling, or directly soldering to the battery, etc., will possibly cause the battery to catch fire, explode, or leak or spew battery fluid. Do not connect the (+) and (–) ■...
- Page 107 Use only the supplied or specified ■ docking station and AC adaptor/charger • If another charger is used, the battery pack may be overcharged, or recharged DANGER — with an abnormal voltage, causing an abnormal chemical reaction to occur, or cause the battery pack to catch fire, explode, leak or spew battery fluid, or generate heat.
- Page 108 Insert the battery correctly, as ■ indicated • When installing the battery, pay attention to the indicated polarity (+ and –), and insert it correctly. • If batteries are installed with the wrong DANGER WARNING orientation, it may cause an abnormal chemical reaction while in the charger, an abnormal voltage flow when it is used, or cause the battery to catch fire,...
- Page 109 Disposal of and recycling the ■ battery • When disposing of used batteries, please consult the laws and regulations in your area for proper battery disposal. CAUTION • Lithium-ion batteries: To conserve the environment and for efficient use of natural resources, please discharge the used battery, cover the (+) and (–) terminals with tape and recycle the insulated battery.
- Page 110 CAUTIONS CONCERNING THE BATTERY General precautions concerning the Cautions concerning use and storage of ■ ■ batteries (when using alkaline the rechargeable Li-ion battery pack batteries) • Do not use the battery with the outer covering or label removed, as doing so •...
-
Page 111: For Correct Use Of Your Camera
Wiping with a cloth soaked with a properly. cleaning substance or chemicals will erode • Sanyo Electric shall not be held responsible the finish or cause it to peel. for any losses that result from images that Caution concerning the battery could not be recorded, are erased, ■... - Page 112 Be careful of condensation under the • Sanyo Electric will not be held responsible for any damage or lost profits arising from the following conditions loss of data. • When moving the camera suddenly from a • If the card is used incorrectly.
- Page 113 Printed in china...