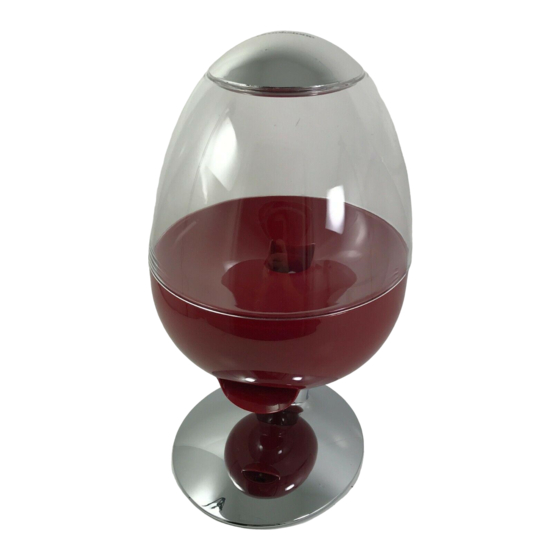
Summary of Contents for Brookstone CandyMan
- Page 1 CandyMan ™ Motion-aCtivated Candy dispenser Craving Candy? Wave your hand!
-
Page 2: Table Of Contents
Filling and Using CandyMan™ . . . . . . . . . . . . . . . . . . - Page 3 CaUTIon • TO REDUCE THE RISK OF ELECTRIC SHOCK, DO NOT REMOVE THE MAIN BODY COMPARTMENT . THERE ARE NO SERVICEABLE PARTS INSIDE . • TO REDUCE THE RISK OF FIRE OR ELECTRIC SHOCK, DO NOT EXPOSE THIS UNIT TO RAIN OR MOISTURE . The lightning flash with arrow-head symbol within an equilateral triangle is intended to alert the user to the presence of uninsulated “dangerous voltage”...
- Page 4 3 . Do not place in, drop or submerge in water or other liquid . 4 . Do not reach for unit that has fallen into water . Unplug it immediately . 5 . Care should be taken so that objects do not fall and liquids are not spilled onto the unit .
-
Page 5: Battery Precautions
9 . Do not overload the electrical outlet . Use only the power source as indicated . 10 . Do not carry this unit by its cord or use the cord as a handle . 11 . Never operate this unit if it has a damaged cord or plug, if it is not working properly, or if it has been dropped or damaged, or dropped into water . -
Page 6: Location Of Parts And Controls
loCaTIon of PaRTs anD ConTRols 2 . Reservoir dome 3 . Funnel 4 . Auger cover 5 . Auger 6 . Auger base Auger base screws (2) 8 . Thumbscrew (1) 9 . Main body 10 . Base 11 . Chute 12 . - Page 7 loCaTIon of PaRTs anD ConTRols (CONtINued) 14 . Thumbscrew (1) 15 . Settings Knob 16 . AC Adapter Jack (adapter sold separately) 17 . Battery Door...
-
Page 8: Cleaning The Unit
3 . Remove the RESERVOIR DOME, LID, FUNNEL, AUgER COVER and AUgER . Unscrew the 2 AUgER BASE SCREWS (Phillips #2 screwdriver required) and remove the AUgER BASE . Note: do not operate CandyMan when it is disassembled. IMPORtANt: dO NOt clean any parts in the dishwasher. - Page 9 Parts you may wipe with a damp cloth: • Main body • Chute • Base • Sensor Note: dO NOt submerge the MAIN BOdY in water. dO NOt fill the ReSeRVOIR with water. ReASSeMBLe Make sure the SETTINgS KNOB is turned to 2 .
-
Page 10: Power Source
6 . Replace RESERVOIR DOME by lining up the thumbscrew tab first and then snapping in the front to the main body (see illustration below) . Step 1 Step 2 7 . Screw in the THUMBSCREW to secure the FUNNEL and the RESERVOIR DOME to the MAIN BODY . -
Page 11: Recommended Candies
AC AdAPteR (sold separately) Plug one end of the adapter into the CandyMan’s AC ADAPTER JACK and the other end into an electrical outlet . CanDYMan ❤’s • Jelly beans • Chocolate coated candy with a hard shell •... -
Page 12: Filling And Using Candyman
CanDYMan Remove the LID . 2 . Pour candy or nuts into the RESERVOIR DOME . 3 . Replace the lid, making sure the lid alignment graphic lines up with the finger groove on the RESERVOIR DOME (see at right) . - Page 13 examples of small-sized candy and nuts: • M&M’S Plain • Jelly Belly Jelly Beans ® ® • Peanuts • M&M’S minis ® ® • Sunflower seeds • Skittles ® • Reese’s Pieces ® ® examples of large-sized candy and nuts: •...
-
Page 14: Specifications
Power source: 4 x AA batteries, switching adapter (6VDC, 1000 mA) . (Sold separately—available at Brookstone stores or www . b rookstone . c om SKU #652446 . ) Dimensions: 13"h x 9"w Weight: 2 lbs . Volume: 12 . 5 cups CaRe anD MaInTenanCe •... - Page 15 • Turn off the unit and gently wipe the sensor with a damp cloth . • When the adapter is plugged into the jack, the batteries are over-ridden . Make sure the adapter is not plugged into CandyMan’s jack if using batteries to power the unit .
- Page 16 Problem: Handfuls are inconsistent . Solution: • Irregular-shaped candy and nuts may cause inconsistent handfuls . • Make sure there is no debris on the sensor . Turn off the unit and gently wipe the sensor with a damp cloth . Problem: There is a loud clicking noise when the sensor is activated .
- Page 17 noTes...
-
Page 18: Warranty
(“Warranty Period”) . If a defect arises and a valid claim is received within the Warranty Period, at its option, Brookstone will either 1) repair the defect at no charge, using new or refurbished replacement parts, or 2) replace the product with a new product that is at least functionally equivalent to the original product, or 3) provide a store credit in the amount of the purchase price of the original product . - Page 19 Brookstone, in so far as permitted by law, provides these products “as is . ” This warranty does not apply to: a) damage caused by failure to follow instructions relating to product’s use or the installation of components; b) damage caused by accident, abuse, misuse, fire, floods, earthquake or other external causes;...
- Page 20 Merrimack, New Hampshire USA 03054 • 800-846-3000 • www.Brookstone.com 646570...

