Table of Contents
Advertisement
Quick Links
Advertisement
Table of Contents

Related Manuals for Smeg ASC82S


Summary of Contents for Smeg ASC82S
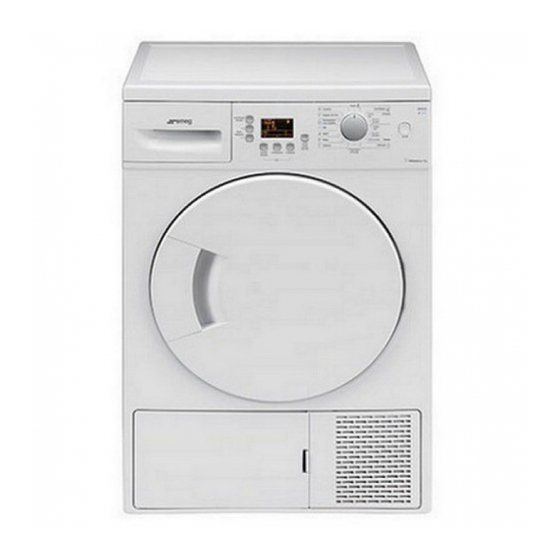
- Page 1 ASC82S Dryer Asciugatrice...
-
Page 2: Please Read This User Manual First
Please read this user manual first! Dear Customer, We hope that you get the best results from the product which has been manufactured in state-of-the-art plants and passed through a strict quality control procedure. Therefore, please read the entire user manual carefully before using the product and keep it as a reference for future use. -
Page 3: Important Safety Instructions
Important safety instructions This section contains safety instructions checked by a qualified electrician or that will help protect from risk of personal the Authorized Service Agent. Our injury or property damage. Failure to company shall not be liable for any follow these instructions shall void any damages that will arise when the warranty. - Page 4 break off during drying. product regularly. Do not allow fibre, • Never attempt to repair the product dust and dirt accumulation around yourself. Do not perform any the exhaust exit and at adjacent repair or replacement procedures areas. on the product even if you know •...
-
Page 5: Intended Use
the drying compartment before not let them tamper with the product. decommissioning or disposing of the • Do not allow children sit/climb on or product. enter in the product. • Check all garments before loading • Do not forget to close the loading and make sure that there is no any door when leaving the room where lighters, coins, metal pieces, needles,... -
Page 6: Appropriate Installation Location
Installation should stay at the same place where Refer to the nearest Authorized Service its connections have been made. Agent for installation of the product. When installing the product, make To make the product ready for use, sure that the rear wall of it does make sure that the electricity and water not touch anywhere (tap, socket, drainage system are appropriate before... -
Page 7: Mounting Over A Washing Machine
undercounter installation part. Connecting the water drain hose • Leave at least 3 cm of space around 1. Pull hose in the product by hand in the sides and the rear wall of the order to disconnect it from where it is product when installing it under a connected. -
Page 8: First Use
Transportation of the product product is used without grounding in accordance with the local regulations. 1. Unplug the product before • Connection must comply with transporting it. national regulations. 2. Remove the water drain (if any) and • Power cable plug must be within easy chimney connections. -
Page 9: Warnings About Sounds
Warnings about sounds Water collected during operation is It is normal to hear metallic noise from pumped to water tank. It is normal the compressor sometimes during to hear pumping noise during this operation. process. Technical specifications Height (adjustable) 84,6 cm Width 59,5 cm Depth... -
Page 10: Preparations For Drying
Preparations for drying Laundry suitable for drying in Things to be done for energy the machine saving Always obey the instructions given Following information will help you use on the garment tags. Dry only the the product in an ecological and energy- laundry having a label stating that efficient manner. -
Page 11: Preparing Laundry For Drying
load more than the capacity values stated Items cleaned, washed or spotted in the table. with gasoil/fuel oil, dry-laundry It is not recommended to load the solvents, industrial chemicals or other dryer with laundry exceeding the combustible or explosive materials level indicated in the figure. -
Page 12: Loading The Laundry
Loading the laundry 1. Open the loading door. 2. Place the laundry in the machine without compressing. 3. Push the loading door to close. Ensure that no items are caught in the door. 12 EN... -
Page 13: Control Panel
Selecting a Programme and Operating Your Machine Control panel 1. Washing Machine Spin Speed / Timer Programme Selection button 2. Display 3. Start / Pause / Cancel button 4. Programme Selection knob 5. On / Off button 6. Anti-creasing button 7. -
Page 14: Preparing The Machine
Preparing the machine bathrobes, etc.). • Synthetics 1. Plug in the machine. Dry less durable laundry with this 2. Place the laundry in the machine. programme. Recommended for 3. Press the On / Off button. synthetics. Pressing the On / Off button does Additional programmes not necessarily mean that the programme has started. - Page 15 • Wool Refresh achieve the desired final drying level at You can use this program to ventilate low temperatures. and soften your woolen laundry that can With this programme, the machine be washed in the washing machine. Do dries for the time selected regardless not use this program to dry your laundry of the dryness level.
-
Page 16: Programme Selection And Consumption Table
Programme selection and consumption table Approximate Spin speed in washing amount of Drying time Programs Capacity (kg) machine (rpm) remaining (minutes) humidity Cottons / Coloreds Extra dry 1000 % 60 Cupboard dry 1000 % 60 Iron dry 1000 % 60 BabyProtect 1000 % 60... -
Page 17: Auxiliary Functions
Auxiliary functions Audio Warning The machine will give an audio warning when the programme comes to an end. If you do not want the machine give an audio warning, press the Volume Level button repeatedly until "x" appears on the Press Anti-creasing button to activate display. - Page 18 symbol will start to flash and machine will period. At the end of the Time Delay pause. Drain the water in the water tank countdown process, Time Delay and press Start / Pause / Cancel button symbol disappears, drying process to resume the programme.
-
Page 19: Starting The Programme
Starting the programme Child-proof Lock Press Start / Pause / Cancel button to Machine is equipped with a Childproof start the programme. Lock which prevents interfering with the Start / Pause symbol will light up to current programme flow by pressing indicate that the programme has started any button. -
Page 20: Canceling The Programme
1. If you want to select Extra Dry However, this process will increase programme instead of Iron Dry the programme time and energy programme, press and hold the consumption since the drying Start / Pause / Cancel button for 3 process will be interrupted repeatedly. -
Page 21: End Of Programme
the display. End of programme Lint Filter Cleaning and Water Tank warning symbols light up in the programme follow-up indicator and "End” label appears on the display when the programme comes to an end. The loading door can be opened and the machine becomes ready for a second cycle. -
Page 22: Maintenance And Cleaning
Maintenance and cleaning Service life of the product extends and up on the lint filter surface. Dry the lint frequently faced problems decrease if filter completely before reinstalling it. cleaned at regular intervals. This product must be unplugged during maintenance and cleaning works (control panel, body, etc.). -
Page 23: Draining The Water Tank
There are dampness sensors in the 2. Drain the water in the tank. machine that detect whether the laundry is dry or not. To clean the sensors: 1. Open the loading door of the machine. 2. Allow the machine to cool down if it is still hot due to the drying process. - Page 24 2. Remove the filter drawer cover by 6. Clean lint, fibre, and cotton raveling turning it in the direction of arrow. on the filter cloth by hand or with a soft piece of cloth. 3. Pull out the filter drawer. When you notice a layer that may lead clogging on filter cloth, please clean the layer by washing in...
-
Page 25: Cleaning The Evaporator
Cleaning the evaporator 10. Place the filter drawer back into its place, turn the filter drawer cower Clean the lints accumulated on the fins clockwise making sure that it is of the evaporator located behind the filter closed securely. drawer with a vacuum cleaner. 11. -
Page 26: Troubleshooting
Troubleshooting Drying process takes too much time. • Pores of the lint filter are clogged. >>> Wash the lint filter with warm water. >>> Clean the sponge and the filter cloth in the filter drawer. • Filter drawer is clogged. >>>... - Page 27 Drum lighting does not turn on. (On models with lamp) • Dryer is not switched on with the On / Off button. >>> Make sure that the dryer is switched on. • Lamp is defective. >>> Call Authorized Service Agent to have the lamp replaced. End/Anti-creasing symbol is on.