Table of Contents
Advertisement
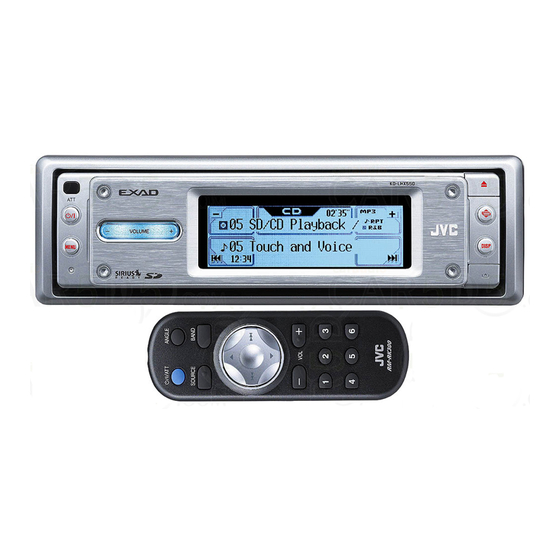
CD/SD RECEIVER
ALAT PENERIMA CD/SD
For canceling the display demonstration, see page 8.
Untuk membatalkan tampilan demonstrasi, lihat halaman 8.
For installation and connections, refer to the separate manual.
Untuk instalasi dan penyambungan, lihat buku pedoman terpisah.
INSTRUCTIONS
BUKU PETUNJUK
MENU
KD-LHX555
KD-LHX555
DISP
GET0283-003A
[UN]
Advertisement
Table of Contents

Related Manuals for JVC Exad KD-LHX555


Summary of Contents for JVC Exad KD-LHX555
- Page 1 CD/SD RECEIVER KD-LHX555 ALAT PENERIMA CD/SD KD-LHX555 MENU DISP For canceling the display demonstration, see page 8. Untuk membatalkan tampilan demonstrasi, lihat halaman 8. For installation and connections, refer to the separate manual. Untuk instalasi dan penyambungan, lihat buku pedoman terpisah.
-
Page 2: How To Reset Your Unit
Thank you for purchasing a JVC product. Please read all instructions carefully before operation, to ensure your complete understanding and to obtain the best possible performance from the unit. IMPORTANT FOR LASER PRODUCTS 1. CLASS 1 LASER PRODUCT 2. CAUTION: Do not open the top cover. There are no user serviceable parts inside the unit; leave all servicing to qualified service personnel. -
Page 3: Table Of Contents
Selecting preset sound modes during playback ........(i-EQ: intelligent equalizer) ....21 Storing your own sound modes ..... 21 Control panel — ..5 KD-LHX555 Parts identification ......... Graphic displays ....22 Basic procedure ........22 Remote controller Downloading the files ......22 —... -
Page 4: How To Read This Manual
How to read this manual How to change the display pattern during playback The following methods are used to make the explanations simple and easy-to-understand: • Some related tips and notes are explained in “More about this receiver” (see pages 36 –... -
Page 5: Control Panel - Kd-Lhx555
Control panel — KD-LHX555 Parts identification 5 0 (eject) button (standby/on attenuator) button 2 Remote sensor (angle) button 7 MENU button • DO NOT expose the remote sensor to 8 Reset button strong light (direct sunlight or artificial lighting). (control panel release) button 3 VOLUME + / –... -
Page 6: Remote Controller
Remote controller — RM-RK300 Installing the lithium coin battery Main elements and features (CR2025) • When operating, aim the remote controller directly at the remote sensor on the receiver. Make sure there is no obstacle in between. (standby/on/attenuator) button Warning: •... -
Page 7: Getting Started
Getting started Basic operations To drop the volume in a moment (ATT) To restore the sound, press it again. Ÿ Select the source. To turn off the power Caution on volume setting: Discs produce very little noise compared with other sources. Lower the volume before playing a disc to avoid damaging the speakers by the sudden increase of the output level. -
Page 8: Canceling The Display Demonstrations
Adjust the hour. Canceling the display demonstrations If no operations are done for about 20 seconds, display demonstration starts. [Initial: Interval]—see page 26. Select “Clock Min” (minute), then adjust the minute. Select “Off.” Exit from the setting. Select “24H/12H,” then select “24Hours”... -
Page 9: Radio Operations
Radio operations Listening to the radio To tune in to a station manually Select “TUNER.” In step on the left... 2 Select the desired station frequencies. Ÿ Select the band (FM/AM). When an FM stereo broadcast is hard to receive Start searching for a station. -
Page 10: Storing Stations In Memory
Manual presetting Storing stations in memory Ex.: Storing FM station of 92.5 MHz into preset number 4 of the FM1 band. You can preset six stations for each band. FM station automatic presetting — SSM (Strong-station Sequential Memory) Select the FM band (FM1 – FM3) you want to store into. -
Page 11: Listening To A Preset Station
Preset Station List Listening to a preset station The lists show either the station frequency or assigned name (the first 8 characters). Appears only for FM. Select a preset station (1 – 6) you want. • Holding can display the Preset Station List (see below). -
Page 12: Disc/Sd Card Operations
Disc/SD card operations Playing a disc in the receiver All tracks will be played repeatedly until you change the source or eject the disc. • When inserting an audio CD or a CD Text About MP3 and WMA tracks disc: Total playing time MP3 and WMA (Windows Media Audio) -
Page 13: Playing Discs In The Cd Changer
Playing discs in the CD changer • When the current disc is an MP3 disc: About the CD changer It is recommended to use the JVC MP3- compatible CD changer with your receiver. • You can also connect other CH-X series CD changers (except CH-X99 and CH-X100). -
Page 14: Playing An Sd Card
Playing an SD card To eject the SD card, press the SD About the SD card card again. You can play back MP3/WMA tracks recorded on the SD card and show the stored image on the display during playback— Attach the control panel. ImageLink. - Page 15 If an SD card has been loaded..Operation screens used for the following operations is of MP3 playback in the receiver. To fast-forward or reverse the track To go to the next or previous tracks To go to the next or previous folders (only for MP3 and WMA tracks) For MP3 tracks: For WMA tracks:...
-
Page 16: Other Main Functions
To select a disc during playback Other main functions Selecting a disc/folder/track on the list • If you hold the icon, the Disc List will • Select a disc (only for the CD appear on the display (see the right column). - Page 17 If you select the current folder When using the remote controller..(highlighted on the screen), its File List appears. • To directly select a disc in the CD • Select a track (only for MP3/WMA changer disc or SD card). •...
- Page 18 • After the last track, the first track will be Ex.: To select track 32 while playing track 6 in selected and vice versa. the CD changer (Twice) * If the source is “CD-CH”: Works only when JVC MP3 compatible CD changer (CH-X1500) is connected.
-
Page 19: Selecting The Playback Modes
Selecting the playback modes You can use only one of the following playback modes at a time. Select your desired playback mode. Mode Plays the beginning 15 seconds of ... Intro play Track: All tracks of the current disc or the SD card. •... -
Page 20: Sound Adjustments
Sound adjustments Setting the basic sound selection menu—SEL B To select the cutoff frequency to the subwoofer. Ÿ Select a setting item. 55Hz: Frequencies higher than 55 Hz are cut off. 85Hz: Frequencies higher than 85 Hz are cut off. 115Hz: Frequencies higher than 115 Hz are cut off. -
Page 21: Selecting Preset Sound Modes (I-Eq: Intelligent Equalizer)
Selecting preset sound modes Storing your own sound modes (i-EQ: intelligent equalizer) Ex.: To adjust “FLAT” Select “FLAT” (see left column). You can select a sound mode suitable to the music genre. Select the frequency band—60Hz, 150Hz, 400Hz, 1kHz, 2.4kHz, 6kHz, Available sound modes 12kHz. -
Page 22: Graphic Displays
Graphic displays Basic procedure Before starting the following procedure, IMPORTANT: prepare a CD-R or an SD card including still • Refer also to Image Converter PDF files images (pictures) and animations (movies). included in the “Manual” folder of the • With Image Converter (Wide Ver 1.2) supplied CD-ROM. -
Page 23: Deleting The Files
Downloading an animation or Select a file. pictures • It takes a long time to download an animation. For details, see page 39. • To activate the downloaded files, see page 25. In step ! on page 22..File name appears. •... - Page 24 Deleting all the stored animation and pictures Appears only if “PICTURE” is selected. • To delete all the stored files • To delete the stored animation File name appears. • To delete the stored pictures • To delete all the stored pictures File name appears.
-
Page 25: Activating The Downloaded Files
2 Select a setting you want. Activating the downloaded fi les • To activate the animations stored for opening and ending screens UserMovie: Your edited animation 1 Select “Opening” or “Ending.” stored in “MOVIE” is activated. UserSlide: Your edited still images stored in “PICTURE”... -
Page 26: General Settings - Psm
General settings — PSM Select a PSM item. Basic procedure You can change PSM (Preferred Setting Mode) items listed in the table that follows. Adjust the PSM item selected. Select a PSM category. Repeat steps to adjust the other PSM items if necessary. You can move to a different category by simply changing the PSM items. - Page 27 Indications Selectable settings, [reference page] Opening When you turn on (“Opening”) and off (“Ending”) the power, [25]..Opening screen Default: [Initial]; Factory-preset animation is used. Ending User: Your own edited animation is used. Ending screen UserPict. [Initial: First stored]; You can select one of the stored files as the graphics, [25].
- Page 28 Indications Selectable settings, [reference page] LCD Type Auto: [Initial]; Positive pattern will be selected during the day time ; while negative pattern will be used during the Display type night time Positive: Positive pattern of the display. Negative: Negative pattern of the display (except still images, animations, and audio level meters).
- Page 29 You can select the language for the VSS. English [Initial] O Chinese (Mandarin) O French (Français) O Language (back to the beginning) Ext Input Changer: [Initial]; To use a JVC CD changer, [13]. External input Ext In: To use any external component, [34]. Telephone Muting1/Muting2: Select either one which mutes the sounds while using the cellular phone.
-
Page 30: Selecting The Dimmer Mode
Set the dimmer start time. Selecting the dimmer mode You can dim the display at night or as you set the timer. Set the dimmer end time. Exit from the setting. Changing the display color Auto: Dims the display when you You can select your favorite display color for turn on the headlights. - Page 31 Creating your own color—User Select the source. You can create your own colors—“USER DAY” and “USER NIGHT.” 1 In step on the left, select the user color. \ CD \ SD \ Changer AllSource* ) \ Line In \ FM \ AM (or Ext In* \ (back to the beginning) When you select “AllSource,”...
-
Page 32: Other Main Functions
Other main functions 2 Select a character. Assigning titles to the sources You can assign titles to station frequencies, CDs (both in this receiver and in the CD changer), and the external components (LINE-IN and EXT-IN). Maximum number of Sources 3 Move to the next character position. -
Page 33: Changing The Control Panel Angle
Changing the control panel angle Detaching the control panel When detaching or attaching the control panel, be careful not to damage the connectors on the back of the control panel and on the panel holder. Detaching the control panel Before detaching the control panel, be sure to turn off the power. -
Page 34: External Component Operations
External component operations You can connect an external component to the LINE IN plugs on the rear—LINE-IN and Adjust the volume. another to the CD changer jack on the rear using the Line Input Adapter KS-U57 (not supplied)—EXT-IN. • For connection, see Installation/Connection Manual (separate volume). -
Page 35: Maintenance
Maintenance How to clean the touch panel How to handle discs/SD cards When removing stains or dust on the surface, When removing a disc from Center holder turn off the power, then wipe with dry soft its case, press down the center cloth. -
Page 36: More About This Receiver
More about this receiver Basic operations Disc/SD card operations General Caution for DualDisc playback • The clock in the “BACK” icon on the screen • The Non-DVD side of a “DualDisc” does works as the time countdown indicator. If no not comply with the “Compact Disc Digital operation is done for a certain period of time, Audio”... - Page 37 Playing an MP3/WMA track • This receiver may be unable to play back some SD cards due to their characteristics or • This receiver can play back MP3/WMA files recording conditions. with the extension code <.mp3> or <.wma> • This receiver cannot play back mini SD card (regardless of the letter case—upper/lower).
- Page 38 ImageLink • This receiver can recognize the total of 512 files, of 200 folders, and of 8 hierarchies of an • ImageLink will not work in the following MP3/WMA disc; 255 files and 63 folders of cases: an SD card. –...
-
Page 39: General Settings—Psm
Graphic displays • If you change the “Amp Gain” setting from “High PWR” to “Low PWR” while the Downloading (or deleting) files volume level is set higher than “Volume 30,” • You can download a file only while selecting the receiver automatically changes the volume “CD”... -
Page 40: Troubleshooting
Troubleshooting What appears to be trouble is not always serious. Check the following points before calling a service center. Symptoms Causes Remedies • Screens suddenly goes off. There is a time limit for Finish the operation within some operations. the time limit. •... - Page 41 Symptoms Causes Remedies • “No Files” appears on the No MP3/WMA tracks are Change the disc or the SD display for a while. recorded. card. MP3/WMA tracks do not Add the extension code have the extension code <.mp3> or <.wma> to their <.mp3>...
- Page 42 Symptoms Causes Remedies • Download does not seem It takes quite a long time to to finish. download an animation of many frames (see page 39). • Opening and ending “KeyIn CFM” is set to Select “On” (see page 26). animation does not appear.
-
Page 43: Specifications
Specifications AUDIO AMPLIFIER SECTION CD/SD PLAYER SECTION Maximum Power Output: Type: Compact disc player Front: 52 W per channel Signal Detection System: Non-contact optical Rear: 52 W per channel pickup (semiconductor laser) Continuous Power Output (RMS): Number of Channels: 2 channels (stereo) Front: 19 W per channel into 4 Ω, 40 Hz Frequency Response: 5 Hz to 20 000 Hz to 20 000 Hz at no more than 0.8%... - Page 44 Having TROUBLE with operation? Please reset your unit Refer to page of How to reset your unit Ada MASALAH dengan cara pengoperasian? Setel kembali unit Anda Lihat halaman mengenai Bagaimana mereset unit anda EN, IN © 2004 Victor Company of Japan, Limited 1204DTSMDTJEIN...
- Page 45 The following illustration shows a typical installation. If you have any questions or require Ilustrasi berikut menunjukkan sebuah tipe pemasangan. Jika anda mempunyai suatu information regarding installation kits, consult your JVC car audio dealer or a company supplying pertanyaan atau informasi yang diperlukan mengenai alat-alat pemasangan, konsultasikan kits.
-
Page 46: Electrical Connections
• Pastikan bahwa alat penerima ini di-ground-kan pada casis mobil setelah pemasangan. Notes: Catatan: • Replace the fuse with one of the specifi ed rating. If the fuse blows frequently, consult your JVC • Ganti sekring dengan voltase yang sudah ditetapkan. Jika sekring sering meledak, car audio dealer. - Page 47 INDONESIA ENGLISH Typical Connections / Ciri khas sambungan-sambungan Before connecting: Check the wiring in the vehicle carefully. Incorrect connection may cause Sebelum penyambungan: Cek perkabelan dalam mobil dengan hati-hati. Penyambungan serious damage to this receiver. yang tidak benar mungkin menyebabkan kerusakan serius pada alat penerima. Ujung dari kabel power dan beberapa konektor dari bodi mobil mungkin berbeda dalam The leads of the power cord and those of the connector from the car body may be different in warna.
- Page 48 CD changer JVC • Before connecting the CD changer, make sure that the receiver is turned off. • Sebelum menyambungkan CD changer JVC, pastikan bahwa alat penerima sudah dimatikan. External component / Komponen luar • Set “Ext Input” to “Ext In” (see page 29 of the INSTRUCTIONS.) / Atur “Ext Input” ke “Ext In” (lihat halaman 29 dari BUKU PETUNJUK.)