
Related Manuals for JVC KW-XR616


Summary of Contents for JVC KW-XR616
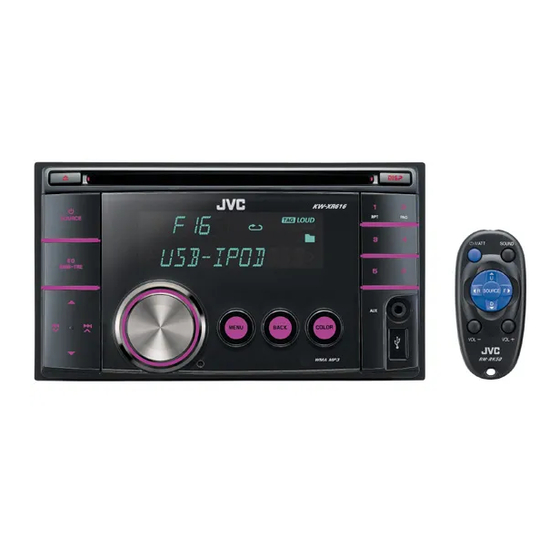
- Page 1 KW-XR616/KW-XR614 CD RECEIVER For canceling the display demonstration, see page 4. For installation and connections, refer to the separate manual. INSTRUCTIONS GET0666-001A [U/UH/UN/UI]...
- Page 2 Thank you for purchasing a JVC product. Please read all instructions carefully before operation, to ensure your complete understanding and to obtain the best possible performance from the unit. IMPORTANT FOR LASER PRODUCTS 1. CLASS 1 LASER PRODUCT 2. CAUTION: Do not open the top cover. There are no user serviceable parts inside the unit; leave all servicing to qualified service personnel.
-
Page 3: Table Of Contents
How to read this manual CONTENTS The following icons/symbols are used to How to read this manual indicate: How to reset your unit Press and hold the button(s) How to forcibly eject a disc [Hold] until the desired operation Canceling the display begins. -
Page 4: Canceling The Display Demonstration
Canceling the display demonstration Turn on the power. Select <DEMO OFF>. [Hold] (Initial setting) Finish the procedure. Setting the clock Turn on the power. [Hold] (Initial setting) Select <CLOCK>. Select <CLOCK SET>. Adjust the hour. Adjust the minute. Finish the procedure. ENGLISH... -
Page 5: Preparing The Remote Controller
Preparing the remote controller (RM-RK50) Warning (to prevent accidents and When you use the remote controller for the first time, pull out the insulation sheet. damage): • Do not install any battery other than CR2025 or its equivalent. • Do not leave the remote controller in a place (such as dashboards) exposed to direct sunlight for a long time. -
Page 6: Basic Operations
Basic operations Ejects the disc Display window Loading slot Selects preset station. Control dial USB (Universal Serial Bus) input terminal Auxiliary input jack Remote sensor • DO NOT expose to bright sunlight. When you press or hold the following button(s)... Remote Main unit General operation... -
Page 7: Listening To The Radio
Remote Main unit General operation controller Adjusts the volume level. — Selects items. • Mutes the sound while listening to a source. If the source is “CD,” “USB,” or “USB-IPOD,” playback pauses. Press the control dial again — to cancel muting or resume playback. •... -
Page 8: Selecting A Preset Station
When an FM stereo broadcast is Manual presetting (FM/AM) hard to receive You can preset up to 18 stations for FM and 6 stations for AM. Ex.: Storing FM station of 92.50 MHz into preset [Hold] number “04.” ] “92.50MHz” ] <TUNER>... -
Page 9: Title Assignment
Title assignment Changing the display information Station name * = Frequency You can assign titles up to 30 station = Clock = (back to the frequencies (FM and AM) using 8 characters (maximum) for each title. beginning) • If you try to assign titles to more than 30 * If no title is assigned to a station, “NO NAME”... -
Page 10: Listening To A Disc
Listening to a disc ] Turn on the power. Ÿ All tracks will be played repeatedly until you change the source or eject the disc. Stopping playback and ejecting Selecting a folder/track on the the disc list “NO DISC” appears. While listening to a disc.. -
Page 11: Selecting The Playback Modes
Selecting the playback modes Changing the display information You can use only one of the following playback modes at a time. Disc title/Album name/performer (folder name)* = Track title (file name)* = Current track number with the elapsed playing time ] “REPEAT”... -
Page 12: Listening To The Usb Device
Listening to the USB device This unit can play MP3/WMA files stored on a USB mass storage class device. You can connect a USB mass storage class device such as a USB memory, Digital Audio Player, etc. to the unit. •... -
Page 13: Using The Bluetooth ® Device
Using the Bluetooth ® device Registering using “OPEN” For Bluetooth operations, it is required to connect the Bluetooth adapter, KS-BTA200 (not Preparation: Operate the device to turn on its supplied) to the expansion port on the rear of Bluetooth function. this unit. -
Page 14: Using A Bluetooth Mobile Phone
Registering using “SEARCH / SPECIAL” Connecting/disconnecting/ deleting a registered device ] “BT-PHONE” or “BT-AUDIO” ] “BT-PHONE” or “BT-AUDIO” ] “NEW DEVICE” ] Select a device you want to connect/disconnect/delete. ] “SEARCH” : To search for available devices The unit searches and displays the list ] “CONNECT”... -
Page 15: Making A Call
When a text message comes in..phone number. If the mobile phone is compatible with text For NUMBER message (notified through JVC Bluetooth adapter) and “MSG INFO” (message info) is set to “AUTOMATIC” ( 17), the unit rings to inform you of the message arrival. -
Page 16: Using A Bluetooth Audio Player
Appears only when a Bluetooth phone is For connecting/disconnecting/deleting a connected and it is compatible with text registered device, message (notified through JVC Bluetooth adapter). Using the remote controller Bluetooth Audio: Shows only “Version.” 2 R / F 3 : Reverse skips/forward... - Page 17 Bluetooth Information: If you wish to receive more information MIC SETTING (microphone setting) about Bluetooth, visit the following JVC web Only for the device being connected for site: <http://www.jvc.co.jp/english/car/> “BT-PHONE.” Adjust microphone volume (English website only) connected to the Bluetooth adapter, [LEVEL 01/02/03].
-
Page 18: Listening To The Ipod/Iphone
Listening to the iPod/iPhone You can connect the iPod/iPhone using the USB 2.0 cable (accessory of the iPod/iPhone) to the USB input terminal on the control panel. Apple iPod/iPhone USB 2.0 cable (accessory of the iPod/iPhone) USB input terminal There are two control terminals: •... -
Page 19: Selecting The Playback Modes
Album name/performer = Track title = may not be performed correctly or as Current track number with the elapsed intended. In this case, visit the following JVC playing time = Current track number with web site: <http://www.jvc.co.jp/english/car/> the clock time = (back to the beginning) -
Page 20: Listening To The Other External
Listening to the other external components You can connect an external component to: • EXT INPUT: Expansion port on the rear of this unit using the following adapters (not supplied): – KS-U57, Line Input Adapter – KS-U58, AUX Input Adapter Preparation: Make sure <EXT ON>... -
Page 21: Selecting A Preset Sound Mode
Selecting a preset sound mode You can select a preset sound mode suitable Storing your own sound mode for the music genre. You can store your own adjustments in memory. FLAT = NATURAL = DYNAMIC = VOCAL [Hold] BOOST = BASS BOOST = USER = (back to the beginning) While listening, you can adjust the tone level of ] <PRO EQ>... -
Page 22: Menu Operations
Menu operations Repeat step 2 if necessary. • To return to the previous [Hold] menu, press BACK. • To exit from the menu, press DISP or MENU. Category Menu item Selectable setting, [ Initial: Underlined DEMO • DEMO ON : Display demonstration will be activated Display demonstration automatically if no operation is done for about 20 seconds. - Page 23 Category Menu item Selectable setting, [ Initial: Underlined SSM * • SSM 01 – 06 : For settings, Strong-station • SSM 07 – 12 Sequential • SSM 13 – 18 Memory MONO * • MONO ON : Activate monaural mode to improve FM Monaural mode reception, but stereo effect will be lost.
- Page 24 Category Menu item Selectable setting, [ Initial: Underlined FADER * R06 – F06 : Adjust the front and rear speaker output [ 00 ] balance. BALANCE * L06 – R06 : Adjust the left and right speaker output [ 00 ] balance.
- Page 25 Category Menu item Selectable setting, [ Initial: Underlined BEEP • BEEP ON : Activates the keypress tone. Keytouch tone • BEEP OFF : Deactivates the keypress tone. AMP GAIN * • LOW POWER : VOLUME 00 – VOLUME 30 (Select if the Amplifier gain maximum power of each speaker is less than control...
-
Page 26: Selecting The Variable Buttons And
Selecting the variable buttons and display color illumination You can select your preferred color for buttons illumination (except for 0 / DISP ) and display color separately. Display zone Button zone All zone Repeat steps 2 and 3 to select a different zone and your preferred color. -
Page 27: [Hold]
Creating your own day and night colors—USER You can create your own colors for <DAY COLOR> and <NIGHT COLOR> to apply to button zone and display zone. • <DAY COLOR> Displayed when <DIMMER> is set to <DIMMER OFF>. • <NIGHT COLOR> Displayed when <DIMMER> is set to <DIMMER ON>. Menu hierarchy Operation •... -
Page 28: Maintenance
Maintenance Moisture condensation Do not use the following discs: Moisture may condense on the lens inside the Single CD (8 cm disc) Warped disc unit in the following cases: • After starting the heater in the car. • If it becomes very humid inside the car. Should this occur, the unit may malfunction. -
Page 29: More About This Unit
More about this unit Basic operations • When a disc is inserted upside down, “PLEASE” and “EJECT” appear alternately on the display. General Press 0 to eject the disc. • If you turn off the power while listening to • If the ejected disc is not removed within a track, playback will start from where it had 15 seconds, it is automatically inserted into been stopped previously next time you turn... - Page 30 • Do not use the following CD-Rs or CD-RWs: • This unit cannot play back the following files: – Discs with stickers, labels, or a protective seal – MP3 files encoded in MP3i and MP3 PRO stuck to the surface. format.
-
Page 31: Bluetooth Operations
Windows Media® Audio. can display up to 64 characters. Bluetooth operations JVC bears no responsibility for any loss of data • While driving, do not perform complicated in an iPod/iPhone and/or USB mass storage operation such as dialing the numbers, using class device while using this System. -
Page 32: Troubleshooting
( If “PROTECT” does not disappear, consult your JVC car audio dealer or a company supplying kits. The unit does not work at all. - Page 33 Symptom Remedy/Cause Disc cannot be played back. • Use a disc with MP3/WMA tracks recorded in a format compliant with ISO 9660 Level 1, Level 2, Romeo, or Joliet. • Add the extension code <.mp3> or <.wma> to the file names.
- Page 34 Symptom Remedy/Cause • “CANNOT PLAY” flashes on the • Attach a USB device that contains tracks encoded display. in an appropriate format. • “NO USB” appears on the display. • Reattach the USB device again. • The unit cannot detect the USB device.
- Page 35 • The Bluetooth word mark and logos are owned by the Bluetooth SIG, Inc. and any use of such marks by Victor Company of Japan, Limited (JVC) is under license. Other trademarks and trade names are those of their respective owners.
-
Page 36: Specifications
Specifications Maximum Power Output: Front/Rear: 50 W per channel Continuous Power Output (RMS): Front/Rear: 20 W per channel into 4 Ω, 40 Hz to 20 000 Hz at no more than 1% total harmonic distortion. Load Impedance: 4 Ω (4 Ω to 8 Ω allowance) Tone Control Range: Bass: ±12 dB (60 Hz, 80 Hz, 100 Hz, 200 Hz) - Page 37 Type: Compact disc player Signal Detection System: Non-contact optical pickup (semiconductor laser) Number of Channels: 2 channels (stereo) Frequency Response: 5 Hz to 20 000 Hz Dynamic Range: 96 dB Signal-to-Noise Ratio: 98 dB Wow and Flutter: Less than measurable limit MP3 Decoding Format: (MPEG1/2 Audio Layer 3) Max.
- Page 38 The countries where you may use the Bluetooth® function ii i nh ng qu c gia mà b n có th s d ng ch c n ng Bluetooth ® i i i i i i...
- Page 39 Country Country Andorra Luxemburg Luxembourg Lëtzebuerg Australia Latvija Österreich Monaco Bosna i Hercegovina Crna Gora Belgien Македонија Belgique Malta България Nederland Canada Norge Schweiz New Zealand Suisse Polska Κύπρος Kıbrıs Portugal Česká republika România Deutschland Srbija Danmark Россия Eesti Sverige España Singapore Suomi...
- Page 40 Having TROUBLE with operation? Please reset your unit Refer to page of How to reset your unit © 2010 Victor Company of Japan, Limited 0110DTSMDTJEIN...
- Page 41 Ilustrasi berikut menunjukkan sebuah tipe pemasangan. Jika anda mempunyai suatu pertanyaan atau informasi yang diperlukan mengenai alat-alat pemasangan, konsultasikan pada penyalur audio mobil JVC atau sebuah regarding installation kits, consult your JVC car audio dealer or a company supplying kits. perusahaan yang mensuplai alat-alat.
- Page 42 KS-U57 / KS-U58 You can connect the following components through the various JVC adapters to the expansion port. / Anda dapat menghubungkan komponen berikut ini melalui berbagai adaptor JVC ke port perluasan. • Connection cords may need to be purchased separately. / Kabel koneksi mungkin harus dibeli secara terpisah.