Table of Contents
Advertisement
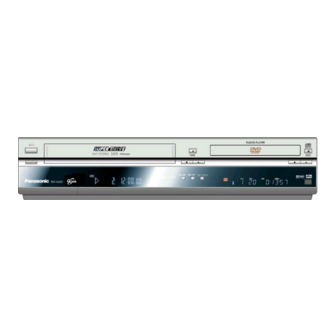
Operating Instructions
DVD PLAYER / VIDEO CASSETTE RECORDER
(DVD/CD Player with MP3 and Hi-Fi Video Cassette Recorder)
NV-VHD1 B
Accessories
Remote Control
EUR7615KB0
AC Mains lead
RJA0044-3C
RF lead
VJA0728-A
Remote Control Batteries
Operating Instructions
Guarantee Card
Quick Start Guide
PDC
PAL
Contents
Please read through all these operating instructions
(especially the safety information) before connecting
or operating this unit, or adjusting any settings.
OSD = On Screen Display
VCR
= Video Cassette Recorder
TV
= Television
€
ˆ
Page
2
3
4
5
6
8
10
11
13
14
17
19
20
21
22
23
24
‡
RQTD0021-B
Advertisement
Table of Contents

Related Manuals for Panasonic NV-VHD1 B


Summary of Contents for Panasonic NV-VHD1 B
-
Page 1: Table Of Contents
Operating Instructions DVD PLAYER / VIDEO CASSETTE RECORDER Page Contents (DVD/CD Player with MP3 and Hi-Fi Video Cassette Recorder) Warning and Precautions NV-VHD1 B Setting up VCR / DVD Controls VCR / DVD Operations VCR Recording VCR Functions VCR Tuning... -
Page 2: Aa, Um3 Or R6
Warnings and Precautions n This unit is intended for use in moderate climates. n Please observe copyright laws when recording sound tracks and film. Caution ! n Do not install, or place this unit, in a bookcase, built-in cabinet or in another confined space. Ensure the unit is well ventilated. -
Page 3: Setting Up
Note about : The following systems from other manufacturers have a similar function to Q Link from Position Panasonic. List of registered trademarks: Q Link (Panasonic), DATA LOGIC (Metz), Easy Link (Philips), Megalogic (Grundig), SMARTLINK (Sony) Manual download start Panasonic VCR Main menu n Set the AV channel of the TV. -
Page 4: Vcr / Dvd Controls
VCR / DVD Controls VCR display DVD display The functions of these buttons can be operated by the remote control or directly on the unit. In this description, the remote control symbols are used in most cases. TV Operations To set the remote control code to operate the TV, see page 23. -
Page 5: Vcr / Dvd Operations
VCR / DVD Operations VCR Operations DVD Operations DVD display VCR display > Playback > (indicated by Playback (indicated by Stop (indicated by Restart from the memorized position To stop winding a tape, recording or playback. Playback Stop Resume (press button 1x) Still Playback (indicated by n Press this button during playback. -
Page 6: Vcr Recording
With the On Screen Menu you can programme Timer recordings (up to 16 programmes). Panasonic VCR Switch on and set the TV to the video output channel and insert a cassette with an intact erasure prevention tab into the VCR. - Page 7 VCR and set the remote control to VCR operation. n Press |VIDEO Plus+| n Enter the VIDEO Plus+ number. For correction use 8 . Panasonic VCR n To access [Timer recording], press |ENTER|. Timer recording n If the channel name is not set automatically, select the channel [Pos] :;...
-
Page 8: Vcr Playback
Note: For more explanation of the SEARCH button, see Programme List. Programme List The List of the Timer recordings are stored if the recordings are longer than 15 minutes (EP mode 25 minutes) Panasonic VCR Programme List and the cassette was not removed. -
Page 9: Vcr Functions
The VCR display is brightly illuminated [DIMMED] The VCR display is dimmed Panasonic VCR Remote Control setting Main menu To use a second Panasonic VCR Timer recording with one remote control in the same place: Output control Tuning n Press |MENU|... -
Page 10: Vcr Tuning
VCR Tuning Change the order of the Channel Panasonic VCR Setting the sound system Main menu positions and the names of the Timer recording This system can receive transmissions which Panasonic VCR Main menu Tuning TV station are broadcast with NICAM sound. -
Page 11: Connecting External Equipment
21-pin scart lead (not supplied) by using EXT LINK function. (Please This device is used to decode scrambled broadcasts (Pay TV). read the operating instructions for your Satellite Receiver for further information). Controls for external recordings Panasonic VCR External source on AV3 Main menu with a Satellite Receiver Timer recording... - Page 12 Connecting External Equipment Connecting with Audio / Video cable Connecting with S-VIDEO lead Connect the Audio / Video cable (white=L, red=R, yellow=video) according The S-VIDEO terminal achieves a more vivid picture to the colours / markings of the terminals. than the VIDEO OUT terminal (only DVD out) (not supplied) If your TV is supporting RGB, then connect a 21 pin scart lead with AV1 (TV) to reach the best picture quality for DVD playback,...
-
Page 13: Dvd Easy Setup
DVD EASY SETUP n Select DVD output n Switch remote control to DVD English Deutsch Panasonic n Select desired language 8 9:; Français EASY SETUP Italiano Español n Press |ENTER| to confirm Svenska Nederlands Português n Press |SETUP| or |RETURN| to exit the screen Initial settings for the unit can be adjusted in a easy way in the shown succession. -
Page 14: Dvd Operation
DVD Operation Playback n Switch remote control to DVD n Press |VCR / DVD OUTPUT| to select DVD output Reading disc information - please wait n Press OPEN/CLOSE | on the unit n Place the disc on the disc tray n Press Playback >... -
Page 15: Dvd Playback / Vcr Functions
DVD Playback MP3 menu Panasonic MP3 Menu n Press |MENU| n Press SKIP \MY FAVOURITES\ to select the page before or page after Track 01 -special remix- n Select Folder (GROUP) Track 02 n Select MP3 Title :; Track 03... - Page 16 DVD Playback Repeat Playback (DVD, VCD, CD, MP3) REPEAT CHAPTER n Press |REPEAT| during playback. REPEAT TITLE The display changes as illustrated. REPEAT OFF CHAPTER TITLE Video CD TRACK DISC TRACK DISC TITLE FOLDER Note: Repeat playback does not work if the elapsed playback time is not shown on the unit’s display. There is no mode for repeating the whole DVD.
-
Page 17: Dvd Settings
To cancel: Press the button |ONE TOUCH MEMORY| to set the factory preset [MEMORY OFF] appears in the display. n Recalling the settings: Press the button |ONE TOUCH MEMORY| [MEMORY ON] appears in the display. Basic operation Panasonic Soundtrack language English n Press |SETUP| the [SETUP] screen appears DVD SETUP... - Page 18 DVD Settings SETUP DISC (DVD, VCD Panasonic Language codes see page 23. n Press |SET UP| to call up the menus of the DVD-player Soundtrack language English DVD SETUP Subtitle language Automatic DISC DVD Menu language English Menu list Factory preset...
-
Page 19: Dvd Osd Menu
DVD OSD Menu OSD-screens are menus that contain information about the disc or unit. These menus allow you to perform operations by changing this information. Note: For some DVD-VIDEO discs certain settings are not allowed by disc. Please use the DVD menu. Progress Indicator n Press |DISPLAY| during playback TITLE 1/17... -
Page 20: Information About The Player
Information about the player This product incorporates copyright protection technology that is protected by the method claims of certain U.S. patents and other intellectual property rights owned by Macrovision Corporation and other rights owners. Use of this copyright protection technology must be authorized by Macrovision Corporation, and is intended for home and other limited viewing uses only unless otherwise authorized by Macrovision Corporation. -
Page 21: Information About The Vcr
If you found the title, simply press the Play button to watch the film. Scan Jet Rewind: The Panasonic VCRs are equipped with a Jet Rewind Drive. To rewind a E180 cassette it will take only 60 seconds. For convenient winding and searching, the tape transportation speeding up extremely fast and is stopping softly in very short time. -
Page 22: Troubleshooting
Troubleshooting The remote control does not work correctly The display is not illuminated: The signal from the remote control does not reach the unit’s window, The mains lead is not connected. n Check the connection. or the distance is too long. n Point the remote control in direction to the unit. -
Page 23: Language Codes
IRRADIO factory default values. You will have to set the initial settings by using Note: If your Panasonic TV can be operated with Code 44 EASY SETUP, see page17. the remote control can operate some additional TV functions with the buttons:... -
Page 24: Index / Specifications
220-240 V AC, 50/60 Hz Matsushita Electric Industrial Co., Ltd. Power consumption 28W (in operation) / approx. 7W (in standby mode) http://www.panasonic.co.uk Controls multifunctional remote control (VCR, DVD and TV) / VCR / DVD direct controls (main functions) VCR Playback functions...