Samsung WA456 Series User Manual
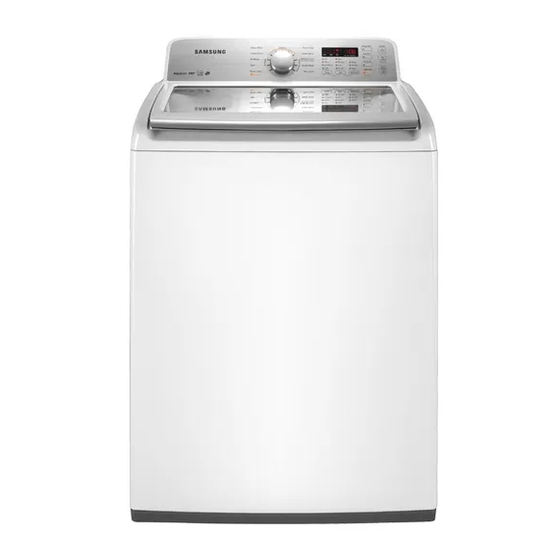
Top-loading washing machine
Hide thumbs
Also See for WA456 Series:
- User manual (132 pages) ,
- Technical information (61 pages) ,
- Fast track troubleshooting (9 pages)
Table of Contents

Related Manuals for Samsung WA456 Series


Summary of Contents for Samsung WA456 Series
-
Page 1: Washing Machine
WA456* WA406* Washing Machine user manual This manual is made with 100% recycled paper. imagine the possibilities Thank you for purchasing this Samsung product. To receive a more complete service, please register your product at www.samsung.com/register... -
Page 2: Smart Check
1. Large Capacity Even bulky garments and blankets get super clean. Samsung’s large capacity washer provides the room clothes need for a more thorough, cleaner wash. 2. PowerJet™ PowerJet™ washes loads gently and more thoroughly than conventional top loaders.Faster drum rotation and the absence of an agitator inside the machine help circulate foam more evenly throughout all your clothes, while powerful water jets provide a thorough rinse. -
Page 3: Safety Information
Congratulations on your new Samsung Washer. This manual contains important information on the installation, use, and care of your appliance. Please take time to read this manual to take full advantage of your washer’s many benefits and features. - Page 4 safety information This appliance is not intended for use by persons (including children) with reduced physical, sensory or mental capabilities, or lack of experience and knowledge, unless they have been WArnInG given supervision or instruction concerning use of the appliance by a person responsible for their safety.
- Page 5 CrITICAL InSTALLATIon WArnInGS WArnInG Plug the power cord into an AC 220-240 V / 50 Hz/wall socket rated at 15 amps or higher. Use the socket for this appliance only. In addition, do not use an extension cord. - Sharing a wall socket with other appliances, using a power strip, or extending the power cord may result in electric shock or fire.
- Page 6 safety information InSTALLATIon CAuTIonS CAuTIon Position the appliance so that the power plug is easily accessible. - Failing to do so may result in electric shock or fire due to electric leakage. Install your appliance on a level and hard floor that can support its weight. - Failing to do so may result in abnormal vibrations, noise, or problems with the product.
- Page 7 Do not touch the power plug with wet hands. - This may result in electric shock. Do not turn the appliance off by unplugging the power plug while the washer is in operation. - Plugging the power plug into the wall socket again may cause a spark and result in electric shock or fire.
- Page 8 safety information Insert the laundry into the washer completely so that laundry does not get caught in the lid. - If laundry gets caught in the lid, it may result in damage to the laundry or the washer, or result in water leakage. Ensure that the faucet is turned off when the washer is not being used.
- Page 9 Do not place any non-laundry objects, such as shoes, food waste, or animals into the washer. - This can cause abnormal vibrations that can damage the washer, and, in the case of pets, cause severe injury or death. Do not press the buttons using sharp objects such as pins, knifes, fingernails, etc. - This may result in electric shock or injury.
-
Page 10: Table Of Contents
contents INsTAllING yOUR WAsheR Unpacking your washer Overview of your washer Basic location requirements Electrical Grounding Water Drain facility Flooring Location considerations Alcove or closet installation Required dimensions for Installation Important note to installer OpeRATING INsTRUCTIONs Loading your washer Getting started WAshING A lOAd Of lAUNdRy Overview of the control panel Child Lock [... -
Page 11: Installing Your Washer
installing your washer unPACkInG your WAShEr Unpack your washer and inspect it for shipping damage. Make sure you have received all the items shown below. If your washer was damaged during shipping, or you do not have all of the items, contact 1-300- 362-603. -
Page 12: Basic Location Requirements
installing your washer bASIC LoCATIon rEquIrEMEnTS Electrical • 220-240 Volt 50 Hz 15 AMP fuse or circuit breaker • Individual branch circuit serving only your Washer is recommended. • Your Washer is equipped with a power cord. NEVER USE AN EXTENSION CORD. CAUTION Grounding ELECTRICAL GROUNDING IS REQUIRED FOR THIS APPLIANCE. -
Page 13: Drain Facility
Drain facility The recommended height of the standpipe is 39 in / 99 cm. The drain hose must be routed through the drain hose clip to the standpipe. The standpipe must be large enough to accept the outside diameter of the drain hose. The drain hose is attached to the washer at the factory. Flooring For best performance, you must install your washer on a solidly constructed floor. -
Page 14: Required Dimensions For Installation
installing your washer Required dimensions for Installation 29.3 in (74.4 cm) 43.9 in (111.4 cm) 39.3in (99.9 cm) 43.9 in (111.4 cm) 29.3 in 27.0 in. (74.4 cm) (68.6 cm) 3 in. (7.6 cm) 48 in.² * (310 cm²) 58.1 in (147.5 cm) 24 in.²... - Page 15 sTep 2 Connecting the water and the drain Connecting the water supply hose Before installing the water supply hoses, make sure there are rubber gaskets inside the fittings at both ends of each new CAUTION water hose. Installing the water supply hoses without rubber gaskets can cause water leakage.
-
Page 16: Connecting The Drain Hose
installing your washer Connecting the drain hose The end of the drain hose can be positioned in three ways: over the edge of a wash basin Secure the guide to the side of the basin wall with a hook or to the tap with a piece of string to prevent the drain hose from moving. -
Page 17: Calibration Mode
“Leveling your washer” section on page 16 for instructions. sTep 6 Calibration mode Your Samsung washing machine detects the laundry weight automatically. For more accurate weight detection, please run Calibration Mode after the installation. To run Calibration Mode, follow these steps: 1. -
Page 18: Operating Instructions
operating instructions WARNING: To reduce the risk of fire, electric shock, or injury to persons when using your appliance, follow basic precautions, including the following: WArnInG LoADInG your WAShEr • You can fill the tub with dry, unfolded clothes, but DO NOT OVERLOAD the tub, No more than 3/4 full. • Overloading may reduce washing efficiency, cause excess wear, and possibly cause creasing or wrinkling of the load. -
Page 19: Washing A Load Of Laundry
washing a load of laundry ovErvIEW of ThE ConTroL PAnEL Select the appropriate cycle for the type of load. The cycle you select determines the tumble pattern and spin speed for the cycle. To minimize wrinkling of laundry, select the Perm Press cycle. Cotton - For averagely or lightly soiled cotton,bed linen,table linen,underwear ,towels,shirts,etc. - Page 20 washing a load of laundry Press the button repeatedly to cycle through the different water temperature options. hot - Whites and heavily soiled, colorfast items. Warm - Colorfast items. Temperature Eco Warm - Moderately soiled, colorfast items; most wrinkle-free items. selection button Cold - Brightly colored, very lightly soiled items.
-
Page 21: Child Lock [ ]
Child Lock [ ] Child Lock prevents children from playing with your washer. Activating the Child Lock function Press and hold the spin and soil level buttons simultaneously for approximately 3 seconds. • When you activate the Child Lock function, the “Child Lock [ ]”... -
Page 22: Signal
washing a load of laundry Signal When the cycle is complete, a chime will sound. When you press and hold both the Temp. and spin buttons simultaneously for 3 seconds or more, the chime will sound intermittently. Garment+ You can add or take out laundry items even after the wash has started, as long as the “Garment+”... -
Page 23: Pre Soak
Pre Soak Use this function when the laundry is heavily contaminated or stained. This function improves the wash performance by adding a Pre Soak cycle. If you select this function, the total cycle time is increased by 15 minutes. When the Pre Soak cycle starts, the washing machine repeats a wash cycle after supplying water and then performs a 5-minute soak cycle. -
Page 24: Washing Clothes Using The Cycle Selector
Washing clothes using the cycle selector Your new washing machine makes washing clothes easy, using Samsung’s “Fuzzy Control” automatic control system. When you select a wash program, the machine will set the correct temperature, washing time, and washing speed. -
Page 25: Detergent Use
DETErGEnT uSE • The use a good quality top loader detergent is recommended. • It is also important to: Pre–treat stains before washing. Sort clothes by color. Sort clothes by the amount of soiling. Avoid overloading. When using powdered detergent it is recommended that the powder be dissolved in warm water to ensure optimum cleaning results. - Page 26 washing a load of laundry Loading the Liquid (or Powder) detergent compartment 1. Pour the recommended amount of laundry detergent Liquid detergent directly into the detergent compartment before starting compartment your washer. 2. If you are using color-safe bleach, add it with the detergent to the detergent compartment.
- Page 27 Loading the Fabric softener compartment 1. Pour the recommended amount of liquid fabric softener fabric softener into the softener compartment. compartment For smaller loads, use less than one capful. 2. Dilute the fabric softener with water until it reaches MAX FILL in the compartment.
-
Page 28: Maintaining Your Washer
maintaining your washer CLEAnInG ThE ExTErIor Turn off the water faucets after finishing the day’s washing. This will shut off the water supply to your washer and prevent the unlikely possibility of damage from escaping water. Leave the lid open to allow the inside of your washer to dry out. Use a soft cloth to wipe up all detergent, bleach or other spills as they occur. -
Page 29: Cleaning The Dispensers
CLEAnInG ThE DISPEnSErS The automatic dispenser may need to be cleaned periodically due to laundry additive buildup. 1. Pull the dispenser drawer straight back until it stops. 2. Tilt the dispenser drawer upward and remove it. 3. Remove the inserts from the 3 compartments. Rinse the inserts and the drawer with warm water to remove traces of accumulated laundry products. -
Page 30: Eco Tub Clean
maintaining your washer ECo Tub CLEAn Eco Tub Clean is a self-cleaning cycle that removes mold that may occur inside the washing machine. 1. Press the power button. 2. Select the eco Tub Clean course. • Once the Eco Tub Clean course is selected, the only function that can be set is Delay Start. -
Page 31: Troubleshooting
troubleshooting ChECk ThESE SoLuTIonS If your WAShEr… pROblem sOlUTION Will not start. • Make sure the lid is closed. • Make sure your washer is plugged in. • Make sure the water source faucets are open. • Make sure to press the Start/Pause button to start your Washer. • Make sure Child Lock is not activated. - Page 32 troubleshooting pROblem sOlUTION • Turn both faucets on fully. fills with the wrong temperature water. • Make sure the temperature selection is correct. • Make sure the hoses are connected to the correct faucets. Flush water lines. • Disconnect the hoses and clean the screens. The hose filter screens may be plugged.
-
Page 33: Information Codes
InforMATIon CoDES The Washer may display information codes to help you understand what is occurring with your Washer better. COde symbOl meANING sOlUTION The Water Level sensor is not Call for service. working properly. Your Washer has tried to fill but Make sure the water faucets are open all the was unsuccessful. - Page 34 troubleshooting COde symbOl meANING sOlUTION Mems sensor problem. Call for service. Temperature sensor problem. Restart the cycle. If the code reappears, call for service. The hot/cold water hose Please connect the hot/cold water hose connection is not correct. connection correctly. A fault is detected in the water Call for service level sensor.
-
Page 35: Appendix
appendix fAbrIC CArE ChArT The following symbols provide garment care direction. The Clothing care labels include symbols for washing, bleaching, drying and ironing, or dry cleaning when necessary. The use of symbols ensures consistency among garment manufacturers of domestic and imported items. Follow care label directions to maximize garment life and reduce laundering problems. -
Page 36: Cycle Chart
appendix CyCLE ChArT Use this chart to set the best cycle and options for you laundry. ( : factory setting, : selectable) functions Course Temp. spin soil level Cotton ... -
Page 37: Helping The Environment
27.0” (68.6) b. Width 58.1” (147.5) C. height with lid open 29.3” (74.4) D. Depth WATeR pRessURe 20-116 psi (137-800 kPa) WeIGhT WA456 / WA406 56.0 kg (122.2 lb) pOWeR CONsUmpTION WAShInG 230 V 700 W SPIn 230 V 400 W... - Page 38 memo...
- Page 39 memo...
- Page 40 QUESTIONS OR COMMENTS? Country CAll OR VIsIT Us ONlINe AT AUSTRALIA 1300 362 603 www.samsung.com Code No. DC68-03133B_EN...