Advertisement
Quick Links
Advertisement

Related Manuals for McIntosh MCD 7009


Summary of Contents for McIntosh MCD 7009
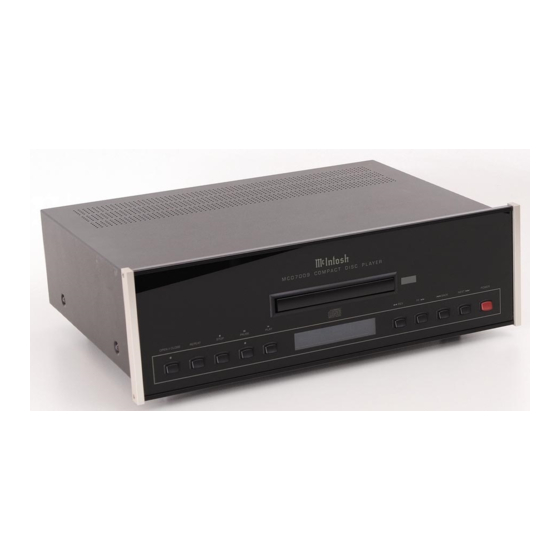
- Page 1 MCD7009 COMPACT DISC PLAYER...
- Page 2 1. Read all instructions - Read the safety and operating instructions before operating the instrument. IMPORTANT 2. Retain Instructions - Retain the safety and operating instructions for future reference. 3. Heed warnings - Adhere to warnings and operating instructions. SAFETY 4.
- Page 3 HOW TO INSTALL BATTERIES IN THE REMOTE CONTROLLER HOW TO INSTALL THE MCD7009 THE REAR PANEL AND HOW TO CONNECT 7, 8 HOW TO OPERATE THE MCD 7009 WITH REMOTE CONTROLLERS FROM OTHER MclNTOSH REMOTE CONTROLLED PRODUCTS 9, 10, 11 THE FRONT PANEL AND REMOTE CONTROLLER...
- Page 4 TAKE ADVANTAGE OF 3 YEARS OF CONTRACT SERVICE. . . FILL IN THE APPLICATION NOW. Your MCD7009 Compact Disc Player will give you many years of satisfactory performance. If you have any questions, please contact, Mclntosh Laboratory Inc. 2 Chambers Street Binghamton, New York 13903-2699 Phone: 607-723-3512 An application for A THREE YEAR SERVICE CONTRACT is included with this manual.
- Page 5 Choose the installation location of your unit carefully. Avoid placing it in direct sunlight or READ close to a source of heat. Also avoid locations subject to vibrations and excessive dust, heat, BEFORE cold or moisture. Keep away from such sources that hum, such as transformers or motors. OPERATING Do not open the cabinet as this might result in damage to the circuitry or electrical shock.
- Page 6 TRANSPORT FIXING (LOCKING) SCREW READ A transport FIXING or locking screw is provided to protect the MCD7009 Laser pickup BEFORE mechanism from shocks and movement during transit or shipping. Access the fixing screw from OPERATING the bottom panel of the player. RELEASE THE FIXING SCREW BEFORE OPERATING 1.
- Page 7 The last page of this manual folds out to show a drawing of the rear panel of the THE REAR PANEL MCD7009. The letters on the drawing refer to the information that follows. AND HOW TO 1. DIGITAL OUT: OFF/ON CONNECT Turns the OPTICAL and COAXIAL, DIGITAL OUT connectors ON or OFF.
- Page 8 8. LEFT and RIGHT BALANCED OUTPUTS THE REAR PANEL Connect cable with XLR type Balanced Connectors from the MCD7009 LEFT and RIGHT BAL- AND HOW TO ANCED OUTPUT jacks to the balanced CD or AUX input jacks of a Preamplifier or Control Center. CONNECT Using balanced connectors and cables can reduce noise and interference by as much as 40dB.
- Page 9 The DATA IN connection allows a Mclntosh Control Center Remote transmitter to operate a wide range of functions on the MCD7009 player from the main area or a remote area. THE REAR PANEL Refer to the drawings of the various Mclntosh hand held remote controllers showing which AND HOW TO pushbuttons are active for controlling the MCD7009.
- Page 10 MX118/C712 REMOTE CONTROL HOW TO OPERATE THE MCD7009 WITH REMOTE CONTROLLERS FROM OTHER MclNTOSH REMOTE CONTROLLED PRODUCTS C39/MX130 REMOTE CONTROL...
- Page 11 C38/C712 REMOTE CONTROL HOW TO OPERATE THE MCD7009 WITH REMOTE CONTROLLERS FROM OTHER MclNTOSH REMOTE CONTROLLED PRODUCTS WK-2 KEYPAD...
- Page 12 FRONT PANEL AND REMOTE CONTROLLER 1. OPEN/CLOSE 2. REPEAT 3. STOP 4. PAUSE 5. PLAY 6. DISPLAY WINDOW A. PROGRAM Indicator B. TRACK Indicator C. INDEX Indicator D. REPEAT / A-B Indicators E. TOTAL / REMAIN Time Indicators R SINGLE Indicator G.
- Page 13 BASIC OPERATION HOW TO 1. Press the POWER pushbutton OPERATE The front panel teal pushbutton nomenclature will turn on. 2. Press the OPEN/CLOSE pushbutton. The Red LED above the pushbutton starts to flash and the disc tray will slide out. The front panel display will indicate "OPEN"...
- Page 14 TO UNLOAD THE DISC HOW TO Press the open/close button on the front panel; playback stops and the disc tray will slide out, OPERATE and all functions are reset to their initial settings. TO TEMPORARILY SUSPEND PLAYBACK (PAUSE MODE) Press the pause button. Playback stops at the current position and the Red LED above the PAUSE pushbutton turns on.
- Page 15 If tracks with numbers higher than 20 are programmed, either the REMAIN time or TOTAL HOW TO REMAIN time may not appear in the display. OPERATE In the playback mode, press the program button. The current track will be programmed as first track.
- Page 16 2. Press the clear button. HOW TO The TRACK indicator now shows the next track number OPERATE "10", to show that "15" has been deleted. To delete other unnecessary tracks, repeat steps 1 and 2 above. ADDITION 1. When the PROGRAM indicator is lit, press the review button to indicate the track number in the display.
- Page 17 1. Press the delete button. HOW TO The display shows the total number of tracks OPERATE and total playback time of the disc. 2. Press the numeric buttons corresponding to the track numbers which you don't want to listen to in the same way as in normal programming. To specify more tracks that are not to be played, press their numeric buttons.
- Page 18 TO REPEAT A DESIGNATED SECTION (A-B HOW TO repeat mode) OPERATE 1. Press the numeric buttons or the play button 2. Designate the point at which playback should start (point A) by pressing the A-B button. The REPEAT indicator lights and the A-B indicator blinks to show that point A has been entered.
- Page 19 This operation is possible even in the program HOW TO playback mode. However only programmed tracks OPERATE will be detected. TO SKIP BACK TO THE PREVIOUS TRACK PRESS THE BUTTON. The MCD7009 will skip back one track each time the button is pressed.
- Page 20 During the manual search operation, sound will be audible but the output level will be HOW TO lowered. This lets you search for any required portion while checking the sound. OPERATE When the desired position is reached, release the button to reenter the previous mode. During the normal play mode (or in the programmed playback mode), when the MCD7009 reaches the end of the disc (or program) after the button has been pressed, the MCD7009...
- Page 21 During playback, shows the elapsed time (2) of the current track, but no time mode in- HOW TO dicator will light. However, each time the time button is pressed, the time counter shows a OPERATE different time, in the order, the remaining time of the current track (3) - the total remaining time of the disc ©...
- Page 22 IF YOU REMEDY PROBABLE CAUSE PROBLEM NEED HELP Plug in securely. No power when power Power plug not inserted securely. is pressed. Disc loaded with Load with label side up. No playback when disc is loaded. label side down. Disc dirty. Clean disc surface.
- Page 23 SIGNAL FORMAT AUDIO SPECIFICATIONS NUMBER OF CHANNELS SAMPLING FREQUENCY 44.1kHz QUANTIZATION BIT FREQUENCY RESPONSE 16-bit linear/channel 4 - 20,000Hz ± 0.3dB CHANNEL BIT RATE SIGNAL-TO-NOISE RATIO 4.3218Mb/sec. Better than 110dB (A-weighted) CHANNEL MODULATION CODE DYNAMIC RANGE EFM (Eight to Fourteen Modulation) Better than 99dB (1kHz) ERROR CORRECTION HARMONIC DISTORTION...
- Page 24 The numbers refer to the paragraphs on page 7.
- Page 25 CUSTOM INSTALLATION DIAGRAM Be112002...