Table of Contents
Advertisement
Quick Links
Advertisement
Table of Contents

Related Manuals for Polaroid LCD TV with Digital Tuner


Summary of Contents for Polaroid LCD TV with Digital Tuner
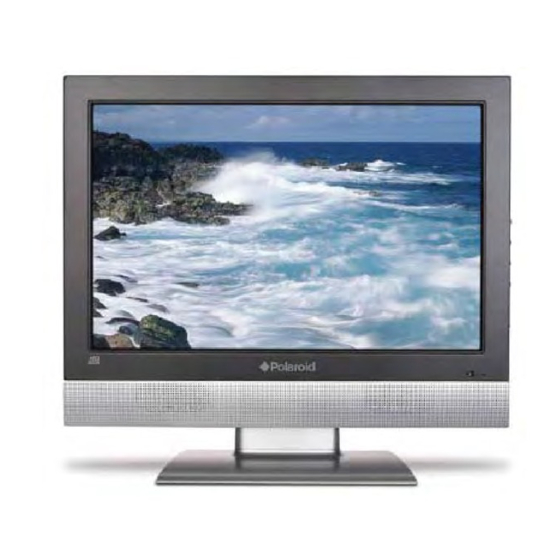
- Page 1 HD-Ready Widescreen LCD TV with Digital Tuner Your TV may look different from the one pictured above. Questions? Need some help? This manual should help you understand your new product. If you have questions, call our free-phone number found on the insert with this icon:...
- Page 2 As a consumer, you are responsible for ensuring that this product is disposed of properly. To fi nd out how to properly dispose of this product, please go to www.polaroid.com and click on “Company“ or call the customer service number for your country listed in the instruction manual.
-
Page 3: Important Safety Instructions
Warnings and Precautions Warnings and Precautions To prevent any injuries, the following safety precautions should be observed in the installation, use, servicing and maintenance of this equipment. Before operating this equipment, please read this manual completely, and keep it nearby for future reference. - Page 4 Warnings and Precautions ▪ Use and handle the power cord with care. Do not place any heavy objects on the AC power cord. ▪ Do not pull the AC power cord. Do not handle the AC power cord with wet hands. ▪...
-
Page 5: Antenna Safety Instructions
Warnings and Precautions Outdoor Antenna Safety Instructions If an outdoor antenna is connected, follow the precautions below: ▪ An outdoor antenna should not be located in any area where it could come in contact with overhead power lines, or any other electric light or power circuits. ▪... -
Page 6: Table Of Contents
CONTENTS Warnings and Precautions Important Safety Instructions ..................1 Antenna Safety Instructions ..................3 Chapter 1 INTRODUCING THE LCD TV Key Features ....................... 5 Cleaning Your LCD TV ....................5 Package Contents ....................... 6 Setting Your LCD TV ....................7 Your LCD TV ........................ -
Page 7: Chapter 1 Introducing The Lcd Tv
Chapter 1 Introducing the LCD TV Chapter 1 Introducing the LCD TV Key Features Various Audio/Video terminals for external equipment connection ▪ 1 composite video input terminal ▪ 1 S-VIDEO terminal ▪ 1 SCART input terminal ▪ 1 set of component Video input terminals ▪... -
Page 8: Package Contents
These items are all you need to set up and operate the LCD TV in its basic confi guration. Make sure all of the above contents are included. If you are missing any items, please contact Polaroid customer service using the Worldwide Contact Sheet or by visitng polaroid.com. -
Page 9: Setting Up Your Lcd Tv
Chapter 1 Introducing the LCD TV Setting Up Your LCD TV How to install the TV Stand Follow the instructions below to install the TV stand: Open the box, and make sure all necessary parts are in the box. The package contains: Stand LCD TV... - Page 10 To fi nd out how to properly dispose of the batteries, please go to www.polaroid.com and click on “Company“ or call the customer service number for your country listed in the...
-
Page 11: Your Lcd Tv
Chapter 1 Introducing the LCD TV Your LCD TV Front/Left /Right Side View and Controls Front View Right Side View Left Side View Infrared Receiver The LED light indicates the LCD TV mode. Orange indicates standby mode. Blue indicates that the TV is “ON”. HEADPHONE VOLUME Connects to the external... - Page 12 Chapter 1 Introducing the LCD TV Rear View and Jacks VHF/UHF IN Connects RF input from VHF/UHF antenna or cable to receive high/standard defi nition television. S-VIDEO/VIDEO/AUDIO(L/R) IN Connects to the S-Video/Composite VIDEO and AUDIO(L/R) output jacks on external video equipment. (S-VIDEO and Video have a common audio input.) YPbPr IN Connects to the DVD player, Digital Set-Top-Box, or...
-
Page 13: Your Remote Control
Chapter 1 Introducing the LCD TV Your Remote Control POWER Change TV in and out of standby mode I-II Cycles through the TV sound options CH LIST (NICAN) : MONO/DUAL/STEREO SUBTITLE Mutes and restores your LCD TV sound. CH LIST Display all channel list &name. - Page 14 Chapter 2 Installing the LCD TV INPUT Pressing INPUT displays the source list, use ▲▼ to select the video equipment connected to the video CH LIST inputs of your LCD TV SUBTITLE S-VIDEO SCART YPbPr HDMI GUIDE SLEEP EXIT ATV/DTV Exits the OSD menu.
-
Page 15: Chapter 2 Installing The Lcd Tv
Chapter 2 Installing the LCD TV Chapter 2 Installing the LCD TV Refer to the owner’s manual of any external equipment to be connected. When connecting any external equipment, do not connect any AC power cords to wall outlets until all other connections are completed. Connecting a TV Cable or an Antenna Antenna Connection The antenna requirements for good color TV reception are more important than those for a black &... - Page 16 Chapter 2 Installing the LCD TV Use one of the following two diagrams when connecting an outdoor antenna. A: Shows how to use a VHF/UHF combination outdoor antenna. B: Shows how to use a separate VHF and/or UHF outdoor antenna. A.
- Page 17 Chapter 2 Installing the LCD TV Cable TV (CATV) Connection ■ A 75-ohm coaxial cable connector is built into the set for easy hookup. When connecting the 75-ohm coaxial cable to the set, connect the 75- ohm cable into the ANT. terminal. ■...
- Page 18 Chapter 2 Installing the LCD TV Use an antenna cable to connect the ATV/DTV signal to the LCD TV’s ANT. terminal. VHF/UHF IN Connect the AC power cord at the back of the TV and connect the power cord to wall outlet.
-
Page 19: Atv Mode
Chapter 2 Installing the LCD TV 2. Use the ▲▼ buttons to select the YES. The Auto Programme Scan (APS) automatically creates a list of receivable channels. Press the EXIT button at any time to interrupt the auto tuning process. (The list cannot be created if interrupted) 530. -
Page 20: Dtv Mode
Chapter 2 Installing the LCD TV 2. Press the ▼ button to select APS and press the OK button to display the Start APS menu: Select your country by the ◄► buttons. TV Setup ◄ ► Country Back Move Select Exit Press the ▼... - Page 21 Chapter 2 Installing the LCD TV 1. Press the MENU button on the remote control to display the Main menu, and use the ◄► to select the DTV Services. DTV Services ► Channel List ► Configuration ► Parental ► Select Exit 2.
-
Page 22: Connecting An A/V Device With Composite Connector
Chapter 2 Installing the LCD TV Connecting an A/V Device with Composite Connector Rear of TV HDMI IN S-VIDEO VIDEO DIGITAL OUT AUDIO IN VHF/UHF IN AUDIO IN PC VGA IN PC AUDIO IN SCART GAME CONSOLE VIDEO OUT AUDIO Cable DVD PLAYER AV Cable Use a composite cable to connect the external A/V device’s composite video/audio jacks to... -
Page 23: Connecting An A/V Device With S-Video Connector
Chapter 2 Installing the LCD TV Connecting an A/V Device with S-Video Connector Rear of TV HDMI IN S-VIDEO VIDEO DIGITAL OUT AUDIO IN VHF/UHF IN AUDIO IN PC VGA IN PC AUDIO IN SCART GAME CONSOLE S-VIDEO OUT AUDIO Cable DVD PLAYER S-VIDEO Cable Use an audio cable to connect... -
Page 24: Connecting An A/V Device With Component (Ypbpr) Connector
Chapter 2 Installing the LCD TV Connecting an A/V Device with Component (YPbPr) Connector Rear of TV HDMI IN S-VIDEO VIDEO DIGITAL OUT AUDIO IN VHF/UHF IN AUDIO IN PC VGA IN PC AUDIO IN GAME CONSOLE COMPONENT AUDIO Cable Pb/Cb Pr/Cr DVD PLAYER... -
Page 25: Connecting An A/V Device With Scart Connector
Chapter 2 Installing the LCD TV Connecting an A/V Device with SCART Connector Rear of TV HDMI IN S-VIDEO VIDEO DIGITAL OUT AUDIO IN VHF/UHF IN AUDIO IN PC AUDIO IN SCART PC VGA IN DVD PLAYER SCART Cable Use a SCART cable to connect the external A/V device ’s SCART socket to the LCD TV’s SCART IN jack. -
Page 26: Connecting An Av Device With Hdmi Connector
Chapter 2 Installing the LCD TV Connecting an AV Device with HDMI Connector Rear of TV HDMI IN S-VIDEO VIDEO DIGITAL OUT AUDIO IN VHF/UHF IN AUDIO IN PC VGA IN PC AUDIO IN SCART HDMI Cable AV EQUIPMENT Use a HDMI cable to connect the AV equipment’s HDMI output jack to the LCD TV’s HDMI IN jacks. -
Page 27: Connecting An Av Device With Dvi Connector
Chapter 2 Installing the LCD TV Connecting an AV Device with DVI Connector Rear of TV HDMI IN S-VIDEO VIDEO DIGITAL OUT AUDIO IN VHF/UHF IN AUDIO IN PC AUDIO IN SCART PC VGA IN AUDIO Cable AUDIO HDMI-to-DVI Cable DVI IN AV EQUIPMENT Use a HDMI-to-DVI cable to connect the AV equipment’s DVI output jack to the LCD TV’s... -
Page 28: Connecting A Pc
Chapter 2 Installing the LCD TV Connecting a PC Rear of TV HDMI IN S-VIDEO VIDEO DIGITAL OUT AUDIO IN VHF/UHF IN AUDIO IN PC VGA IN PC AUDIO IN SCART AUDIO Cable VGA Cable Use a D-SUB cable to connect the PC’s D-SUB output jack to the LCD TV’s VGA input jack. -
Page 29: Connecting An Audio Receiver Or A Digital System
NOTE: If you have a Home Theater/Stereo System that you would like to use with your new Polaroid TV, we recommend that you do NOT use your TV’s audio output for this connection. For the best sound quality, our product testing has shown that you should connect your Home Theater/ Stereo System directly to your A/V device. -
Page 30: Operating The Menu
Chapter 3 Using the OSD Features Chapter 3 USING The OSD FEATURES Operating the Menu Press the button to turn the LCD TV on. Press the MENU button on the remote control, the on-screen menu will appear on the screen. Use the ◄► buttons to select your main menu option. PICTURE MENU: Allows you to make adjustments to your picture settings. -
Page 31: Audio Menu
Chapter 3 Using the OSD Features AUDIO MENU: Allows you to customize the audio options and effects. ▪ If the signal source is AV/S-VIDEO/YPbPr/HDMI/ ▪ If the signal source is TV/DTV, the AUDIO Menu SCART, the AUDIO Menu appears as: appears as: Audio Setup Audio Setup... - Page 32 Chapter 3 Using the OSD Features ▪ If the signal source is VGA, the OSD Setup Menu appears as: OSD Setup ◄ ► Language English Time Out Transparency ◄ ► Sleep timer ► Reset Move Select Exit TV SETUP MENU: Allows you to edit and label channels.
-
Page 33: Customizing The Picture Settings
Chapter 3 Using the OSD Features Customizing the Picture Settings Press the button to turn the LCD TV on. Press the MENU button on the remote control to display the Main menu, and use the ◄► buttons to select the Picture. Use the ▲▼... - Page 34 Chapter 3 Using the OSD Features Saturation Controls the colour intensity. Sharpness Increase this setting to see crisp edges in the picture; decrease it for soft edges. Scale Selects through Wide mode settings : In TV/AV/S-VIDEO/SCART mod NORMAL /FULL/ZOOM1/ ZOOM2 n YPbPr/HDM mode, only 480i and 576i mode can be adjusted : NORMAL /FULL/ZOOM1/ZOOM2...
-
Page 35: Customizing The Audio Settings
Chapter 3 Using the OSD Features Customizing the AUDIO Settings Press the button to turn the LCD TV on. Press the MENU button on the remote control to display the Main menu, and use the ◄► buttons to select the AUDIO. Use the ▲▼... -
Page 36: Customizing The Tv Settings
Chapter 3 Using the OSD Features Customizing the OSD SETUP Settings Press the button to turn the LCD TV on. Press the MENU button on the remote control to display the Main menu, and use the ◄► buttons to select the OSD SETUP. Use the ▲▼... - Page 37 Chapter 3 Using the OSD Features Customizing the TV Settings Press the button to turn the LCD TV on. Press the MENU button on the remote control to display the Main menu, and use the ◄► buttons to select the TV Setup. Use the ▲▼...
- Page 38 Chapter 3 Using the OSD Features Fine Tune Allows adjustment for the fi ne tune level by hand if signal is too weak or picture is blurry. Add/Erase Allows addition/removal of channels on the channel list. Channel Name Allows channel labels to be edited. Use the ▼▲◄►...
-
Page 39: Customizing The Vga Settings
Chapter 3 Using the OSD Features Customizing the VGA Settings Press the button to turn the LCD TV on. Press the MENU button on the remote control to display the Main menu, and use the ◄► buttons to select the VGA Setup. Use the ▲▼... -
Page 40: Chapter 4 Using The Dtv Features
Chapter 4 Using the DTV Features Chapter 4 USING THE DTV FEATURES Operating the Menu INPUT You can set the digital TV setting, press the button on the remote to display the Source List. Use the ▲▼ buttons to select DTV, and press the OK button. Press the MENU button on the remote control, the on-screen menu will appear on the screen. - Page 41 Chapter 4 Using the DTV Features Channel List Menu: Configuration Channel Installation User Settings System Parameters Signal Information Parental Control Menu: Parental Control Parental Control Enabled Receiver lock Configuration Menu Channel lock Maturity level None PIN code change EPG Menu: 17:56 23/03/2004 GUIDE...
-
Page 42: Customizing The Channel List Settings
Chapter 4 Using the DTV Features Customizing the Channel List Settings The Channel List feature allows you to select programs from a list you specify. Channel list Create a favourite list Modify a favourite list Delete a favourite list The Channel List menu includes the following options: Create a favorite list Press the ▲... - Page 43 Chapter 4 Using the DTV Features Modify a favorite list Press the ▲ ▼ buttons to highlight the Modify a Favorite list and press OK to display the menu: Modify a favorite list 1 BBC ONE 2 BBC TWO 3 BBC THREE 4 CBBC Channel 5 BBC NEWS24 6 BBCi...
-
Page 44: Customizing The Confi Guration Settings
Chapter 4 Using the DTV Features Customizing the Confi guration Settings The Confi guration feature allows you to add new channels, set audio or subtitle languages, set the time, and view system and signal information. Configuration Channel Installation User Settings System Parameters Signal Information The Configuration menu includes the following options:... - Page 45 Chapter 4 Using the DTV Features System Parameters Press the ▲ ▼ buttons to highlight the System Parameters and press OK to display the menu: System Parameters System Information Factory Reset System Upgrade System Information: ▪ Press OK to display the system information menu ▪...
-
Page 46: Customizing The Parental Control Settings
Chapter 4 Using the DTV Features Customizing the Parental Control Settings The Parental Control feature allows you to set up the TV to block programs according the content and rating levels. Parental Control Parental Control Disabled Receiver lock Configuration Menu Channel lock Maturity level None... -
Page 47: Usinging The Dtv Osd Settings
Chapter 4 Using the DTV Features Usinging the DTV OSD Settings PROGRAM INFORMATION Banner details After each channel change or after a press on the INFO button, a banner is displayed at the bottom of the screen for a few seconds, including service type (1), current list (2), channel number in the list (3), channel name (4), event name (5), current time (6), event duration bargraph with start and stop times (7) as well as specifi... -
Page 48: Troubleshooting
Specifications TROUBLESHOOTING Before consulting service personnel, check the following chart for a possible cause of problem and for a possible solution. TV will not turn on Make sure the power cord is plugged in, then press the button on the remote. Make sure the AC switch on the rear of the TV is turned on. -
Page 49: Specifi Cations
Specifications SPECIFICATIONS MODEL LCD Panel Panel Size 20.1” TFT LCD Brightness Contrast Ratio 1000:1 Max. Resolution 1680 x 1050 C-VIDEO/ S-VIDEO/ Input Connector AUDIO IN(L/R) YPbPr/ AUDIO IN(L/R) 1 SCART PC VGA IN HDMI IN PC AUDIO IN DIGITAL OUT HEADPHONE VHF/UHF IN Power Source... - Page 50 Questions? Need some help? Call our free-phone number found on the insert with this icon: Or visit www.polaroid.com.