Table of Contents
Advertisement
English
Please read these instructions before operating your set and retain them for future reference.
The images shown in this manual are for illustrative purposes only.
Operating Instructions
Plasma Television
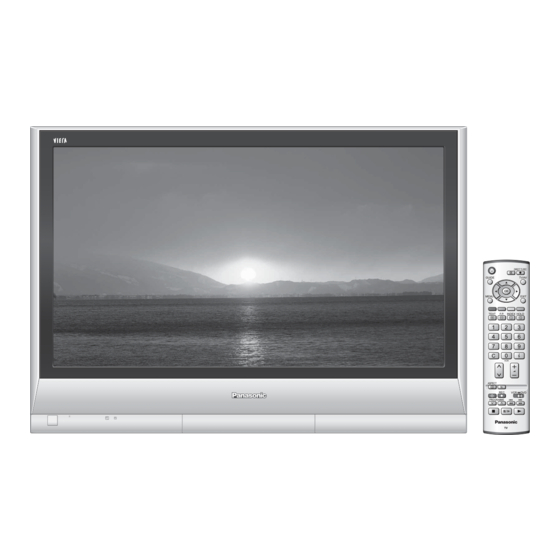
TH-37PV45EH
Model No.
DIRECT TV REC
GUIDE
TV/AV
OK
MENU
EXIT
TEXT
F.P.
INDEX HOLD
1
2
3
4
5
6
7
8
9
C
0
VCR
ASPECT
N
REC
VCR
DVD
PROGRAMME
TV
Advertisement
Table of Contents

Related Manuals for Panasonic Viera TH-37PV45EH


Summary of Contents for Panasonic Viera TH-37PV45EH
-
Page 1: Operating Instructions
Operating Instructions Plasma Television TH-37PV45EH Model No. DIRECT TV REC GUIDE TV/AV MENU EXIT TEXT F.P. INDEX HOLD ASPECT PROGRAMME English Please read these instructions before operating your set and retain them for future reference. The images shown in this manual are for illustrative purposes only. - Page 2 Turn your own living room into a movie theatre! Experience an amazing level of multi-...
-
Page 3: Table Of Contents
media excitement Contents Be Sure to Read • Safety Precautions ······································ 4 (Warning / Caution) Enjoy rich multi-media • Notes ··························································· 5 • Maintenance················································ 5 Camcorder Quick Start Guide Accessories / Options ·········· 6 Identifying Controls Personal ··············· 7 computer Connection ································... -
Page 4: Safety Precautions
Using an unauthorized stand or other fi xtures may and other sources of heat make the unit shaky, risking injury. Be sure to ask your local Panasonic dealer to perform setup. Avoid exposing the TV set to direct sunlight and other Use optional stands / mounts (p. 6). -
Page 5: Notes
Notes Caution Remember not to keep still pictures on the screen for extended lengths of time When cleaning the TV unit, remove the Such still pictures cause after-images on the plasma mains plug screen if they are displayed for a long time. These (Cleaning an energized unit may cause electrical shock.) after-images are not considered malfunctions and are When TV will not be used for a long... -
Page 6: Accessories / Options
Accessories / Options Standard accessories Check that you have the accessories and items shown Remote Control Batteries for the Remote Operating Instructions Transmitter Control Transmitter Pan European Guarantee Card • • EUR765109A R6 (UM3) Ferrite core • J0KF00000018 Pedestal • TBL0E0001 or TBL0E0002 Clamper Mains Lead... -
Page 7: Identifying Controls
Identifying Controls Store setting (p. 18) Used to store tuning and Function Volume / Contrast / Brightness / Colour / Sharpness other function settings / Tint (NTSC mode) / Bass / Treble / Balance / select Tuning mode (p. 18) Switches TV/AV AV4 terminals (p. -
Page 8: Connection
Connection External equipments and cables shown in this manual are not supplied with this TV. Please ensure that the unit is disconnected from the mains before attaching or disconnecting any leads. Watching TV VHF / UHF aerial Rear terminal portion Rear of the TV (enlarged view) Fastener... -
Page 9: Auto Setup
Auto Setup Search and store TV channels automatically. These steps are not necessary if the setup has been completed by your local dealer. Turn the TV On with the On / Off switch • You can now use the remote control to turn On the unit or turn the unit to standby mode. -
Page 10: Watching Tv
Watching TV Turn power on (for about 1 second) On / Off switch on unit should be On. Select a programme number GUIDE EXIT down To select the two-digit programme number, e.g. 39 HOLD (in a short time) Select from the Programme table GUIDE select page select programme... -
Page 11: Vcr
DVD: Skip to the previous track or title Start recording Press and hold to search backward The remote control will be available for various Panasonic equipment with the following settings. Switch to select VCR or DVD you want to change Enter the code below... -
Page 12: Viewing Teletext
Viewing Teletext You can enjoy teletext broadcasting, including news, weather forecasts and subtitles, if this service is provided by the broadcasters. What is TOP / FLOF mode? In TOP / FLOF mode, four differently coloured subjects are situated at the bottom of the screen. To access more information about one of these subjects, press the appropriately coloured button. - Page 13 If you wish to hold the current page without updating Stop or resume automatic updating HOLD HOLD HOLD To resume Return to the main index page • INDEX INDEX TOP / FLOF mode only Call up a • F.P. Call up the page stored in "blue". •...
-
Page 14: How To Use Menu Functions
How to Use Menu Functions Various menus allow you to make settings for the picture, sound, Menu list and other functions so that you can enjoy watching TV in your own way. Menu Item Display menu Viewing mode • MENU Displays the functions that Contrast, can be set (varies according... - Page 15 Adjustments / Confi gurations (alternatives) Basic picture mode (Dynamic / Normal / Cinema / Auto) • Viewing mode Dynamic Set for each input signal Contrast Brightness Adjusts colour, brightness, etc. for each picture mode to suit your taste Colour Sharpness Adjusts tint of image •...
-
Page 16: Editing And Setting Channels
Editing and Setting Channels The current channel settings can be changed according to your needs and reception conditions. Display the menu MENU MENU EXIT Select "Setup menu" Main m e n u next Pic tu re m e nu select So u n d me n u Se tu p me n u Edit... - Page 17 Name Select the programme number to edit Programme edit Programme Prog. Chan. Name Lock 3 FTP CH44 number CH51 CH41 select CH47 CH37 Cursor Edit To delete After confi rming, press To add After confi rming, press green green To move Select destination yellow yellow...
- Page 18 Editing and Setting Channels Automatically set the channels received in the area Start Auto setup Select your country Country Deutschland Österreich France select Italia España WARNING Portugal Nederland Danmark All current tuning Sverige Norge data will be erased Suomi Belgium Schweiz ELLADA Polska...
-
Page 19: Displaying Pc Screen On Tv
Displaying PC Screen on TV The screen of the PC connected to the unit can be displayed on the TV. You can also listen to PC sound with the audio cable connected. To connect PC (p. 24) Select the external input TV/AV TV/AV Select "PC"... -
Page 20: External Equipment
External Equipment Q-Link Q-Link interlocks the TV unit and VCR / DVD recorder, enables easy recording and playback. Condition • Use the VCR / DVD recorder with the following logos: "Q-Link", "NEXTVIEWLINK", "DATA LOGIC", "Easy Link", "Megalogic", or "SMARTLINK" • Connect the equipment to this unit’s AV2 or AV3 terminal via a "fully-wired"... - Page 21 HDMI connections to some Panasonic equipments (Panasonic DVD Recorder DIGA, Panasonic Player theatre, Panasonic Amplifi er, etc.) allow you to enjoy the easy playback or home theatre. About connections, see "Connections" (p. 23). Read the manuals of the equipment too.
- Page 22 External Equipment Connections • External equipments and cables shown are not supplied with this TV. Connect VCR / DVD recorder (Recording, Playback) Rear of the TV For Q-Link connection (p. 20) VCR / DVD recorder AV 1 AV 2 AV 3 COMPONENT AUDIO SCART...
- Page 23 Panasonic Amplifi er Player theatre Panasonic DVD recorder DIGA Read the manuals of Panasonic Amplifi er or Player theatre for details. • It is recommended that you use Panasonic’s HDMI cable. Recommended part number: RP-CDHG15 (1.5 m) RP-CDHG30 (3.0 m)
- Page 24 For other connections, consult the instructions of each equipment, the table below, and the specifi cations (p. 31). Control with HDMI (p. 21) DIGA or Panasonic Amplifi er • When using HDMI2 terminal as Control with HDMI, select the external input to HDMI2 for the fi...
- Page 25 To watch satellite broadcasts Set top box To record / playback SCART cable DVD Recorder / VCR RF cable SCART cable SCART cable AV 1 AV 2 AV 3 (Q-Link) (Q-Link) COMPONENT AUDIO AUDIO VIDEO VIDEO VIDEO AUDIO VIDEO S-VIDEO S-VIDEO To watch DVDs DVD player...
-
Page 26: Technical Information
Technical Information Aspect Ratio The optimum size and aspect can be chosen, and you can enjoy fi ner images. (p. 10) Auto aspect: Auto aspect determines the best aspect ratio to use to fi ll your screen. It does this using a four step process to determine if the picture being viewed is a widescreen picture. - Page 27 GND (Ground) GND (Ground) NC (not connected) Control with HDMI HDMI connections to some Panasonic equipments allow you to enjoy the easy playback or home theatre. • Setup the equipment to enable this function. Read the manual of the equipment. •...
- Page 28 Technical Information SCART and S-video terminal information AV1 SCART terminal AV2 SCART terminal (RGB, VIDEO) (VIDEO, S-VIDEO, Q-Link) Suitable inputs for AV1 include RGB (Red / Green / Blue). AV2 - Pins 15 and 20 are dependent on AV2 S-VHS / VIDEO switching.
-
Page 29: Faqs
FAQs Before requesting service or assistance, please follow these simple guides to resolve the problem. If problem still persists, please contact your local Panasonic dealer or Panasonic Customer Care Centre for assistance. White spots or shadow images (noise) • Check the position, direction, and connection of the aerial. - Page 30 FAQs Problem Actions • Set "P-NR" in the Picture menu (to remove noise). (p. 14) Chaotic image, noisy • Check nearby electrical products (car, motorcycle, fl uorescent lamp). No image can be • Is "Colour" or "Contrast" in the Picture menu set to the minimum? (p.
-
Page 31: Licence
Licence Trademark Credits • VGA is a trademark of International Business Machines Corporation. • Macintosh is a registered trademark of Apple Computer, USA. • S-VGA is a registered trademark of the Video Electronics Standard Association. Even if no special notation has been made of company or product trademarks, these trademarks have been fully respected. - Page 32 Information on Disposal for Users of Waste Electrical & Electronic Equipment (private households) This symbol on the products and/or accompanying documents means that used electrical and electronic products should not be mixed with general household waste. For proper treatment, recovery and recycling, please take these products to designated collection points, where they will be accepted on a free of charge basis.
Need help?
Do you have a question about the Viera TH-37PV45EH and is the answer not in the manual?
Questions and answers