Advertisement
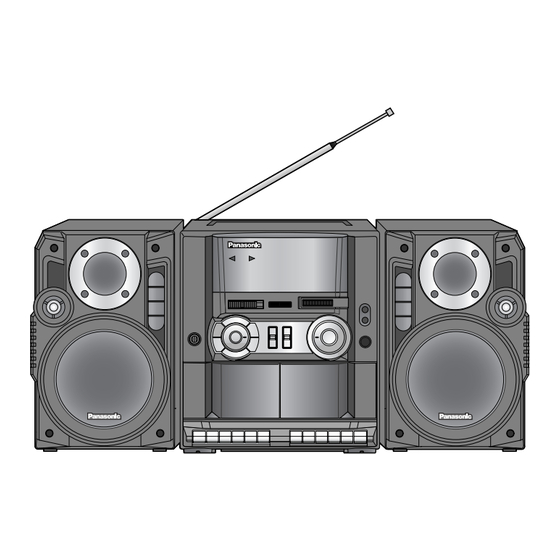
RX-CT65
Dear customer
Thank you for purchasing this product.
Before connecting, operating or adjusting this product, please read
these instructions completely.
Please keep this manual for future reference.
Table of contents
.................................................................................
.....................................................................
.................................................................................
.........................................................................................
................................................................................................
.....................................................................
................................................................
...........................................................................
.............................................................
................................................................
.............................................................
Supplied accessories
Check the packaging for these accessories.
1 AC power supply cord
Note
The included AC power supply cord is for use with this unit only.
Do not use it with other equipment.
GC GU GS
Portable Stereo Component System
3
4
5
6
7
8
9
10
11
Back cover
Back cover
Operating Instructions
RX-CT65
Model No.
RX-CT60
RQT7611-G
Advertisement
Table of Contents

Related Manuals for Panasonic RX-CT60


Summary of Contents for Panasonic RX-CT60
-
Page 1: Table Of Contents
Portable Stereo Component System Operating Instructions RX-CT65 Model No. RX-CT65 RX-CT60 Dear customer Thank you for purchasing this product. Before connecting, operating or adjusting this product, please read these instructions completely. Please keep this manual for future reference. Table of contents Control guide ................. - Page 2 These operating instructions are applicable to models RX- CT65 and RX-CT60, however, are intended primarily for model RX-CT65. CAUTION: Change the voltage setting to suit the AC voltage in your area. See page 5. Note that the unit will be seriously damaged or fail to operate correctly if this setting is not made correctly.
-
Page 3: Control Guide
Control guide RX-CT65 RX-CT60 10 11 12 13 10 11 12 13 24 25 18 19 21 22 36 37 Speakers (woofer) Speakers (tweeter) Built-in microphone (MIC) Preset equalizer buttons Band selector (BAND) RX-CT65 Operation/battery check/deck 2 tape direction indicators... -
Page 4: Speaker Connection
Connect the speaker cords Attaching the speakers Detaching the speakers RELEASE RELEASE RX-CT65 RX-CT60 Before attaching or detaching the speakers, Be sure to disconnect the speaker cords. Be sure to set [SELECTOR] to “TAPE/ OPR OFF ”. • The function selector switch does not separate entire unit from mains even if in “TAPE/... -
Page 5: Power Supply
Power supply AC power supply cord Batteries Car battery cord VOLT ADJ 220- 220- 240V 240V 110- 110- 127V 127V 110-127V 220-240V R20/LR20 (D, UM-1) DC IN (12-13.2V) To household AC IN ~ AC outlet AC power supply cord Set the voltage. Use a flat-head screw-driver to turn the voltage selector for the area in which the unit will be used. -
Page 6: The Radio
The radio To improve reception SELECTOR BAND TUNING FM MW SW1 SW2 LINE IN RADIO TAPE/ OPERATION/BATT MW/SW1 EDIT/FM MODE/BP FINE TUNING HIGH/ STEREO/II SW1/SW2 NORMAL/ STEREO/II MIC/ MONO/I Follow steps 1 to 3. In step 1: “OPERATION/BATT” lights while the radio is on. In step 2: Select FM, MW, SW1 or SW2. -
Page 7: Tapes
Tapes RX-CT65 RX-CT60 SELECTOR SELECTOR LINE IN LINE IN RADIO RADIO TAPE/ TAPE/ OPERATION/BATT OPERATION/BATT Use normal position/TYPE I tape only. Tape can be played either DECK 1 or DECK 2. Follow steps 1 to 3. OPR OFF In step 1: Set to “TAPE/ ”. -
Page 8: Recording The Radio
Recording the radio Erasure prevention TUNING Side A Tab for Side A Tab for Side B EDIT/FM MODE/BP HIGH/ STEREO/II NORMAL/ STEREO/II MIC/ MONO/I Use normal position/TYPE I tape only. Follow steps 1 to 3. In step 1: Set [SELECTOR] to “RADIO” and tune to the station. ( page 6) In step 2: Insert the tape inside with the side to be recorded facing out and close by hand. -
Page 9: Recording Tape To Tape
RADIO STEREO/II MIC/ TAPE/ MONO/I RX-CT65 RX-CT60 Use normal position/TYPE I tape only. Follow steps 1 to 7. In step 1: Set [SELECTOR] to “TAPE/ ”. OPR OFF In step 2: Insert the tape inside with the side to be recorded facing out and close by hand. -
Page 10: Other Functions
Other functions Recording from an externally connected CD Recording through the Equalizer/ player etc. built-in microphone (MIC) Headphones CD player,etc. SELECTOR EDIT/FM MODE/BP SELECTOR HEAVY HIGH/ STEREO/II LINE IN LINE IN SOFT VOCAL NORMAL/ RADIO RADIO STEREO/II MIC/ TAPE/ TAPE/ CLEAR FLAT MONO/I... -
Page 11: Troubleshooting Guide
Set the [CD/LINE IN] switch on the rear panel of this unit to HIGH and try recording again. low. Use the AC power supply cord or insert fresh batteries, and press [ PLAY], then press (RX-CT60 only) Not ejected or closed. STOP/EJECT]. RQT7611... -
Page 12: Maintenance
637 x 295 x 265 mm Main unit: 278 x 295 x 265 mm Speaker box: 189 x 295 x 228 mm Mass (RX-CT65) 7.9 kg without batteries (RX-CT60) 7.1 kg without batteries Power consumption in standby mode: (RX-CT65) 4.3 W (RX-CT60) 3.48 W Note: Specifications are subject to change without notice.