Hoover Nextra Instruction Book
5+5 wash'n dry
Hide thumbs
Also See for Nextra:
- Instruction book (232 pages) ,
- Troubleshooting manual (3 pages) ,
- Instruction book (32 pages)
Table of Contents
Advertisement
Advertisement
Table of Contents

Related Manuals for Hoover Nextra


Summary of Contents for Hoover Nextra
- Page 1 I I n n s s t t r r u u c c t t i i o o n n B B o o o o k k ®...
-
Page 2: Table Of Contents
C C o o n n t t e e n n t t s s I I n n t t r r o o d d u u c c t t i i o o n n . -
Page 3: I I N N T T R R O O D D U U C C T T I I O O N N
I I n n t t r r o o d d u u c c t t i i o o n n C C h h e e c c k k t t h h a a t t n n o o d d a a m m a a g g e e h h a a s s o o c c c c u u r r r r e e d d t t o o t t h h e e m m a a c c h h i i n n e e d d u u r r i i n n g g t t r r a a n n s s i i t t . -
Page 4: U U N N P P A A C C K K I I N N G G T T H H E E P P R R O O D D U U C C T T
U U n n p p a a c c k k i i n n g g t t h h e e p p r r o o d d u u c c t t Remove the machine from its packaging close to the final location of the machine. - Page 5 4 4 . . Remove the four retaining screws in the transit bar and pull out the transit bracket. W W e e r r e e c c o o m m m m e e n n d d y y o o u u k k e e e e p p t t h h e e t t r r a a n n s s i i t t b b r r a a c c k k e e t t a a n n d d s s c c r r e e w w s s t t o o p p r r o o t t e e c c t t t t h h e e m m a a c c h h i i n n e e f f o o r r f f u u t t u u r r e e t t r r a a n n s s i i t t .
-
Page 6: I I N N S S T T A A L L L L A A T T I I O O N N
7 7 . . Take the two plastic fixing clips and fix the base panel to the base of the machine. Bring the machine back to the upright position. 8 8 . . Cover the central hole in the rear of the machine with the cap enclosed in the instruction bag. -
Page 7: Electricity Supply
E E l l e e c c t t r r i i c c i i t t y y s s u u p p p p l l y y Y Y o o u u m m a a y y b b e e c c h h a a r r g g e e d d f f o o r r a a s s e e r r v v i i c c e e c c a a l l l l i i f f a a Washing machines are supplied to operate at a voltage of p p r r o o b b l l e e m m w w i i t t h h y y o o u u r r... -
Page 8: Connecting To The Cold Water Supply
C C o o n n n n e e c c t t i i n n g g t t o o t t h h e e c c o o l l d d w w a a t t e e r r s s u u p p p p l l y y Only one hose is required to install this machine to a cold T T h h i i s s A A p p p p l l i i a a n n c c e e... -
Page 9: Connection Of The Machine To The Drain
C C o o n n n n e e c c t t i i o o n n o o f f t t h h e e m m a a c c h h i i n n e e t t o o t t h h e e d d r r a a i i n n This machine must be connected in accordance with the water supply regulations. -
Page 10: Moving The Machine Into Position
M M o o v v i i n n g g t t h h e e m m a a c c h h i i n n e e i i n n t t o o p p o o s s i i t t i i o o n n Your machine is heavy so care must be taken when moving it. -
Page 11: T T E E S S T T I I N N G G T T H H E E I I N N S S T T A A L L L L A A T T I I O O N N
T T e e s s t t i i n n g g t t h h e e i i n n s s t t a a l l l l a a t t i i o o n n Refer to the programme guide for details of how to select programmes. -
Page 12: W W A A S S H H I I N N G G A A N N D D D D R R Y Y I I N N G G A A D D V V I I C C E E
W W a a s s h h i i n n g g a a n n d d D D r r y y i i n n g g a a d d v v i i c c e e The following tips are designed to assist in getting the best results from your machine whilst utilising it in the most environmentally-friendly and economical way. -
Page 13: Drying
t t a a n n g g l l i i n n g g . . E E n n s s u u r r e e t t h h a a t t p p o o c c k k e e t t s s a a r r e e e e m m p p t t i i e e d d o o f f l l o o o o s s e e c c h h a a n n g g e e a a n n d d o o t t h h e e r r s s m m a a l l l l i i t t e e m m s s . -
Page 14: T T H H E E D D I I S S P P E E N N S S E E R R
T T h h e e D D i i s s p p e e n n s s e e r r C C O O M M P P A A R R T T M M E E N N T T I I C C O O M M P P A A R R T T M M E E N N T T P P r r e e w w a a s s h h d d e e t t e e r r g g e e n n t t F F a a b b r r i i c c C C o o n n d d i i t t i i o o n n e e r r... -
Page 15: Dispensing Instructions
A A R R I I E E L L Q Q u u i i c c k k W W a a s s h h A A c c t t i i o o n n – – C C h h o o s s e e n n a a n n d d r r e e c c o o m m m m e e n n d d e e d d b b y y H H o o o o v v e e r r When we produce a new washing machine we subject it to every test possible. -
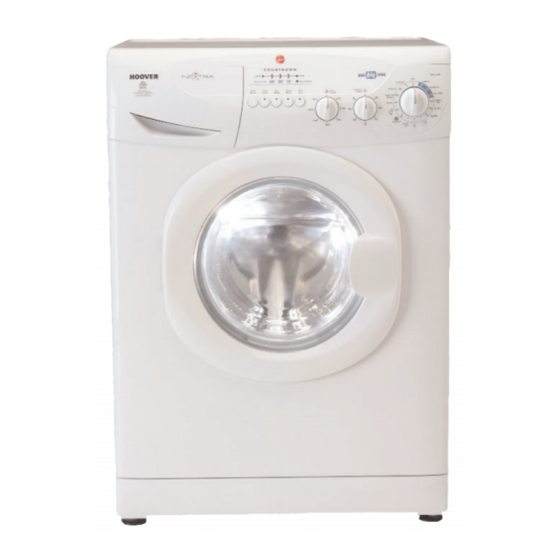
Page 16: T T H H E E C C O O N N T T R R O O L L P P A A N N E E L L
T T h h e e C C o o n n t t r r o o l l P P a a n n e e l l COUNTDOWN Display START/ TEMPERATURE PROGRAMME OPTIONS DRYING TIME PAUSE SELECTOR SELECTOR BUTTONS SELECTOR... - Page 17 P P A A U U S S E E The programme may be paused at any time during the wash cycle by holding down the START/PAUSE button for about two seconds. When the machine is in the paused mode, the time remaining for the programme in the COUNTDOWN indicator and option buttons will flash.
-
Page 18: W W A A S S H H A A N N D D D D R R Y Y O O P P T T I I O O N N S S
W W a a s s h h a a n n d d D D r r y y O O p p t t i i o o n n s s T T h h e e o o p p t t i i o o n n s s s s h h o o u u l l d d b b e e s s e e l l e e c c t t e e d d B B E E F F O O R R E E p p r r e e s s s s i i n n g g t t h h e e S S T T A A R R T T b b u u t t t t o o n n P P r r e e w w a a s s h h This option is available on the cottons and synthetics programmes. - Page 19 T T e e m m p p e e r r a a t t u u r r e e S S e e l l e e c c t t o o r r The washing machine is equipped with a Temperature Selector knob to set the temperature you require.
-
Page 20: Automatic Features
A A u u t t o o m m a a t t i i c c F F e e a a t t u u r r e e s s A A u u t t o o m m a a t t i i c c V V a a r r i i a a b b l l e e C C a a p p a a c c i i t t y y ( ( H H a a l l f f L L o o a a d d ) ) The washing machine is fitted with a self adjusting water level system. -
Page 21: P P R R O O G G R R A A M M M M E E S S E E L L E E C C T T O O R R
P P r r o o g g r r a a m m m m e e S S e e l l e e c c t t o o r r For handling the various types of fabric and their level of soiling in your laundry the washing machine has different programme groups according to type of wash, temperature, spin speeds and duration (see Programme Guide). -
Page 22: Daily Programmes
S S p p o o r r t t s s Hoover has given sports items their own wash care programme. This washing machine has a unique Sportswear programme. It is specially designed to wash mixed sportswear fabrics that cannot be washed on hotter programmes and is designed to remove the soiling and staining created by participation in sports activities. -
Page 23: P P R R O O G G R R A A M M M M E E G G U U I I D D E E
P P r r o o g g r r a a m m m m e e G G u u i i d d e e A A u u t t o o m m a a t t i i c c D D r r y y i i n n g g C C y y c c l l e e M M a a x x i i m m u u m m M M a a x x i i m m u u m m M M a a x x i i m m u u m m... -
Page 24: A A T T Y Y P P I I C C A A L L W W A A S S H H A A N N D D D D R R Y Y C C Y Y C C L L E E
A A T T y y p p i i c c a a l l W W a a s s h h a a n n d d D D r r y y C C y y c c l l e e This section summarises the main points when completing a L L i i q q u u i i d d d d e e t t e e r r g g e e n n t t s s a a n n d d wash cycle. -
Page 25: Starting The Cycle
S S t t a a r r t t i i n n g g t t h h e e c c y y c c l l e e Press the START/PAUSE button. The door locked indicator and the START light illuminate, within a few seconds the programme will begin. -
Page 26: C C L L E E A A N N I I N N G G A A N N D D R R O O U U T T I I N N E E M M A A I I N N T T E E N N A A N N C C E E
C C l l e e a a n n i i n n g g a a n n d d R R o o u u t t i i n n e e M M a a i i n n t t e e n n a a n n c c e e The washing machine needs very little maintenance, but regular attention to a few small details will ensure the continued performance of your washing machine. - Page 27 C C l l e e a a n n i i n n g g t t h h e e f f i i l l t t e e r r The washing machine is fitted with a special filter to prevent items such as coins, buttons, etc.
-
Page 28: T T R R O O U U B B L L E E S S H H O O O O T T I I N N G G
T T r r o o u u b b l l e e s s h h o o o o t t i i n n g g W W h h a a t t m m i i g g h h t t b b e e t t h h e e c c a a u u s s e e o o f f ..D D e e f f e e c c t t s s y y o o u u c c a a n n r r e e m m e e d d y y y y o o u u r r s s e e l l f f Before calling GIAS Service for technical advice please run through the following checklist. - Page 29 T T h h e e m m a a c c h h i i n n e e i i s s n n o o i i s s y y o o r r v v i i b b r r a a t t e e s s a a l l o o t t d d u u r r i i n n g g t t h h e e c c y y c c l l e e … … ●...
-
Page 30: Power Failure
P P o o w w e e r r F F a a i i l l u u r r e e If there is a power failure the wash cycle will be interrupted, and the wash programme and functions will be suspended. When the power is restored, the wash programme and functions will re-start from the same point and complete the programme. -
Page 31: C C U U S S T T O O M M E E R R S S E E R R V V I I C C E E
Hoover Service free of charge (except for the price of the call). P P h h o o n n e e G G I I A A S S o o n n... -
Page 32: Y Y O O U U R R G G U U A A R R A A N N T T E E E E
Y Y o o u u r r G G u u a a r r a a n n t t e e e e Hoover guarantees all parts of this product for 5 years from the date of purchase. During that time Hoover will replace or repair all defective parts free of charge, except for parts subject to fair wear and tear such as belts.