Table of Contents
Advertisement
Use & Care Guide
Manual de Uso y Cuidado
Guide d'utilisation et d'entretien
English / Español / Français
Models/Modelos/Modèles: 253.4475*
Kenmore Elite
®
Freezer
Congelador
Congélateur
* = Color number, número de color, le numéro de la couleur
P/N 297299000 (1105)
Sears Brands Management Corporation
Hoffman Estates, IL 60179 U.S.A.
www.kenmore.com
www.sears.com
Sears Canada Inc.
Toronto, Ontario, Canada M5B 2C3
www.sears.ca
Advertisement
Table of Contents

Related Manuals for Electrolux 253.4475

Summary of Contents for Electrolux 253.4475
- Page 1 Use & Care Guide Manual de Uso y Cuidado Guide d’utilisation et d’entretien English / Español / Français Models/Modelos/Modèles: 253.4475* Kenmore Elite ® Freezer Congelador Congélateur * = Color number, número de color, le numéro de la couleur P/N 297299000 (1105) Sears Brands Management Corporation Hoffman Estates, IL 60179 U.S.A.
-
Page 2: Table Of Contents
Record Model/Serial Numbers Important Safety Instructions Please Read and Save these Instructions Safety Precautions This Use & Care Guide provides specific operating Do not attempt to install or operate your unit until you instructions for your model. Use your unit only as instructed have read the safety precautions in this manual. -
Page 3: Important Safety Instructions
Important Safety Instructions (Continued) WARNING WARNING Please read all safety instructions before using your new These guidelines must be followed to ensure that safety appliance. mechanisms in this unit will operate properly. For Your Safety Electrical Information • Do not store or use gasoline, or other flammable •... -
Page 4: Warranty Information
Kenmore Elite Limited Warranty When this appliance is installed, operated and maintained according to all supplied instructions, the following warranty coverage applies. To arrange for warranty service, ® call 1-800-4-MY-HOME (1-800-469-4663). • For one year from the date of purchase, free repair will be provided if any non- consumable part of this appliance fails due to defective materials or workmanship. -
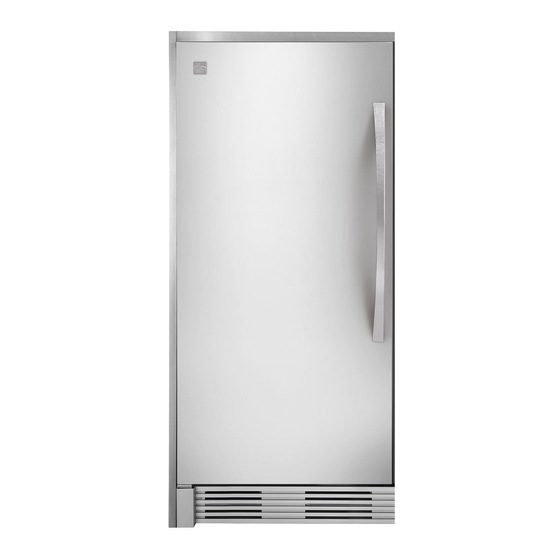
Page 6: Features At A Glance
Features at a Glance *Features may vary according to model. Ice Maker Electronic Control Ice Bin Air Filter Air Baffle Two Liter Adjustable Door Bins Glass Lighting Shelves Upper Freezer Basket Lighting Full Width Door Bins Lower Freezer Basket Light Switch Adjustable Bottom Hinge... -
Page 7: Installation
Installation Required Tools You will need the following tools: Installation This Use & Care Guide provides general installation and operating instructions for your model. We recommend • Allow the following clearances for ease of installation, using a service or kitchen contracting professional to install proper air circulation, and plumbing and electrical your freezer. -
Page 8: Door Removal
Door Removal Instructions Door Handle Mounting Instructions Kick Plate Removal To remove the kick plate, use a Phillips head screwdriver 1. Remove handle from carton and any other protective and remove the two screws holding the kick plate to the packaging. -
Page 9: Leveling Instructions
Leveling Instructions Leveling Leveling Instructions For Matching Refrigerator/Freezer Pair: • Level door of first unit using all four levelers and slide unit The freezer must have all bottom corners resting firmly on into place. Recheck for levelness and adjust if necessary. a solid floor. - Page 10 Leveling Instructions DOOR REMOVAL If door must be removed: • Unplug the unit or switch the breaker that supplies power to the unit to the off position. • Remove the plastic top hinge cover. • Hold the door in place while removing the top hinge from the cabinet.
-
Page 11: Controls
Controls SETTING THE ELECTRONIC CONTROL Cool Down Period For safe food storage, allow four (4) hours for freezer to cool down completely. The freezer will run continuously for the first several hours. Electronic Control The Electronic Control is located inside the freezer. Temperature is factory preset to provide satisfactory food storage temperatures. -
Page 12: Electronic Control Features
Controls (Continued) Adjust UP Key Air Filter Reset Key Te mp Mode Key Alarm Reset Key Door Ajar Power Fail Replace Air Filter Adjust DOWN Key Control Lock Key Indicator Indicator Indicator ELECTRONIC CONTROL FEATURES Replace Air Filter When the “REPLACE AIR FILTER” LED is illuminated yellow, the air filter needs to be replaced. -
Page 13: Sabbath Mode
Controls (Continued) SABBATH MODE The Sabbath Mode is a feature that disables portions of the freezer and its controls in accordance with the observance of the weekly Sabbath and religious holidays within the Orthodox Jewish community. To initiate or cancel Sabbath Mode, press the CONTROL LOCK and TEMP MODE keys at the same time and hold for three (3) seconds. - Page 14 Controls (Continued) ALARMS There are four possible conditions that will cause the alarm tone to sound. High Temp Alarm If the temperature inside the cabinet has exceeded 23ºF (-5ºC) for 1 hour or more, the HIGH TEMP LED will illuminate, the HIGH TEMP Alarm will sound with 4 short beeps every ½ second, and the cabinet temperature shows in the display.
-
Page 15: Changing The Filter
Changing the Filter LED Lighting AIR FILTER To Replace LED Lights: 1. Unplug your freezer’s power cord. The air filter is located inside one of the 2 Liter Door Bins. 2. Remove light cover by pushing up and out. The air filter cover is located on the upper right side of 3. -
Page 16: Connecting Water Supply
Connecting Water Supply To Freezer WATER SUPPLY To Connect Water Supply Line To Ice Maker Inlet Valve 1. Disconnect freezer from electric power source. WARNING 2. Place end of water supply line into sink or bucket. Turn ON water supply and flush supply line until To avoid electric shock, which can cause death or water is clear. -
Page 17: Connecting Water Supply
Connecting Water Supply To Freezer Plastic Water Tubing Steel to Ice Maker Clamp Fill Tube Stainless Steel Waterline Water Valve Bracket Valve Inlet Water Valve 6 ft. Stainless Steel Water Line From Household Water Supply Figure B. Stainless Steel Water Line Connection 5. -
Page 18: Ice Service
Ice Service ICE SERVICE If your freezer has an automatic ice maker, it will provide a sufficient supply of ice for normal use. During the initial startup of your freezer, however, no ice will be produced during the first 24 hours of operation. Automatic ice makers are also optional accessories that may be installed in some models at any time. -
Page 19: Storage Features
Storage Features Glass Shelves Adjustable Two Liter Door Bins Multi-position adjustable slide out glass shelves can be This model is equipped with adjustable door bins that can moved to any position for larger or smaller packages. The be moved to suit individual needs. shipping spacers that stabilize the shelves for shipping may To Move Door Bins: be removed and discarded. -
Page 20: Storing Food And Saving Energy
Storing Food and Saving Energy Ideas for Storing Foods Ideas for Saving Energy Frozen Food Storage Installation • Keep the freezer compartment at 0° F or lower. • Locate the freezer in the coolest part of the room, out of direct sunlight, and away from heating ducts or •... -
Page 21: Care & Cleaning
Care & Cleaning Protecting Your Investment Keeping your freezer clean maintains its appearance and prevents odor build-up. Wipe up any spills immediately and clean the freezer compartments at least twice a year. NOTE Do not use abrasive cleaners such as window sprays, scouring cleansers, flammable fluids, cleaning waxes, concentrated detergents, bleaches, or cleansers containing petroleum products on plastic parts, interior doors, gaskets, or cabinet liners. -
Page 22: Before You Call
Before You Call Before calling for service, review this list. It may save you time and expense. This list includes common occurrences that are not the result of defective workmanship or materials in this freezer. CONCERN POTENTIAL CAUSE COMMON SOLUTION Freezer Operation Freezer does not run. -
Page 23: Before You Call
Before You Call (continued) CONCERN POTENTIAL CAUSE COMMON SOLUTION Sound And Noise Louder sound levels • Modern freezers have increased • This is normal. When the surrounding noise level is whenever freezer is storage capacity and more low, you might hear the compressor running while it stable temperatures. - Page 24 Get it fixed, at your home or ours! Your Home For troubleshooting, product manuals and expert advice: www.managemylife.com For repair – in your home – of all major brand appliances, lawn and garden equipment, or heating and cooling systems, no matter who made it, no matter who sold it! For the replacement parts, accessories and owner’s manuals that you need to do-it-yourself.