Table of Contents
Advertisement
Available languages
Available languages
Includes information on SOLAR Model Nos. OS6110, OS6120, OS6130, OS6140 and OS6150
Failure to follow instructions may cause
damage or explosion, always shield eyes.
Read entire instruction manual before use.
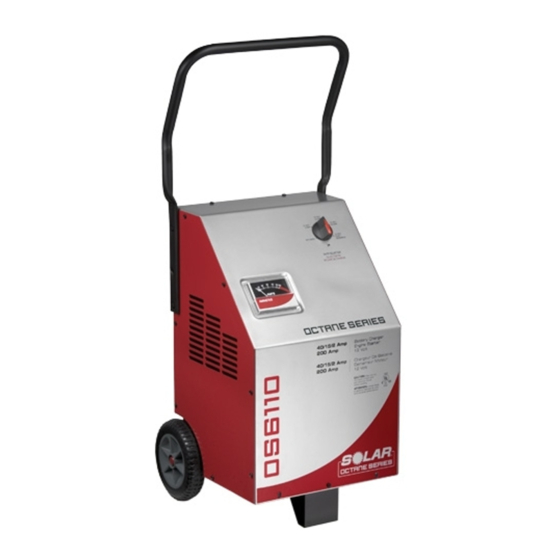
Wheel Charger
Owner's Manual
WARNING
Warning: This product contains chemicals, including
lead, known to the State of California to cause
cancer, birth defects and other reproductive harm.
Wash hands after handling.
Advertisement
Chapters
Table of Contents

Related Manuals for Solar Octane OS6110


Summary of Contents for Solar Octane OS6110
- Page 1 Wheel Charger Owner’s Manual Includes information on SOLAR Model Nos. OS6110, OS6120, OS6130, OS6140 and OS6150 WARNING Warning: This product contains chemicals, including lead, known to the State of California to cause Failure to follow instructions may cause cancer, birth defects and other reproductive harm.
-
Page 2: Safety Information
Working around lead-acid batteries may be dangerous. Lead-acid batteries release explosive gases during normal operation, charging and jump starting. Carefully read and follow these instructions for safe use. Always follow the specific instructions in this manual and on the SOLAR Battery Charger each time you use the SOLAR Battery Charger. -
Page 3: Shock Hazards
WARNING – Shock Hazards 1. This battery charger is intended for indoor use only. Do not expose the charger to rain or snow. 2. NEVER attempt to charge a marine (boat) battery while the boat is on or near the water. A boat must be on a trailer and located indoors before attempting to charge its battery(s). -
Page 4: Battery Explosion
WARNING – Battery Explosion Hazards 1. NEVER connect both battery charger clamps directly to the two posts of the same battery. See Operation Instructions for connection procedures. 2. NEVER allow the dc output clamps to touch each other. 3. ALWAYS be extra cautious to reduce the risk of dropping a metal object, such as a tool, onto or near the battery. -
Page 5: Personal Precautions
PERSONAL PRECAUTIONS 1. Someone should be within range of your voice or close enough to come to your aid when you work near a lead-acid battery. 2. Have plenty of fresh water and soap nearby in case battery acid contacts skin, clothing, or eyes. 3. -
Page 6: Table Of Contents
TABLE OF CONTENTS SAFETY SUMMARY Safety Information ............2 Shock Hazards . - Page 7 OPERATION Operating Instructions ............15 Connecting to Batteries Installed in Vehicles .
-
Page 8: Introduction
INTRODUCTION Description This battery charger is designed to handle the majority of your charging and starting needs. • Multiple Charge Rates for various battery sizes. • High-Amperage Engine Start to help start vehicles when the battery is too weak to do the job alone. •... -
Page 9: Assembly
ASSEMBLY Assemble the Handle Assemble the charger handle according to the following instructions and illustrations. 1. Carefully remove the charger Remove the Screws Lift the Handle Into Position unit and all associated hardware from carton. 2. Unscrew the two screws on either side of the charger as shown in Figure 1. -
Page 10: Preparation
PREPARATION Charger Placement Place the charger in a clean, dry, stable, well-ventilated spot as far from the battery as the DC output cables permit. NEVER place the charger directly above the battery being charged; gasses from the battery will corrode and damage the charger. -
Page 11: Battery Preparation
Battery Preparation WARNING: Battery explosion can injure and cause property damage! Never smoke or allow a spark or flame in the vicinity of the battery or engine. See Safety Summary, pages 2-4. If it is necessary to remove the battery from the vehicle to charge it, make sure all accessories in the vehicle are off and always remove the grounded cable from the battery first. -
Page 12: Controls And Indicators
Charge Rate Selector switch is a multiposition rotary switch in most of the chargers. The available settings for each charger are described in Table 1 using Figure 4 to identify the switch positions. Table 1. Charge Rate Selector Switch Settings Charge Rate Selector Switch Settings Model Number OS6110 None Med. High Start OS6120 High/ Med. -
Page 13: Timer Switch Setting
For Model OS6140, set the Volt Selector to the proper voltage. While monitoring the ammeter, turn the Rate Selector until the ammeter stops increasing, but do not exceed the maximum charge rate recommended by the battery manufacturer or the chart above. See Timer Switch Setting for information about 10 Amp automatic on/off mode. -
Page 14: Alternator Test (12 Volt Only)
Alternator test (12 Volt only) 1. With the charger OFF and clamps properly hooked to the battery, start the engine and while running at fast idle, press the Test Switch. 2. Read the alternator condition on the alternator test scale at the upper right section of the test meter. The battery should be in a good state of charge before attempting this test. -
Page 15: Operating Instructions
OPERATION Operating Instructions ATTENTION: Do not attempt to operate this battery charger until you have read and understood the entire Safety Summary provided in this manual. Note: Go to Assembly in this manual before proceeding with the operation of your battery charger. Do not attempt to operate the charger until all required user-assembly is completed. -
Page 16: Charging Instructions
5. Position yourself and the free end of the cable (attached to the NEG battery terminal) as far away from the battery as the cable will allow. Then, WHILE FACING AWAY FROM THE BATTERY, connect the NEGATIVE charger clamp to the free end of the cable. Charging Instructions 1. -
Page 17: Charging Time Instructions
Charging Time Instructions Manual battery chargers need to be disconnected from a battery when the battery has reached 100% of charge or sooner. If this is not done, the battery will overcharge, resulting in possible battery damage. The following instructions or the associated Length of Charge Time Charts (60 amps down to 2 amps, one for each charging range) will allow you to determine how long it will take to bring a specific battery to full charge. - Page 18 Table 2. Charge Amp Settings MODEL NUMBER 6V HIGH 12V LOW 12V MED. 12V HIGH 24V HIGH START OS6110 2 Amp 15 Amp 40 Amp 200 Amp 12V 200 Amp 12V OS6120 40 Amp 2 Amp 15 Amp 40 Amp...
- Page 19 Table 5. Length of Charge Time Chart 15 Amps BATTERY RATINGS HOURS TO CHARGE @ 15 AMPS Approx. Approx. for the percent-of-charge now in the battery Reserve Marine Cold Capacity Cranking Cranking Ampere 100% (Minutes) Amps Amps Hours HOURS TO CHARGE DEEP CYCLE* 11.2 Table 6.
-
Page 20: Engine Starting
Engine Starting This battery charger can provide a high-current output to help start a vehicle with a weak battery. However, the onboard computer in some vehicles can be damaged when attempting to jumpstart. ALWAYS READ THE VEHICLE OPERATOR’S MANUAL BEFORE AUXILIARY STARTING to determine if jumpstarting can do damage to the vehicle. If not, read and follow these instructions. -
Page 21: Maintenance
MAINTENANCE CAUTION: Make sure charger is unplugged from AC outlet before performing any cleaning or maintenance. A minimum amount of care can keep your battery charger working and looking good for years. 1. Clean the clamps after each use. Wipe off any battery fluid that may have come in contact with the clamps to prevent corrosion. -
Page 22: Limited Warranty
Registering Your Purchase: For best service and to receive periodic product updates, follow the instructions below to register your purchase: Please visit: www.cloreregistration.com Click on the SOLAR logo Complete the information in the web form and click “submit” It’s that easy! -
Page 24: Informacion De Seguridad
Siga siempre las instrucciones específicas de este manual y las que se hallan en la unidad SOLAR cada vez que vaya a arrancar un motor con su SOLAR. Todas las baterías de plomo-ácido (autos, remolques y botes) producen gas de hidrógeno, que puede explotar con violencia si hay chispas o fuego. -
Page 25: Riesgo De Descargas
ADVERTENCIA – RIESGO DE DESCARGAS 1. Este cargador de baterías es para interiores solamente. No lo exponga a luvia o nieve. 2. NUNCA trate de cargar una batería marina cuando la embarcación se encuentre en el agua o cerca del agua. -
Page 26: Riesgo De Explosion De La Bateria
ADVERTENCIA – RIESGO DE EXPLOSION DE LA BATERIA 1. NUNCA conecte AMBAS mordazas del cargador DIRECTAMENTE sobre los dos bornes de la misma batería. Vea en las INSTRUCCIONES DE OPERACION los procedimientos de conexión. 2. NUNCA permita que se toquen entre sí las mordazas de salida de corriente continua. 3. -
Page 27: Precauciones Personales
PRECAUCIONES PERSONALES 1. Asegúrese de que haya persoas que le puedan oir o estén suficientemente cerca para brindarle auxilio cuando trabaje cerca de una bateria de plomo-ácido. 2. Tenga siempre cerca agua y jabón en abundancia en caso de que el ácido de la bateria haga contacto con cu piel, ropa u ojos. - Page 28 ÍNDICE DE MATERIAS RESUMEN DE SEGURIDAD Informacion de seguridad ...........24 Riesgo de descargas .
- Page 29 OPERACION Instruciones de operacion ..........37 Conexion del cargador a una bateria instalada en un vehiculo .
-
Page 30: Introduccion
INTRODUCCION DESCRIPCION Este cargador de baterías está diseñado para realizar la mayoría de sus trabajos de carga y arranque. • VARIAS INTENSIDADES DE CARGA para distintos tamaños de baterías. • AMPERAJE ALTO PARA ARRANCAR EL MOTOR de un vehículo cuya batería está descargada. •... -
Page 31: Montaje
MONTAJE MONTAJE DEL ASA Monte el asa del cargador con arreglo a las siguientes instrucciones e ilustraciones. 1. Saque cuidadosamente de la Retire los tornillos Levante el asa hacia arriba caja la unidad del cargador y los elementos de fijación correspondientes. -
Page 32: Preparacion
PREPARACION UBICACION DEL CARGADOR Coloque el cargador un lugar limio, seco, estable y bien ventilado, tan apartado de la batería como los cables de salida de CC lo permitan. NUNCA ponga el cargador directamente sobre la batería que se va a cargar. Los gases de la batería son corrosivos y dañninos para el cargador. -
Page 33: Preparacion De La Bateria
PREPARACION DE LA BATERIA ADVERTENCIA: ¡LA EXPLOSION DE UNA BATERIA PUEDE CAUSAR LESIONES Y DAÑOS A LA PROPIEDAD! NUNCA FUME NI PERMITA QUE HAYA CHISPAS O LLAMAS CERCA DE LA BATERIA O EL MOTOR. Vea la Seguridad el Resumen, las páginas 2-4. Si es necesario quitar la batería del vehículo para cargarla, asegúrese que todos los accesorios del vahículo estén apagados y SIEMPRE quite PRIMERO de la batería el cable conectado a tierra. -
Page 34: Controles E Indicadores
En la Tabla 1 están las intensidades disponibles en cada cargador y en la Figura 4 se identifican las posiciones. Tabla 1. Regulaciones del selector de intensidad Regulaciones del Selector de Intensidad Modelo Numero OS6110 Ninguna Baja Med. Alta Arranque... -
Page 35: Ajuste De Contador De Tiempo
Para el modelo OS6140, ajuste el SELECTOR DE VOLTAJE al valor apropiado. Al mismo tiempo que vigila el amperímetro, gire el SELECTOR DE INTENSIDAD hasta que la lectura del amperímetro deje de subir pero no se exceda de la intensidad de carga máxima recomendada por el fabricante de la batería o la tabla de abajo. Vea la sección de AJUSTE DEL CONTADOR DE TIEMPO si desea información sobre el modo automático on/off de 10 amperios. -
Page 36: Prueba De Porcentaje De Carga De La Bateria (12 Voltios Solamente)
Prueba de porcentaje de carga de la batería (12 voltios solamente) 1. Con el cargador apagado (OFF) y las mordazas conectadas correctamente a la batería, oprima el interruptor de prueba (TEST) y lea el porcentaje de carga de la batería en la parte superior izquierda de la escala en el medidor de prueba. -
Page 37: Operacion
OPERACION INSTRUCCIONES DE OPERACION ¡ATENCION!: NO TRATE DE OPERAR ESTE CARGADOR DE BATERIAS a menos que haya leído y entendido todo el RESUMEN DE SEGURIDAD que se encuentra en este manual. NOTA: Lea la sección de ENSAMBLAJE antes de proceder con la operación de su cargador. NO TRATE DE OPERAR EL CARGADOR A MENOS QUE HAYA COMPLETADO EL ENSAMBLAJE REQUERIDO. -
Page 38: Instrucciones De Carga
4. Conecte la mordaza POSITIVA (roja) del cargador a la terminal POSITIVA de la batería. 5. Acomódese usted con la punta libre del cable (conectado a la terminal NEGATIVA de la batería) tan lejos de la batería como el cable lo permita. Luego, DANDO LA ESPALDA A LA BATERIA, conecte la mordaza NEGATIVA del cargador a la punta libre del cable. -
Page 39: Determinacion De Tiempo De Carga
DETERMINACION DE TIEMPO DE CARGA Los cargadores manuales deben desconectarse de la batería cuando ésta alcanza el 100% de carga O ANTES. Si no se desconecta, la batería se sobrecargará y puede dañarse. Las siguientes instrucciones o TABLAS DE TIEMPO DE CARGA (de 60 amperios a 2 amperios, uno para cada margen de carga) le servurán para determinar cuánto tiempo necesita para cargar completamente una batería. - Page 40 Tabla 2. Ajustes de carga en amperios MODELO NO. 6V ALTA 12V BAJA 12V MED 12V ALTA 24V ALTA ARRANQUE OS6110 2 Amp 15 Amp 40 Amp 200 Amp 12V 200 Amp 12V OS6120 40 Amp 2 Amp 15 Amp...
- Page 41 Tabla 5. Tiempo de carga con 15 amperios HORAS DE CARGA @ 15 AMPS Amperajea Amperajea aproxim. aproxim. Capacidad arranque arranque de reserva 100% A-hr en marina en frio (Minutos) HORAS DE CARGA CICLO PROLONGADO* 11.2 Tabla 6. Tiempo de carga con 2 amperios HORAS DE CARGA @ 2 AMPS Amperajea Amperajea...
-
Page 42: Arranque De Un Motor
ARRANQUE DE UN MOTOR Este cargador de baterías ofrece una salida de corriente alta para ayudar a arrancar el motor de un vehículo que tiene la batería descargada. Sin embargo, algunos procesadores de computo en el vehículo pueden dañarse si se trata de arrancar el vehículo con la ayuda del cargador. -
Page 43: Mintenimiento
MINTENIMIENTO PRECAUCION: Asegúrese que el cargador esté desenchufado de la fuente de CA antes de realizar su limpieza o mantenimiento. Ciertos cuidados mínimos pueden ayudar a mantener su cargador de baterías en buenas condiciones de funcionamiento y buena apariencia por muchos años. 1. -
Page 44: Garantia Limitada Del Fabricante
GARANTIA LIMITADA DEL FABRICANTE Clore Automotive, L.L.C. garantiza que por 2 años a partir de la fecha de la compra original en una distribuidora, en el caso de la unidad entera, reparará sin cargo por repuestos y mano de obra este producto si se encuentra defectuoso en sus materiales o mano de obra. -
Page 46: Précautions À Observer
CONSERVER AVERTISSEMENT Lisez entièrement ces instructions avant d'utiliser le SOLAR. Gardez-les à titre de référence. Avant d'utiliser le produit, lisez ces instructions ainsi que le manuel d'instruction, ceux-là sur la pile ou les informations de sécurité fournie avec le produit utilisant la pile. En suivant les instructions et les procédures de sécurité, vous réduirez tout risque d'accident. -
Page 47: Risques De Chocs Électriques
AVERTISSEMENT – RISQUES DE CHOCS ÉLECTRIQUES 1. Ce chargeur de batteries est conçu pour être utilisé uniquement à l’intérieur. Ne l’exposez pas à la pluie ou à la neige. 2. NE tentez JAMAIS de charger une batterie qui se trouve à bord d’un bateau ou à proximité de l’eau. Procédez à... -
Page 48: Risques D'explosion D'une Batterie
AVERTISSEMENT – RISQUES D’EXPLOSION D’UNE BATTERIE 1. Ne branchez JAMAIS les DEUX pinces du chargeur DIRECTEMENT sur les deux bornes d’une même batterie. Lisez les CONSIGNES D’UTILISATION pour connaître la méthode de branchement. 2. Ne mettez JAMAIS les pinces de sortie en c.c. en contact l’une de l’autre. 3. -
Page 49: Les Precautions Personnelles Pour Observer
LES PRECAUTIONS PERSONNELLES POUR OBSERVER 1. Assurez-vous TOUJOURS que quelqu’un est à portée de voix ou suffisamment proche pour venir rapidement à votre aide lorsque vous travaillez à proximité d’une batterie au plomb. 2. Prévoyez TOUJOURS à proximité une grande quantité d’eau fraîche et du savon en cas de projection d’acide de la batterie dans les yeux, sur la peau ou sur les vêtements. - Page 50 TABLE DES MATIERES RÉSUMÉ DES CONSIGNES DE SÉCURITÉ Précautions à observer ........... .46 Risques de chocs électriques .
- Page 51 UTILISATION Consignes d’utilisation ........... . .59 Branchement à...
-
Page 52: Introduction
INTRODUCTION DESCRIPTION Ce chargeur de batterie est conçu pour satisfaire la plupart de vos besoins en matière de recharge de batterie et de démarrage de moteur. • RÉGIMES MULTIPLES DE CHARGE pour batteries de différentes capacités. • DÉMARRAGE DE MOTEUR À HAUTE INTENSITÉ pour permettre la mise en marche d’un véhicule dont la batterie est insuffisamment chargée. -
Page 53: Assemblage
ASSEMBLAGE ASSEMBLAGE DE LA POIGNÉE Assembler la poignée du chargeur selon les instructions et les illustrations suivantes. 1. Retirer soigneusement du Retirer les Vis Soulever et positionner la Poignée carton le chargeur et tout le matériel fourni. Dévisser les deux vis de chaque côté... -
Page 54: Préparation
PREPARATION POSITIONNEMENT DU CHARGEUR Placez le chargeur dans un endroit propre, sec, stable et bien ventilé, aussi éloigné de la batterie que le permettent les câbles de sortie en c.c. Ne placez JAMAIS le chargeur directement au-dessus de la batterie en cours de charge; les gaz produits par la batterie sont corrosifs et peuvent endommager le chargeur. -
Page 55: Préparation De La Batterie
PRÉPARATION DE LA BATTERIE ATTENTION : L’EXPLOSION D’UNE BATTERIE PEUT CAUSER DES BLESSURES CORPORELLES ET DES DÉGÂTS MATÉRIELS! NE FUMEZ JAMAIS À PROXIMITÉ DE LA BATTERIE OU DU MOTEUR ET ÉLOIGNEZ-EN TOUTE SOURCE D’ÉTINCELLES OU DE FLAMMES. Voir le RÉSUMÉ DES CONSIGNES DE SÉCURITÉ, les pages 46-48. S’il est nécessaire de déposer la batterie du véhicule pour la charger, assurez-vous que tous les accessoires à... -
Page 56: Commandes Et Voyants
Les réglages disponibles pour chaque modèle sont décrits dans le tableau 1 et les différentes positions du sélecteur sont illustrées sur la figure 4. Tableau 1. Réglages du sélecteur du régime de charge Réglages de sélecteur du régime de charge Modèle OS6110 Aucun Arr t Moy. Faible Fort D mar. -
Page 57: Réglage Du Temporisateur
Pour les modèles OS6140, réglez le SÉLECTEUR DE TENSION à la tension nécessaire. Tout en surveillant l’ampèremètre, tournez le SÉLECTEUR DE RÉGIME jusqu’à ce que l’aiguille s’arrête de monter, sans toutefois dépasser le régime de charge maximale recommandé par le fabricant de la batterie ou indiqué sur le tableau ci- dessus. -
Page 58: Test Du Pourcentage De Charge De La Batterie (12 Volts Seulement)
Test du pourcentage de charge de la batterie (12 volts seulement) 1. Le chargeur étant hors tension (“OFF”) et les pinces correctement branchées à la batterie, appuyez sur l’interrupteur de TEST et lisez le pourcentage de charge de la batterie sur l’échelle supérieure gauche du testeur. -
Page 59: Consignes D'utilisation
UTILISATION CONSIGNES D’UTILISATION ATTENTION ! : N’UTILISEZ PAS CE CHARGEUR DE BATTERIE avant d’avoir lu et bien compris tout le RÉSUMÉ DES CONSIGNES DE SÉCURITÉ figurant dans ce manuel. REMARQUE : Passez à la section ASSEMBLAGE du manuel avant de mettre en marche votre chargeur de batterie. NE FAITES PAS FONCTIONNER LE CHARGEUR AVANT D’AVOIR EFFECTUÉ... -
Page 60: Instructions Pour La Charge
ATTENTION : L’EXPLOSION D’UNE BATTERIE PEUT CAUSER DES BLESSURES CORPORELLES ET DES DÉGÂTS MATÉRIELS ! Pour réduire le risque d’explosion, ne BRANCHEZ JAMAIS LES DEUX PINCES DU CHARGEUR DE BATTERIE DIRECTEMENT AUX DEUX BORNES D’UNE BATTERIE. 4. Branchez la pince POSITIVE (rouge) du chargeur à la borne POSITIVE de la batterie. 5. -
Page 61: Instructions Sur La Durée De Charge
le bas de l’échelle, refaites une mesure avec le voltmètre. Si aucun changement de tension n’est survenu, la batterie doit être réparée ou remplacée. MISE EN GARDE : N’UTILISEZ PAS L’AMPÈREMÈTRE pour déterminer quand la charge est terminée. L’inobservation de cette mise en garde peut entraîner la surcharge de la batterie qui risque d’être endommagée. La batterie peut surchauffer et même exploser. - Page 63 REMARQUE : Les durées de charge indiquées sur les tableaux ci-dessus sont très précises à condition d’utiliser les valeurs nominales de la CAPACITÉ DE RÉSERVE ou le nombre d’AMPÈRES-HEURES de la batterie. Les valeurs nominales pour le DÉMARRAGE À FROID et le DÉMARRAGE DE BATTERIES POUR BATEAU sont données à titre approximatif et peuvent varier d’une batterie à...
-
Page 64: Démarrage Du Moteur
DÉMARRAGE DU MOTEUR Le chargeur de batterie peut débiter un courant de sortie de haute intensité permettant le démarrage d’un moteur avec une batterie faible. Cependant, les ordinateurs de bord de certains véhicules peuvent être endommagés par le démarrage avec un chargeur d’appoint. LISEZ TOUJOURS LE MANUEL DU VÉHICULE AVANT D’UTILISER UN CHARGEUR D’APPOINT pour vous assurer que cette intervention n’entraînera aucun dommage. -
Page 65: Entretien
ENTRETIEN MISE EN GARDE : Assurez-vous que le chargeur est débranché de la prise secteur avant tout travail de nettoyage ou d’entretien. Un minimum d’entretien assurera le bon fonctionnement de votre chargeur de batterie et lui conservera un aspect neuf pendant de longues années. 1. -
Page 66: Garantie Limitee
GARANTIE LIMITÉE Clore Automotive, L.L.C. garantit que, pour une période de 2 ans à partir de la date d’achat initial pour l’appareil tout entier, ce produit sera réparé gratuitement (pièces et main-d’œuvre) s’il est jugé défectueux en raison de défauts de matériaux ou de fabrication. Si, malgré les efforts raisonnables de Clore Automotive, le produit s’avère irréparable, Clore Automotive aura l’option soit de rembourser le prix d’achat initial soit de fournir un appareil de remplacement. - Page 68 Wheel Charger Owner’s Manual Clore Automotive • Kansas City, MO 64161 • www.cloreautomotive.com • 913.310.1050 Warning: This product contains chemicals, including lead, known to the State of California to cause cancer, birth defects and other reproductive harm. Wash hands after handling. Designed and quality assured by Clore Automotive, LLC, Kansas City, MO USA.