Electrolux E48GC76EPS Installation Instructions Manual
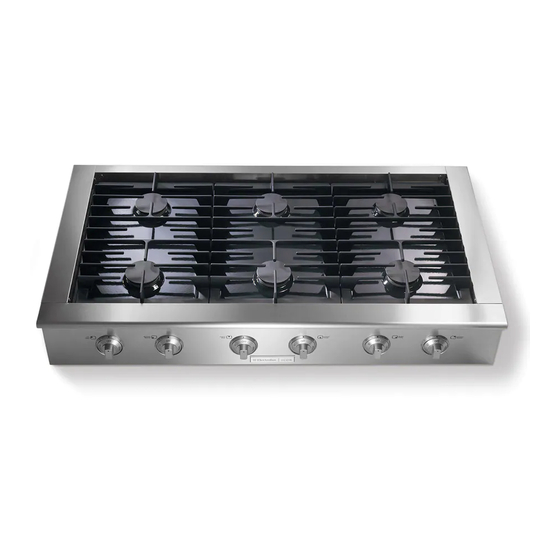
Slide in gas cooktop
Hide thumbs
Also See for E48GC76EPS:
- Installation instructions manual (32 pages) ,
- Wiring diagram (1 page) ,
- Use and care manual (28 pages)
Table of Contents
Advertisement
Quick Links
Advertisement
Table of Contents

Related Manuals for Electrolux E48GC76EPS


Summary of Contents for Electrolux E48GC76EPS
- Page 1 Installation Instructions Slide In Gas Cooktop...
-
Page 2: Safety
Safety (MPORTANT S AFETY(NSTRUCT(ONS ..........))))))))))))))))))))))))))))))))))))))))))))))))))))))))))))_i!i ¸!!iiiiiiiiiiiiiiiiiiiiiiiiiiiiiiiiiiiiiiiiiiiiiiiiiiiiiiiiiiiiiiiiiiiiiiiiiiiiiiiiiiiiiiiiiiiiiiiiiiiiiiiiiiiiiiiiiiiiiiiiiiiii) Safety Precautions Do notattemptto install oroperateyour unit until you have readthesafety precautions in this manual. Safety itemsthroughoutthis manual are labeled with a Warning or Caution based onthe risktype. Definitions _Thisisthesafetyalertsymbol. Itisusedtoalertyoutopotentialpersonal iniuiyhazards. Obeyallsafetymessagesthatfollowthissymboltoavoid possible injuryordeath. -
Page 3: Safetyprecautions
Safety 3 SAFETYPRECAUTIONS ,,%, WARNING • Read all instructions before using the appliance. • Improper installation, adjustment, alteration, service, or maintenance can cause personal injury or property damage. Refer to these instructions and the accompanying Use & Care Manual. For assistance or additional information, consult a qualified installer, service agency, manufacturer (dealer), or the gas supplier. - Page 4 Safety...
-
Page 5: Finding Information
Finding Information READAND SAVETHESEINSTRUCTIONS For toll-free telephone support in the U.S. and Canada: 1-877- 4ELECTROLUX (1-877-435-3287) For online support and Internet product information: www.electroluxusa.com @2005 Eiectroiux Home Products, Inc. Post Office Box 212378, Augusta, Georgia 30917, USA All rights reserved. Printed in the USA... -
Page 6: Table Of Contents
Finding Information TABLEOF CONTENTS Safety ..............Definitions ............Important SafetyInstructions ....... 2 Safety Precautions ..........Finding Information..........5 PleaseReadAndSaveThisGuide....5 Questions? ............TableOfContents..........Preparing for Installation ........7 Verifying Package Contents........ 7 Cabinet/Counterop P reparation ......7 Makingthe GaslElectricConnection ....11 Requirements . -
Page 7: Preparingfor Installation
Preparingfor Installation VERIFYPACKAGE CONTENTS • Literature Pack • Griddle • Bolts/Washers • Simmer Plate • Burner Grate Pack • Wok Stand • Burner Set • Stainless Steel Cleaner • LP Conversion • Gas Pressure Regulator • Burner Cap Pack CABINET/COUNTER'FOP PREPARATION The installation of this built-in appliance... - Page 8 Dimensions apply to both Figure 1 E36GC76EPS: 36" (914mm) Minimum models unless otherwise E48GC76EPS: 48" (1219mm) Minimum stated (see Figure 1). Locate the electrical supply box within reach of the included Hood 48 inch long flexible cord so...
- Page 9 Downdraft Vent Hood 36" model: E36DD75ESS; 48" model: E48DD75SS) Vertical non-combustible surface rear wall E36GC76EPS-33 7/8" (860mm) "_. E48GC76EPS - 43 1/2" (1105mm) z _['_-. Backsplash Max.3/4" (19ram) _--_, _[--]213/_+; ..I i21 3/8" 1_7_mm ..(543mm) 1/4" (6mm) ",, "_...
- Page 10 * If 2 W' clearance can not be maintained, then optional Dimensions stainless steel backsplash or noncombustible backsplash material must be used - otherwise this installation will require custom cabinet and countertop dimensions. Cooktop Model E48GC76EPS 48" Min. 48" 46" 48" Figure 6 E36GC76EPS 36"...
-
Page 11: Makingthe Gaslelectricconnection
Making the Gas/Electric Connection Gas SupplyRequirements Check your local building codes for the proper method of installation. In the absence of local codes, this appliance should be installed in accordance with the National Fuel Gas Code ANSI Z223.1/NFPA 54. Be certain that the appliance being installed is correct for the gas service... -
Page 12: L,P,Gasconversion
Making the Gas/ElectricConnection LiQU(FIEDPETROLEUM (PROPANE)GAS CONVERS(ON This appliance can be used with Natural Gas and Propane Gas. It is shipped from the factory for use with natural gas. A kit for converting to LP gas is supplied with your cooktop. The kit is marked "FOR LP/PROPANE GAS CONVERSION". - Page 13 Making the Gas/Electric Connection iiiiiiiiiiiiiiiiiiiiiiii iiiiiiiiiiiiiiiiiiiiiiiiiiiiiiiiiiiiii ElectricalSupplyRequirements iiiiiiiiiiiiiiiiiiiiiiiiiiiiiiiiiiiiiiiii iiiiiiiiiiiiiiiiiiiiiiiiiiiiiiiiiiiiiiiiiiiiiiiiiiiiiiiiiiiiiiiiiiiiiiiiiiiiiiiiiiiiiiiiiiiiiii The correctvoltage, frequencyand amperage mustbe suppliedtothe appliance iiiiiiiiiiiiiiiiiiiiiiiiiiiiiiiiiiiiiiiiiiiiiiiiiiiiiiiiiiiiiiii from an isolated, groundedcircuitwhich isprotectedbyaproperlysizedcircuit iiiiiiiiiiiiiiiiiiiiiiiiiiiiiiiiiiiiiiiiiiiiiiiiiiiiiiiiiiiiiiii breakerortime-delayfuse, iiiiiiiiiiiiiiiiiiiiiiiiiiiiiiiiiiiiiiiiiiiiiiiiiiiiiiiiiiiiiiii HHHHHHHHHHHHHHHHHHHHHHHHHHHHHHHHHHHHHHHHHHHH Thecooktopmustbeconnectedtothepowersupplywithcopperwireonly. iiiiiiiiiiiiiiiiiiiiiiiiiiiiiiiiiiiiiiiiiiiiiiiiiiiiiiiiiiiiiiii use of aluminum wire may result in unsatisfactoryconnections. Flexible armored iiiiiiiiiiiiiiiiiiiiiiiiiiiiiiiiiiiiiiiiiiiiiiiiiiiiiiiiiiiiiiii nonmetallic, sheathedcoppercable(withagroundingwire) shouldbeusedto iiiiiiiiiiiiiiiiiiiiiiiiiiiiiiiiiiiiiiiiiiiiiiiiiiiiiiiiiiiiiiii...
-
Page 14: Installation
Installation INSTALLING THECOOKTOP Place and center the cooktop within the cutout. Secure the cooktop to the countertop utilizing the two (2) 1/4-20 bolts provided. Do not overtighten screws. CONNECTING T HEGAS Attach the gas pressure regulator (included with the cooktop) to cooktop pipe nipple inlet. -
Page 15: Gasand Electricrequirements T Able
Natural 4" Water Column 5" Water Column E36GC76EPS 10" Water Column 11" Water Column Liquid Propane 120VAC, 0.7 Amps (0.084 Kw) 60Hz, 15A Natural 4" Water Column 5" Water Column E48GC76EPS 10" Water Column 11" Water Column Liquid Propane... -
Page 16: Installing Theburnercomponents
Installation (NSTALUNG THEBURNER COMPONENTS BurnerComponents Remove the brass burner rings, porcelain burner caps, and porcelain grates from their shipping packages. Place each burner ring onto its corresponding burner base, being certain that the four alignment tabs slide into the matching notches the base. -
Page 17: Making Theelectrical C Onnection
Installation MAK(NGTHE ELECTR(CAL CONNECT(ON Plug the three-prong plug from the appliance into the properly grounded polarized wall receptacle. -
Page 18: Operation
Operation VER(FY(NG THE OPERAT(ON ..........Before beginning the test procedure, ensure that the gas supply is turned off at the shut-off valve, all cooktop control valves are in the "OFF" position, and all burner rings, burner caps, and grates are properly positioned on the cooktop. - Page 19 Operation iii iiiiiiiiiiiiiiiiiiiiiiiiiiiiiiiiiiii Turn on the main gas supply to the cooktop by opening the gas shut-off valve. Test each burner separately by pressing and turning one control knob at a time counterclockwise to the "LITE/Hr' position. All ignitors will spark simultaneously. will take approximately four seconds for ignition to occur, at which time all igniters...
- Page 21 ICON Professional series Liquid Petroleum Gas (LPG) Conversion Instructions Cooktop Models: E36GC76EPS, E48GC76EPS Model E36GC76EPS shown This conversion kit shall be installed by a qualified service agency in accordance ----_ WARNING: with the manufacturer's instructions and all applicable codes and requirements...
- Page 22 [] Electrolux I Ic o N Before converting to LPG, install the cooktop in the cabinet according to the installation instructions provided. LPG Conversion Kit for Models E36GC76EPS E48GC76EPS (36 and 48-Inch) Kit Part Number: 700208-1 Part Number quantity Description...
- Page 23 Professional Series Cooktop LPG Conversion If the cooktop is connected to a natural gas Remove the grates from the top. supply line, close the gas supply valve. Remove all of the burner caps and burner rings Disconnect the cooktop power connector from from top of the burner heads.
- Page 24 [] Electrolux [ m c o N Locate the regulator. It is underneath the Remove the spool from the cap and insert the cooktop, below the right rear burner. opposite side, The large end of the spool must insert into the regulator first for LPG operation, Remove the regulator cap from the regulator.
- Page 25 Professional Series Cooktop LPG Conversion Insert the large end of the burner ring removal Repeat steps 5-1 and 5-2 for the remaining burners. toot into the top of the left rear burner head. Unscrew and remove the nut. Lift out the spill tray. Remove the burner head, Slip the igniter wire off of the burner as you remove it.
- Page 26 [] Electrolux [ Ic o N Make sure all knobs are in the off position, the burner location, The bypass orifice's size is stamped on its head, Remove all of the burner knobs from the front of the cooktop, Insert the bypass orifice and the attached o-ring...
- Page 27 10 mm open-end wrench. Repeat steps 7-1 through 7-5 for the remaining burners. Burner E36GC76EPS E48GC76EPS Location _36-Inch_ _48-Inch_ Left Rear Left Front Right Rear Ricjht Front...
- Page 28 [] Electrolux [ ic o N I_'t / _ "Jl: -I _:'_'1 D1 i iiI _i i_-!-I ! I iC_II 1_-_ !- Connect the U-tube manometer to the LPG Make sure all knobs on the front of the cooktop supply line.
- Page 29 Professional Series Cooktop LPG Conversion Burner E36GC76EPS E48GC76EPS Location _36-Inch_ _48-Inch_ Left Rear HN A-0053-E HN A-0053-E Left Front HN A-0052-E HN A-0052-E Right Rear HN A-0052-E HN A-0052-E Right Front HN A-0053-E HN A-0053-E Center Rear HN A-0053-E HN A-0053-E...
- Page 30 [] Electrolux I Ic o N Hake sure that all knobs on the front of the 10-4 10-1 Re-assemble the burner heads, burner head cooktop are in the off position. nuts, burner rings, and burner caps without the spill tray in place. Be sure the igniter wire is...
- Page 31 The ElectroIux Professional Series cooktop is equipped burners having the following ratings: Sealed power burner(s) - input rating: 17,000 BTU per hour. Sealed power burners - input rating: 15,000 BTU per hour. Sealed precision burner(s) - input rating: 8500 BTU per hour E36GC76EPS (36-Inch) and E48GC76EPS (48-Inch) Fiqure 12-2 Burner Layout For elevations above 2000 feet, burner ratings are reduced at the rate of 4% for each 1000 feet above sea level.
- Page 32 .09/2.3 Ric_htFront HN A-0053-E .39/9.9 Center Rear HN A-0053-E .37/9.5 Center Front HN A-0053-E .38/9.7 Model E48GC76EPS (48-Inch) The Electrolux Group USA • 250 Bobby Jones Expressway * Augusta, GA 30907 1-877-4electrolux (1-877-453-8287) • www.etectroluxusa.com CANADA • 5855 Terry Fox Way • Mississauga,...