Table of Contents
Advertisement
Available languages
Available languages
OWNER S MANUAL
OWNER'S MANUAL
'
ATSC color Television
HTR13
HTR20
HTF20
HTF201
MUTE
Q.VIEW
INFO
INPUT
TV/DTV
1
2
3
4
5
6
7
8
9
SAP
P.MODE
0
- -
OK
CH+
VOL
MENU
VOL
-
+
CH-
CC
SLEEP
S.MODE
GUIDE
ARC
CH.LIST
FAV.LIST
AUDIOLIST
EXIT
Before operating the unit, please read this manual thoroughly.
VIDEO
L-AUDIO-R
TV/AV
MENU
VOL-
VOL+
CH-
CH+
Advertisement
Chapters
Table of Contents

Related Manuals for Haier HTF20

Summary of Contents for Haier HTF20
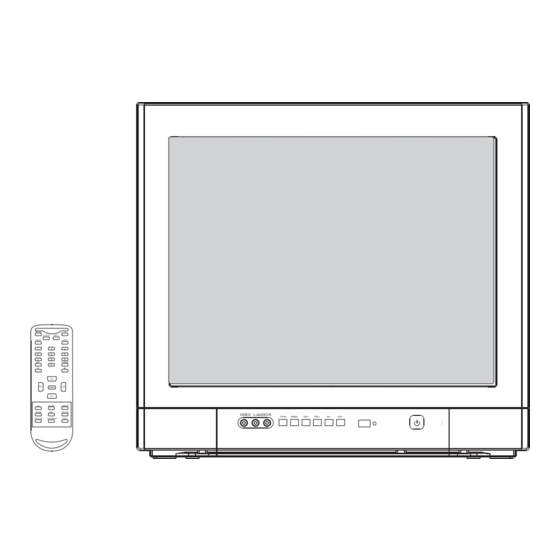
- Page 1 OWNER S MANUAL OWNER'S MANUAL ATSC color Television HTR13 HTR20 HTF20 HTF201 MUTE Q.VIEW INFO INPUT TV/DTV P.MODE MENU SLEEP S.MODE GUIDE CH.LIST FAV.LIST AUDIOLIST EXIT Before operating the unit, please read this manual thoroughly. VIDEO L-AUDIO-R TV/AV MENU VOL-...
-
Page 2: Table Of Contents
PRECAUTIONS FCC WARNING-This equipment may generate or use radio frequency energy. Changes or modifications to this equipment may cause harmful interference unless the modifications are expressly approved in the instruction manual. The user could lose the authority to operate this equipment if an unauthorized change or modification is made. -
Page 3: Important Safeguards
WARNING:TO REDUCE THE RISK OF FIRE OR ELECTRIC SHOCK, DO NOT EXPOSE THIS APPLIANCE TO RAIN OR MOISTURE. CAUTION RISK OF ELECTRIC SHOCK DO NOT OPEN CAUTION: TO REDUCE THE RISK OF ELECTRIC SHOCK, DO NOT REMOVE COVER (OR BACK). NO USER SERVICEABLE PARTS INSIDE. -
Page 4: Important Safety Instructions
Important safety Instructions 14. GROUNDING OR POLARIZATION Do not defeat the safety purpose of the polarized or grounding-type plug. A polarized plug has two blades with one wider than the other. A grounding type plug has two blades and a third grounding prong. - Page 5 23. DAMAGE REQUIRING SERVICE Unplug this unit from the wall outlet and refer servicing to qualified service personnel under the following conditions: a. When the power-supply cord or plug is damaged. b. If liquid has been spilled, or objects have fallen into the unit. c.
-
Page 6: Installation
Installation Antenna connection If the picture is not clear or is snowy, it is recommended that an External Aerial is used, this is usually mounted outside. twin-lead cable Antenna adapter (Not supplied) 75 coaxial cable Plug (Not supplied) Note: * It is recommended that a 75 ohm coaxial antenna is used to avoid interference. -
Page 7: Front Panel Of The Tv Set
Front panel the TV set Video 1 HTR13/HTR20/HTF20 VIDEO L-AUDIO-R TV/AV VIDEO IN jack AUDIO IN (L/R) jacks TV/AV switching HTF201 Power Button Power Indicator and remote receiving window MENU VOL- VOL+ MENU Channel down/up Volume decrease/ increase TV/AV MENU... -
Page 8: Rear Panel Of The Tv Set
Parts and functions Rear panel of the TV set HTR13/HTR20/HTF20 Component video input terminal Video output terminal VIDEO1 Video input terminal HTF201 Component video input terminal Video output terminal VIDEO1 Video input terminal AUDIO1 VIDEO AUDIO AUDIO1 Antenna input socket... -
Page 9: Remote Control
EXIT TV/DTV MODE ARC( Aspect Ratio Control) (only in 16 9mode) FAV.LIST Button CH.LIST Button Q.VIEW Button INPUT Button SAP Button (only be available for HTF20,HTF201) OK Button MENU Button SLEEP Button CC(Closed Caption) Button GUIDE Button Remote control Button... -
Page 10: The Other Video And Audio Equipment
The other video and audio equipment Connections You can connect the DVD,VCR and stereo system to the output to enjoy a higher quality of picture and sound effect. ANT IN... -
Page 11: Antenna Connections
If you are using an indoor or outdoor antenna, follow the instructions below that correspond to your antenna system. If you are using a cable TV service (CABLE), see the Cable TV connections. Combination VHF/UHF antenna (Single 75 ohm cable or 300 ohm twin-lead wire) RF IN jack 75 ohm... -
Page 12: Cable Tv Connections
Cable TV connections This unit has an extended tuning range and can tune most cable channels without using a Cable TV Converter box. Some cable companies offer "premium pay channels" in which the signal is scrambled. Descrambling these signals for normal viewing requires the use of a descrambler device which is generally provided by the cable company. -
Page 13: Connections To Other Equipment
Using the audio/video inputs If you connect the TV to a camcorder or Video Game, you can select different modes by pressing TV/AV. Press TV/AV repeatedly to select the desired mode. "AV1", "AV2", "COMPONENT" or TV channel will display on the screen for 4 seconds, displayed on the screen when no signal input. -
Page 14: Setting The Language And Blue Screen
Setting the language and blue screen You can choose from three different languages (English, French and Spanish) for the on-screen displays. MUTE Q.VIEW INFO INPUT TV/DTV P.MODE MENU SLEEP FAV.LIST CH.LIST GUIDE EXIT SETTING THE LANGUAGE Press POWER ( ) to turn on the TV. Press MENU, and then press VOL+/- button to select FUNCTION menu,... -
Page 15: Channel Menu
Here describes the case for searching and memorizing channels for DTV/ATV. MUTE Q.VIEW INFO INPUT TV/DTV P.MODE MENU SLEEP FAV.LIST CH.LIST GUIDE EXIT AUTO SCAN (DTV/ATV) (When using antenna) The channels broadcasted in DTV and ATV are automatically scanned and memorized. Only the receivable channels in the area where this TV is used will be memorized. - Page 16 Channel menu SETTING SKIP After the programs are presetting, you can skip some programs so that to select your favorite channels only. MUTE Q.VIEW INFO INPUT TV/DTV P.MODE MENU SLEEP FAV.LIST CH.LIST GUIDE EXIT Press MENU, and then press VOL+/- button to select CHANNEL menu, then press CH- button to enter.
-
Page 17: Channel Selection
You can select the channel by using either CH +/- button or Channel number buttons. How to select the channel in each way is shown below. Using CH +/- button Using CH +/- button on the remote control, change the channel. Same operation is available with CH +/- button on the front panel of the main unit. -
Page 18: Volume Adjustment
Volume adjustment This section describes how to adjust the volume when viewing TV. The MUTE function, which is useful when you have a visitor or a phone call, will be also described. MUTE Q.VIEW INFO the remote control. INPUT TV/DTV when adjusting the volume. -
Page 19: Screen Information
You can display the currently selected channel number or other information such as the audio mode on the screen for checking. In the analog mode, the currently selected channel number and the audio mode are displayed. Display the channel number and the audio mode. MUTE Q.VIEW INFO... -
Page 20: Video Menu
Video menu MUTE Q.VIEW INFO INPUT TV/DTV P.MODE MENU SLEEP FAV.LIST This will adjust the intensity of bright parts in the picture but keep the dark parts unchanged. CH.LIST GUIDE EXIT This will adjust the light output of the complete picture, which will mainly affect the darker areas of the picture. -
Page 21: Audio Menu
Press MENU button. The main menu screen will appear. Press VOL+/- button to select AUDIO Option, MUTE then press CH- button Q.VIEW INFO to enter. INPUT TV/DTV P.MODE Press CH+/- to select the desired option, then press VOL+/- to adjust. MENU This will adjust the sound output level. -
Page 22: Manual Time Setting
Manual time setting You must set the time manually for ON/OFF Timer. MUTE Q.VIEW INFO INPUT TV/DTV P.MODE MENU SLEEP FAV.LIST CH.LIST GUIDE EXIT EXAMPLE: Setting the time to "8:30 AM" TO SET TIME Press MENU. The main menu screen will appear. Press VOL+/- button to select TIME option, then press CH- button... -
Page 23: Setting The On/Off Timer
This feature allows you to have the TV automatically turn on/off at a predetermined time. If you program The ON/OFF TIMER, the TV will turn on/off at the time your predetermined. MUTE Q.VIEW INFO INPUT TV/DTV P.MODE MENU SLEEP FAV.LIST CH.LIST GUIDE EXIT... -
Page 24: Function Menu
Function menu SETTING THE NTSC CAPTION This allows you to configure the way you choose to view the captioning. MUTE Q.VIEW INFO INPUT TV/DTV Then use VOL+/- button to P.MODE MENU SLEEP FAV.LIST CH.LIST GUIDE EXIT Press the MENU button and then use VOL+/- button to select the FUNCTION menu. - Page 25 An age limitation can be set to forbid children to see and hear violent scenes or pictures for adults, etc. The TV Corresponds to "TV RATING" and "MOVIE RATING". to use thepare ntal control function, you must register a password. MUTE Q.VIEW INFO...
- Page 26 Function menu MUTE Q.VIEW INFO INPUT TV/DTV P.MODE MENU SLEEP FAV.LIST CH.LIST GUIDE EXIT NOTES: If you forget the password, you cannot set the Parent Control. To avoid forgetting the password, write it down and keep it in a safe place.
- Page 27 TO SET PARENTAL CONTROL ON/OFF MUTE Q.VIEW INFO INPUT TV/DTV P.MODE TO SET PARENTAL GUIDE MENU SLEEP FAV.LIST CH.LIST GUIDE EXIT To use the TV after Parent Control is activated. When the program applied to the Parental Control, setting is received, enter the password.
- Page 28 Function menu TO SET THE MPAA RATING MUTE Q.VIEW INFO INPUT TV/DTV P.MODE Rating for Movies previously shown in theaters: Movie Rating MENU SLEEP FAV.LIST CH.LIST GUIDE If you set PG-13 : G and PG movies EXIT will be available , PG-13, R, NC-17 and X will be blocked.
-
Page 29: Closed Caption
WHAT IS CLOSED CAPTIONING? This television has the capability to decode and display closed captioned television programs. Closed captioning will display text on the screen for hearing impaired viewers or it will translate and display text in another language. MUTE Q.VIEW INFO INPUT... -
Page 30: Dtv Setup Menu
DTV setup menu SETTING CLOSED CAPTION MODE In DTV mode Press MENU. The main menu screen will appear. Press VOL+/- button to MUTE select DTV SETUP. Q.VIEW INFO then press CH- button INPUT TV/DTV to enter the submenu. Press CH+/- button to select DTV CC. - Page 31 SETTING THE CC USER SETTING Press MENU. The main menu screen will appear. Press VOL+/- button to select DTV SETUP. then press CH- button MUTE to enter the submenu. Q.VIEW INFO INPUT TV/DTV Press CH+/- button to select DTV CC. P.MODE Press VOL+ button and then press CH+/- button...
- Page 32 DTV setup menu SETTING THE DTV CAPTION STYLE(continue) MUTE Q.VIEW INFO INPUT TV/DTV P.MODE MENU SLEEP FAV.LIST CH.LIST GUIDE EXIT Style Select this option to select the font style of caption display according to your own preference. Press the VOL+/- button to select Style1, Style2, Style3, Style4,Style5, Style6, Style7, Style8.
- Page 33 SETTING THE DAYLIGHT SAVING Daylight saving time is automatically set by specially broadcasted signals. This menu item allows you to disable the automatic setting of daylight saving time. This is useful if you live in an area or state where daylight saving is not applied, but you receive channels from other areas where daylight MUTE saving signals are broadcasted.
- Page 34 DTV setup menu MUTE Q.VIEW INFO INPUT TV/DTV P.MODE MENU SLEEP FAV.LIST CH.LIST GUIDE EXIT SETTING ATSC PARENTAL LOCK Press MENU. The main menu screen will appear. Press VOL+/- button to select DTV SETUP. then press CH- button to enter the submenu. Press CH+/- button to select ATSC PARENTAL LOCK.
-
Page 35: Other Function
GUIDE - This activates some, but not all, electronic program guides (EPG data) when it is used and transmitted by some DTV station providers. It is only supported when receiving DTV channels. MUTE Q.VIEW INFO INPUT TV/DTV P.MODE 1. Press the GUIDE button to switch on GUIDE. MENU 2. -
Page 36: Picture Mode
Other Functions QUICKLY VIEW This function enables quick swap to the last watched program. Suppose the channel number you used just now is 8 and the channel number you are using is 18 (as shown in the figure). MUTE Q.VIEW INFO INPUT TV/DTV... -
Page 37: Troubleshooting Guide
To assist in location possible faults use help guide below BREAKDOWN PHENOMENON PICTURE SOUND Picture with snow Double or Triple Image Disturb Normal No Picture No color Normal volume Scramble Normal or Weak Volume Color Spot Normal volume Note: 1.If the fault can not be corrected using the above guide consult with your local authorized service center. -
Page 38: Specifications
The specifications offered you here are for reference only. With product improvement there may be some differences between the description and the final product. HTR13 HTR20 HTF20 HTF201 NOTE Design and specifications are subject to change without notice. Dimensions quoted in this manual are approximate. -
Page 39: Warranty
Haier. The warranties described herein shall be the sole and exclusive warranties granted by Haier and shall be the sole and exclusive remedy available to the purchaser. Correction of defects in the manner and for the period of time described herein, shall constitute... - Page 41 MANUAL DEL USUARIO Televisor color ATSC HTR13 HTR20 HTF20 HTF201 Antes de poner en funcionamiento la unidad, lea este manual con atención. VIDEO L-AUDIO-R TV/AV MENU VOL- VOL+...
- Page 42 PRECAUCIONES COMISIÓN FEDERAL DE COMUNICACIONES, ADVERTENCIA: Este equipo puede generar o usar energía de radio frecuencia. Los cambios o las modificaciones a este equipo pueden provocar interferencia perjudicial a menos que las modificaciones hayan sido aprobadas expresamente en el manual de instrucciones. El usuario puede perder la autoridad para usar este equipo si se realizan cambios o modificaciones no autorizadas.
-
Page 43: Precauciones
PRECAUCIONES DE SEGURIDAD IMPORTANTES2 ADVERTENCIA: PARA REDUCIR EL RIESGO DE INCENDIOS O DESCARGA ELÉCTRICA, NO EXPONGA ESTE EQUIPO A LLUVIAS O HUMEDAD. PRECAUCIÓN RIESGO DE DESCARGA ELÉCTRICA, NO ABRIR PRECAUCIÓN: PARA REDUCIR EL RIESGO DE DESCARGA ELÉCTRICA, NO RETIRE LA CUBIERT A (O LA PARTE POSTERIOR) DE ESTA UNIDAD. -
Page 44: Instrucciones De Seguridad Importantes
Instrucciones de seguridad importantes 14. DESCARGA A TIERRA O POLARIZACIÓN No anule el propósito de seguridad del enchufe polarizado o con descarga a tierra. El enchufe polarizado tiene dos puntas y una de ellas es más ancha que la otra. El enchufe con descarga a tierra tiene dos puntas y una tercera clavija para la descarga a tierra. - Page 45 Instrucciones de seguridad importantes 23. DAÑOS QUE REQUIEREN REPARACIÓN Desenchufe esta unidad del tomacorriente de la pared y derive la reparación a personal de reparaciones calificado en las siguientes circunstancias: a. Cuando el cable de suministro de energía o el enchufe estén dañados. b.
-
Page 46: Instalación
Instalación Conexión con la antena Si la imagen no es clara o aparece con lluvia, se recomienda el uso de una antena externa aérea, que por lo general se instala afuera. cable conductor doble de 300 ? Adaptador para la antena (No se suministra) cable coaxial de 75? - Page 47 Panel frontal del equipo de televisión Video 1) VIDEO L-AUDIO-R TV/AV Enchufe de entrada de VIDEO cambio de TV/AV Enchufes de entrada de AUDIO (I/D) Interruptor de energía Luz indicadora Receptor de señal cambio de TV/AV MENU VOL- VOL+ Canal hacia MENÚ...
- Page 48 Panel trasero del equipo de televisión Video 2 HTR13/HTR20/HTF20 Terminal de entrada del componente de video Terminal de salida de video Terminal de entrada de video HTF201 Terminal de entrada del componente de video Terminal de salida de video Terminal de entrada de video...
-
Page 49: Control Remoto
MUTE Q.VIEW INFO INPUT TV/DTV P.MODE MENU SLEEP FAV.LIST CH.LIST GUIDE EXIT Botón de encendido Botón DISPLAY (MOSTRAR) Botón TV/DTV Botones para la selección directa de canales (0-9) Botón P.MODE (Modo de la imagen) Botón - Botones para subir/bajar de canal Botón ARC (Control de la proporción de aspecto) (sólo en el modo 16:9) Botón FAV .LIST (LISTA DE FAVORITOS) - Page 50 Otras conexiones a equipos de audio y video Puede conectar el DVD, la videograbadora y el sistema estéreo a la salida para disfrutar de una mejor calidad de imagen y efecto de sonido. un televisor adicional DVD, VCD u otras unidades ANT IN Salida de video Salida de audio...
- Page 51 Si está usando una antena interior o exterior, siga las instrucciones a continuación que le correspondan a su sistema de antena. Si está utilizando un servicio de televisión por cable (CABLE), consulte las conexiones de televisión por cable. Combinación de antena VHF/UHF (cable único de 75 ohm o 300 ohm con cable conductor doble) Enchufe de entrada RF...
-
Page 52: Conexiones Para Televisión Por Cable
Esta unidad tiene un rango de sintonización extendido y puede sintonizar la mayoría de los canales de cable sin utilizar la caja de conversión de televisión por cable. Algunas empresas de cable ofrecen “canales pagos premium", en los cuales se encripta la señal. Para desencriptar estas señales para que la visualización sea normal es necesario el uso de un dispositivo desencriptador que por lo general lo suministra la empresa de PARA LOS SUSCRIPTORES AL SERVICIO BÁSICO DE TELEVISIÓN POR CABLE Entrada RF... -
Page 53: Conexiones Con Otros Equipos
Conexiones con otros equipos Uso de las entradas de audio y video Si conecta el televisor con una filmadora o juego de video, puede seleccionar los distintos modos presionando TV/AV. Presione TV/AV varias veces para seleccionar el modo deseado. En la pantalla aparecerán durante 4 segundos “AV1", "AV2”, "COMPONENT” o el canal de televisión, cuando no hay señal de entrada en la pantalla aparecerá... -
Page 54: Configuración Del Idioma Y De La Pantalla Azul
Configuración del idioma y de la pantalla azul Puede elegir entre tres idiomas diferentes (inglés, francés y español) para las representaciones en pantalla. CONFIGURACIÓN DEL IDIOMA 1 Presione POWER ( encender el televisor. 2 Presione MENU y luego presione el botón VOL+/- para seleccionar el menú... -
Page 55: Menú De Canales
Aquí se describe la búsqueda y memorización de canales para DTV/ATV. ¦ EXPLORACIÓN AUTOMÁTICA (DTV/ATV) (Cuando se utiliza antena) Los canales emitidos en DTV y ATV se exploran y memorizan automáticamente. Sólo se memorizarán los canales que se reciben en el área donde se utiliza el televisor. - Page 56 CONFIGURACIÓN DE LA OPCIÓN SALTEAR Después de establecer previamente los programas, puede saltear algunos programas para seleccionar sólo sus canales favoritos. 1. Presione MENU y luego presione el botón VOL+/- para seleccionar el menú CANAL, luego presione el botón CH- para entrar. 2.Presione el botón CH+/- para seleccionar la opción SALTEAR, luego presione...
-
Page 57: Selección De Canales
Puede seleccionar el canal utilizando el botón CH +/- o los botones con los números de los canales. A continuación se muestra cómo se debe seleccionar el canal de cada una de estas maneras. 1 Utilizando el botón CH +/- - Utilizando el botón CH +/- del control remoto, cambie el canal. -
Page 58: Ajuste Del Volumen
Esta sección describe cómo debe ajustarse el volumen cuando se mira televisión. También se describirá la función SIN SONIDO, que es útil cuando tiene visitas o una llamada telefónica. 1 Utilizando el botón VOL +/- - Puede ajustar el volumen del audio con el botón VOL +/- del control remoto. -
Page 59: Información En Pantalla
Puede desplegar en la pantalla el número de canal seleccionado en un momento determinado u otra información, como el modo de audio, para su control. En el modo analógico, se muestran el número de canal seleccionado y el modo de audio. 1 Despliegue el número de canal y el modo de audio. -
Page 60: Menú De Video
CONFIGURACIÓN DE VIDEO 1. Presione el botón MENU. Aparecerá la pantalla con el menú principal. 2. Presione el botón VOL+/- para seleccionar la opción IMAGEN, luego presione el botón CH- para entrar. 3. Presione el botón CH +/- para seleccionar la opción deseada y luego presione el botón VOL +/- para ajustar. - Page 61 CONFIGURACIÓN DEL AUDIO 1 Presione el botón MENU. Aparecerá la pantalla con el menú principal. 2 Presione el botón VOL+/- para seleccionar la opción SONDIO, luego presione el botón CH- para entrar. 3 Presione el botón CH +/- para seleccionar una opción y luego presione el botón VOL +/- para ajustar.
-
Page 62: Configuración Manual De La Hora
Para utilizar el temporizador de encendido/apagado, debe configurar manualmente la hora. Configuración manual de la hora EJEMPLO: Configuración de la hora "8:30 AM" PARA CONFIGURAR LA HORA 1 Presione MENU. Aparecerá la pantalla con el menú principal. 2 Presione el botón VOL+/- para seleccionar la opción HORA, luego presione... -
Page 63: Configuración Del Temporizador De Encendido/Apagado
Configuración del temporizador de encendido/apagado Esta función le permite que el televisor se encienda o se apague automáticamente a una hora predeterminada. Si programa el temporizador de encendido/apagado, el televisor se encenderá o se apagará a la hora que predeterminó. CONFIGURACIÓN PARA ENCENDIDO DEL TEMPORIZADOR 1 Presione MENU. -
Page 64: Menú Función
CONFIGURACIÓN DEL SUBTITULADO EN NTSC Esto le permite configurar la manera en que elije visualizar el subtitulado. 1. Presione el botón MENU y luego utilice el botón VOL +/- para seleccionar el menú FUNCIÓN. 2. Presione el botón CH- para entrar, luego presione el botón CH+/- para seleccionar NTSC TÍTULO... - Page 65 Puede configurarse una limitación de la edad para prohibir a los niños ver y oír escenas violentas o imágenes para adultos, etc. El televisor se remite a “CLASIFICACIÓN PARA TELEVISIÓN" y “CLASIFICACIÓN DE PELÍCULAS”. Para utilizar la función de control infantil, debe registrar un código.
- Page 66 NOTAS: Si olvida el código, no podrá configurar el Control infantil. Para evitar olvidarse el código, escríbalo y guárdelo en un lugar seguro. PARA CAMBIAR EL CÓDIGO 1 Presione MENU. Aparecerá la pantalla con el menú principal. 2 Presione el botón VOL+/- para seleccionar la opción FUNCIÓN, luego presione el botón...
- Page 67 Cómo utilizar el televisor cuando se ha activado el Control infantil. Cuando se recibe el programa que se aplica a la configuración Control infantil, introduzca el código. Cuando se introduce el código correctamente, se suspende la protección de forma temporal. NOTA: La función de Control infantil se activa sólo con los programas y las cintas que son compatibles con la...
- Page 68 CÓMO CONFIGURAR LA CLASIFICACIÓN MPAA 1 Entre al menú CONTROL INFANTIL. 2 Presione el botón CH+/- para seleccionar CLASIFICACIÓN MPAA, luego presione el botón VOL+ para entrar al submenú. 3 Presione el botón CH+/- para seleccionar la clasificación deseada. Clasificación de películas previamente emitidas en cines: Clasificación de películas (Permite todos los programas) (Audiencia general)
-
Page 69: Subtítulos Ocultos
¿QUÉ SON LOS SUBTÍTULOS OCULTOS (CC, en inglés)? Este televisor tiene la capacidad de decodificar y mostrar programas de televisión con subtítulos ocultos. Con los subtítulos ocultos, se muestra texto en la pantalla para los televidentes con discapacidades auditivas, o se traduce y muestra el texto en otro idioma. NOTAS: Cuando seleccione los subtítulos ocultos, el subtitulado tendrá... -
Page 70: Menú De Configuración De Dtv
CONFIGURACIÓN DE DTV CC (SUBTÍTULOS OCULTOS EN DTV) Esto le permite configurar la manera en que elije visualizar el subtitulado digital. Seleccione uno de los canales de servicio digital que pone a disposición el proveedor de subtitulados. Existen 6 servicios estándar. El servicio 1 se denomina Servicio de Subtitulado Primario. - Page 71 Menú de configuración de DTV CONFIGURACIÓN DEL MODO DE USUARIO CON SUBTÍTULOS OCULTOS (CC) 1 Presione MENU. Aparecerá la pantalla con el menú principal. 2 Presione el botón VOL+/- para seleccionar CONFIGURACIÓN de DTV, luego presione CH- para entrar al submenú.
- Page 72 Menú de configuración de DTV CONFIGURACIÓN DEL ESTILO DE SUBTITULADO EN DTV (continuación) ¦ Estilo Seleccione esta opción para elegir el estilo de la fuente de los subtítulos que aparecen en pantalla según sus preferencias. Presione el botón VOL+/- para seleccionar Estilo1, Estilo2, Estilo3, Estilo4, Estilo5, Estilo6, Estilo7, Estilo8.
- Page 73 Menú de configuración de DTV CONFIGURACIÓN PARA EL AHORRO DE ENERGÍA La hora para el ahorro de energía se fija automáticamente con señales emitidas especialmente. Este elemento del menú le permite desactivar la configuración automática de tiempo de ahorro de energía. Esto es útil si vive en una zona o estado donde no se aplica el ahorro de energía, pero recibe canales de otras áreas donde se emiten señales de ahorro de energía.
- Page 74 Menú de configuración de DTV CONFIGURACIÓN DEL BLOQUEO INFANTIL ATSC 1 Presione MENU. Aparecerá la pantalla con el menú principal. 2 Presione el botón VOL+/- para seleccionar CONFIGURACIÓN DE DTV, luego presione CH- para entrar al submenú. 3 Presione el botón CH+/- para seleccionar BLOQUEO INFANTIL...
-
Page 75: Otras Funciones
GUÍA - Activa algunas, aunque no todas, guías electrónicas de programas cuando las utilizan y transmiten algunos proveedores de estaciones de DTV. Sólo es compatible con la recepción de canales DTV. GUÍA 03:00 ---04:00 Imagen en movimiento 04:00 ---05:00 Imagen en movimiento 1. - Page 76 VISUALIZACIÓN RÁPIDA Esta función le permite ir rápidamente al último programa que se miró. 1 Por ejemplo, el número de canal que usó último es el 8 y el canal que está usando es el 18 (como se muestra en la figura).
- Page 77 Guía para la detección y solución de problemas Utilice la guía a continuación como una ayuda para ubicar las posibles fallas. FALLA IMAGEN Imagen con lluvia Imagen doble o triple Perturbaciones Normal Sin imagen Sin color Volumen normal o débil Distorsión Manchas de color Nota:...
- Page 78 Consumo de energía Accesorios Modelo HTR13 HTR20 HTF20 HTF201 NOTA El diseño y las especificaciones están sujetos a cambios sin aviso previo. Las dimensiones mencionadas en este manual son aproximadas. Los logotipos registrados que aparecen en este manual, tales como los que aparecen en la página con los contenidos de los discos reproducibles, son los de los poseedores de la licencia...
-
Page 79: Garantía
Los productos de marca Haier, cuando son enviados en su embalaje original, no deben tener mano de obra o materiales defectuosos, y Haier asume que, según sea su decisión, reparará el defecto o reemplazará el producto defectuoso con uno nuevo o un equivalente... - Page 80 0090500143 Ver.1 .0...