Table of Contents
Advertisement
Advertisement
Table of Contents

Related Manuals for Husqvarna Huskylock 90


Summary of Contents for Husqvarna Huskylock 90
-
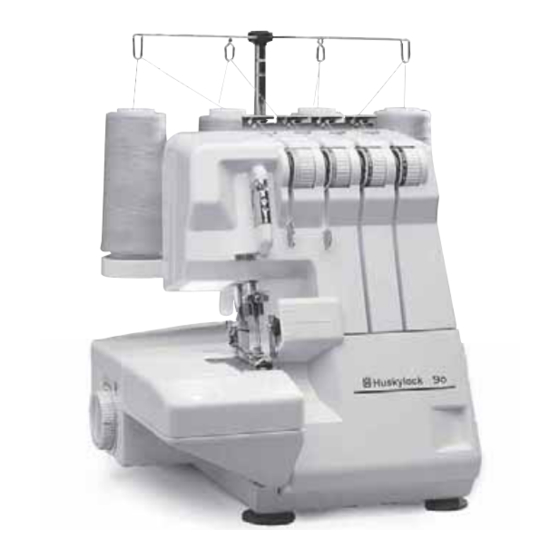
Page 1: Operating Manual
Operating manual Instrucciones Huskylock 90 Huskylock 90... -
Page 2: Safety Instructions
• Keep your work area well lighted. • Always unplug before relamping. Replace bulb with same type rated 15 W. SAVE THESE INSTRUCTIONS This sewing machine is intended for household use Huskylock 90... -
Page 3: Instrucciones De Seguridad
Esta máquina tiene un cable especial del pedal. Si el cable estuviera dañado cambielo por otro cable del mismo tipo. Este cable se vende por los revendedores de Husqvarna. El montaje del cable debe efectuarse por un especialista. -
Page 4: Table Of Contents
Puntada extendida Changing the needle Cambio de aguja Replacing the bulb Cambio de bombilla Replacing the cutters Cambio de cuchillos Trouble shooting guide Posibles averías Cleaning and lubricating Limpieza y lubrificación Service Servicio Specification of the machine Especificaciones Huskylock 90... -
Page 5: Name Of Main Components
Upper looper Presser foot Garfio superior Prensatelas Cutting width adjustment knob Regulador para el reglaje del ancho de corte Lower knife Cuchillo inferior Free arm Brazo libre Lower looper Garfio inferior Free arm release lever Palanca de desembrague Huskylock 90... -
Page 6: Setting Up Your Machine
Domestic type of Notch thread spool Ranura Discos para bobina Hilo de casa Al utilizar pequeños carretes de hilo de casa, saque los porta-carretes y coloque los discos sobre las bobinas. Huskylock 90... -
Page 7: Connecting The Foot Machine
Ponga la caja de Place the waste trastos entre la máquina catcher between the y la mesa. machine and table. Huskylock 90... -
Page 8: Controlling The Sewing Speed
Cuchillo superior suplementario Cubierta de plástico Pinzas Needles Agujas Hexagon wrench key Llave de encastre 4 Spool caps 4 Discos para bobina Brush Pincel de limpieza Manual de instrucciones Screwdriver Operating manual Waste catcher Destornillador Caja de trastos Huskylock 90... -
Page 9: Using The Machine
Free arm release lever Brazo libre Palanca de Abra la tapa frontal, estire la superficie de desembrague trabajo y abra la tapa lateral con la palanca para enhebrar la máquina. Huskylock 90... -
Page 10: Looper Threading
(1) and (2). porta-carrete a través el guía-hilo (1) y (2). Important! The thread Atención! El hilo debe estar must lie correctly between correctamente entre los the two thread tension discs discos de tensión del hilo. inside the dials. Huskylock 90... -
Page 11: Looper Threading
• Saque el hilo dejando un trozo de Raise the presser foot and place the aprox. 10 cm hacia atrás. Levante el threads under it, then lower the prensatelas, introduzca el hilo y baje presser foot. otra vez el prensatelas. Huskylock 90... -
Page 12: Needle Threading
Important! The thread must lie estar correctamente entre correctly between the two discs (3) los discos de tensión del inside the tension dials. hilo (3). Left needle thread Right needle thread Hilo de la aguja izquierda Hilo de la aguja derecha Huskylock 90... -
Page 13: Needle Threading
• Saque el hilo dejando un trozo deaprox. from the needle eyes. Raise the presser 10 cm hacia atrás. Levante el foot and place the threads under it, then prensatelas, introduzca el hilo y baje lower the presser foot. otra vez el prensatelas. Huskylock 90... -
Page 14: Trial Sewing
When your work is finished, continue sewing to form about 5 cm (2") long thread chain from the end of fabric. Cut the threads. Cuando haya terminado, cintinúe cosiendo una cadena de hilo de aprox. 5 cm. Corte el hilo: Huskylock 90... -
Page 15: Adjusting Thread Tensions
Correct thread tension / Tension de los hilos correcta Right needle thread Hilo de aguja izquierda 6 mm (0.24") Back side Revés Left needle thread Hilo de aguja derecha Lower looper thread Hilo del garfio inferior Upper looper thread Hilo del garfio superior Huskylock 90... -
Page 16: Correct And Incorrect Thread
Regule la tensión del hilo del garfio infe- Regule la tensión del hilo del garfio supe- rior más floja y la tensión del garfior supe- rior más floja y la tensión del garfior infe- rior más fuerte. rior más fuerte. Huskylock 90... -
Page 17: Table Of Sewing Materials
Overlock thread LOOPER THREAD Non-spun thread Thread tension Medium - Loose Medium Medium - Tight Standard setting Overedging width (Between left needle and the edge) 5.2-5.5 mm 5.2-5.5 mm 5.5-6 mm Stitch length 2-2.5 mm 2.5-3 mm 2.5-3 mm Huskylock 90... - Page 18 Hilo no hilado Tensión del hilo Normal - Floja Normal Normal - Fuerte Posición normal Ancho del sobrehilado 5.2-5.5 mm 5.2-5.5 mm 5.5-5.6 mm (entre la aguja izquierda y el borde Longitud de 2-2.5 mm 2.5-3 mm 2.5-3 mm puntada Huskylock 90...
-
Page 19: Changing The Thread
Saque el hilo del garfio hasta que el nudo de hilos se encuentre debajo del prensatelas. Pocket handle Asa cerrada Built-in pocket handle The built-in pocket handle is a convenient way to carry your machine. Asa cerrada El asa cerrada facilita llevar la máquina. Huskylock 90... -
Page 20: Adjustment Of Stitch Length
1.0 - 2.0 mm (3.0 mm reglaje Rolled hemming 1.0 - 2.0 mm normal) Picot edging 3.0 - 4.0 mm Dobladillo estrecho 1.0 - 2.0 mm Dobladillo enrollado 1.0 - 2.0 mm Borde del festón 3.0 - 4.0 mm Huskylock 90... -
Page 21: Cutting Width
“W” = más ancho. Narrow Estrecho Cutting width Wide adjustment knob Ancho Regulador del ancho de corte The proper cutting width / Ancho de corte correcto Stitch width Ancho de puntada Cutting width Ancho de corte Front side Derecho Huskylock 90... -
Page 22: Ancho De Corte
La puntada overlock de tres hilos con la La puntada overlock de tres hilos con la aguja derecha tendrá 4 mm de anchura. aguja izquierda tendrá 6 mm de anchura. 6 mm (0.24") 4 mm (0.16") Back side Revés Front side Front side Derecho Derecho Huskylock 90... -
Page 23: Free Arm Sewing
The letter R will now be adjacent to the ranurado y desplace el dedo, saliendo de screw. la parte izquierda del pie, hacia adelante hasta el tope y apriete el tornillo. La marca con la letra “R” debe estar ahora justo delante el tornillo. Finger Dedo Huskylock 90... -
Page 24: Rolled And Narrow Hemming
17. Front 1,5 mm Narrow hemming For seams on sheer or lightweight fabrics. Needle thread Set the tensions as shown on page 17 for Upper looper thread a balanced tension. Back Lower looper thread Front Huskylock 90... - Page 25 Revés Hilo de aguja Derecho Dobladillo estrecho (borde) Para géneros elásticos utilice la misma Hilo de aguja tensión del hilos como para overlock Hilo del garfio normal. superior Revés Hilo del garfio inferior Derecho Huskylock 90...
-
Page 26: Differential Feed
Primero haga una prueba en un trozo del mismo tipo de tela que quiere utilizar. Always test on a spare fabric before sew- ing on your actual garment. Differential feed adjustment dial (outer dial) Mando de regulación para el transporte diferencial Huskylock 90... -
Page 27: Gathering
Ajuste the front feed teeth. The front feed teeth hacia ”S”. therefore holds the fabric taught to pre- vent puckering. Huskylock 90... -
Page 28: Changing The Needle
Use needle system HAx1 (=130/705H) no máquinas normales de coser. 11-16 (=75-100), (household type) Hexagon wrench key Llave de encastre Flat side to the back Parte plana hacia atrás Machine front Parte delantera de la máquina Needle Aguja Huskylock 90... -
Page 29: Replacing The Bulb
4) Empuje y gire para sacar la bombilla Important! The machine is designed to usada. use a 15 watt bulb. 5) Inserte una nueva bombilla girándola hasta su posición correcta. ¡Importante! Utilizar solamente bombillas de 15W. Lamp cover Protección de la bombilla Huskylock 90... -
Page 30: Replacing The Cutters
5) Tighten the upper cutter set screw firmly and close the front cover. Upper cutter set screw Tornillo del cuchillo superior Upper cutter Cuchillo superior Screwdriver Destornillador Overlaps 0.5-1.0 mm Solapado 0,5-1.0 mm Lower cutter Cuchillo inferior Huskylock 90... -
Page 31: Trouble Shooting Guide
Differential feed is not set Set differential feed N-G Fabric not Upper cutter is blunt or Replace or adjust the cutter cutted neatly wrongly positioned Fabric edges Too much fabric is within Re-adjust the seam width 21 -22 curl the stitch Huskylock 90... -
Page 32: Posibles Averías
N - G La tela no está bién Cuchillo superior en- Cambie cuchillo o cortada dañado o mal colocado colóquelo correctamente El borde del género se Demasiado tela ”dentro Ajuste el ancho de enrolla de la costura” puntada 21 -22 Huskylock 90... -
Page 33: Cleaning And Lubricating
Lubrificar una a dos veces only the points illustrated. por mes en uso normal - una vez a la semana en uso frecuente. Service Servicio Contact your dealer. Para preguntas sobre el servicio o el uso se pueden dirigir a su revendedor. Huskylock 90... -
Page 34: Specification Of The Machine
4 hilos 6 mm 3 hilos 6 mm o 4 mm Longitud de puntada 1-5 mm Elevación del prensatelas 4.5 mm Agujas Sistema HAx1 (=130/705H) Dimensiones de la máquina Ancho 285 mm Profundidad 285 mm Altura 291 mm Peso 7 kg Huskylock 90... - Page 35 Nos reservamos el derecho de cambiar el equipamiento de la máquina y sus accesorios sin previo aviso o hacer modificaciones en su funcionamiento o diseño. Sin embargo estas modificaciones se harán siempre en beneficio del consumidor y del producto. Huskylock 90...
-
Page 36: Huskylock
VSM Group AB • SE-561 84 Huskvarna, Sweden w w w. h u s q v a r n av i k i n g . c o m Huskylock 90...