Table of Contents
Advertisement
Advertisement
Table of Contents

Related Manuals for Wacom Intuos GD-0405-R


Summary of Contents for Wacom Intuos GD-0405-R
- Page 1 ® ® USER’S MANUAL FOR WINDOWS USER’S MANUAL FOR WINDOWS Navigation Contents Index...
-
Page 2: Contents Index
Wacom Company, Limited, 1998 All rights reserved. No part of this manual may be reproduced except for your express personal use. Wacom reserves the right to revise this publication without obligation to provide notification of such changes. Wacom does its best to provide current and accurate information in this manual. -
Page 3: Index
Plug the computer into an outlet that is on a different circuit from the television or radio. If necessary, consult your authorized Wacom dealer or an experienced radio/television technician for additional suggestions. Changes or modifications to this product not authorized by Wacom could void the FCC Certification and negate your authority to operate the product. -
Page 4: Ce Declaration
EN 60742 (safety of low voltage devices) Based on the results of these tests, Wacom declares that the above mentioned devices conform to Article 10.1 of the European Council Directive 89/336/EEC and to the European Council Directive 73/23/EEC, and indicates this conformity by the CE-sign on each device. -
Page 5: Table Of Contents
TABLE OF CONTENTS Trademarks Using the Pen Radio and Television Interference Holding the Pen FCC Notice Pointing CE Declaration Clicking About the Manual Using the Side Switch Navigating the Manual Dragging Proximity INSTALLATION Drawing with Pressure Things to Know Before Installation Drawing with Tilt Hardware Installation Erasing... - Page 6 Customizing Your Tools Working with Application-Specific Settings Pen and Airbrush Tabs Creating an Application-Specific Setting 4D Mouse and Lens Cursor Tabs Adding Additional Tools to an Application’s Tool List Adjusting Tip Feel Changing Settings for a Specific Application and Tool Adjusting Double-Click Removing Application-Specific Settings Customizing Tool Buttons...
- Page 7 Configuring for a Wintab Compatible Digitizer Configuring Tablet Menus and Screen Pointing Areas 128 Product Specifications General Specifications for All Intuos Tablets Intuos 4x5Tablet (Model GD-0405-R) Intuos 6x8Tablet (Model GD-0608-R) Intuos 9x12Tablet (Model GD-0912-R) Intuos 12x12 Tablet (Model GD-1212-R) Intuos 12x18Tablet (Model GD-1218-R)
-
Page 8: About The Manual
ABOUT THE MANUAL This interactive User’s Manual provides quick access to information about Intuos. Just click on a navigation button or highlighted word to move through the document. • Table of Contents enables you to go directly to a topic by clicking on it. •... -
Page 9: Index
Information about application software. Many graphics applications have built-in support for Intuos features (such as pressure-sensitivity, tilt, airbrush simulation, 3D navigation with the 4D Mouse, and two-handed input). You can find a listing of applications that support these features at Wacom’s web site (see Product Information). -
Page 10: Navigating The Manual
NAVIGATING THE MANUAL Use the navigation controls to move through the manual: Go to front page. Contents Go to Table of Contents. Index Go to Index. Go back to previous view. Page back, or page forward. HEADING TEXT Go to beginning of section. Topic Go to topic. -
Page 11: Installation
INSTALLATION Intuos is compatible with Windows 95 or later and NT 4.0 or later, and with all applications that support a mouse. Before you install the Intuos Graphics Tablet System, be sure to turn off your computer. Connect the hardware, then install the software. THINGS TO KNOW BEFORE INSTALLATION HARDWARE INSTALLATION SOFTWARE INSTALLATION... -
Page 12: Things To Know Before Installation
• If you are using a DOS shell under Windows 95 or later or NT 4.0 or later, Intuos will automatically function in the DOS shell after you install the Wacom drivers for Windows. INSTALLATION Contents Page 12 Index... -
Page 13: Hardware Installation
HARDWARE INSTALLATION To install your Intuos tablet: Turn off your computer. Connect the AC power cable to the tablet cable. Connect the tablet cable to a serial communication port. Connect the power adaptor to your AC outlet or power strip. The tablet’s LED will light. Note: If you have a 12x12 or larger tablet, turn on the power switch (located on the right side of the tablet). -
Page 14: Software Installation
SOFTWARE INSTALLATION To install your Intuos software for Windows 95 or later and NT 4.0 or later: 1. Make sure the tablet’s power and serial cables are connected, then turn on your computer. The status LED on your tablet should light to indicate the tablet is powered up. 2. -
Page 15: Uninstalling The Software
... button and follow the prompts to remove the Intuos software driver. EMOVE REGISTRATION To register your product, please complete and mail in the Wacom Registration Card that came with your tablet. Online registration may be available in some regions. If available, the Internet location will be printed on your Registration Card. -
Page 16: Product Information
PRODUCT INFORMATION To learn more about which software applications currently support your Intuos tablet and tools, visit the Wacom web site for your region: USA, Canada, Central and South America http://www.wacom.com/productinfo Europe, Middle East and Africa http://www.wacom.de/productinfo Japan http://www.wacom.co.jp Asia Pacific (English) http://www.wacom.co.jp/asia-pacific... -
Page 17: Using Intuos
USING INTUOS This section introduces you to the Intuos Graphics Tablet System. If you are new to using a graphics tablet and tablet input tools, read the following sections. They describe your Intuos tools and explain how to use them with the tablet. APPEARANCE AND FEATURES SETTING UP YOUR WORK AREA WORKING WITH THE TABLET... -
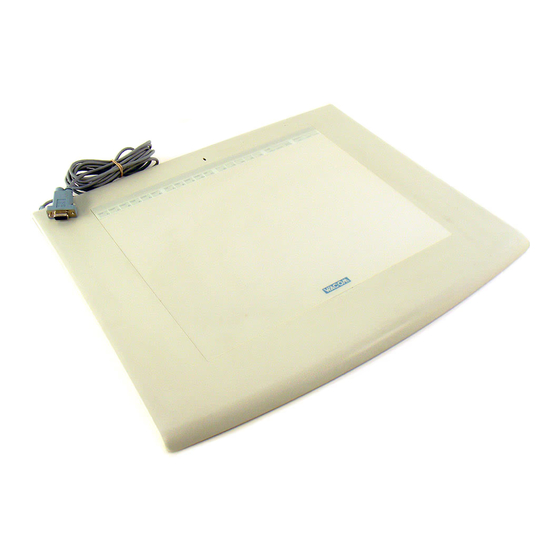
Page 18: Appearance And Features
APPEARANCE AND FEATURES The Intuos Graphics Tablet System consists of two basic elements: a graphics tablet that serves as your work area, and the Intuos Tools you use with the tablet. For a complete listing of Intuos tablets, refer to Parts and Accessories. -
Page 19: Intuos 6X8 And 9X12 Tablets
INTUOS 6X8 AND 9X12 TABLETS Status LED Incline Bar Menu Strip (shown attached) (removable) Cable Pen Stand Active Area Tablet Overlay QuickPoint Area Markings (not available for the 6x8 tablet) Note: The Intuos 9x12 tablet is shown. To learn more about your tablet, see Working with the Tablet. -
Page 20: Intuos 12X12 And 12X18 Tablets
INTUOS 12X12 AND 12X18 TABLETS Pen Stand Status LED Cable Power Switch Menu Strip (removable) Active Area Tablet Overlay QuickPoint Area Markings Note: The Intuos 12x12 tablet is shown. To learn more about your tablet, see Working with the Tablet. USING INTUOS Contents Page 20... -
Page 21: Intuos Tools
INTUOS TOOLS A variety of Intuos tools are available for your tablet. All Intuos tools are cordless, batteryless, and ergonomically designed. Each tool also has a Tool ID, enabling you to work with multiple tools on the same tablet and to customize each tool differently. Note: The tool(s) included with your tablet will vary depending on which tablet model and configuration you purchased. - Page 22 The Intuos 4D Mouse is an ideal tool for 2D or 3D navigation. It provides four degrees of control: x and y position, thumbwheel position, and positional rotation. The thumbwheel can be set to emulate the Microsoft IntelliMouse and used for scrolling, zooming, and other tasks in supporting applications. Adjustable for left- or right-handed use.
- Page 23 The Lens Cursor is an ideal tool for entering precise coordinate position information. Use the Lens Cursor with graphics and CAD applications for very accurate tracing or digitizing images. Lens (moveable) Programmable Buttons Ergonomic Shape For information on these and other available Intuos tools, refer to Parts and Accessories.
-
Page 24: Setting Up Your Work Area
SETTING UP YOUR WORK AREA Organize your work area so you can work comfortably. Position your Intuos tablet, input tools, and keyboard so they are easily accessible without unnecessary reaching. Your monitor should be positioned so you can view it comfortably with a minimum of eyestrain. To minimize fatigue: •... -
Page 25: Working With The Tablet
WORKING WITH THE TABLET Your tablet comes with a pen stand, a customizable menu strip, and a transparent overlay. ADJUSTING THE PEN STAND For some tablet models the stand attaches to the tablet, for others it is free-standing. 4x5 tablets: The stand is free-standing. Place it 6x8 tablets: The stand can be free-standing or within easy reach of your tablet. -
Page 26: Adjusting Tablet Incline
ADJUSTING TABLET INCLINE Intuos 6x8 and 9x12 tablets come with a rubber bar that can be used to raise the tablet’s incline angle. If you frequently use the tablet on your lap, you may not want to apply the incline bar. For desktop use, you may find an inclined tablet position more comfortable. -
Page 27: Using The Tablet Menu Strip
USING THE TABLET MENU STRIP All Intuos tablets have a menu strip with programmable buttons that allow you to quickly perform common tasks. For 4x5 tablets, the menu strip is printed on the overlay sheet. For 6x8 and larger tablets, the menu strip is removable, and can be written on with a pencil. - Page 28 To customize the tablet menu strip buttons, see Customizing Tablet Buttons. By default, the tablet menu strip buttons will perform common keystroke functions, such as: Button name Keyboard shortcut Function Ctrl+N Open a new document open Ctrl+O Open an existing document close Alt+F, C Close a document...
-
Page 29: Using The Pen
USING THE PEN Intuos Pens are cordless, batteryless, and pressure sensitive. There are four basic techniques for using the Intuos Pen: pointing, clicking, double-clicking, and dragging. With a bit of practice, using the pen will become second nature to you. If you are unfamiliar with using a pen, try the exercises on the following pages. -
Page 30: Pointing
POINTING The Intuos Pen positions the pointer (or cursor) on your screen. You can position the screen cursor two different ways, like a pen (Pen Mode) or like a mouse (Mouse Mode). • In Pen Mode, the tablet’s active area is like a mapped representation of your computer screen where every point on the tablet’s active area corresponds to exactly one point on the display screen;... -
Page 31: Clicking
CLICKING Clicking. To click, tap the tablet once with the tip of the Intuos Pen, or press the pen tip on the tablet with enough force to register a click. (With the pen tip, there is no audible “click” sound.) Try clicking on a folder icon by moving the screen cursor over the icon and pressing down on the pen tip. -
Page 32: Using The Side Switch
USING THE SIDE SWITCH The standard Intuos Pen is equipped with a DuoSwitch. This switch has two programmable functions that can be selected by rocking the switch in either direction. You can use the DuoSwitch whenever the pen tip is in Proximity of the tablet. -
Page 33: Dragging
DRAGGING Dragging is used to select and move objects on the screen. To drag, first point to an object. Then press the Intuos Pen to the tablet and slide it across the tablet. The selected object will move across the screen. To select text, move the screen cursor to the beginning of a text line, then drag the Intuos Pen across the tablet until the text is highlighted. -
Page 34: Proximity
PROXIMITY The pen is activated as soon as it enters proximity, about 10 mm (0.4 inch), above the tablet’s active area. This allows you to position the screen cursor or use the side switch without touching the pen tip to the tablet. -
Page 35: Drawing With Pressure
DRAWING WITH PRESSURE The Intuos Pen responds to the nuance and inflection of your hand movements, enabling you to create natural-looking pen and brush strokes. Many graphics applications have drawing tools that respond to the pressure you place on the pen. For example, in some drawing programs sliders are used to vary brush characteristics (width, color, and opacity). -
Page 36: Drawing With Tilt
As an example, with the Wacom PenTools Virtual Airbrush Photoshop plug-in, tilting the pen results in an elongated pattern. -
Page 37: Erasing
ERASING The eraser on the Intuos Pen works like the eraser on a pencil. In graphics applications that support the pen’s eraser, you can erase intuitively and naturally. When you use the pen’s eraser, the application will automatically switch to the eraser tool. You can also use the eraser in many standard office applications. The eraser will not be pressure sensitive, but you can use it to select and delete text or spreadsheet cells. -
Page 38: Eye-Hand Coordination Exercise
EYE-HAND COORDINATION EXERCISE If you use a mouse, you may remember how long it took to get used to positioning the screen cursor. Your Intuos Pen, likewise, will take a bit of practice to master the technique of positioning the screen cursor in Mode. -
Page 39: Using The Airbrush
USING THE AIRBRUSH The Intuos Airbrush is similar to the Intuos Pen, but also includes a fingerwheel for an additional degree of control. With proper software support, you can simulate realistic airbrushing. For example, tilting the Intuos Airbrush can cause the spray pattern to elongate and feather out. Rolling the fingerwheel can adjust the spray intensity, and pressure on the tip can control the brush size. -
Page 40: Holding The Airbrush
Your index finger should operate the wheel independently of the pressure you apply to the tip. To customize the fingerwheel, see Airbrush Settings. Visit Wacom’s web site to learn which applications currently support the airbrush fingerwheel. See Product Information. USING INTUOS Contents... -
Page 41: Using The 4D Mouse
USING THE 4D MOUSE The Intuos 4D Mouse is a cordless, batteryless mouse that works on any Intuos tablet. You can position and navigate the screen cursor like you do with the Intuos Pen. By default, the thumbwheel emulates the Microsoft IntelliMouse. -
Page 42: Setting Right- Or Left-Handed Operation
SETTING RIGHT- OR LEFT-HANDED OPERATION The 4D Mouse can be set for either right- or left-handed use. Set the mouse so that the thumbwheel is exposed on the side next to your thumb—the button settings will automatically be reconfigured. The default setting is for the left-click button to be under your index finger. -
Page 43: Using The 4D Mouse Thumbwheel
For a full description of thumbwheel features and functionality, see Customizing the 4D Mouse Thumbwheel. Visit Wacom’s web site for a list of applications that currently support the 4D Mouse thumbwheel. See Product Information. USING INTUOS... -
Page 44: Using The Lens Cursor
USING THE LENS CURSOR The Intuos Lens Cursor is an ergonomic input device that allows you to enter precise coordinate position information into your computer. The Lens Cursor reports the position of the cross-hair to the computer. This makes the Lens Cursor especially useful for tracing and digitizing drawings into graphics and CAD applications. -
Page 45: Caring For Your Tools And Tablet
CARING FOR YOUR TOOLS AND TABLET Keep your Intuos tools and tablet surface clean. Dust and dirt particles can stick to your Intuos tools and cause wear to the tablet surface. Regular cleaning with a soft, damp cloth will help prolong the life of your tablet surface and Intuos tools. -
Page 46: Replacing The Pen Or Airbrush Tip
REPLACING THE PEN OR AIRBRUSH TIP The tip (nib) will wear with normal use. When the nib gets too short or develops a flat point, you can replace it with the extra nib that came with your tool. 1. Clasp the old nib with a tweezer, needle-nosed plier, or similar instrument and pull it straight out of the pen or airbrush. -
Page 47: Customizing
CUSTOMIZING After you master the basics of using your Intuos Graphics Tablet System, you may want to customize the way Intuos works. This chapter describes how to use the Wacom control panel to adjust your Intuos tool and tablet settings. -
Page 48: Opening The Control Panel
1. Using your Intuos tool, click on the Windows S button. Then, select S and C TART ETTINGS ONTROL ANEL 2. Double-click on the tablet icon. To open the Wacom control panel, double-click here with the tool you wish to customize. CUSTOMIZING Contents Page 48 Index... -
Page 49: Control Panel Features
CONTROL PANEL FEATURES Use the Wacom control panel to customize your Intuos Graphics Tablet System. Pull-Down Menus access many control panel features. These buttons add an application or tool to the lists at the left. Application List displays applications with customized Control Panel settings. -
Page 50: Tabs
TABS The tabs allow you to customize your Intuos tablet and tools. When you open the control panel with an Intuos tool, the tool is automatically selected in the T and the appropriate tabs are displayed. If the T has more than one tool, you can select a different tool to customize and the appropriate tabs will display for that tool. - Page 51 Tab buttons apply only to the selected tab: • To set the currently open tab to its factory default values, click • If you have changed settings on a tab and want to return the tab to its previously saved or last applied settings (whichever is most recent using the OK or A buttons), click PPLY...
-
Page 52: Control Panel Lists
CONTROL PANEL LISTS Located in the upper portion of the control panel, the A and T allow you to create PPLICATION different tool settings for individual applications. For example, you might set your pen tip for a soft feel in Painter and a firm feel in all other applications. - Page 53 Intuos tool that has been used on the tablet. Each Intuos tool that is used on the tablet will automatically appear in the T . However, the Wacom control panel settings must be saved before a tool is permanently added to the list. See Adding a New Tool more information.
-
Page 54: Control Panel Buttons
CONTROL PANEL BUTTONS The control panel buttons apply to all items in the control panel, including tab settings, items in control panel lists, and menu options. • To close the control panel and save changes, click • To close the control panel without saving changes, click •... -
Page 55: Customizing Your Tools
CUSTOMIZING YOUR TOOLS To change tool settings, open the control panel using the tool you wish to customize. The tool will automatically be selected in the T , and the appropriate tabs will be displayed. To customize settings for a different tool, select it from the T by clicking on its icon. -
Page 56: Adjusting Tip Feel
ADJUSTING TIP FEEL To adjust the sensitivity of your Intuos Pen or Airbrush tip, select the T tab. To create broad brush strokes or to click with a light touch, use a soft tip setting. For maximum control while drawing thin lines, use a firm tip setting. -
Page 57: Adjusting Double-Click
D tab. Because a large double-click distance may adversely affect your brushstrokes in OUBLE LICK some drawing applications, Wacom recommends setting a small double-click distance and using the upper side switch to double-click. Use custom double-click settings when checked. -
Page 58: Customizing Tool Buttons
CUSTOMIZING TOOL BUTTONS Select the T tab to change the functions assigned to the eraser, side switch, and tip of your UTTONS Intuos Pen or Airbrush. If you are using an airbrush, you can also customize the fingerwheel sensitivity. For each tool button, a pull-down menu enables you to choose the function that will be performed. Select the function to perform when using the eraser. -
Page 59: Button Functions
Button Functions Each button has a pull-down menu that allows you to choose the function that will be performed when the button is pressed. The following list describes all available functions. However, some options are not available for all buttons. •... - Page 60 • ..Enables you to simulate a series of keystrokes. When you select this option, the EYSTROKE dialog box appears. There, you can enter a keystroke or keystroke sequence to EFINE EYSTROKE play back. Keystroke combinations can include letters, numbers, function keys (such as F3) and modifier keys (such as S , or C ).
- Page 61 • ..Enables you to simulate modifier key(s) (such as S , or C ). Many applications ODIFIER HIFT use modifier keys to constrain the size or placement of objects. If you select this option, the D EFINE dialog box appears. There, you select the modifier key(s) to simulate. ODIFIER You can select the C box plus...
- Page 62 • . Sets a button so that, when pressed, the pressure is locked at the current pressure RESSURE level until the button is released. For example, you can paint with pressure-sensitivity until you reach the brush size that you like. You can then press the button and continue painting with the same size brush until the button is released.
-
Page 63: Airbrush Settings
Reducing the fingerwheel range allows you to achieve the same effect with less finger movement. Move the wheel forward for less effect and move it back for more effect. Visit Wacom’s web site for a list of applications that currently support airbrush features. See Product Information. -
Page 64: Adjusting Eraser Feel
ADJUSTING ERASER FEEL To adjust the sensitivity of your Intuos Pen or Airbrush eraser, select the E tab. To erase with a RASER broad stroke or to click with a light touch, use a soft tip setting. For maximum control while erasing, use a firm eraser setting. -
Page 65: Customizing Tilt Sensitivity
Note: Tilt is direction-sensitive and can be used in some applications to control brush orientation. Visit Wacom’s web site for a list of applications that currently support tilt. See Product Information. CUSTOMIZING Contents... -
Page 66: Tablet To Screen Mapping
TABLET TO SCREEN MAPPING To change the relationship between tool movement on your tablet and cursor movement on the screen, select the M tab. The default P for each tool is P , which means that each APPING OSITIONING point on the tablet maps to a corresponding point on the screen. In P , the M tab looks like APPING... - Page 67 With M selected, the M tab looks like this: OUSE APPING Positioning Mode. In Mouse Mode, the screen cursor moves with relative positioning. Select the Orientation of your tablet. Select a slower or faster screen cursor speed when in Mouse Mode. CUSTOMIZING Contents Page 67...
-
Page 68: Positioning Mode
Positioning Mode The P controls how the screen cursor moves. OSITIONING • In Pen Mode, wherever you place an Intuos tool on the tablet, the cursor jumps to the corresponding point on the screen. This is the default setting and is required for tracing. •... -
Page 69: Orientation
Orientation If you want the tablet menu buttons on the side or the bottom of your tablet, or if you are working with a tall monitor, you can rotate the tablet to one of the following orientations: • . Tablet orientation is horizontal, with tablet buttons at the top. This is the default setting. ANDSCAPE •... -
Page 70: Aspect
Aspect Aspect defines the constraints of the tablet to screen relationship. A options include: SPECT • . Sets a 1:1 scale between the tablet and NE TO the display. Moving your tool one inch on the tablet will move the cursor one inch on the screen. A traced image appears the same size as the original image on your display screen. -
Page 71: Tablet Area
Tablet Area These settings allow you to define the tablet area that will be mapped to the display area. Uses the entire active area of the tablet for tablet to display mapping. This is the default setting. Displays the P dialog box where ORTION OF ABLET... - Page 72 Enter coordinates to select the tablet area. • Select U of measure for the displayed NITS values. A count equals one line of tablet resolution. • Enter values for the T , and OTTOM boundary of the tablet area. Values IGHT are measured from the top left corner of the tablet’s active area.
- Page 73 • . This option (available for Intuos 9x12 and larger tablets) divides the tablet into two UICK OINT independent areas: a large area for drawing, and a small area for quick navigation. QuickPoint Mode can be selected and deselected using the tablet buttons or screen Pop-up Menu. See Customizing Tablet Buttons Customizing the Pop-up Menu...
-
Page 74: Display Area
Display Area The D options allow you to define which portion of the display screen your tablet will map to. ISPLAY • . Select this option to access the entire display. This is the default setting. If more NTIRE ISPLAY than one monitor is in use, a pull-down menu is displayed with options for selecting A ONITORS individual monitors. -
Page 75: Customizing The 4D Mouse And Lens Cursor
CUSTOMIZING THE 4D MOUSE AND LENS CURSOR To modify your 4D Mouse and Lens Cursor button settings, select the T tab. UTTONS Select the function to perform when pressing a button. These options are available only when 15-Button 4D Mouse selected in the tab. -
Page 76: Programming The 4D Mouse And Lens Cursor
Programming the 4D Mouse and Lens Cursor As with the Intuos Pen and Airbrush, you can select a function to perform for each button from the button pull-down menus. Refer to Button Functions for a description of the available options. The 4D Mouse and Lens Cursor buttons are chordable;... - Page 77 To reserve a button for an application-defined function, set the button to A . The driver PPLICATION EFINED then reports only the button number to the application, and the function can be assigned from within your application. See your application manual(s) for instructions on assigning these functions. Depending on the thumbwheel position, the following button numbers are reported to the application when a button is set to A PPLICATION...
-
Page 78: Creating A Button Box
Creating a Button Box If you are working on an Intuos 6x8 or larger tablet and you have a 4D Mouse or Lens Cursor, plus at least one other tool (a pen, for example), you might consider using the 4D Mouse as a Button Box. This gives you the freedom to draw with the pen without having to reach for the keyboard to enter a keystroke. -
Page 79: Customizing The 4D Mouse Thumbwheel
Requires the least amount of thumbwheel movement for maximum effect. To see which applications currently support the thumbwheel, visit Wacom’s web site (see Product Information). Refer also to your application manuals for information on how best to use this feature. -
Page 80: Customizing The Pop-Up Menu
CUSTOMIZING THE POP-UP MENU Select the P tab to customize the available functions on the Pop-up Menu list. The Pop-up Menu list may include keystroke functions and mapping options. To display the Pop-up Menu, set one of your tool buttons to the P function. -
Page 81: Add Keystrokes
ADD KEYSTROKES To add a keystroke definition to the Pop-up Menu, click on the A ... button. A dialog box will EYSTROKE appear where you can specify and name the keystroke function. You can also create different keystroke functions for different applications. See Working with Application-Specific Settings for more information. -
Page 82: Customizing Tablet Buttons
CUSTOMIZING TABLET BUTTONS To customize the tablet menu strip buttons, select the T tab. By default, tablet buttons with ABLET UTTONS predefined functions have that function selected in their pull-down menu. The settings of other tablet buttons are set to I . - Page 83 2. Select an item from the tablet button’s pull-down menu. • . Simulates a keystroke or keystroke combination. EYSTROKE • . Sets the pressure feel of the pen, airbrush, or eraser to a soft setting. RESSURE • . Sets the pressure feel of the pen, airbrush, or eraser to a firm setting. RESSURE •...
-
Page 84: Working With Multiple Tools
WORKING WITH MULTIPLE TOOLS The Wacom control panel is designed to help you customize and keep track of your Intuos tool settings. The tool you use to open the control panel is automatically selected, and the appropriate tabs for that tool are displayed. -
Page 85: Adding A New Tool
OK to save your changes and permanently add the tool to the . If you use a second Intuos tool on the tablet, a new tool discovered message box appears. This reminds you to open the Wacom control panel and click OK to permanently add the new tool to the T . -
Page 86: Using More Than One Tool
Each Intuos tool features Tool ID, which makes each device unique. Any settings you customize in the Wacom control panel apply only to the specific tool for which they were made. If you have two identical Intuos tools, they will appear as numbered devices in the T . -
Page 87: Working With Application-Specific Settings
WORKING WITH APPLICATION-SPECIFIC SETTINGS You may wish to have different tool settings for a particular application. The A lets you PPLICATION customize your Intuos tablet and tool settings for individual applications. The A PPLICATION displays icons for applications with customized settings. The T displays icons for tools that are... - Page 88 If application-specific settings have not been created, a single icon labeled A is displayed PPLICATIONS in the A , and the tool settings displayed in the tabs are applied to all applications. PPLICATION When a second application is added to the A , the A icon changes to A PPLICATION...
-
Page 89: Creating An Application-Specific Setting
CREATING AN APPLICATION-SPECIFIC SETTING To create an application-specific setting, click on the A ... button or select PPLICATION TO ... from the A pull-down menu. The A PPLICATIONS FOR USTOM ETTINGS PPLICATION FOR USTOM dialog box appears. ETTINGS Select an application to add to the . - Page 90 If you are working with a single tool, it is automatically added to the T for the application you have added. If you are using more than one tool, the A dialog box is displayed. Choose one or OOL TO PPLICATION more tools to add to the T for this application.
-
Page 91: Adding Additional Tools To An Application's Tool List
ADDING ADDITIONAL TOOLS TO AN APPLICATION’S TOOL LIST To add another tool to an application’s T , click on the A ... button or select T OOL TO OOL TO ... from the A pull-down menu. The A dialog box appears. Choose USTOMIZE OOL TO USTOMIZE... -
Page 92: Changing Settings For A Specific Application And Tool
CHANGING SETTINGS FOR A SPECIFIC APPLICATION AND TOOL To change settings for a specific application and tool combination, from the A choose the PPLICATION application you want to change tool settings for. From the T , choose the tool you want to customize. -
Page 93: Checking Your Tablet Connection
CHECKING YOUR TABLET CONNECTION Select the C tab to check the status of your tablet connection to the serial port. ONNECTION When checked, the tablet driver is on. Displays all serial ports. The port in use by the tablet is selected. Ports used by other devices are dimmed. -
Page 94: Pull-Down Menus
PULL-DOWN MENUS Use the pull-down menus to access additional custom settings options, a language selection menu, and online documentation. Help is available for most dialog boxes that appear when you make a menu selection—just click on the dialog box H button for detailed information on settings and options. -
Page 95: Add
The A menu contains the following options: • ..Opens a dialog box where you can add one or more tablets. Refer to Installing Multiple Tablets for information ABLET on adding multiple tablets. • ..Opens a dialog box where you can add an application to the A . -
Page 96: Language
LANGUAGE The L menu allows you to switch between English and other installed languages. Typically, the ANGUAGE language of the operating system is installed when you install the driver, but other languages can be specified during a custom install. Please refer to the Readme file for more information. HELP The H menu contains the following options:... -
Page 97: Advanced Features
ADVANCED FEATURES You can use advanced features to further customize your Intuos Graphics Tablet System for the way you like to work. ADVANCED TIP PRESSURE SETTINGS ADVANCED ERASER PRESSURE SETTINGS COPYING SETTINGS USING DUALTRACK ADVANCED MAPPING ADVANCED FEATURES Contents Page 97 Index... -
Page 98: Advanced Tip Pressure Settings
ADVANCED TIP PRESSURE SETTINGS To customize advanced tip pressure settings, from the T tab select M . The advanced PTIONS options enable you to change the click pressure and pressure curve settings independently. (In the basic options display, these settings are adjusted simultaneously with the T slider.) RESSURE Important: The T... -
Page 99: Click Force Adjustment
CLICK FORCE ADJUSTMENT The click force setting adjusts the amount of force required to generate a button click. The C bar graphically displays LICK ORCE the force level at which a click occurs. Enter a value from 0.1 to 50% or drag the C bar to set the force LICK... -
Page 100: Pressure Curve Adjustment
PRESSURE CURVE ADJUSTMENT Changing the shape of the pressure curve will change the feel of the pen tip. A pressure curve that increases quickly makes the tip feel more sensitive to changes in force. The control points at each end of the pressure curve set the minimum and maximum amount of force your pen or airbrush will respond to. - Page 101 To automatically set the maximum force for the way you draw, click the S button and draw several TART strokes in the drawing area. As you draw, the M control moves, and the value in the edit AXIMUM ORCE box changes to reflect the peak pressure registered by your hand movements. To start over, click the button and begin a new drawing.
-
Page 102: Advanced Eraser Pressure Settings
ADVANCED ERASER PRESSURE SETTINGS To customize advanced eraser pressure settings, select the E tab and click on the M RASER button. You work with the advanced eraser settings in the same manner as with the Advanced PTIONS Tip Pressure Settings. Important: The E slider overrides the advanced pressure settings. -
Page 103: Copying Settings
COPYING SETTINGS To copy settings to another tool or application choose the C ... option from the E menu, ETTINGS or click on the C ... button. A dialog box is displayed where you can copy settings from ETTINGS one tool to another within the same application or between different applications. You can also copy settings between different types of Intuos tools. -
Page 104: Using Dualtrack
USING DUALTRACK All Intuos tablets (except the 4x5 tablet) support the concurrent use of two Intuos tools on a tablet. This feature is called DualTrack. DualTrack will function according to how an application implements support for two input tools. In some applications, two-handed input is used to rotate, size, and position an object by controlling two handles on the object simultaneously. -
Page 105: Advanced Mapping
ADVANCED MAPPING The ability to adjust basic mapping features is sufficient for most users. However, if your work demands a high degree of flexibility, you can have additional control over your tablet to display settings by clicking on the A ... - Page 106 Before you begin, verify that you have selected the correct application and tool for which you want to create advanced mappings. Then plan your mapping area(s). For example, you may want to define a small area for navigation, and a larger one for drawing. For best results, patiently complete each of the following steps: 1.
- Page 107 3. Define the size of the tablet area by dragging the handles of the selected tablet area. Then click and drag the tablet area to the desired position. For more precise control in selecting the tablet area, click the S ...
- Page 108 • To Fit. Maps the selected tablet area to the selected screen area. The scale and the vertical and horizontal proportions are not maintained. To set the scale, click the S button. In the S CALE CALE dialog box, enter values to define the tablet to screen ratios for the x and y axes. The ratio ACTOR between x- and y-scale factor indicates how much a traced image will be distorted by the mapping relationship between tablet and screen.
- Page 109 7. Click OK to confirm your changes and close the dialog box. To exit the dialog box without making changes, click C ANCEL Notes: • To remove a mapping, select the mapping to be removed and click on the D button.
-
Page 110: Having Trouble
HAVING TROUBLE? Most of the time your tablet will work flawlessly. But if you are having trouble, Wacom recommends you do the following: 1. Look in the troubleshooting chart. Your problem may be described there and you can try the solution offered. -
Page 111: Testing Your Intuos Tablet
TESTING YOUR INTUOS TABLET If the Wacom Tablet driver failed to load properly, first perform the recommended action in the error message on your screen. If that does not solve the problem, perform the following tests. TESTING SERIAL TABLETS Make sure your Intuos tablet is properly connected and that power is on to both your computer and tablet. -
Page 112: Testing Your Intuos Tools
TESTING YOUR INTUOS TOOLS From the Wacom control panel’s H menu, select D ... to open the D dialog box. IAGNOSTICS IAGNOSTICS The tablet driver version, tablet hardware and connection, and pointing device information is shown. TESTING A PEN OR AIRBRUSH 1. - Page 113 • For the airbrush, move the fingerwheel forward—the W value should decrease to a value of HEEL approximately 0 when the fingerwheel is all the way forward. Move the fingerwheel backward—the value should increase to approximately 1000 when the fingerwheel is all the way back. HEEL 4.
-
Page 114: Testing A 4D Mouse Or Lens Cursor
TESTING A 4D MOUSE OR LENS CURSOR 1. Test the buttons on your 4D Mouse or Lens Cursor by clicking each button. The tablet’s status LED should change color, and the S state should change for each button you click. WITCHES Note: The numbers shown correspond to the thumbwheel... -
Page 115: General Problems
(see Contacting Technical Support). The tablet does not respond to Open the Wacom control panel and go to the C tab. Verify ONNECTION my Intuos tool(s). that D ON is checked. - Page 116 The side switch does not work. Be sure you press the side switch when the pen tip is in proximity—do this without pressing down on the pen tip. From the Wacom control panel, verify that the side switch is set to the proper function for the application and tool that you are using.
- Page 117 Move the tablet about 15 cm (6 inches) away from your monitor. screen cursor is very erratic or Some monitors can emit Radio Frequency (RF) noise which can jumps around. interfere with the Wacom tablet. HAVING TROUBLE? Contents Page 117...
- Page 118 WINDOWS-SPECIFIC PROBLEMS Double-clicking is difficult. Be sure you are quickly tapping the tablet twice in the same place on the tablet’s active area. Wacom recommends using the side switch to double-click (review the techniques in Clicking). Try increasing the D...
-
Page 119: Contacting Technical Support
If you cannot find the answer in this manual, you may find updated information about your problem in the Readme file located on the Intuos CD-ROM. For information on accessing Wacom’s 24-hour automated online support and for a directory of Wacom Technical Support numbers, see Who to Call for your region. - Page 120 WHO TO CALL If you think your Wacom tablet is not working properly, contact the Wacom support staff for the area where your product was purchased. If you have a modem, you can download the latest software drivers from the Internet or the Wacom bulletin board.
-
Page 121: Usa, Canada, Central And South America
Worldwide Web: http://www.wacom.com/productsupport 24-hour Technical Support information: Answerbook—online support database. FAQs—Frequently Asked Questions and answers. Software updates. Anonymous FTP Site: Type ftp.wacom.com and go to the Software updates. /pub/drivers subdirectory. Phone: ++1-360-896-9833 Technical Support. (English) (Normal business hours, Pacific Time) FAX: ++1-360-896-9724 Technical Support. -
Page 122: Europe, Middle East And Africa
Europe, Middle East and Africa Contact your local distributor, or: Worldwide Web: http://www.wacom.de Software updates. Anonymous FTP Site: Type ftp.wacom.de and go to the Software updates. /pub subdirectory. Phone (Austria): ++43-(0)1-599 142 001 Technical Support. Phone (Belgium): ++32-(0)2-713 38 10 Technical Support. -
Page 123: Japan
Japan Contact your local distributor, or: Worldwide Web: http://www.wacom.co.jp Software updates and information. (Japanese) Phone: ++81-(0)3-5322-3905 Technical Support. (Japanese) FAX: ++81-(0)3-5322-3916 Technical Support. (Japanese) Internet Email: tablet@wacom.co.jp Technical Support and sales. (Japanese) Asia Pacific (English) Contact your local distributor, or: Worldwide Web: http://www.wacom.co.jp/asia-pacific... -
Page 124: Appendices
APPENDICES This section contains information on working with multiple tablets and working with AutoCAD. You will also find product specifications, a listing of available parts and accessories, and license and warranty information. INSTALLING MULTIPLE TABLETS WORKING WITH AUTOCAD PRODUCT SPECIFICATIONS PARTS AND ACCESSORIES LICENSE AND WARRANTIES (USA) APPENDICES... -
Page 125: Installing Multiple Tablets
INSTALLING MULTIPLE TABLETS If multiple Wacom tablets are installed on a single computer when the Wacom control panel is opened, a is displayed above the A . The T contains an icon for each installed ABLET PPLICATION ABLET tablet, and allows you to select the tablet for which your changes will apply. -
Page 126: Working With Autocad
WORKING WITH AUTOCAD AutoCAD for Windows can support the Intuos tablet as a System Pointing Device or as a Wintab Compatible Digitizer. By default, AutoCAD is configured to use Intuos as a System Pointing Device. If you will be using Intuos with tablet menus or to digitize drawings to proper scale, you will need to follow the procedures below. - Page 127 For AutoCAD Release 13: 1. Start AutoCAD. From the D , open the O menu and select C RAWING DITOR PTIONS ONFIGURE 2. From the C window, select option #4 C . Type Y to select another ONFIGURATION ONFIGURE DIGITIZER digitizer.
- Page 128 CONFIGURING TABLET MENUS AND SCREEN POINTING AREAS A screen pointing area is a rectangular region on the tablet surface where the tablet acts like a system mouse. When the pointer is within a screen pointing area, the tablet can access windows, menus, and other applications outside AutoCAD’s drawing area.
- Page 129 1. From the D , open the T menu (O menu for Release 13). RAWING DITOR OOLS PTIONS 2. Select T , and then C ABLET ONFIGURE 3. Define tablet menu areas. Follow the prompts at the bottom of the A CAD D .
- Page 130 Calibrating Intuos for AutoCAD in Windows If you are using Intuos to digitize a drawing, you will need to calibrate Intuos with the paper drawing’s coordinate system. The calibration allows you to digitize points from the paper drawing into the appropriate coordinate system of your drawing file.
-
Page 131: Product Specifications
PRODUCT SPECIFICATIONS GENERAL SPECIFICATIONS FOR ALL INTUOS TABLETS Coordinate resolution 100 lpmm (2540 lpi) Accuracy (pen) +/- 0.25 mm (0.010 in) Accuracy (Lens Cursor) +/- 0.15 mm (0.006 in), +/- 0.25 m (0.010 in) on Intuos 4x5, 6x8, and 9x12 tablets Tilt +/- 60 degrees, +/- 50 degrees for Intuos 4x5 tablets Maximum reading height with... -
Page 132: Intuos 4X5Tablet (Model Gd-0405-R)
INTUOS 4X5TABLET (MODEL GD-0405-R) Active area (W x D) 127.0 x 106.0 mm (5.0 x 4.24 in) Physical size (W x D x H) 225.0 x 210.0 x 7.5 mm (9.0 x 8.4 x 0.29 in) Cable length 2.5 m (8.2 ft) Weight 540 g (1.19 lb) -
Page 133: Intuos 12X12 Tablet (Model Gd-1212-R)
INTUOS 12X12 TABLET (MODEL GD-1212-R) Active area (W x D) 304.8 x 316.8 mm (12.19 x 12.67 in) Physical size (W x D x H) 444.0 x 435.5 x 37.0 mm (17.76 x 17.42 x 1.48 in) Cable length 2.5 m (8.2 ft) Weight 2.1 kg (4.62 lb) Power consumption... -
Page 134: Intuos Airbrush (Model Gp-400E)
INTUOS AIRBRUSH (MODEL GP-400E) Fingerwheel travel 10 mm (0.39 in) Fingerwheel resolution 1024 levels Pen tip travel 0.1 mm (0.04 in) or less Pressure levels 1024 levels Eraser tip travel 1.3 mm (0.05 in), approximately Physical size (L x D) 162.5 x 32.6 mm (6.38 x 1.28 in) Weight 24 g (0.85 oz), approximately... - Page 135 INTUOS STROKE PEN (MODEL GP-120) Pen tip travel 1.3 mm (0.05 in), approximately Pressure levels 1024 levels Physical size (L x D) 151 x 12.5 mm (5.94 x 0.49 in) Weight 12 g (0.42 oz), approximately Tip refill type Polyacetal (Part No. PSI-A011) INTUOS 4D MOUSE (MODEL GC-500) Physical size (L x D x H) 113.5 x 72.6 x 38.5 mm (4.47 x 2.86 x 1.52 in)
-
Page 136: Ordering Parts And Accessories
PARTS AND ACCESSORIES Your Intuos Graphics Tablet System is the ultimate set of master tools for creative professionals. Intuos is a totally integrated and intelligent system, starting with the tablet as the heart of the system. The tablet, combined with your Intuos Pen and other Intuos tools, enables you to paint more intuitively, illustrate better, and edit imagery faster than ever before. -
Page 137: Airbrush
AIRBRUSH Intuos Airbrush (model GP-400E) The first true computer airbrush, the pressure-sensitive Intuos Airbrush incorporates a pressure-sensitive tip and eraser, tilt sensitivity, and a fingerwheel that provides an additional degree of control over the application of digital paint. 4D MOUSE Intuos 4D Mouse (model GC-500) With simultaneous x/y/z axis manipulation and rotation, the capabilities of the 4D Mouse are unlike any other input device. -
Page 138: Other Parts And Accessories
OTHER PARTS AND ACCESSORIES Description Part Number Menu Strip (6x8 tablet) PSH-A149 (9x12 and 12x12 tablets) PSH-A150 (12x18 tablet) PSH-A151 Overlay Sheet (4x5 tablet) PSH-A144 (6x8 tablet) PSH-A145 (9x12 tablet PSH-A146 (12x12 tablet) PSH-A147 (12x18 tablet) PSH-A148 Pen Stand (4x5, 6x8, and 9x12 tablets) PST-A017 (12x12 and 12x18 tablets) PST-A018... -
Page 139: License And Warranties (Usa)
The enclosed product includes computer programs embedded in firmware and accompanying diskette or CD-ROM (the “Software”). The Software is licensed, not sold, to you for use only with Wacom products upon the terms of this license, and Wacom reserves any rights not expressly granted to you. Wacom grants to you a non-exclusive right to use this copy of the Software in conjunction with a Wacom product at a single location. -
Page 140: Limited Warranty
(1) year, as long as you own the product as evidenced by a copy of the receipt and a registration card that has been returned to Wacom within 30 days of purchase. - Page 141 LIMITATION OF LIABILITY FOR CONSEQUENTIAL DAMAGES, THE ABOVE LIMITATION MAY NOT APPLY TO YOU. In the event that any of the above limitations are held unenforceable, Wacom’s liability for any damages to you or any party shall not exceed the purchase price you paid, regardless of the form of any claim.
-
Page 142: Warranty On Sales Outside Of U.s. And Canada
In all other respects the terms of the warranty as set forth above apply to such sales. Should you have any questions about this Agreement, or if you desire to contact Wacom for any reason, please contact in... -
Page 143: Glossary
GLOSSARY Active area. The drawing area of the tablet where your Intuos tools are detected. Application-specific settings. Intuos tool and tablet settings that have been customized for individual applications. The control panel enables you to program a tool to behave uniquely in different applications. Your application-specific settings are in effect whenever you use the application. - Page 144 Double-click speed. The maximum time that can pass between clicks and still be accepted as a double- click. Increasing the double-click time makes double-clicking easier. Eraser-aware application. A software application that has built-in support for the Intuos eraser. These applications take advantage of the eraser in different ways, depending on what makes sense for the application.
- Page 145 Nib. The replaceable tip of the Intuos Pen or Airbrush. Pen Mode. A method of positioning the screen cursor. Wherever you place your Intuos tool on the tablet, the screen cursor will be at that same corresponding point on the screen. This is known as absolute positioning, and allows you to position the screen cursor without having to first find it and then move it with a “pick up and roll”...
- Page 146 Screen cursor. The pointer on the display screen. Screen cursors come in different shapes (such as an I-beam, arrow, or box), depending on which application you are running. Thumbwheel. The wheel on the side of the Intuos 4D Mouse that gives you an additional control variable for your work.
-
Page 147: Index
INDEX 4D Mouse testing buttons, customizing using programming Application-specific settings setting handedness operation creating testing working with using Aspect as 15-button mouse AutoCAD as a Button Box calibrating for Intuos thumbwheel configuring for Intuos 4D Mouse and Lens Cursor tabs, customizing configuring screen pointing areas About the manual configuring tablet menus... - Page 148 Customizing Edit menu 4D Mouse and Lens Cursor Environmental conditions buttons Eraser feel, customizing tabs Erasing, with pen 4D Mouse thumbwheel Eye-hand coordination exercise advanced Features eraser pressure 12x12 tablet tip pressure 12x18 tablet airbrush settings 4x5 tablet click force 6x8 tablet double-click 9x12 tablet...
- Page 149 Lens Cursor other buttons, customizing pens programming testing clicking using clicking with using as a Button Box double-clicking with License and Warranties (USA) drawing Manual, about with pressure Mapping with tilt advanced erasing with options, adding to Pop-up Menu holding Menus pointing replacing the tip...
- Page 150 Registration, mailing Tablet Remove menu buttons, customizing Removing connection, checking keystrokes from Pop-up Menu storing mapping options from Pop-up Menu testing settings working with Serial tablets Tablet area testing Tablet to screen mapping, customizing Settings Technical Support changing for specific application and tool contacting copying linking to web page...
-
Page 151: Windows-Specific Problems
Thumbwheel customizing using Tilt sensitivity, customizing Tilt, drawing with replacing Tip feel, customizing Tool buttons, customizing Tool List, adding tools to Tools adding to Tool List customizing testing using more than one Troubleshooting general problems Windows-specific problems Uninstalling software Using more than one tool Warranties and License (USA) Web page, linking to Windows-specific problems, troubleshooting... - Page 152 Ken Loftus—Product Testing Paul Stone—Technical Support And a final special note of thanks to the Wacom International Reviewers for their global perspective and specific areas of expertise that combined to enhance the technical accuracy and quality of the documentation. Contents...