Table of Contents
Advertisement
Quick Links
Advertisement
Table of Contents

Related Manuals for Halcro dm8


Summary of Contents for Halcro dm8
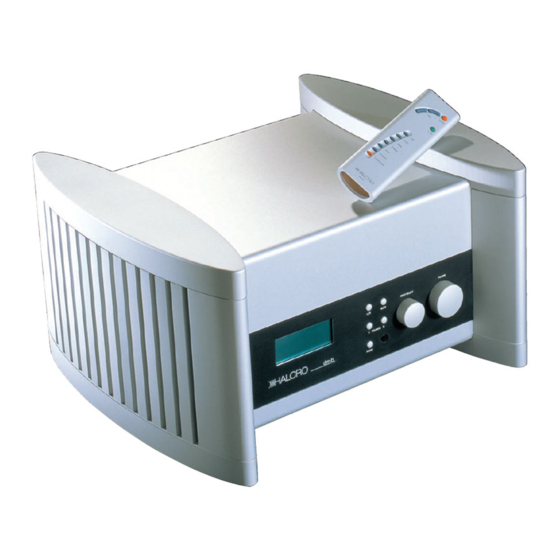
- Page 1 Preamplifier with remote control Owner’s Manual www.halcro.com...
-
Page 2: Table Of Contents
If service is required ........29 Connect the mains supply cable ....17 Transportation of products....... 30 Bridging............17 Freight damage claims......30 Break-in period..........17 If you have moved ........30 Programmable input selections....17 Thank you for choosing Halcro!....30... -
Page 3: Introduction
The brief given to our R&D team, headed by connoisseurs. Bruce Candy, was to produce two models of If you desire to contact Halcro to give us preamplifier to satisfy the needs of every feedback on your purchase or for general... -
Page 4: Important Safety Information
The fuse The dm8 is designed to operate on any mains is located on the rear panel in the main switch. supply in the range of 90 to 240 V, 50 to... -
Page 5: Product Design
This Second, all circuits in the preamplifier exhibit minimizes output noise. exceptionally low noise (see specifications). The dm8 and dm10 preamplifiers feature Third, there is no compromise whatever with balanced, unbalanced, current mode and the choice of components (Vishay resistors, bridged current mode outputs. -
Page 6: Microprocessor Control
Audible relay noise Microprocessor control The dm8 and dm10 use mechanical relays in excellent audio electronics all switching including the volume control complemented and controlled by a number of because they exhibit the following ideal highly integrated micro-controllers located characteristics: close to the electronics they serve. -
Page 7: Industrial Design
Industrial design Product form Control interface The aim when designing the dm8 and dm10 Knobs and buttons create preamplifier that The volume and input selector knobs use a unmistakably part of the Halcro product family, unique magnetic incremental indexing but at the same time a component that would mechanism developed to provide a very complement any high-end audio system. -
Page 8: Mechanical Design
Display Mechanical design A high-resolution display was chosen in order The Halcro dm8 and dm10 can boast their to provide clean simple graphics without the spectacularly noise distortion rough edges associated with displays of specifications while their cases contain lesser quality. The graphic layout of the display... -
Page 9: Installation
Halcro preamplifier, please contact your dealer. Positioning Unpacking The Halcro dm8 preamplifier can be placed anywhere indoors. There is no need to leave o Unscrew the four knurled knobs at the room around the unit to allow for ventilation as... -
Page 10: Controls And Connections
Controls and Connections Front panel Figure 1 LCD information display Balance control right Balance control left Input select control Standby/On button Volume control Mute button Phase button Remote sensor window... - Page 11 MUTE appears on the display, or press 3. Standby/On button: The Halcro dm8 is the MUTE button. designed to remain in Standby mode when not in use. This button will toggle the unit 8.
-
Page 12: Front Panel Display
Front panel display Figure 2 1. Main information display: The information provided on this display changes depending function that currently being processed. In normal use it will display the volume of both the left and right of the system (Fig 2, C). When a different signal source is selected it will appear on the main display for a few seconds. -
Page 13: Rear Panel
Rear panel Figure 3 Programmable inputs Remote sensor window Program buttons Main power switch, mains socket and fuse holder Tape monitor output Remote power amplifier output Output sockets Output selector switch... - Page 14 They will Once the dm8 has been programmed, the remain illuminated once they have been main power switch can be left on and the dm8 Connecting signal sources allocated – see left in Standby when not in use. If the main page 15.
-
Page 15: Remote Control
3. Standby/On button: Press to switch the system between Standby and On. 4. Signal source buttons: Press to select any one of six signal sources on the dm8. 5. Function button: Press to choose the following functions: balance between the... -
Page 16: Dm8 Outputs
The balanced voltage outputs or current- If you are changing your signal source units, mode outputs most desirable de-allocate the input source first – see allocating Program buttons minimizing earth loop generated mains hum on page 18. and ripple, or high frequency interference if Connect all signal source units (such as CD these are a problem. -
Page 17: Connecting To A Power Amplifier
• two pairs of balanced voltage outputs for power amplifiers. The dm8 has a remote power amplifier control output (Fig 3, 7), which will remotely switch the Select the method you wish to run your power Halcro amplifiers from Standby to On. Cables... -
Page 18: Connect The Mains Supply Cable
Programmable input cable selections Plug the main power cable into the main seven available pairs power socket on the rear of the dm8. (Fig programmable input connectors: 3, 6.) • three unbalanced voltage inputs • three balanced voltage inputs Bridging •... -
Page 19: Operation
Operation Start up De-allocating program Switch the main power switch to On. buttons When the unit is switched on at the main To de-allocate program buttons, press and power switch (Fig 3, 6) the preamplifier will go hold the applicable program button and into Standby mode. -
Page 20: Volume
Back light Stored volumes The backlight can be turned on and off by The dm8 memorizes the volume levels. using the remote control. Press the function A volume setting for each programmed input button once (Fig 4, 5) then the Mute button source is memorized on either power off or on (Fig 4, 2) to toggle the back light on and off. - Page 21 Volume – balancing function Front panel Remote control The volume can be evenly distributed through Use the Function key on the remote control to the speakers or one channel can be louder change the relative volume for the left and than the other.
- Page 22 Switching between sources To select a device, press the appropriate If a source is selected (either through the front button on the remote control or turn the panel or remote control) and the correct selector knob on the front panel until the source is not selected, ensure that the device you require appears in the center of program...
-
Page 23: Electronic Protection And Reliability
Halcro high temperature rated capacitors highly • all Halcro electrolytic capacitors are rated advantageous compared to the standard at a minimum of 105ºC instead of the 85ºC rated devices. -
Page 24: Dm8 Specifications
Specifications Inputs Power consumption • 100 W max via IEC input. three RCA Unbalanced Voltage Mode • three XLR Balanced Voltage Mode • one RCA Current Mode Mains voltage Any five of the above I/Ps are user All voltages from 85 to 240 V AC at 40 to programmable to respond to the device 200 Hz or 120 to 340 V D.C. - Page 25 Dimensions Balance: Front Panel; 2 x Push Buttons Width: 448 mm, 17.64 in Remote Control; Function Key, Depth: 400 mm, 15.74 in 2 x Push Buttons Height: 240 mm, 9.44 in Weight: 23 kg, 50 lb Mute: Front Panel; 1 x Push Button Remote Control;...
-
Page 26: Input Impedance
Input impedance Input programming • Each input may be assigned to a source. The 10 kohms + 10 kohms balanced assigned source is defined on the display and • 10 kohms unbalanced on the remote control. This is memorized and •... -
Page 27: Care And Maintenance
Please read the following procedures very please ask your dealer or contact Halcro at: carefully: service@halcro.com o Before cleaning, turn the power to the unit off at the main power switch. -
Page 28: Troubleshooting
Ensure the output select switch is set to the correct output mode. Ensure the dm8 is not muted or the volume is too low. Will not select source Ensure the source is connected to a programmed input and the program button adjacent to the input is illuminated. -
Page 29: Service And Warranty Information
During the strong warranty that protects your investment warranty period, Halcro will remedy all such in Halcro products for years to come. It is our defects without charge for parts or labor. expressed desire that your Halcro products... -
Page 30: Transferability
To qualify for free warranty service, the that the original sales receipt or proof of following conditions must be met: purchase is supplied to both subsequent • the unit must be returned to Halcro or its owners Halcro when ownership authorized repair center in the original changes. -
Page 31: Transportation Of Products
Halcro dealer on request. We are not equipped to accept freight collect shipments. Thank you for choosing Halcro is not liable for freight, courier, or other Halcro! charges incurred in transporting a unit to and We trust that you will enjoy the performance... - Page 32 Copyright and acknowledgements This product is manufactured by Extraordinary Technology (Hi-Fi) Pty Ltd trading as Halcro and Halcro Audio (USA) Inc. Halcro dm8 Owner’s Manual Revision 2.0, © Halcro 2005...