
Related Manuals for Avery Dennison MonarchNet2 9855


Summary of Contents for Avery Dennison MonarchNet2 9855
- Page 1 ® Monarch Printers 9855 ® 9860™ TC7411MN2OI Rev. AG 5/08 ©2007 Paxar Americas, Inc. a subsidiary of Avery Dennison Corp. All rights reserved.
- Page 2 Any update will be incorporated in a later edition of this manual. ©2006 Paxar Americas, Inc a subsidiary of Avery Dennison Corp. All rights reserved. No part of this publication may be reproduced, transmitted, stored in a retrieval system, or translated into any language in any form by any means, without the prior written permission of Paxar Americas, Inc.
-
Page 3: Table Of Contents
T A B L E O F C O N T E N T S GETTING STARTED..................1-1 Overview ....................1-1 Audience ....................1-1 Using This Manual ...................1-2 System Requirements ................1-2 Supported Operating Systems..............1-3 Supported Network Protocols ..............1-3 Setting Up the Print Server ...............1-4 Checking the Print Server Hardware ............1-5 Verifying Successful Installation ...............1-5 Verifying Successful Installation ...............1-6... - Page 4 Wireless....................2-7 Signal Strength ................... 2-8 SSID ....................2-9 Wireless Mode................... 2-10 A-Point Density ................. 2-11 Transmit Rate ................... 2-12 Channel .................... 2-13 Default Network ..................2-14 Factory Defaults ................2-15 Test Label .................... 2-16 NCL Settings ..................2-17 USING A WEB BROWSER ................3-1 Logging In ....................
- Page 5 Reading the Virtual Panel ............... 3-20 Using Custom Commands ............... 3-21 Changing the Password................3-22 Updating Firmware ................3-24 Basic Security Configurations ..............3-25 CONSOLE COMMANDS ................4-1 Conventions ....................4-2 Accessing Telnet Console Mode..............4-2 Help Commands ..................4-4 General Commands .................4-6 Setup Commands .................. 4-11 RFID Commands ...................
- Page 6 TROUBLESHOOTING ................... 6-1 Printing a Test Label ................6-1 General Troubleshooting Information ............6-4 Troubleshooting Wireless Configuration Problems ........6-7 Technical Support ................... 6-7 SPECIFICATIONS ..................A-1 802.3 Specifications ................A-1 Optional 802.11b/g Specifications............. A-1 Options ....................A-2 GLOSSARY ....................G-1 INDEX ......................
-
Page 7: Getting Started
G E T T I N G S T A R T E D Your Monarch® 9855® or 9860™ Version 5.0 or greater printer contains MonarchNet2™ software, which allows you to access, configure, and control your printers with the Monarch® 7411™ Ethernet Print Server remotely across a LAN (local area network), WLAN (wireless local area network), or WWW (world-wide web) connection. -
Page 8: Using This Manual
U s i n g T h i s M a n u a l Following is a summary of the contents of this manual: Chapter Contents Getting Started Information you should know before using the printer. Configuring the Setting communications between your network and 802.11b/g and printer. -
Page 9: Supported Operating Systems
♦ Wireless mode (infrastructure or Ad-Hoc). ♦ The SSID (service set identifier) for your wireless network. ♦ If you are using TCP/IP (recommended for Windows Networks) and are not connected to a DHCP server (for obtaining an IP address automatically), you need a unique IP address for the wireless print server (for example: 192.0.0.192) and a subnet mask. -
Page 10: Setting Up The Print Server
S e t t i n g U p t h e P r i n t S e r v e r For MonarchNet2 to operate, make sure the print server is set to use the printer’s internal parallel port and use bi-directional communications. If this is not already set for you: From the printer’s Main Menu, select Setup, Port Settings, Parallel Comm., Port, and press... -
Page 11: Checking The Print Server Hardware
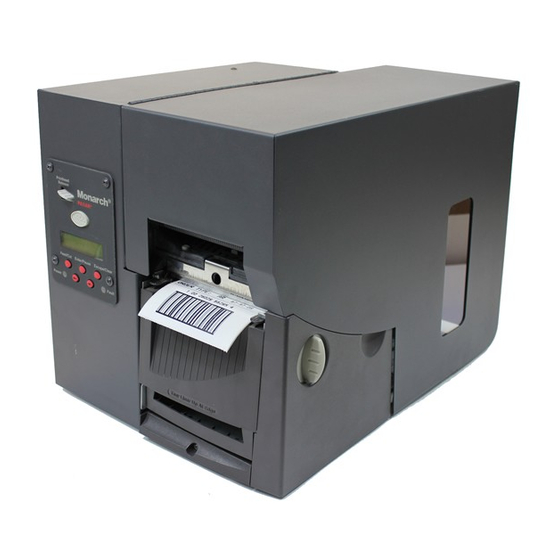
C h e c k i n g t h e P r i n t S e r v e r H a r d w a r e The Ethernet print server comes preinstalled and tested in your printer. Antenna Test Button LEDs... -
Page 12: Verifying Successful Installation
V e r i f y i n g S u c c e s s f u l I n s t a l l a t i o n When the printer is turned on, the print server runs through a set of power-up diagnostics for a few seconds. - Page 13 Test Button Press this button down for less than five seconds to print a configuration label on the printer. The label shows the current wireless and network settings of the print server. See “Printing a Configuration Label” for more information. If the label does not print, see Chapter 6, “Troubleshooting.”...
-
Page 14: About "Print Mode Ready
A b o u t “ P r i n t M o d e R e a d y ” When you turn on your printer, you may see several different “Print Mode Ready” screens based on your printer’s current configuration. When you see Description The printer is ready to accept data, but it... -
Page 15: Printing A Configuration Label
P r i n t i n g a C o n f i g u r a t i o n L a b e l To print a configuration label, press the Test button on the back of the print server. - Page 16 1-10 MonarchNet2 Operating Instructions...
-
Page 17: Configuring The 802.11B/G And Ip Settings
C O N F I G U R I N G T H E 8 0 2 . 1 1 b / g A N D I P S E T T I N G S This chapter explains how to configure and view your network settings by using the printer’s Main Menu. -
Page 18: Saving Settings
S a v i n g S e t t i n g s After you display the option you need, press Enter/Pause to save the setting. Press Escape/Clear to exit to the next higher menu. If you save any network or wireless options, the print server resets and uses the new settings. -
Page 19: Ip Address
I P A d d r e s s The IP (Internet Protocol) Address is a unique identifier for a device on a network. It consists of four 3-digit numeric fields, separated by periods. To change the setting, from the Main Menu: Select Setup, Network. Then follow these steps. -
Page 20: Subnet Mask
S u b n e t M a s k IP networks are divided using subnet masks. The subnet mask address determines where the IP address belongs in the network. It consists of four 3-digit numeric fields. To change the setting, from the Main Menu: Select Setup, Network. Then follow these steps. -
Page 21: Ip Gateway
I P G a t e w a y The IP Gateway (or router) allows connections (communications) between different subnets on a network. It consists of four 3-digit numeric fields. To change the setting, from the Main Menu: Select Setup, Network. Then follow these steps. - Page 22 B o o t M e t h o d The boot method sets the way the device receives its IP address. The choices include Auto, Static, BOOTP, DHCP, and RARP. Tries DHCP, BOOTP, and RARP, then sets to Static if the Auto IP address is not automatically set using any of the previous methods.
-
Page 23: Boot Method
To change the setting, from the Main Menu: Select Setup, Network. Then follow these steps. Press until you see NETWORK Boot Method Press Enter/Pause. The current setting is displayed, for example: BOOT METHOD BOOTP After you display the option you need, press Enter/Pause. Press Escape/Clear until you see the Main Menu. -
Page 24: Signal Strength
The options are listed in the table below. Option Choices Signal Strength 0 to 100 SSID xxxxxxxxxxxxxx Wireless Mode infrastructure or Ad-Hoc APoint Density Low/Med/High Transmit Rate 1/2/5.5/11/12/18/24/36/48/54 Channel 1 to 11 Signal Strength The connection between the device and access point is shown as signal strength, which is a percentage from 0 to 100, where 0 is no connection and 100 is an excellent connection. - Page 25 SSID The Service Set Identifier (SSID) is a unique identifier that must match for all nodes on a subnetwork to communicate with each other. It consists of up to 32 characters (any printable character, including spaces). If using the space character, it must be enclosed in quotation marks.
-
Page 26: Wireless Mode
Wireless Mode The wireless mode sets how you communicate with your wireless network. In Ad-Hoc mode, you do not need an access point. Ad-Hoc mode is also called peer-to-peer (point-to-point) communications, so as long as the devices are in range, they will connect and communicate with each other. Infrastructure mode requires an access point to communicate. -
Page 27: Apoint Density
A-Point Density The A-Point density is the access point’s density. If the communication quality (transmit rate) between devices on a network drops below a certain level, the devices scan for another access point in the area offering better transmit rates, etc. The range is Low, Medium, or High. If set to High density, the device searches for another access point in range using 11 Mbps communications;... -
Page 28: Transmit Rate
Transmit Rate The transmit rate sets the maximum speed at which the devices communicate with each other on the network. The speeds are in Mbps (megabits per second). Choices include: 1, 2, 5.5, 11, 12, 18, 24, 36, 48, or 54. The transmit rate is negotiated with the access point and this setting may be ignored. -
Page 29: Channel
Channel This option selects the channel on which your network devices communicate. All devices must be on the same channel to communicate. Other radio devices such as Bluetooth® wireless devices, microwave ovens, or 2.4-gigahertz cordless phones may operate on the same channel as your network. -
Page 30: Default Network
D e f a u l t N e t w o r k The default network option allows you to reset the print server to default settings or factory default settings. ♦ If you select default setting, any defaults set using the SET DEFAULT Telnet console command are restored. -
Page 31: Factory Defaults
Factory Defaults If you reset the print server to factory defaults, the following values are restored. Some settings may stay the same, depending on your network configuration. Description Default This value is hard-coded and does not change TCP/IP Enabled Name PXR_xxxxxx (xxxxxx = the last six digits of the MAC address.) IP Address... -
Page 32: Test Label
T e s t L a b e l You can print a configuration label if your print server does not have a test button. The label is best-displayed using 2” wide by 4” long labels. If the label is too small, some information may print outside the label edges. -
Page 33: Ncl Settings
N C L S e t t i n g s The Network Control Language files (NCL) are in a readable format similar to Microsoft® Windows® 3.0 initialization (.ini) files. For example, you can create an NCL file that sets your printer to specific settings every time you turn on the printer, such as black mark supply, high energy ribbon, and on-demand mode. - Page 34 2-18 MonarchNet2 Operating Instructions...
-
Page 35: Using A Web Browser
U S I N G A W E B B R O W S E R You can configure and manage the printer and print server using your Web browser: Microsoft® Internet Explorer, version 6.0, or greater; Netscape® Communicator, version 4.7 or greater; or Mozilla Firefox®. ♦... -
Page 36: Logging In
L o g g i n g I n Start your Web browser. Type in your printer’s IP address and press Enter. For example, 192.0.0.192. The printer’s display shows the “N” network symbol or the antenna symbol when the printer is connected and ready to receive data. - Page 37 Click Administrator Log On or the printer’s name (for example: PXR8A983A). Type access for the password and click Submit. You do not need a user name. The password is case-sensitive and saved in the printer’s flash memory. See “Access Control” to change the password.
-
Page 38: Configuring The Printer
The About tab appears with information about your printer, including printer name, IP address, installed/enabled options, and more. Click the Tech Support tab if you need to contact us. C o n f i g u r i n g t h e P r i n t e r You can configure the printer using your Web browser. -
Page 39: Changing The Printer Setup
Changing the Printer Setup Only configure the settings required for your network/printer. Only the available options for your printer are displayed. Note: On the Printer Setup tab, set the Ribbon: None, Ribbon, or High Energy. Set the Supply Type: Aperture, Die Cut, Black Mark, or Continuous. If you are using edge aperture supplies, use the die cut setting. - Page 40 Set the Skip Index mode: No or Yes. Skip index allows you to print an image over multiple labels. Set the Backfeed: Off, On, or Extended. Backfeed advances each printed label to the specified dispense position and then backs up the next label to be printed underneath the printhead.
-
Page 41: Changing The System Setup
Changing the System Setup Only configure the settings required for your network/printer. On the System Setup tab, set the Flash Storage: Enabled or Disabled. Flash storage allows packets with “R” or “N” selectors to be stored in Flash Memory, instead of volatile RAM. Packets stored in flash memory are saved when the printer is turned off. -
Page 42: Reset/Initialize Network
Select Slashed Zero to print zeros with a slash (Ø): No or Yes. Click Submit when finished. R e s e t / I n i t i a l i z e N e t w o r k Click Save/Re-init Network (on the Protocols tab) to reset and initialize the network interface. -
Page 43: Configuring The Network Settings
C o n f i g u r i n g t h e N e t w o r k S e t t i n g s You can configure the print server to operate on your network. From the side Menu Bar, click Network Configuration. -
Page 44: Changing Tcp/Ip Settings
Changing TCP/IP Settings Only configure the settings required for your network/printer. On the Protocols tab, set the Boot Method: Auto, BOOTP, DHCP, RARP, or Static. Set the number of Boot Tries: 1-10. The default is 3. If you are having a problem receiving an IP address with BOOTP, set this number to 10. - Page 45 Enter the Domain Name. Enter the Primary DNS Server’s IP address. 10. Enter the Secondary DNS Server’s IP address. 11. Select Enable Network Time to enable the network time protocol, which allows the printer to query a time server on the network and synchronize the clock in the printer.
-
Page 46: Changing Snmp Settings
20. Select Enable Web Authorization Timeout to make the Web pages time out after five (5) minutes of inactivity. The time out period is set for five minutes and cannot be Note: changed. 21. Select Enable HP Jet Admin if using HP Jet Admin. No other settings are required for HP JetAdmin. - Page 47 Enter the System Location. Verify the Read Community Name and change if necessary. Verify the Read/Write Community Name and change if necessary. Verify the Trap Community Name and change if necessary. Enter the Trap IP address, if it does not automatically appear. Enter the Trap IP port, if it does not automatically appear.
-
Page 48: Changing Wireless Settings
Changing Wireless Settings Only configure the settings required for your network/printer. Click the Wireless tab to configure the wireless network (802.11b/g) settings. Set the Mode: Ad-Hoc or infrastructure. In Ad-Hoc mode, you do not need an access point. Infrastructure mode requires an access point to communicate. - Page 49 Set the Regulatory Domain, which is the country of use. Set the AP Density: Low, Medium, or High. If the communication quality (transmit rate) between devices on a network drops below a certain level, the devices scan for another access point in the area offering better transmit rates, etc.
- Page 50 Using WEP If you select 64 BIT Encryption or 128 BIT Encryption, you need to enter the WEP keys. Determine which Key Selection to use: 1-4. Set the WEP Key values. You must use the same key values for devices to communicate with each other on the network. As you enter the values for the WEP keys, you can see the Note: characters.
- Page 51 Configuring Certificates For TLS and TTLS authentication, you may need to configure the Authentication Server Certificate. Select Configure Authentication Server Certificate (on the Wireless tab). Click Browse to search for the appropriate Root Certificate. Click Submit. You see the Root (Public) Key in the Certificate Root Key window.
-
Page 52: Setting Alerts
Click Submit at the bottom of the screen when finished. Click Back to return to the previous screen. Click the Protocols tab. Click Save Re-init Network (on the Protocols tab) before any changes take effect. Even though you submitted your changes on the previous screen, they do not take effect until you click Save Re- init Network. -
Page 53: Receiving An Alert
Enter the Mail Domain Name. Select the message format: Plain Text or HTML. Specify up to three users who will receive alert messages. Select the alerts for each user. ALL is a toggle switch to select or deselect all the boxes for each user. The “Printer Offline” alert only appears if the operator presses Escape/Clear on the printer, not Enter/Pause. -
Page 54: Reading The Virtual Panel
R e a d i n g t h e V i r t u a l P a n e l The virtual panel operates just like the printer’s control panel. You can use the virtual panel to clear errors, feed labels, and more. From the side Menu Bar, click Virtual Panel Display. -
Page 55: Using Custom Commands
U s i n g C u s t o m C o m m a n d s The Custom Commands menu allows you to enter MPCL format and batch data to print a label or enter Telnet console commands. From the side Menu Bar, click Custom Command. -
Page 56: Changing The Password
Click Submit. The MPCL format is sent or results from a Telnet console command appear. C h a n g i n g t h e P a s s w o r d You can change the access password for MonarchNet2. This should only be done by your System Administrator. - Page 57 Retype the New Password to confirm it. Press Submit when finished. If you change the password and attempt to log in using the old password, this message appears. It also appears for various error conditions when configuring the printer. Click LOGIN to login using the correct password and correct the problem.
-
Page 58: Updating Firmware
U p d a t i n g F i r m w a r e You can update the printer’s firmware. Make sure the Resident (Boot Loader) is version 2.3 or greater. From the side Menu Bar, click Firmware Update. Make sure your printer is connected and ready to receive data. - Page 59 B a s i c S e c u r i t y C o n f i g u r a t i o n s There are two main decisions to be made when choosing wireless security: encryption method and authentication protocol. The encryption method determines the algorithm used to encrypt the message.
- Page 60 Authentication Protocol Type RADIUS User ID & Certificate Private Key Server Passw ord Info File Protocol Enterprise LEAP PEAP* PAP or Optional* Required* Required MSCHAPv2 TTLS EAP- PAC* FAST Personal *PEAP This is only for server-side certificates. *Optional Leaving the Certificate Root Key and the Certificate CN (common) names blank, no validation of the host certificate is performed.
-
Page 61: Console Commands
C O N S O L E C O M M A N D S Use this chapter to configure the Print Server using Telnet. You must have a basic understanding of the Telnet application. For initial setup, do not use Telnet, use auto-discover mode. Once you have the IP address, you can use Telnet or a Web browser. -
Page 62: Conventions
C o n v e n t i o n s This section uses the following conventions: Type the capitalized letters of each keyword instead KEYwords of the whole keyword. Some keywords require more capitalized letters than others. For example, KEYVAL RAdio Mutually-exclusive options are included within square... - Page 63 The password is case-sensitive. Depending on your printer’s firmware version, you may not be prompted for a username. The Telnet session times out after 10 minutes of inactivity. Note: To view the current wireless (or network) settings, type sh en (show wireless settings) and press Enter: WiFi Mode = INFRASTRUCTURE WiFi SSID: ABC123...
-
Page 64: Help Commands
Type INIT and press Enter to save the settings and initialize the unit. 10. Type EXIT to exit Telnet. See the following sections for a list of the most frequently used commands. H e l p C o m m a n d s For help at any time, type “Help”... - Page 65 Syntax: Help set ip IP LPD/TCP Parameters ADdress aa.bb.cc.dd IP node address [EN/DIS] IP set via ARP BAnner [EN/DIS] LPD banner printing CHKSUM [EN/DIS] IP receive checksum BOot Number of DHCP/BOOTP tries ENable/DISable Enable or Disable IP Processing FTIme [EN/DIS] Fast timeout [EN/DIS] FTP protocol...
-
Page 66: General Commands
G e n e r a l C o m m a n d s From the list of commands, the brackets - [] indicate to pick one of the options listed, the items inside curly braces - {} are optional and do not need to be specified. - Page 67 HElp Displays the list of available commands. Sets a specified parameter. SHow Displays current settings. INIT Saves settings and initializes unit. SAVE Saves configuration settings. SET DEFAULT Sets print server to factory defaults. SET LOAd [EN/DIS] Enables or disables firmware reload after exit. SET LOAd HOst <name>...
- Page 68 SET PROtect <password> Sets the update password. SET SERVEr NAme <name> Sets server node name. SET SERVIce <servicename> <protocol> [EN/DIS] Enables or disables specified protocol on specified service. SET SERVIce <servicename> BOT nn Sets service BOT string to nn. SET SERVIce <servicename> EOT nn Sets service EOT string to nn.
- Page 69 SHow FREE Shows amount of available memory. SHow LOAd Shows the print server’s firmware update parameters. SHow POP3 Shows POP3 parameters SHow PORt Shows port parameters. SHow PORt <name> STA Shows the current port status. SHow PRN DISplay Shows the text currently on the LCD display. SHow PRN CFG Displays the printer configuration as an NCL file.
- Page 70 SHow PRN KEYpad Shows the current status of the keypad lock. SET PRN KEYpad [LOck/UNlock] Locks or unlocks the printer’s keypad. SHow PRN LOG Displays the NCL log file. SET PRN RESET Rests the printer (Telnet and remote shell only). SHow PRN STAtus Shows the printer’s current status (decoded ENQ status bytes).
-
Page 71: Setup Commands
UNPROTect Allows the user to enter the update password (if one has been defined). Once the update password is entered correctly, SET commands can be used to modify the configuration until the console session is closed with EXIT. UPTIME Shows how long the printer has been on in format hh:mm:ss up N day(s), hh:mm:ss. - Page 72 SHow PRN BATchoptions {CLearfields/ NUmberofparts/ CUTOption/ CUTMultiple/ CUTLTicketprompt/ CUTAfterbatchprompt/ NOCutbeforeprompt/ CUTLStripprompt/ PRintmultiple/ QUantity} Shows the specified batchoptions parameter’s current setting. If no parameter is specified, it shows the current settings of all parameters in the batchoptions category. SET PRN COMmunication [BAudrate/ WOrdlength/ STopbits/ PArity/ FLowcontrol/ PPort/ PMode] value Sets the specified communication parameter to the specified value.
- Page 73 SHow PRN INFo {MOdel/ SErial/ FIrmversion/ BOotversion/ COntrastpot/ PIcversion/ KNifeversion/ RFidversion/ NEtworkversion/ TOtals} Shows the specified info parameter. If no parameter is specified, it shows all parameters in the info category. SET PRN MEMoryconfig [DOwnloadablefonts/ FORmat/ IMage/ REceive/ TRansmit/ VEctorfonts] value Sets the specified buffer’s size the specified value.
- Page 74 SHow PRN STOrage FLash Shows the amount of unused flash memory. SHow PRN STOrage FORmats {format # or ALl} Shows headers for individual or all formats. Note that ‘0’ is shorthand for ‘ALl’. SHow PRN STOrage FONts Shows headers for all fonts. CLear PRN STOrage FLash Formats flash memory (user area only).
- Page 75 SHow PRN SUPply SYncsupply Resynchronizes the supply. SET PRN SYStem [POwerupmode/ LAnguage/ BAtchseparators/SLashedzero/SYmbolset] value Sets the specified system parameter to the specified value. SHow PRN SYStem {POwerupmode/ LAnguage/ BAtchseparators/SLashedzero/SYmbolset} Shows the specified system parameter’s current setting. If no parameter is specified, it shows the current settings of all parameters in the system category.
-
Page 76: Rfid Commands
R F I D C o m m a n d s SET PRN RFId [WRiteattempts/ PRotocol/ SIgnal/ RPower/ WPower] value Sets the specified RFID parameter to the specified value. SHow PRN RFId {MOduletype/ VErsion/ WRiteattempts/ PRotocol/ SIgnal/ RPower/ WPower/ REgion/ FRequency/ SUmmary} Shows the specified RFID parameter’s current setting. - Page 77 SET EN CERTKEY <keyvalue> Sets the EAP root key value. SET EN CHannel nn Sets 802.11b/g wireless channel. SET EN ENC [DISable/64/128/WPA/WPA2/WPA2-WPA/ Dynamic WEP] Sets the encryption mode. See Chapter 3, “Using the Web Interface” for more information. SET EN ID <userID> Sets the authentication user ID.
- Page 78 SET EN REGDOMain <countrycode> Sets the region of operation for the print server using the following table. The list of supported countries varies based on the radio type (802.11b or 802.11b/g). When running in Ad-hoc mode or when IROAM is disabled, you need to set the radio for the region of operation.
- Page 79 Country Description Country Description Code Code DENMARK PUERTO RICO DOMINICAN REPUBLIC QATAR ECUADOR ROMANIA EGYPT RUSSIAN FEDERATION EL SALVADOR SAUDI ARABIA ESTONIA SINGAPORE FINLAND SLOVAKIA FRANCE SLOVENIA GEORGIA SOUTH AFRICA GERMANY SPAIN GREECE SRI LANKA GUATEMALA SWEDEN HONDURAS SWITZERLAND HONG KONG SYRIAN ARAB REPUBLIC HUNGARY TAIWAN...
-
Page 80: Tcp/Ip Commands
SET EN SPeed <1/2/5.5/6/9/11/12/18/24/36/48/54> Sets 802.11b/g wireless speed in megabits per second (Mpbs). SET EN SSID “<ssid>” Sets 802.11b/g wireless SSID. Use quotes if there is a space in SSID. This is case sensitive. SH EN STATS Shows the network I/O statistics. SET EN WEP [DIS/64/128] Sets wired equivalent privacy encryption level to disabled, 64-bit, or 128-bit. - Page 81 SET IP BANNER [EN/DIS] Sets printing of LPD job banners. SET IP BOot n Sets number of retries (n) for DHCP, BOOTP, RARP SET IP CHKSUM [EN/DIS] Enables or disables IP receive checksum. SET IP FTime [EN/DIS] Enables or disables fast timeout. SET IP FTP [EN/DIS] Selects whether to use the FTP protocol.
- Page 82 SET IP RANGE [EN/DIS/ALL] Sets the valid range of IP addresses. SET IP REtry [EN/DIS] Enables or disables LPD retry continuation SET IP ROuter aa.bb.cc.dd Sets default Router/Gateway address (or access point). SET IP SUBnet aa.bb.cc.dd Sets default subnet mask. SET SERVIce <servicename>...
-
Page 83: Snmp Commands
S N M P C o m m a n d s CLear SNMP CONtact <string> Removes SNMP SysContact. CLear SNMP LOCation <string> Removes SNMP SysLocation. SET SNMP GETCOMM <string> Gets SNMP community. SET SNMP SETCOMM1 <string> or SET SNMP SETCOMM2 <string> Sets SNMP community 1 or community 2 name. -
Page 84: Using The Network Packet
U s i n g t h e N e t w o r k P a c k e t Use the Network Packet to send console commands directly to the network card via the printer’s serial port. If the network card does not appear to be communicating with the printer, you can use the Network Packet to change the SSID, IP address, etc. -
Page 85: Using The Smart Relay System
U S I N G T H E S M A R T R E L A Y S Y S T E M The Smart Relay System consists of two printers (primary and partner) connected with a serial cable. Based on the type of data sent, the batch prints to the appropriate printer. -
Page 86: Initial Smart Relay Setup Procedures
I n i t i a l S m a r t R e l a y S e t u p P r o c e d u r e s Follow these steps as listed or errors may occur. Connect the printers. -
Page 87: About The Partner Printer
data transferred to the partner printer and requires less processing by the primary printer. All formats, graphics, fonts, or check digits used with the Smart Relay system must be sent to the primary printer. See “Connecting the Printers” and “Configuring the Partner Printer” for more information. The primary printer does not forward any of the following to the partner printer: ♦... -
Page 88: Connecting The Printers
The partner printer must be configured to specific communication settings. See “Configuring the Partner Printer” for more information. Formats, fonts, graphics, and batches are limited to the amount of available memory in the partner printer. If you send a batch that does not print, check the available memory in the partner printer. -
Page 89: Configuring The Partner Printer
C o n f i g u r i n g t h e P a r t n e r P r i n t e r The partner printer must be configured to 115200 Baud, No parity, 8-bit word length, 1 stop bit, and XON/XOFF flow control. Select Setup, Port Settings, Serial Comm from the partner printer’s Main Menu. - Page 90 SET PRN RELay FILter [OFF/NONE/RFID/NONRFID] Sets the Smart Relay Filter to Does not forward any data - primary printer prints all batches. NONE Forwards ALL data to primary AND partner printer – batches print on both the primary and partner printers. RFID Forwards RFID batches to the partner printer.
-
Page 91: About The Smart Relay Counter
Example SET PRN REL COUNT 1 Sets the Smart Relay counter (collation) to one. For more information about the counter, see “About the Smart Relay Counter.” Example SET PRN REL POS 10 5 Sets the Smart Relay counter (collation) field position on the label to 10 (for the row) and 5 (for the column). - Page 92 To stop printing the collation number on formats, use this command: SET PRN REL COUNT NONE. ♦ The counter field appears in Bold, Reversed type - design formats with the counter field’s height and width in mind, so data is not overwritten.
-
Page 93: Troubleshooting
T R O U B L E S H O O T I N G This chapter contains information about printing a test label and correcting some problems that may occur. P r i n t i n g a T e s t L a b e l If you have difficulty communicating with the print server or printer: Verify that the printer is operating properly, is online, and supplies are loaded correctly. - Page 94 Use this table to solve some common printer/network problems. Problem Action Printer does not appear The value for each segment must be to save IP, subnet, or less than 255 in these addresses. gateway address. Printer does not If you have reset network or wireless communicate with settings, allow time for the printer to network card or access...
- Page 95 Use this table to solve some common MonarchNet2 Web browser problems. Problem Action Verifier does not The optional verifier must be enabled appear as an and properly connected. For more installed/enabled option information, see your verifier’s through your Web Operating Instructions. browser.
-
Page 96: General Troubleshooting Information
G e n e r a l T r o u b l e s h o o t i n g I n f o r m a t i o n Use the following information if your print server is not operating properly. - Page 97 Use four-inch supply. If you are using supply that is shorter than four inches long, temporarily change your supply type to “continuous” to print the entire test label. After printing the test label, change your supply type to your previous setting. Once you see “Print Mode Ready”...
- Page 98 The password is case-sensitive. Depending on your printer’s firmware version, you may not be prompted for a user name. Once here, you have verified operation to the print server. Ping the printer. Pinging the printer tells you if it is "seen" on the network. If you cannot ping the printer, turn the printer off and then on.
-
Page 99: Troubleshooting Wireless Configuration Problems
T r o u b l e s h o o t i n g W i r e l e s s C o n f i g u r a t i o n P r o b l e m s Your computer’s wireless adapter and/or access point should be configured to match your print server. - Page 100 6-8 MonarchNet2 Operating Instructions...
-
Page 101: Specifications
S P E C I F I C A T I O N S 802.3 or optional 802.11b/g Link Layer: TCP/IP Protocols: Passthru BOOTP DHCP RARP LPD/LPR Telnet RSH or REMSH (remote shell) SNMP NetWare HP Jet Admin 8 0 2 . 3 S p e c i f i c a t i o n s 10 Mbps or 100 Mbps Communication Rate:... -
Page 102: Options
O p t i o n s Wireless 802.11b/g communications are available. However, check with International Sales for an approved list of countries or regions where these devices can be used. A-2 MonarchNet2 Operating Instructions... -
Page 103: Glossary
G L O S S A R Y The full path of a file, including the computer system and Absolute Pathname any directories or subdirectories. For example, c:\program files\monarch softw are\mpcl toolbox\9855.phu An interface between a wireless network and a wired Access Point network. - Page 104 You can select which channel your network devices use to Channel or communicate. All devices must be on the same channel to RF Channel communicate in Ad-Hoc mode. Other radio devices such as Bluetooth® wireless devices, microwave ovens, or 2.4-GHz cordless phones may operate/interfere if they are on the same channel as your network.
- Page 105 A printer protocol that uses TCP/IP to establish connections LPD/LPR between printers on a network. Also known as Line Printer Daemon/Line Printer Remote. A hardware address (6-byte) that uniquely identifies each node MAC Address or of a network. The MAC address is set during manufacturing Media Access and does not change.
- Page 106 Authentication mode of WPA used in SOHO environments. The key value (or pass-phrase) is used for network (Pre-Shared authentication only (not data encryption). It does not use a Key) RADIUS server like the other modes, but uses a shared key to provide the initial authentication with the access point or host.
- Page 107 One of the available boot methods. Use static if your network Static uses fixed configuration. The IP address remains the same Method every time the device connects to the network. A portion of a network that shares a common address Subnet component.
- Page 108 A security protocol for wireless local area networks. WEP was WEP or designed to provide the same level of security as that of a Wired wired network, which is inherently more secure than a wireless Equivalent network because wired networks are easily protected against Privacy unauthorized access.
-
Page 109: Index
I N D E X configuration label ..... 1-9, 2-17 console commands .... 4-1 address Gateway ....2-2, 2-6 IP ......2-2, 2-4 MAC ......2-2 DHCP ....... 2-7 Subnet mask ....2-5 alerts network ....3-19, 3-21 EAP-FAST AP density ...... 2-12 authentication.... - Page 110 master RARP ........2-7 printer ......5-3 requirements mode system ......1-2 encryption .... 3-16, 3-27 reset wireless ....... 2-11 network ......3-9 network setting alerts ....3-19, 3-21 password ..... 3-24 protocols ....... 1-3 settings reset ......3-9 printer ....3-5, 3-7, 3-8 SNMP ....
- Page 111 virtual display ....3-22 TCPIP commands ....4-20 settings ....3-11, 3-12 Telnet commands 4-1, 4-4, 4-6, 4-16 128 Bit ......3-17 test 64 Bit ......3-17 button ......1-7 settings ....3-17, 3-27 label ......1-9, 2-17 wireless TFTP server ....3-26 AP density....
- Page 112 iv MonarchNet2 Operating Instructions...
- Page 114 Visit www.monarch.com for sales, service, supplies, information, and telephone numbers for our locations throughout the world. TOLL FREE: 1-800-543-6650 (In the U.S.A.) 1-800-363-7525 (In Canada)