Avocent LONGVIEW 1000 Installer/User Manual
Hide thumbs
Also See for LONGVIEW 1000:
- Quick installation manual (8 pages) ,
- Features and benefits (2 pages)
Table of Contents
Advertisement
Advertisement
Table of Contents

Related Manuals for Avocent LONGVIEW 1000


Summary of Contents for Avocent LONGVIEW 1000
- Page 1 ® LONGVIEW 1000 Installer/User Guide...
- Page 2 USA Notification Warning: Changes or modifications to this unit not expressly approved by the party responsible for compliance could void the user’s authority to operate the equipment. Note: This equipment has been tested and found to comply with the limits for a Class A digital device, pursu- ant to Part 15 of the FCC Rules.
- Page 3 LongView 1000 Extender Installer/User Guide Avocent, the Avocent logo, The Power of Being There and LongView are registered trademarks of Avocent Corporation or its affiliates in the U.S. and other countries. All other marks are the property of their respective owners.
- Page 4 Instructions This symbol is intended to alert the user to the presence of important operating and maintenance (servicing) instructions in the literature accompanying the appliance. Dangerous Voltage This symbol is intended to alert the user to the presence of uninsulated dangerous voltage within the product’s enclosure that may be of sufficient magnitude to constitute a risk of electric shock to persons.
-
Page 5: Table Of Contents
Connecting power........................6 Chapter 3: Operations ..................... 7 About Your LongView 1000 Extender ....................7 Configuring keyboard layout and emulation for the receiver via the OSD........ 8 Configuring keyboard layout and emulation for the transmitter via the OSD ......8 Configuring your OSD hotkey sequence.................. - Page 6 LongView 1000 Installer/User Guide...
-
Page 7: Chapter 1: Product Overview
2-button mouse. • Video - The LongView 1000 extender supports VGA, SVGA, XGA and UXGA resolutions up to 75 Hz refresh rate. Both CRT and LCD monitors with standard 15-pin high density connectors are supported. -
Page 8: Safety Precautions
To avoid potentially fatal shock hazard and possible damage to equipment, please observe the following precautions: • Do not use a 2-wire extension cord in any Avocent product configuration. • Test AC outlets at the server and monitor for proper polarity and grounding. -
Page 9: Chapter 2: Installation
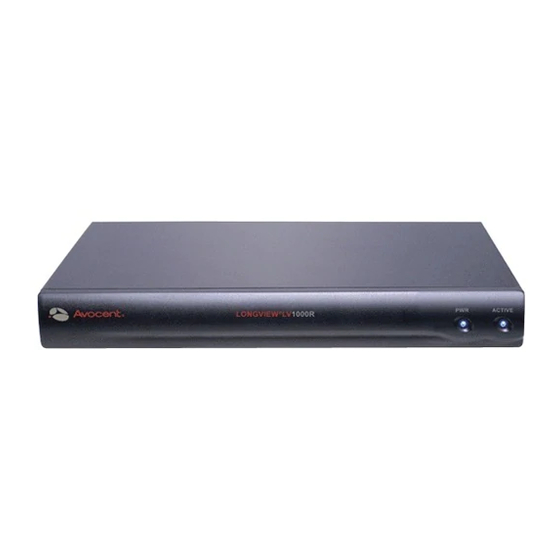
CHAPTER Installation Getting Started Before installing your LongView 1000 extender system, refer to the list below to ensure that you have all the items necessary for installation. Needed for the LongView 1000 extender system • LongView 1000R receiver (supplied) •... - Page 10 LongView 1000 Installer/User Guide To connect the LongView 1000R receiver: Select a convenient location for your LongView 1000R receiver. Plug your keyboard, monitor and mouse cables into the appropriate ports on the back of the LongView 1000R receiver. Insert one end of a UTP cable into the LINK port on the rear of the LongView 1000R receiver.
- Page 11 Table 2.1: Description of Figure 2.1 Number Description Number Description AMIQDM module Serial ports LongView 1000 External power supply receiver USB ports Local peripherals To connect the AMIQDM module: Turn off the remote server. Connect the AMIQDM module keyboard, monitor and mouse connectors to the appropriate ports on the back of the server.
-
Page 12: Connecting Power
The LongView 1000R receiver features an external power supply with a four-pin miniDIN connector. A DC port is located on the rear of the LongView 1000R receiver. NOTE: Use only an Avocent-supplied power supply. To connect power to the LongView 1000R receiver: Plug the external power supply’s four-pin miniDIN connector into the DC port on the... -
Page 13: Chapter 3: Operations
Operations About Your LongView 1000 Extender While the default settings on your LongView 1000 extender will work with most systems, you may choose to change settings to better fit your extender system. Internal settings such as keyboard layout, emulation and hotkey sequences can be configured via the On-Screen Display (OSD), while Flash upgrades are available via the bootloader function. -
Page 14: Configuring Keyboard Layout And Emulation For The Receiver Via The Osd
LongView 1000 Installer/User Guide Configuring keyboard layout and emulation for the receiver via the OSD To change your keyboard layout and/or emulation: Activate the OSD by pressing the hotkey sequence. If you are activating the OSD for the first time, any of the sequences in Table 3.1 will activate the display. Ensure the Config tab is selected. -
Page 15: Configuring Your Osd Hotkey Sequence
Chapter 3: Operations Select or de-select the Audio Out, Audio In or Serial radio buttons to enable or disable these functions and click Apply. Configuring your OSD hotkey sequence To change the hotkey sequence that activates your OSD: Activate the OSD by pressing the default or your currently configured hotkey sequence. Ensure the Config tab is selected. - Page 16 LongView 1000 Installer/User Guide Figure 3.2: Local System Information Figure 3.3: Remote System Information...
-
Page 17: Accessing The Command Line
Chapter 3: Operations Figure 3.4: No Device Connected Accessing the Command Line To access the Command Line on your LongView 1000 extender system, press Ctrl Shift together. The Command Line displays. Equalization tuning To adjust the video quality of the monitor connected to your extender, you may manually tune the equalization values that are applied during video compensation. -
Page 18: Deskew Tuning
LongView 1000 Installer/User Guide Select the color(s) you wish to adjust. You may adjust colors individually or as a group. To increase the offset value of the selected color(s) by increments of one, press the key or key. Plus -or-... -
Page 19: Upgrading Your Longview 1000R Receiver And Transmitter Via Bootloader
NOTE: If deskew tuning is not supported on your extender, you will not be able to access the DeSkew Tuning screen. Upgrading Your LongView 1000R Receiver and Transmitter via Bootloader The LongView 1000 extender system can be upgraded through the serial port. All terminal ® commands are accessed through a terminal or PC running HyperTerminal emulation software or equivalent. -
Page 20: Activating Bootloader
LongView 1000 Installer/User Guide Figure 3.7: Com1 Properties Activating bootloader To activate bootloader: Activate the OSD by pressing the hotkey sequence. Ensure the Config tab is selected. Click the Invoke checkbox in the bottom-right corner of the screen. Click the Call button. -
Page 21: Bootloader Features
Chapter 3: Operations Figure 3.9: Active Bootloader Menu Bootloader features You can select several bootloader options using the terminal menu keyboard. Resetting the LongView 1000R receiver from the terminal menu Once bootloader is active, you can exit the menu and reset the device by typing LongView 1000R receiver upgrade via XMODEM Option 1 allows you to program the bootloader or the application of the LongView 1000R receiver. - Page 22 LongView 1000 Installer/User Guide Figure 3.10: Boot or Application Upgrade of the LongView 1000R Receiver NOTE: You can also visit www.avocent.com to access upgrade files. Figure 3.11: OSD During XMODEM Update NOTE: Figure 3.9 will display during an XMODEM update via the serial console of the LongView 1000R receiver.
- Page 23 Chapter 3: Operations Transmitter boot and application upgrade via XMODEM Option 2 allows you to program the boot and application of the connected transmitter. The update file has to be sent via XMODEM from the terminal software after this option is chosen. Figure 3.12: Upgrade Transmitter Boot or Application Code The OSD screen in Figure 3.11 will appear when a connected transmitter is being updated.
- Page 24 LongView 1000 Installer/User Guide Transmitter FPGA upgrade via XMODEM Option 3 allows you to program the FPGA code of the connected transmitter. The update file has to be sent via XMODEM from the terminal software after this option is chosen. See Figure 3.12.
- Page 25 Chapter 3: Operations Re-request Pod The Re-request Pod feature allows an extender to attempt to regain access to a device if the user station has no keyboard or mouse connected. When access is re-established to the target audio and serial, access to the device is also re-established. NOTE: The term “pod”...
- Page 26 LongView 1000 Installer/User Guide...
-
Page 27: Appendices
APP ENDICE S Appendices Appendix A: Technical Specifications Table A.1: LongView 1000 Extender Product Specifications Extension Ports Number Connectors RJ-45 switch interconnect User Ports Number PS/2: 1; USB: 1 (with two connectors); Serial: 1; VGA video: 1 Type PS/2, USB and VGA video 6-pin miniDIN, PS/2 keyboard and mouse;... - Page 28 LongView 1000 Installer/User Guide Table A.1: LongView 1000 Extender Product Specifications (Continued) Standard: • 1920 x 1440 @ 60 Hz with 100 feet of UTP from target device to user • 1600 x 1200 up to 75 HZ with 200 feet of UTP from target device to user •...
-
Page 29: Appendix B: Technical Support
Appendix B: Technical Support Our Technical Support staff is ready to assist you with any installation or operating issues you encounter with your Avocent product. If an issue should develop, follow the steps below for the fastest possible service. To resolve an issue: Check the pertinent section of this manual to see if the issue can be resolved by following the procedures outlined. -
Page 30: Appendix C: Troubleshooting
No power status light on LongView 1000R receiver Verify that the power supply is plugged in correctly. Ensure that the power cable from the Avocent-supplied power supply is securely plugged into the LongView 1000R receiver. No video on monitor attached to LongView 1000R receiver Verify that the monitor attached to the LongView 1000R receiver has power. - Page 31 Appendices Table C.1: Troubleshooting the LongView 1000R Receiver (Continued) No audio from speakers attached to LongView 1000R receiver Ensure that the audio cable is securely plugged into the line out port of the server (should be color-coded green). Ensure that the speaker cable is securely plugged into the line out port of the LongView 1000R receiver.
- Page 32 LongView 1000 Installer/User Guide...
- Page 34 For Technical Support: www.avocent.com/support 590-550-501D...