Table of Contents
Advertisement
Quick Links
Advertisement
Table of Contents

Related Manuals for Grundig Tharus 110 PW 110-9410 TOP


Summary of Contents for Grundig Tharus 110 PW 110-9410 TOP
- Page 1 COLOUR TELEVISION Tharus 110 PW 110-9410 TOP ENGLISH NEDERLANDS ESPAÑOL...
-
Page 2: Table Of Contents
CONTENTS ________________________________________________________________________ Set-up and safety Wall mounting Overview Controls on the plasma television Connections on the plasma television The remote control 10-11 Connection and preparation Connecting the antenna cable Connecting the external HiFi amplifier Connecting the power cord Inserting batteries in the remote control 12-14 Settings Setting the menu language... - Page 3 CONTENTS __________________________________________________________________________________ 23-24 Operation as a PC monitor Connecting a PC Operation with the PC 23-24 Settings for the PC Evaluating synchronisation signals 25-28 Using external devices Decoder or satellite receiver/set-top box 26-27 Video recorder or DVD player Camcorder 29-30 Special settings Tuning to new television channels Setting the television channels by entering the frequency...
-
Page 4: Set-Up And Safety
Have the inside of the set cleaned from time to time. Ask your specialist dealer. Do not open the device under any circumstances. No warranty claims are accepted for damage resulting from improper handling. Only use genuine GRUNDIG connection cables, accessories and replacement parts. Ensure that the mains cable is not damaged. - Page 5 SET-UP AND SAFETY _________________________________________________________________ This highly digitalised device offers optimum picture and sound quality. The essential requirements are a perfectly functioning antenna system and a high-quality antenna cable. Therefore only use the antenna cable provided or one of the same quality. For this reason, avoid cable loops near the device.
-
Page 6: Wall Mounting
SET-UP AND SAFETY _________________________________________________________________ Wall mounting The plasma screen should only be fixed to vertical walls. The wall surface must be strong enough to bear the weight. For wooden or cavity walls, use suitable wall plugs and screws. Use fastening equipment suitable for a weight of 50 kg. Mark the holes on the wall. -
Page 7: Overview
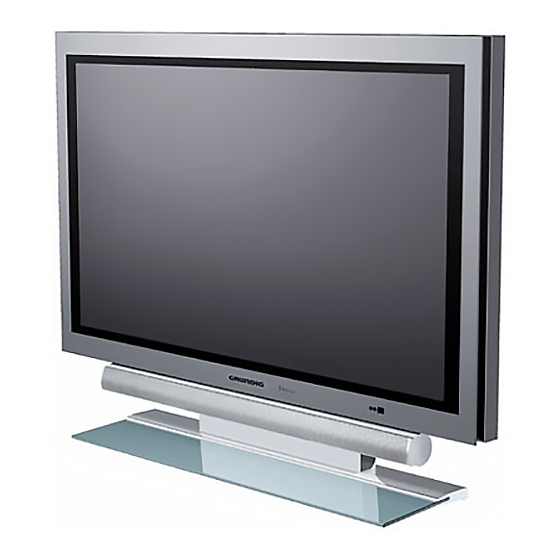
OVERVIEW ______________________________________________________________________ Controls on the plasma television Power switch h a r u s Standby display and receiver for remote control commands Power switch, switches the device to and from standby mode Note: The illustrations in the operating manual all depict a stand, which is available as an accessory from your specialist dealer. - Page 8 RS 232 MINISTERO P.T. (D.M. 26.03.92) Input: ANTENNA (VIDEO) (S-VIDEO) EURO AV/SCART 2 115-230 V 50/60 Hz 3,6/1,8 A Made for Grundig in Germany 2133-0014-0725 LINE OUT AUDIO LINE IN VIDEO LINE IN THARUS 110 YUV/VIDEO YC (S-VIDEO) PW 110-9410 TOP Serial No.:...
-
Page 9: The Remote Control
Selects the topic in teletext mode Switches the remote control for operating the basic functions of the Mode Grundig satellite receiver (SAT), video recorder (VCR) und DVD player (DVD) Keep pressing »Mode« until »SAT«, »VCR« or »DVD« lights up. Then press the appropriate button. -
Page 10: Connection And Preparation
MINISTERO P.T. (D.M. 26.03.92) Input: ANTENNA (VIDEO) (S-VIDEO) 115-230 V 50/60 Hz 3,6/1,8 A EURO AV/SCART 2 Made for Grundig in Germany 2133-0014-0725 Connecting the antenna cable Connect the antenna cable to the »ANTENNA« socket. AUDIO LINE IN YUV/VIDEO YC (S-VIDEO) ANTENNA... -
Page 11: Inserting Batteries In The Remote Control
CONNECTION AND PREPARATION _______________________________________ Inserting batteries in the remote control Open the battery compartment by removing the lid. Insert the batteries (Micro type, for example LR 03 or AAA, 2x1.5 V). Observe the polarity (marked on the base of the battery compartment). Close the battery compartment. -
Page 12: Settings
SETTINGS ____________________________________________________________________________ Switch the device to standby by pressing the power switch »IO« on the left side of the device, and then switch it on by pressing »P+« or one of the numerical buttons on the remote control. Setting the menu language Press »i«... -
Page 13: Changing Preset Channels
SETTINGS ____________________________________________________________________________________ Changing preset channels You can delete channels that have been stored more than once during the auto- matic search. You can also store channels in a different preset position, change or enter the name of a channel. Deleting television channels Press »i«... -
Page 14: Picture Settings
SETTINGS ____________________________________________________________________________________ Picture settings Open the »Picture« menu by pressing » « (red). Contrast : Brightness : Select the function item by pressing »P+« or »P-«: Sharpness : – »Contrast« Color : Tint : – »Brightness« DNC : – »Sharpness« Photo CD : –... -
Page 15: Television Operation
TELEVISION OPERATION ___________________________________ Switching on Press the power switch »IO« on the left side of the device to switch it to standby mode. – The red LED lights up. Switch the television by pressing »P+« or one of the numerical buttons »1…... -
Page 16: Displaying Information About The Television Schedule
TELEVISION OPERATION _________________________________________________________ Displaying information about the television schedule Press »TV-G« to display information. Press »TV-G« to switch off the information. Displaying information about the channel position Press »?« to display the information. – The display disappears automatically after a short while. Freeze-frame If you wish to view a particular scene for longer, you can freeze the frame of the current programme. -
Page 17: Pip Mode
TELEVISION OPERATION _________________________________________________________ PIP mode PIP (picture in picture) allows you to watch an inset picture from a second picture source in addition to the current channel. DVD players, video recorders, satellite receivers or PCs can be used as picture sources, but they must be connected to the input jacks at the back of the device. -
Page 18: Changing The Picture Format
TELEVISION OPERATION _________________________________________________________ Changing the picture format Select the picture format with » «. The selected picture format, for example »16:9«, appears on the screen. – You can choose between the following picture formats: “Panorama” format This setting is suited to films with a large width/height ratio. During programmes in 4:3 format the picture is stretched horizontally if the »Panorama«... -
Page 19: Teletext Mode
TELETEXT MODE __________________________________________________________ TOP or FLOF text mode Press »TXT« to switch to teletext mode. Teletext pages can be selected directly with »1… 0«. The current programme overview (teletext page 333) can be called up with »TV-G«. To return to teletext page 100, press »i«. Note: At the bottom of the screen, you will see an information line consisting of a red, green and, depending on the station, yellow and blue text field. -
Page 20: Convenience Functions
CONVENIENCE FUNCTIONS __________________________ Entering the switch-off time This function allows you to enter a switch-off time for the television. After this Inputs / PIP time has elapsed, the television switches to standby mode. Picture Display Press »i« to open the main menu. Sound Set Up Select »Set Up«... -
Page 21: Displaying And Concealing The Logo
CONVENIENCE FUNCTIONS ___________________________________________________ Displaying and concealing the logo This function allows you to switch off the GRUNDIG logo, which is displayed after the television is switched on. Display Source Info : Language : English Press »i« to open the main menu. -
Page 22: Setting The Audio Output Signal Level
CONVENIENCE FUNCTIONS ___________________________________________________ Setting the audio output signal level This setting enables you to set the audio output signal for the »LINE OUT« sockets. Press »i« to open the main menu. Volume : Balance : Select »Sound« with »P+« or »P-« and confirm with » «. Equalizer : Classic Option :... -
Page 23: Operation As A Pc Monitor
MINISTERO P.T. (D.M. 26.03.92) ANTENNA (VIDEO) (S-VIDEO) EURO AV/SCART 2 115-230 V 50/60 Hz 3,6/1,8 A Made for Grundig in Germany 2133-0014-0725 Connect the »PC (RGB/DVI)« socket on the television set and the appropri- LINE OUT AUDIO LINE IN ate socket of the PC with the VGA cable provided (video signal). -
Page 24: Evaluating Synchronisation Signals
OPERATION AS A PC MONITOR ___________________________________________ Select »Main input settings« with »P+« or »P-« and confirm with » «. – The first four lines are information about the PC. Note: The other settings are explained in the following sections. H Freq : 48.5 kHz V Freq : 60.1 Hz... -
Page 25: Using External Devices
MINISTERO P.T. (D.M. 26.03.92) Input: ANTENNA (VIDEO) (S-VIDEO) 115-230 V 50/60 Hz 3,6/1,8 A EURO AV/SCART 2 Made for Grundig in Germany 2133-0014-0725 PAY-TV Connect the »EURO AV/SCART 1« or »EURO AV/SCART 2« socket on the television set and the appropriate socket on the decoder, satellite receiver or set top-box using a EURO-AV cable. -
Page 26: Video Recorder Or Dvd Player
ANTENNA RS 232 MINISTERO P.T. (D.M. 26.03.92) (VIDEO) (S-VIDEO) EURO AV/SCART 2 115-230 V 50/60 Hz 3,6/1,8 A Made for Grundig in Germany 2133-0014-0725 AUDIO OUT DIGITAL AUDIO OUT VIDEO OUT EURO AV 110-240 V ~ 50/60Hz 20 W S VIDEO OUT Connect the socket of the television »EURO AV/SCART... - Page 27 USING EXTERNAL DEVICES _____________________________________________________ Setting a preset station for a video recorder or DVD player This setting automatically selects the preset station for the video recorder or DVD player when the device is switched on. Press »i« to open the main menu. Main input : SCART 2 Main input settings...
-
Page 28: Camcorder
(S-VIDEO) 115-230 V 50/60 Hz 3,6/1,8 A EURO AV/SCART 2 Made for Grundig in Germany 2133-0014-0725 Connect the VIDEO LINE IN »VIDEO« socket of the television and the corre- sponding socket of the camcorder (VHS/Video 8) using cinch cables (video... -
Page 29: Special Settings
SPECIAL SETTINGS ____________________________________________________ Tuning to new television channels This setting is only required if a new television channel comes on air and you Inputs / PIP want to keep the order your channels are in, or if you receive channels with Picture different TV standards where you live. -
Page 30: Setting The Television Channels By Entering The Frequency
SPECIAL SETTINGS ____________________________________________________________________ Setting the television channels by entering the frequency Press »i« to open the main menu. Select »Inputs/PIP« with »P+« or »P-« and confirm with » «. Select »Main input« by pressing »P+« or »P-«, and then press » « or » « to select »TUNER«. -
Page 31: Information
INFORMATION _____________________________________________________________ Technical data Operating voltage: 210 – 250 V~, 50/60 Hz Power consumption: during operation 300 W, in standby approx. 5 W Music signal power: 2 x 30 W Sine wave power: 2 x 20 W Reception range: C01 ... C80, special channels S01 ... S41 Channel positions: 99 and 6 AV Screen diagonal/... -
Page 32: Rectifying Minor Problems
INFORMATION __________________________________________________________________________ Rectifying minor problems If the remedies below are not successful, please consult an authorised GRUNDIG dealer. Please bear in mind that malfunctions can also be caused by external devices such as video recorders or satellite receivers. Problem Possible cause Remedy No picture or sound. - Page 33 INFORMATION __________________________________________________________________________ Problem Possible cause Remedy Picture, but no sound. Volume set to minimum or Turn up or switch on the volume. loud speaker switched off. Volume control via audio Select sound output via cinch sockets activated loudspeaker. (if this option is available). Problem caused by station.
- Page 34 Grundig AG i. Ins. Beuthener Str. 41 D-90471 Nürnberg http://www.grundig.com • • •...