Table of Contents
Advertisement
Quick Links
Advertisement
Table of Contents

Related Manuals for Grundig GV 900 SV/1


Summary of Contents for Grundig GV 900 SV/1
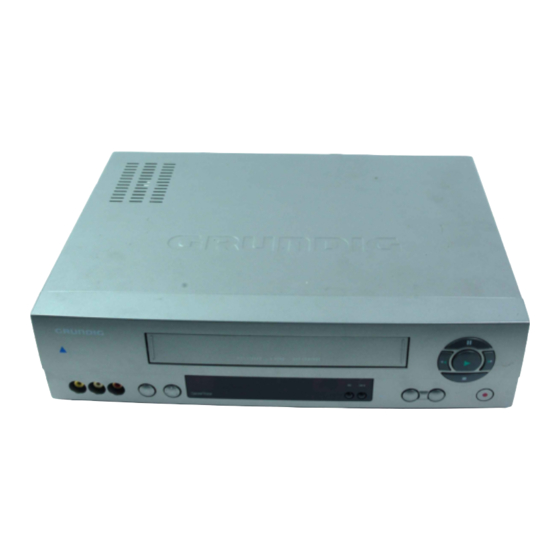
- Page 1 VIDEORECORDER GV 900 SV/1 DEUTSCH FRANÇAIS ENGLISH NEDERLANDS ITALIANO...
-
Page 2: Table Of Contents
CONTENTS ________________________________________________________________________ Videorecorder GV 900 SV/1 Special features of your video recorder Contents of delivery Installation and Safety At a Glance Front side of the video recorder Rear side of the video recorder The remote control Connecting and Preparation Connecting the aerial, TV set, satellite receiver, and mains cable... - Page 3 Setting the time and date manually Special Functions Selecting the »MODE« menu On-screen display on/off Continous playback Selecting the video recorder’s control address Child lock Remote Control of TV Sets Fixing Faults Yourself Technical Data Help in the Case of a Defect Grundig After-Sales Points...
-
Page 4: Video Recorder Gv 900 Sv/1
Really easy programming of recordings. Select the desired programme from your TV guide, enter the ShowView number indicated there, ready. SAT video control Socket for the timer control of a Grundig satellite receiver connected. Contents of delivery Video recorder GV 900 SV/1 Remote control 2 batteries 1.5 V–, Mignon type... -
Page 5: Installation And Safety
INSTALLATION AND SAFETY _________________________ In order that you may enjoy this high-quality and comfortable video recorder for a long time it is very important that you observe the following points when instal- ling the recorder. This video recorder is intended for the reception, recording and reproduction of TV picture and sound signals. -
Page 6: At A Glance
AT A GLANCE ________________________________________________________________ Front side of the video recorder INFO Switches the video recorder off. Ejects the cassette. › › OK Calls up data, confirms and saves settings. › › INFO Displays the menu, switches back to the TV picture. Selects programmes downwards. -
Page 7: Rear Side Of The Video Recorder
AT A GLANCE _____________________________________________________________________________ Rear side of the video recorder LINE 2 ( ) IN/DECODER ANTENNA IN CANAL PLUS / L2 ( ENTREE ANTENNE LINE 1 ( ) IN/OUT RF OUT SON / VIDEO ( L1/ SORTIE ANTENNE Ü Ü Mains cable to mains supply socket. -
Page 8: The Remote Control
AT A GLANCE _____________________________________________________________________________ The remote control On this page you will find a brief description of the important remote control functions. Refer to the corresponding chapters of this manual for more infor- mation on operation. Direct the remote control at the video recorder. Switches the video recorder off (standby). -
Page 9: Connecting And Preparation
CONNECTING AND PREPARATION _______ INPUT-SAT VIDEO CONTROL 220-240 V~ EURO AV TV EURO AV DECODER EURO AV VCR 50-60 Hz ) IN/DECODER LINE 2( ANTENNA IN CANAL PLUS / L2( ENTREE ANTENNE LINE 1( ) IN/OUT RF OUT SON / VIDEO(L1/ SORTIE ANTENNE Notes: If the TV set is equipped with the Megalogic function, the video recorder and... - Page 10 CONNECTING AND PREPARATION _______________________________________ If a satellite receiver equipped with a SAT control socket is connected to the LINE 2( II ) IN/DECODER video recorder: II ) ANTENNA IN CANAL PLUS / L2( ENTREE ANTENNE LINE 1( I ) IN/OUT RF OUT connect the »LINE 2 (II)
-
Page 11: Switching The Video Recorder On And Off (Energy-Saver Mode)
CONNECTING AND PREPARATION _______________________________________ Switching the video recorder on and off (energy-saver mode) Switch the video recorder on with the » « button. Switch the video recorder to standby with the » « button. – The video recorder is now in standby and the time is visible in the display. -
Page 12: Settings
SETTINGS ____________________________________________________________________________ Adjusting the TV set to the video recorder This adjustment is not necessary if the video recorder and the TV set are con- nected with a EURO-AV cable. Preparation Switch the TV set on. Select the »AV« programme position for video playback via the aerial socket. Consult also the user manual of your TV set. -
Page 13: Channel Programming With The Automatic Tuning System Ats Euro Plus
SETTINGS ____________________________________________________________________________________ Channel programming with the automatic tuning system ATS euro plus The recorder has a built-in receiver. It can therefore receive and record television programmes independently of the TV set. For this, you must programme the TV channels on the video recorder. When carrying out this function, the time is automatically updated, provided a TV programme with teletext is received on programme position 1. - Page 14 SETTINGS ____________________________________________________________________________________ COUNTRY Select the country (place of installation) using the » « buttons. If the country you require is not given in the table, select the »OTHERS« line. Confirm your selection with the » « button. OTHERS A table asking you whether the aerial cable or the EURO-AV cable has been connected to the video recorder appears.
-
Page 15: Playback
PLAYBACK _________________________________________________________________________ Basic playback functions Preparation Switch the TV set on. Select the »AV« programme position for video playback on the TV set. Insert a recorded cassette with its window up into the cassette compartment until it is automatically pulled in. –... -
Page 16: Additional Playback Functions
PLAYBACK __________________________________________________________________________________ Additional playback functions Double playback speed Press the » « button during playback. Press the » « button once again to return to normal playback. Slow motion During freeze-frame (playback-pause): press the » I I I « button a longer time. –... -
Page 17: Index Search
PLAYBACK __________________________________________________________________________________ Playing back NTSC colour recordings When playing back NTSC recordings, the recorder switches automatically to this system. Note: During NTSC playback, no freeze-frame function is possible. Index search This search system enables the automatic return to the tape position » 0 : 0 0 : 0 0 «. Preparation Switch the TV set on. -
Page 18: Recording
RECORDING ____________________________________________________________________ The three recording options With your video recorder you may record programmes in three different ways: Right away, that is you select the desired programme on the video recorder then start recording. At a later time using the ShowView number. At a later time by entering the data of the desired TV programme if you do not know the ShowView numbers. -
Page 19: Instant Recording
RECORDING _______________________________________________________________________________ Instant recording Preparation Switch the TV set on. Select the »AV« programme position for video playback on the TV set. Insert a cassette with sufficient playing time and intact erase tab (cassette not erase-protected) into the cassette compartment until it is fully pulled in. –... -
Page 20: Assembling Recordings With Clean Joints
RECORDING _______________________________________________________________________________ Assembling recordings with clean joints With this function you will have no disturbing transitions between the individual recordings during playback. During playback, locate the end of the picture scene at which you wish to join the new recording. Press the »II «... -
Page 21: Programmed Recording - By Entering The Showview Number
RECORDING _______________________________________________________________________________ Programmed recording – by entering the ShowView number Notes: The time and date must correctly be set on the recorder. The ShowView numbers of the different broadcasts can be found in TV programme guides. If all programmed recording positions (TIMER positions) are occupied, you must clear one position, refer to “Clearing programmed recording data”... - Page 22 RECORDING _______________________________________________________________________________ Confirm the ShowView number with the »OK« button. – The current recording data appears on the picture screen. DATE PR START STOP 12 19:30 20:15 – – / – – – – – – : – – – –...
- Page 23 RECORDING _______________________________________________________________________________ Programmed recording – by entering the data for the desired TV programme Use this programmed recording mode if you do not know the ShowView numbers of the TV programmes. Notes: The time and date must correctly be set on the recorder. If all programmed recording positions (TIMER positions) are occupied, you must clear one position, refer to “Clearing programmed recording data”...
- Page 24 RECORDING _______________________________________________________________________________ Change the programme position number (PR) with » « or » «, or DATE PR START STOP enter it with two digits using the » 0 … 9 « buttons. 12 – – : – – – – : – – Confirm with the »OK«...
-
Page 25: Checking, Altering And Clearing Programmed Recording Data
RECORDING _______________________________________________________________________________ Checking, altering and clearing programmed recording data Preparation Switch the TV set on. Select the »AV« programme position for video playback on the TV set. Checking programmed recording data If recording standby is activated, press the » TIMER ON/OFF«... -
Page 26: Interrupting The Recording Standby Mode Of The Video Recorder
RECORDING _______________________________________________________________________________ Clearing recording data If recording standby is activated, press the » TIMER ON/OFF« button. DATE PR START STOP 02 12 19:30 20:15 02 14 21:00 22:00 Press the » « button. – – – – – – – – : – – – – : – – –... -
Page 27: Copying
COPYING ___________________________________________________________________________ … from a second video recorder or a DVD player 2 EXTERNAL / DEC. - AV 2 AUDIO 1 EXTERNAL / EURO - AV 1 II ) IN/DECODER LINE 2( ANTENNA IN CANAL PLUS / L2( II ) ENTREE ANTENNE LINE 1( I ) IN/OUT... -
Page 28: Operation With A Satellite Receiver
SATELLITE RECEIVER _________________________________________________ Operation with a satellite receiver not equipped with a SAT control socket PAY-TV INPUT-SAT 220-240 V~ EURO AV TV EURO AV DECODER EURO AV VCR 50-60 Hz LINE 2( ) IN/DECODER ANTENNA IN CANAL PLUS / L2( ENTREE ANTENNE ) IN/OUT LINE 1(... - Page 29 SATELLITE RECEIVER __________________________________________________________________ Connect the »ANTENNA IN« socket on the video recorder with the corre- sponding socket (TV) on the satellite receiver using a commercially available aerial cable. Connect the aerial cable supplied with the »RF OUT« socket of the video recorder and the aerial socket ( ) of the TV set.
-
Page 30: Operation With A Decoder
OPERATION WITH A DECODER __________________ Activating the decoder If you wish to receive encrypted TV programmes from private broadcasters with your video recorder, you will require an appropriate decoder. Consult a specialized dealer about the decoder. Connection Connect the »LINE2 (II) IN/DECODER«... -
Page 31: Special Settings
SPECIAL SETTINGS ____________________________________________________ Re-sorting TV channels manually Preparation Switch the TV set on. Select the »AV« programme position for video playback on the TV set. Setting Call up the main menu with the » INFO« button. – The »MENU« table appears on the picture screen. Select the »INSTALLATION «... -
Page 32: Changing Or Entering Station Names
SPECIAL SETTINGS ____________________________________________________________________ Select the » CANCEL« line using the » « or » « button then activate it with CHANNEL SORT the »OK« button. MOVE – On the picture screen appears the station table and in the background the CANCEL NAME picture of the selected programme position. -
Page 33: Channel Programming With The Manual Tuning System Or By Entering
SPECIAL SETTINGS ____________________________________________________________________ Channel programming with the manual tuning system or by entering the channel numbers manually If you do not know the channel/special channel numbers of the TV stations you wish to programme, or if the recorder could not find a TV station with the help of the automatic tuning system, you can use the manual search for programming. -
Page 34: Skipping Tv Channels
SPECIAL FUNCTIONS ________________________________________________________________ Skipping TV channels Use this function if you wish to skip one ore more programme positions when selecting these step by step with the » « or » « button. Preparation Switch the TV set on. Select the »AV« programme position for video playback on the TV set. Setting Call up the main menu with the »... -
Page 35: Setting The Time And Date
SETTING THE TIME AND DATE _____________________ The digital clock of the recorder continues running for approximately 1 hour even when the recorder is disconnected from the mains. However, the time is not visible in the display Automatic updating If a TV channel which has Teletext is set on programme position 1 of the recorder, the recorder takes over the time and updates automatically its internal clock. -
Page 36: Special Functions
SPECIAL FUNCTIONS _____________________________________________ The functions “On-screen display on/off“, “Continuous playback“, “Selecting the video recorder’s control address” and “Operation with a 16:9 format TV set” can be selected in the »MODE« menu. Selecting the »MODE« menu Switch the TV set on. Select the »AV«... -
Page 37: Selecting The Video Recorder's Control Address
SPECIAL FUNCTIONS ________________________________________________________________ Selecting the video recorder’s control address Your remote control can be used to operate different GRUNDIG video recorders independently of one another. Ask your specialized dealer which GRUNDIG video recorders are suited. To ensure that the two video recorders do not disturb each other, the control address of the GV 900 must be changed. -
Page 38: Remote Control Of Tv Sets
REMOTE CONTROL OF TV SETS _________________ With the video remote control you can also control GRUNDIG colour TV sets. The functions that can actually be operated depend, of course, on the technical features of your GRUNDIG TV set. Note: Point the remote control at the TV set. -
Page 39: Fixing Faults Yourself
FIXING FAULTS YOURSELF ______________________________ Not all picture and sound faults mean that there is a defect in your recorder. Disturbed reception can also be caused by a cable which is accidently pulled out, a defect in the TV set, or failure of the transmitter or the TV aerial system. Fault Cause Remedy... -
Page 40: Technical Data
TECHNICAL DATA _______________________________________________________ This video recorder complies with the VDE 0860 safety regulation and consequently also with the international safety specifications IEC 65 and CEE 1. This device complies with the requirements of the guidelines 89/336/ECC and 73/23/ECC. TV standard: CCIR, PAL B/G, 625 lines CCIR, MESEC B/G, 625 lines System:... -
Page 41: Help In The Case Of A Defect
HELP IN THE CASE OF A DEFECT _______________ GRUNDIG After Sales Points GRUNDIG GRUNDIG GRUNDIG Kundendienst Mitte Kundendienst Süd Kundendienst Nord Dudenstraße 45-53 Beuthener Straße 65 Kolumbusstraße 14 D-22113 Hamburg D-68167 Mannheim D-90471 Nürnberg +49/40-7 33 31-0 +49/6 21-33-76-70 +49/9 11-7 03-0... - Page 42 Grundig AG Kurgartenstraße 37 D-90762 Fürth http://www.grundig.de • • •...