Teac AG-H600NT Owner's Manual
Hide thumbs
Also See for AG-H600NT:
- Owner's manual (100 pages) ,
- Brochure & specs (14 pages) ,
- Schematic diagrams (11 pages)
Table of Contents
Advertisement
Quick Links
Download this manual
See also:
Owner's Manual
Advertisement
Table of Contents

Related Manuals for Teac AG-H600NT


Summary of Contents for Teac AG-H600NT
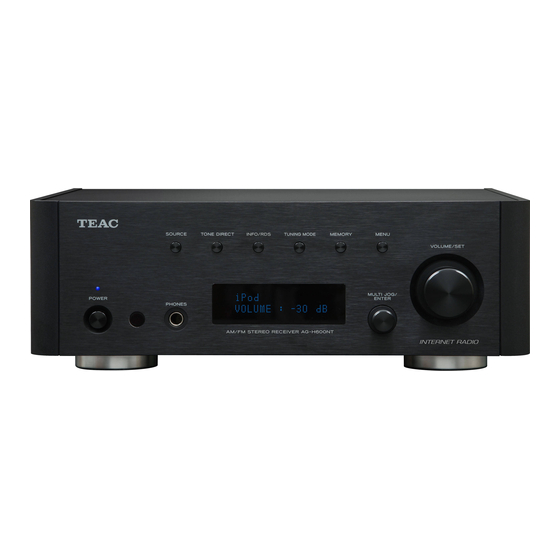
- Page 1 D010391208 TEAC Stereo Receiver OWNER'S MANUAL MODE D'EMPLOI MANUAL DEL USUARIO TEAC TUNING MODE SOURCE TONE DIRECT INFO MEMORY MENU VOLUME/SET MULTI,JOGI ENTER POWER PHONES © STEREO RECEIVER AG~HeOONT INTERNET RADIO Madefor ~iPod Enabled...
- Page 2 IMPORTANT SAFETY INSTRUCTIONS 1) Read these instructions. 2) Keep these instructions. 3) Heed all warnings. 4) Follow all instructions. CAUTION: TO REDUCE THE RISK OF ELECTRIC SHOCK, DO 5) Do not use this apparatus near water NOT REMOVE COVER (OR BACK) NO USER-SERVICEABLE 6) Clean only with dry cloth.
- Page 3 • IF YOU ARE EXPERIENCING PROBLEMS WITH THIS PRODUCT, For the LAN port, shielded cable must be used with this unit to CONTACT TEAC FOR A SERVICE REFERRAL. DO NOT USE THE ensure compliance with the Class B FCC limits.
-
Page 4: Table Of Contents
Contents Before Use Read this before attempting any operations. Thank you for choosing TEAC. Read this manual carefully to get the best performance from this unit. • When the unit is turned on, switching on the TV may cause lines to appear on the TV screen, depending on the condition of the Contents. -
Page 5: Connecting Antennas (Am/Fm)
Connecting Antennas (AM/FM) FM Indoor Antenna AM Indoor Loop Antenna The high-performance AM loop antenna provided with this unit is Connect the lead-type FM antenna to the FM 750 socket, extend sufficient for good reception in most areas. the lead and tune in your favourite station (page 16). To stand the loop antenna on a surface, fix the claw to the slot in Adjust the antenna in a suitable location like a window frame or the antenna base. -
Page 6: Connection
• Be sure to thoroughly read through the instruction manuals of the equipment you will connect and observe all instructions. TV monitor, etc. VIDEO S-VIDEO Cassette deck, Turntable CD recorder, etc. LINE LINE Connect one of these cables. 1=== AG-H600NT -· -0---------./ V~~' ~IID ~ITJ _ _ _ I OQC~JO '~DI18IGJI~~ ~PEDANCE 01ID SPEAKER (4-8tl) i''S'.'_._ _... - Page 7 LINE IN/OUT jacks iPod dock port These jacks transmit an analog 2-channel audio signal. Connect Connect the iPod dock (option) to this port. the components using RCA cables. • Make sure the label A side of the plug is up. •...
-
Page 8: Internet Connection
Internet Connection System Connection To enjoy the Internet Radio and the Music Player function, connect If you have TEAC compact disc player PD-H600, convenient system the unit to the broadband internet network. control functions are possible. • If you can use a wireless LAN in your installation site, connect the PD-H600 supplied wireless LAN antenna to the WLAN jack. -
Page 9: Speaker Connection
Speaker Connection Remote Control Unit AG-H600NT The provided Remote Control Unit allows the unit to be operated from a distance. When operating the remote control unit, point it towards the O~~0 1[)08 remote sensor on the front panel of the unit. -
Page 10: Parts Identification
Parts Identification SOURCE Remote Sensor POWER When using the remote control unit, point it towards the remote Press this switch to turn the unit on or off. The standby indicator lights orange when the unit is in the sensor. standby mode. When the unit is turned on, the indicator lights blue. - Page 11 Stop (-) Use this button to stop playback of PD-H600 or iPod. SHUFFLE Use this button change the random mode of PD-H600 or iPod. (I~~A/~V) Skip/Scroll Use these buttons to skip tracks/files during playback of the PD-H600. Use these buttons to scroll through menu items. (~III) Play/Pause Use this button to start or pause playback of the PD-H600 or...
-
Page 12: Basic Operation
Basic Operation L!~oooo Start playback of the component, or tune in a radio station on this unit. Please read the instructions of each component. Gradually turn up the volume to the required level by turning the VOLUME/SET knob. VOLUME/SET Press the power switch to turn the unit on. ,..--- standby indicator POWER Muting... -
Page 13: Adjusting Bass, Midrange, Treble, And Balance Of Speakers
Adjusting Bass, Midrange, Treble, and Balance of Speakers Each time you press the DIMMER button, the display changes TONE DIRECT as follows: NORMAL (Normal) (go@ DIMMER (Dimmed) LIGHT OFF (Display off) Select the item to adjust. • This setting is not memorized when the unit turns into standby. VOLUME/SET The next time the unit is turned on, the display is illuminated as normal. -
Page 14: Listening To Ipod
Listening to iPod Basic operations Select iPod by pressing the SOURCE button repeatedly. SOURCE To suspend playback temporarily (pause mode) (~/II). During playback, press the play/pause button Playback stops at the current position. 0 0 0 0 0 0 0 0 0 I©O (Q)o@ L - - . - Page 15 Shuffle playback Menu operations To go back to the previous menu 0 0 0 0 0 0 Press the MENU button. 0 0 0 SHUFFLE 0 0 0 ~G.a 0 0 0 0 0 0 0 0 0 0 0 0 0 0 0 0 0 0 &...
-
Page 16: Listening To Fm/Am
Listening to FM/AM Select the station you want to listen to. MULTI JOG/ ENTER Manual tuning mode Turn the MULTI JOG/ENTER knob (or press the TUNING/PRESET Select FM or AM by pressing the SOURCE button button on the remote control unit) until the station you repeatedly. -
Page 17: Preset Tuning
Preset Tuning (1) Within 4 seconds, press the MEMORY button. Manual Preset (FM/AM) You can store up to 30 FM and 30 AM stations. MEMORY The station is stored. • To store more stations, repeat steps • If you do not press the MEMORY button within 4 seconds after selecting the preset number, presetting will be cancelled. - Page 18 Preset Tuning (2) How to select preset stations (FM/AM) Checking preset stations (FM/AM) You can see the list of preset stations. Press the MEMORY SCAN button while listening to FM or AM. MEMORY SCAN ©o@ 0 0 0 0 0 0 0 <...
-
Page 19: Internet Radio Initial Setup
Internet Radio Initial Setup Enter the correct password for the network if required. Initial setup When you use the Internet radio function for the first time, the unit • See "How to input characters" below. starts an initial setup procedure to connect to the Internet. Now the unit starts to connect to the Internet. -
Page 20: Listening To Internet Radio
Listening to Internet Radio Select "Stations" for Internet Radio stations, or "Podcasts" Listening to an Internet Radio station/a Podcast Podcasts. Turn the MULTI JOG/ENTER knob to select the item, and then press the MULTI JOG/ENTER knob. MULTI JOG/ MULTI JOG/ ENTER ENTER ©t... - Page 21 If you have selected "Location", "Genre" or "Search To change the displayed information stations" in step search for the channel you want. INFO Turn the MULTI JOG/ENTER knob to select the item, and then press the MULTI JOG/ENTER knob. MULTI JOGI MULTI JOGI...
-
Page 22: Internet Radio Menu Operations
Internet Radio Menu Operations You can access channel lists or setup menus using the Internet Radio Items of the Internet Radio menu menu of this unit. Last listened To open the Internet Radio menu You can select the station/Podcast from the ones you listened to While listening to the Internet Radio, press the MENU button recently. -
Page 23: Network Configuration
Network Configuration When an update is available, "Press 'Info' to update to Software update X.X.X.XXX" appears. Press INFO/RDS button to start The software of the unit can be updated via the Internet connection, update. so that you are able to use the latest features of the unit. Regularly check for updates. -
Page 24: Radio Portal
Shared Folders Station list ..My Added Stations Once you set the files on your computer open to access, AG-H600NT can connect to the computer and play back the files. To use this Accessing the Radio portal function, you need to configure the sharing settings of your music folders so that other computers or AG-H600NT can read the files. - Page 25 Hdfl' with tnt Llbftty Media Sharing window opens. Activate "Share my media to:". The AG-H600NT appears in the device list as "Unknown Device". Select the "Unknown Device" and click "Allow". The AG-H600NT can now access to the shared library. ~."...
- Page 26 ••..,." .. "line acce... cick MedII sh.ring o On F.ew4 eorYigl.Iedlo bbH!tis tolder m a r J "'.ndowJ; Copy the music files you want to enjoy on AG-H600NT into Mhdhe'~~$onthenel.worit. V.ew \ll"ndPw$ Fi-ew4 sdtM" you' the "Public Music" folder in the "Public" folder.
- Page 27 Check the user account name and its password. Check the user account name and its password. To access the computer from AG-H600NT, you need the user To access the computer from AG-H600NT, you need the user account name and the password of the computer.
-
Page 28: Media Player Initial Setup
Music Player Initial Setup Select a network name you want to use. Initial setup Turn the MULTI JOG/ENTER knob to select the item, and then When you use the Music player function for the first time, the unit press the MULTI JOG/ENTER knob. starts an initial setup procedure to connect to the LAN. -
Page 29: Listening To Music Player (Shared Media)
If you have a problem connecting to the shared media • Check if "Allow" is selected for AG-H600NT ("Unknown Device") (page 25). JOHN: ~HOME-PC: • Check if your AG-H600NT is properly connected to the LAN. Computer name User account name... -
Page 30: Listening To Music Player (Shared Folders)
• Check sharing settings on your computer (pages 26 to 27). ~WORKGROUP • Check if your AG-H600NT is properly connected to the LAN. • Check the settings of user name and password on AG-H600NT. Domain or "Workgroup" name... -
Page 31: Troubleshooting
Cannot insert the iPod. yourself before you call your dealer or a TEAC service centre. .. Check if appropriate adapter is inserted to the dock. .. Remove dust or obstacles from the dock and the iPod. - Page 32 Cannot find a track. (Shared Media) Add the track to the media library of Windows Media Player. Set your AG-H600NT as a "Unknown Device" in the device list of Windows. (page 25) Select "Allow" for AG-H600NT ("Unknown Device") (page 25).
-
Page 33: Specifications
Specifications Accessories Amplifier Section Remote control unit (RC-118l) x 1 Power output. .75 W + 75 W (8 0, 1 kHz, JEITA) Batteries (AAA) x 2 90 W + 90 W (4 0, 1 kHz, JEITA) AM loop antenna x 1 Rated power output . - Page 34 TEAC CANADA LTD. 5939 Wallace Street, Mississauga, Ontario L4Z 1Z8, Canada Phone: (905) 890-8008 c.v. TEAC MEXICO, SA de Rio Churubusco 364, Colonia Del Carmen, Delegaci6n Coyoacim, CP 04100, Mexico DF, Mexico Phone: (5255)5010-6000 TEAC UK LIMITED Unit 19 & 20, The Courtyards, Hatters Lane, Watford, Hertfordshire, WD18 8TE, U.K. Phone: (0845) 130-2511...
- Page 35 • The outputs of the AUX OUT jacks cannot be adjusted I -; ---Ir~-~ using the volume knob on the AG-H600NT; to adjust the subwoofer volume after the subwoofer is connected, use the volume control on the subwoofer. Red plug...
- Page 36 TEAC CR·HSOONT / AG·H600NT Tips for how to set up IIMusic Player" after Internet Radio set up. io set up the MusIc Player feature, you will need a good understanding of home networks (wired and/or wireless), and also of PC based audio file shafillcl...
- Page 37 TEAC CR-H500NT / AG-H600NT FAQ for JlMusic Player" Can not understand how to input characters. thi's',m#Y'happ,en',:~hJ'ri'yoJir~n~tw9ffi1,iW'failed,during'the:,power on When a CR-H500NT/AG-H600NT restarts '~~i8g~~~~t~t,~{~~~'~,?~~~~~f~'~~;:~f~;~.~,,~t~~~g ~ ~e :~.-H after wireless LAN setup is completed, a Region setup menu (in preference setup) ~il'~jtill~~;' lMi~tj~~~'~::£;...
- Page 38 Whenever you require repair service for your TEAC/TASCAM equipment, please contact the TEACITASCAM Dis- Phone: 221 967 220 tributor in your country, or write directly to the Service Department of TEAC Corporation in Tokyo. Facsimile: 221 967222 Audiopolis S.R.O. (TAsCAM Products only)
- Page 39 Facsimile: 58-212-232-9674 Facsimile: 216 3277355 Radikal Ltd. 5ti. (TASCAM Products only) MIDDLE EAST lhlamur-Yildiz Cad. Kessaf Sok. Israel Alron Stereo Systems Ltd. (TEAC Hi-Fi Products Only) No:4/2 Besiktas 9 Hahoshlim St. P.O. 34353, Istanbul Herzlia B. 12009 Phone: 0212 259 7971...
- Page 40 I'appereil. carrier.) 4. Endommagement subi durant Ie transport du produit. (Les reclamations doivent etre 5. Damage resulting from the repair or attempted repair by anyone other than TEAC or an addressees au transporteur.) authorized TEAC. 5. Endommagement par suite de la reparation ou de la tentative de reparation par toute 6.
- Page 41 TEAC service station within the country in which the product was purchased. If you are repare par un agent de service TEAC agree pour Ie pays ou I'appareil a ete achete. Si vous ne pouvez pas trouver un agent de service TEAC dans votre localite, veuillez contacter TEAC...