Table of Contents
Advertisement
Advertisement
Chapters
Table of Contents

Related Manuals for Electrolux EDC 3150


Summary of Contents for Electrolux EDC 3150
- Page 1 136904090 -00- 26072007...
-
Page 2: Table Of Contents
Contents For the user For the installer Safety information Technical data Description of the appliance Installation 13-14 – Positioning Using your appliance – Electrical supply – Before you use the dryer for the first time – Wall mounting – Capacity Rukowodstwo po \kspluatacii –... -
Page 3: Safety Information
Safety information Before installing and first using the tumble dryer, read this instruction booklet carefully, including its hints and warnings. To avoid unnecessary mistakes and accidents, it is important to ensure that all people using the dryer are thoroughly familiar with its operation and safety features. Save these instructions and make sure they remain with the tumble dryer if it is moved or sold, so that everyone using it through its life can be properly informed on appliance use and safety. -
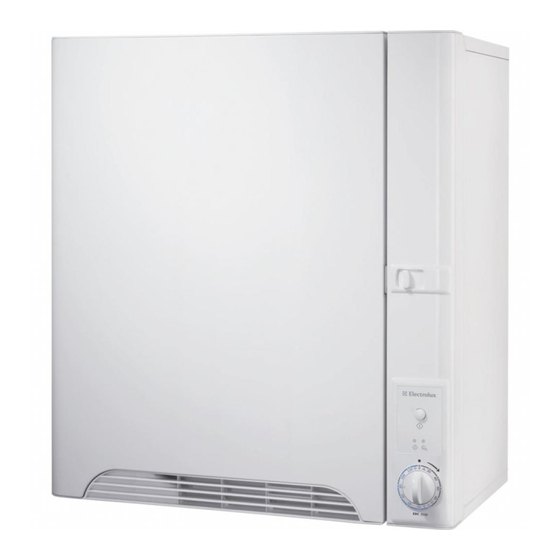
Page 4: Description Of The Appliance
Description of the appliance Door Latch (push the knob to the right to open) Avoid opening the door while a program is in progress. Space for programme chart (Self-adhesive label) Control panel Warm air discharge Air ducts - These should not be obstructed. Condenser This is built into the door and needs to be cleaned at regular intervals. -
Page 5: Description Of The Appliance
Description of the appliance 10. Rating plate 11. Drum 12. Electrical lead 13. Connector for drain hose There is a drain hose as an extra accessory for you who want and can connect the tumble dryer directly to a drain outlet. Fix the hose to the connector (13) after releasing the hose clip and removing the plug. -
Page 6: Using Your Appliance
Using your appliance Before using the dryer for the first time Capacity (dry items) Dampen some clean pieces of unwanted cloth and dry Cotton max. 3,4 kg them for about 15 minutes the very first time, to make Synthetics max. 1,5 kg sure that there is no dust or dirt in the dryer. -
Page 7: Program Chart
Program chart Which program should I use? Timed drying This program chart is designed to help you dry your laundry correctly. The program/timer knob has two different sections, each with its own drying temperature and time scale: is used to represent cotton. Here you can set the dryer for up to 120 minutes, because cotton and thick non-synthetic fabrics need longer to dry. -
Page 8: Maintenance
Maintenance The filters For your tumble dryer to function correctly, the filters need to be cleaned before or after every load dried. To clean them: 1. Open the door. 2. Open the coarse filter upwards (Fig. A). 3. Brush the fluff off the fluff filter, which is under the coarse filter (Fig. -
Page 9: Emptying The Water Tank
Maintenance Emptying the water tank If you have connected the tumble dryer directly to a waste pipe with the accessory hose, you can ignore this section. A warning light on the control panel will come on when it is time to empty the water tank. If it is operating when this happens, the dryer will stop automatically until the tank is emptied. -
Page 10: General Information
General washing and drying information Sorting Starched items Always sort loads for drying according to the type of fabric Laundry which has been starched can also be dried in a (check the care labels) and how much you want to dry them. tumble dryer. -
Page 11: If The Machine Is Not Working
If the machine is not working Before calling out an engineer, please check through the details below because some faults can be rectified easily without the need to call out an engineer. If service is called to resolve a problem listed below or to repair a fault caused by incorrect installation or mis-use, there is a risk that you will be responsible for the cost. -
Page 12: Service
Service Service and Spare Parts Before calling service, use the trouble shooting table «If the machine is not working» to try to attend to the fault yourself. Servicing and repairs must be carried out by a service company authorised by the supplier. Use only spare parts supplied by these. -
Page 13: Installation
Installation Positioning You can install this dryer in a number of different ways. We will show you the most suitable of these. Whichever way you install it, here are some points to bear in mind: Always ensure that the dryer is level for optimum functioning. -
Page 14: Wall Mounting
Installation Wall mounting Different wall materials require different types of mounting If you are installing the dryer between wall-mounted cup- hardware. Purchase mounting hardware suited to the walls boards, you should use the wall mounting console. If the in your home. Use a minimum of 3 suitable fasteners to adjacent cupboards are more than 370 mm deep, don’t attach your mounting console to the wall. -
Page 15: Rukowodstwo Po \Kspluatacii
Sodervanie Dlq polxzowatelq Dlq ustanow]ika Informaciq po bezopasnosti Tehni^eskie dannye Ob]aq informaciq Ustanowka 26-27 – Raspolovenie pribora Opisanie pribora 18-19 – Podsoedinenie k seti – Kreplenie k stene Instrukcii po ispolxzowani@ 20 – Pered perwym ispolxzowaniem – Wmestimostx – Primery wesa nekotoryh widow belxq Tablica programm –... -
Page 16: Informaciq Po Bezopasnosti
Informaciq po bezopasnosti Pered ustanowkoj i ispolxzowaniem su[ilxnogo barabana wnimatelxno pro^itajte instrukci@, w tom ^isle prawila i sowety po bezopasnosti. Znanie instrukcii pozwolit wam ispolxzowatx pribor maksimalxno \ffektiwno i prodlitx srok ego \kspluatacii. Kavdyj polxzowatelx su[ilxnogo barabana dolven t]atelxno oznakomitxsq s instrukciqmi po ispolxzowani@ i bezopasnosti. Hranite instrukci@ w nadevnom meste i prosledite za tem, ^toby instrukciq w slu^ae prodavi pribora pere[la wmeste s priborom k nowomu wladelxcu. -
Page 17: Ob]Aq Informaciq
Ob]aq informaciq po stirke i su[ke belxq Sortirowka Nakrahmalennye izdeliq Wsegda sortirujte belxe w zawisimosti ot materiala Nakrahmalennoe belxe movno su[itx w su[ilxnom barabane. (prowerqjte po qrlyku na izdelii) i wremeni, kotoroe wy Dlq polu^eniq bezupre^nogo rezulxtata wyberite revim, namereny ego su[itx. Belxe dolvno swobodno levatx w pri kotorom belxe ostaetsq ^utx wlavnym posle su[ki, barabane. -
Page 18: Opisanie Pribora
Opisanie pribora Dwernaq za]elka (^toby otkrytx dwercu podwinxte za]elku wprawo). Izbegajte otkrywatx dwerx wo wremq su[ki. Mesto dlq shemy programm (samokle@]aqsq \tiketka) Panelx uprawleniq Wypusk teplogo wozduha Wentilqcionnye otwerstiq - ne dolvny bytx zablokirowany. Kondensator Kondensator wstroen w dwercu, ego nuvno periodi^eski ^istitx. - Page 19 Opisanie pribora 10. Tabli^ka s tehni^eskimi dannymi 11. Baraban 12. |lektri^eskij kabelx 13. Otwod dlq podkl@^eniq sliwnogo [langa Esli wy hotite podkl@^itx su[ilxnyj baraban naprqmu@ k sliwu, wy movete dopolnitelxno priobresti sliwnoj [lang. Udalite so [langa zavim, wynxte zaglu[ku i podsoedinite [lang k otwodu (13).
-
Page 20: Instrukcii Po Ispolxzowani
Instrukcii po ispolxzowani@ Pered perwym ispolxzowaniem Wmestimostx (suhoe belxe) Hlopok Maks. 3,4 kg Pered perwym ispolxzowaniem pribora namo^ite wodoj kaku@-nibudx nenuvnu@ odevdu i prosu[ite ee w Sintetika Maks. 1,5 kg barabane w te^enie 15 minut, ^toby proweritx, net li wnutri grqzi ili pyli. Primery wesa nekotoryh widow belxq Prowerxte, podkl@^en li pribor k seti. -
Page 21: Tablica Programm
Tablica programm Su[ka po zadannomu wremeni Dannaq tabpica programm pomovet wam prawilxno wysu[itx wa[e belxe. Selektor programm/wremeni razdelen na 2 sektora, kavdyj iz kotoryh imeet swo@ temperaturu su[ki i [kalu wremeni: ispolxzuetsq dlq obozna^eniq hlopka. B \tom sektore wy movete ustanowitx wremq su[ki do 120 minut, tak kak dlq su[ki hlopka i tolstyh nesinteti^eskih tkanej trebuetsq bolx[e wremeni. -
Page 22: Uhod I O^istka
Uhod i o^istka ~istka filxtrow ~toby su[ilxnyj baraban rabotal normalxno, neobhodimo pro^i]atx filxtry pered ili posle kavdogo ispolxzowaniq. Dlq \togo: 1. Otkrojte dwerx. 2. Podnimite wwerh filxtr gruboj o^istki (ris. A). 3. }etkoj o^istite wors s worsowogo filxtra, nahodq]egosq pod filxtrom gruboj o^istki (ris.B). -
Page 23: Oporovnenie Emkosti Dlq Wody
Uhod i o^istka Oporovnenie emkosti dlq wody Esli wy podkl@^ili su[ilxnyj baraban ^erez [lang (dopolnitelxnyj aksessuar) naprqmu@ k sliwnoj trube, to wy movete ne ^itatx \tot razdel. Signalxnyj indikator na paneli uprawleniq budet migatx, kogda nuvno oporovnitx emkostx dlq sbora wody. Esli emkostx napolnqetsq wo wremq raboty pribora, su[ilxnyj baraban awtomati^eski ostanawliwaetsq i emkostx nuvno oporovnitx. -
Page 24: Esli Su
Esli su[ilxnyj baraban ne rabotaet Nekotorye nepoladki w rabote su[ilxnogo barabana mogut wozniknutx iz-za naru[eniq prawil uhoda ili neprawilxnoj zkspluatacii izdeliq, nekotorye iz ztih nepoladok movno legko ustranitx samostoqtelxno, bez pomo]i specialista iz serwisnogo centra. Prevde, ^em obratitxsq w serwisnyj centr, povalujsta, prowedite neobhodimye prowerki po priwedennomu nive spisku. -
Page 25: Tehni^eskoe Obsluviwanie
Tehni^eskoe obsluviwanie Rekomenduem wam zapisatx dannye w nivepriwedennu@ Tehni^eskoe obsluviwanie i tabli^ku: zap^asti TYPE. (TIP) ............Esli woznik kakoj-libo sboj w rabote pribora, sna^ala pro^itajte glawu ”Esli su[ilxnyj baraban ne rabotaet” MOD. (Modelx)............i popytajtesx i ubeditesx, ^to wy ne movete ustranitx PROD.NO. -
Page 26: Ustanowka
Ustanowka Raspolovenie pribora Wy movete raspolovitx su[ilxnyj baraban razli^nymi sposobami. My prodemonstriruem wam naibolee priemlemye iz nih. Kak by wy ne raspolovili pribor, nekotorye aspekty wsegda nado imetx w widu: Dlq normalxnogo funkcionirowaniq pribor dolven obqzatelxno bytx wyrownen. Wo wremq raboty pribora temperatura w pome]enii ne dolvna prewy[atx +35°S. - Page 27 Ustanowka Kreplenie k stene Dlq sten iz razli^nyh materialow trebuetsq raznoe monta- Esli wy namereny ukrepitx su[ilxnyj baraban na stenu vnoe oborudowanie. Priobretite montavnoe oborudowanie, mevdu [kafami, wam ponadobitsq montavnyj komplekt podhodq]ee dlq sten w wa[em dome. Ispolxzujte minimum dlq ustanowki na stenu. Esli prilega@]ij k priboru 3 podhodq]ih krepleniq dlq Ustanowki montavnogo [kaf bolee 370 mm glubinoj, ne zabudxte ostawitx kron[tejna na stene.
- Page 28 Technical changes possible Prawo na izmeneniq sohranqetsq...