Advertisement
Quick Links
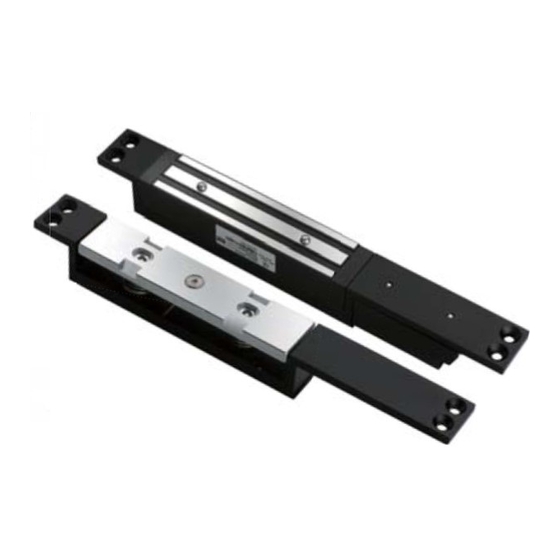
GS705N-30 Shear Lock Installation Instruction
Make sure that the door and frame is wide and deep enough to install the shear lock and run the wires. Make sure the central lines
on the door frame and door leaf align. Install the magnet assembly in the door frame before installing the armature assembly in the
door leaf.
Before installation, make sure the door, especially double-action doors, always return to the dead center after it is opened. Use
door hinges if necessary.
Specifications
Holding Force
Up to 1200 lbs (545 Kg) in shear.
12/24 VDC selectable via jumpers +10%
Power Input
over voltage is acceptable , under voltage
will reduce holding force.
420mA/12 VDC; 210mA/24 VDC The unit
Current Draw
does not require initial voltage increase to
operate.
Finish
M a g n e t a n d A r m a t u r e : Z i n c p l a t e d
Housing: Black powder coated
Magnet bond sensor output,
Monitoring Output
0.5A/125VAC, 1A/24VDC
Door Gap
2mm
Operating Temper.
-30°C to +50°C
Connecting Diagram
12Vdc
24Vdc
Voltage Selection jumpers
Check jumper settings before
connecting the lock to 24 VDC
input power. Damage to the
lock may result from incorrect
jumper settings.
Dimensions
Install the magnet assembly into the door
frame before installation the armature assembly
into the door leaf. The magnet assembly requires
space to run wires, as wall as space for the
recesses portion of the unit. Make sure that the
position selected for the magnet assembly leaves
enough room on the door to install the armature
assembly.
Copyright
©
Gianni Industries, Inc. All Rights Reserved.
P-MU-GS705N-30 Ver. E Publish:2011.12.16
Magnet Assembly
SPDT rating
Armature Assembly
Magnet bond sensor output
N.C.
SPDT rated:
0.5A/125VAC, 1A/24VDC
COM.
N.O.
-
+
Control Device
N.C. contact or Access Relay
6
2
3
2 5
1
Lock Bolt
2 6
7
5. 9
3.5
Armature vertical
adjustment screws
Caution:
Make sure that the "+" and "-"
wires are connected correctly.
Failure to observe polarity will
result in a short circuit and is
-
n o t c o v e r e d b y p r o d u c t
Power
+
warranty.
supply
GS705N-30
Unit: mm
Lock Bolt
Keep Hole
Push-off button
Keep Hole
2-1
Advertisement

Related Manuals for Gianni Industries Shear Lock P-MU-GS705N-30


Summary of Contents for Gianni Industries Shear Lock P-MU-GS705N-30
- Page 1 GS705N-30 Shear Lock Installation Instruction Make sure that the door and frame is wide and deep enough to install the shear lock and run the wires. Make sure the central lines on the door frame and door leaf align. Install the magnet assembly in the door frame before installing the armature assembly in the door leaf.
- Page 2 Mortise Installation Flat Lugs is used when the door frame is deep, and to prevent the Electromagnetic Lock or the Armature Plate caved in, add flat lugs to raise the plane (level) of the Electromagnetic Lock face or the Armature Plate face to the door frame surface.