Table of Contents
Advertisement
Quick Links
Advertisement
Table of Contents

Related Manuals for Huawei EchoLife HG520s


Summary of Contents for Huawei EchoLife HG520s
-
Page 1: User Manual
EchoLife HG520s Home Gateway User Manual HUAWEI TECHNOLOGIES CO., LTD. - Page 3 HUAWEI TECHNOLOGIES CO., LTD Huawei Administration Building Bantian, Longgang District Shenzhen, 518129 People’s Republic of China www.huawei.com 202013...
- Page 4 Copyright © Huawei Technologies Co., Ltd. 2006. All rights reserved. No part of this document may be reproduced or transmitted in any form or by any means without prior written consent of Huawei Technologies Co., Ltd. Trademarks and Permissions and other Huawei trademarks are trademarks of Huawei Technologies Co., Ltd.
-
Page 5: Safety Precautions
Avoid collision during storage, transportation and operation of the equipment. Without prior written consent from Huawei, no company or individual is allowed to decompile, disassemble, modify or reverse engineer the equipment and shall be solely responsible for any effect resulted from such action. - Page 6 The temperature of the equipment shell goes up when used for long hours. This is a normal phenomenon. Cleaning: Before cleaning the equipment, turn off the equipment and unplug the power supply. Clean the equipment shell with a piece of soft cloth. Do not spray liquid onto the equipment, to avoid damage to the internal circuit.
-
Page 7: Table Of Contents
Table of Contents Chapter 1 Introduction..............1 1.1 Functions and Features ............1 1.2 Hardware Configuration ............1 1.2.1 Front Panel...............2 1.2.2 Rear Panel ...............4 1.2.3 Splitter..............4 Chapter 2 Installation of the HG520s..........6 2.1 Preparation.................6 2.2 Connecting the HG520s............6 2.3 Establishing Configuration Environment ......8 2.3.1 Parameter Configuration...........8 2.3.2 Steps................8 2.4 Web Configuration Page .............9... - Page 8 3.4.2 Steps..............18 3.5 Configuring the PPPoA mode ...........20 3.6 Configuring the RFC2684B Mode........20 3.6.1 Preparation.............20 3.6.2 Steps..............21 3.7 Configuring the RFC2684 (IPoA) Mode ......23 3.8 Configuring the Wireless Mode .........23 3.8.1 Preparation.............23 3.8.2 Steps..............24 Chapter 4 Other Settings..............27 4.1 Configuring the QoS ............27 4.2 Changing the IP Address of the LAN of the HG520s..28 4.3 Changing the Administrator Password of the HG520s ..29 4.4 Restoring the Default Factory Settings ......29...
-
Page 9: Chapter 1 Introduction
Chapter 1 Introduction This chapter introduces functions and structure of the EchoLife HG520s Home Gateway (hereinafter referred to as the HG520s). 1.1 Functions and Features The HG520s is a type of Asymmetric Digital Subscriber Line (ADSL) terminal. Data, video and audio are transmitted through the common telephone line at a higher rate by the HG520s. -
Page 10: Front Panel
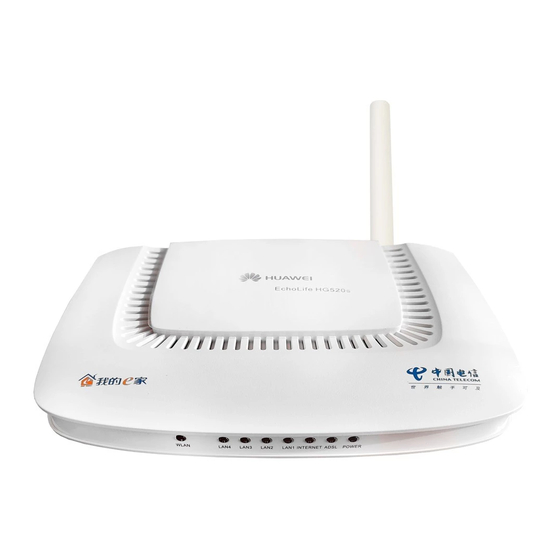
& Note: Figures of the front panel and the rear panel are only for your reference. 1.2.1 Front Panel Figure 1-1 shows the front panel of the HG520s. WLAN LAN4 LAN3 LAN2 LAN1 INTERNET ADSL POWER Figure 1-1 Front panel of the HG520s Table 1-1 shows indicators in the front panel. - Page 11 Indicator Color Status Description The embedded PPPoE and PPPoA dial-ups of the HG520s are successful, but there is no data transmission. There are data are being INTERNET Green Blinking transmitted in the INTERNET interface. The HG520s is in the bridge mode or the PPPoE/PPPoA connection is not established.
-
Page 12: Rear Panel
1.2.2 Rear Panel Figure 1-2 shows the rear panel of the HG520s. ON/ OFF ADSL RESET POWER LAN1 LAN2 LAN3 LAN4 Figure 1-2 Rear panel of the HG520s Table 1-2 shows interfaces and buttons in the rear panel. Table 1-2 Interfaces and Buttons in the rear panel Interface/Button Description Antenna... - Page 13 same telephone line at the same time, you need an external splitter to separate the voice and data signals: LINE: Connecting to the phone jack on the wall. PHONE: Connecting to the telephone. MODEM: Connecting to the ADSL interface of the HG520s.
-
Page 14: Chapter 2 Installation Of The Hg520S
Chapter 2 Installation of the HG520s This chapter introduces the installation when the HG520s is used for the first time. 2.1 Preparation Connect your computer with the HG520s through the Ethernet interfaces. Before installing the HG520s, make sure that your computer is equipped with the network card 2.2 Connecting the HG520s Figure 2-1 shows the connection of the HG520s. - Page 15 Connect the HG520s as follows: Caution: Before connecting the HG520s, power off the HG520s and your computer. Connect the interfaces of the splitter with the corresponding equipment by using the telephone line. Connect the LINE interface of the splitter with the telephone jack on the wall.
-
Page 16: Establishing Configuration Environment
2.3 Establishing Configuration Environment You can configure the HG520s on the Web configuration page. This section describes the process to establish the configuration environment of the HG520s. 2.3.1 Parameter Configuration Before establishing the configuration environment, set the following parameters. Table 2-1 Parameters for the configuration environment Name Description Default:... -
Page 17: Web Configuration Page
Step To... Do... The process to unselect this function is described as follows (taking Internet Explorer 6.0 as an example): (1) Start the Internet Explorer. Select Tools > Internet Options... to display the Internet Make sure not Options dialog box. to use the proxy server. - Page 18 Configuration area: It is on the right side of the page.
-
Page 19: Chapter 3 Service Configuration
Chapter 3 Service Configuration This chapter introduces the method for configuring the HG520s. & Note: The figures in the following configuration operations are only for your reference. 3.1 Method 3.1.1 Protocol Model Figure 3-1 shows the protocol model of for the connection between the HG520s and the DSLAM at the office end. -
Page 20: Steps
The transmission between the HG520s and the DSLAM is based on the asynchronous transfer mode (ATM). In the service configuration of the HG520s, you need to configure parameters, for example, the permanent virtual channel (PVC). 3.1.2 Steps The service modes of HG520s can be realized by configuring the corresponding working parameters. - Page 21 when you select a service mode. Table 3-1 lists the service modes of the HG520s. Table 3-1 Service modes of the HG520s Service Mode Working Method Configuration Take the HG520s as bridge Refer to 3.3 equipment. Bridge "Configuring the Use the PPPoE dial-up software Bridge Mode."...
-
Page 22: Configuring The Bridge Mode
Service Mode Working Method Configuration Note: ISP = Internet Service Provider IPoA = Internet Protocol over ATM Caution: Some parameters are validated only after they are saved and the HG520s is rebooted. Follow the prompt in the configuration page to perform this operation. -
Page 23: Steps
Name Configuration Install the PPP dial-up software on your computer to access the Internet (The PPP dial-up software Windows XP operating system is provided with the PPP dial-up software) Username and password for Provided by the ISP the PPPoE dial-up Note: VPI = Virtual Path Identifier VCI = Virtual Channel Identifier... - Page 24 Figure 3-2 Configuring the Bridge mode Click Submit. 2. Configuring your computer After completing the configuration of the HG520s, you need to install the PPP dial-up software to access the Internet. The Windows XP (Professional) operating system has a embedded PPPoE dial-up software. To set up a dial-up connection in Windows XP system, do as follows: Select Start...
-
Page 25: Configuring The Pppoe Mode
Select an option from Anyone's use or My use only and click Next. Enter the username and password. Then click Next. (10) Click Finish. 3.4 Configuring the PPPoE Mode In the PPPoE mode, the HG520s uses the embedded PPP dial-up software for dialing. -
Page 26: Steps
& Note: After the DHCP server is enabled, the HG520s allocates the private IP address for the computer. 3.4.2 Steps 1. Configuring the HG520s Follow the steps described as follows: Log in to the Web configuration page. For the procedure, refer to 2.3 "Establishing Configuration Environment."... - Page 27 Figure 3-3 Configuring the PPPoE mode Fill in the username and the password (provided by the ISP). Click Submit. Select Basic > DHCP in the navigation tree to display the DHCP configuration page. Set DHCP to Server in the DHCP configuration page.
-
Page 28: Configuring The Pppoa Mode
(10) Click Submit. 2. Configuring Your Computer Configure the network card for your computer, to enable the computer to automatically obtain information such as the IP address and the gateway. 3.5 Configuring the PPPoA mode In the PPPoA mode, the HG520s uses the embedded PPP dial-up software for dialing. -
Page 29: Steps
Name Configuration There are two methods: WAN IP address/subnet mask Obtain IP address automatically Use the static IP address VPI/VCI Provided by the ISP Multiplex Provided by the ISP DHCP mode of the HG520s Enable the DHCP server 3.6.2 Steps 1. - Page 30 Figure 3-4 Configuring the RFC2684B mode Click Submit. Select Basic > DHCP in the navigation tree to display the DHCP configuration page. Set DHCP to Server in the DHCP configuration page. Click Submit. 2. Configuring Your Computer Configure the network card for your computer, to enable the computer to automatically obtain information such as the IP address and the gateway.
-
Page 31: Configuring The Rfc2684 (Ipoa) Mode
3.7 Configuring the RFC2684 (IPoA) Mode Configuring the RFC2684 (IPoA) mode is similar to the way of configuring the RFC2684B mode. The only difference is that you have to select RFC2684 (IPoA) in the PVC configuration mode to configure IPoA. For details, refer to 3.6 "Configuring the RFC2684B Mode." 3.8 Configuring the Wireless Mode In the Wireless mode, the HG520s makes you access the Internet without connecting a cable. -
Page 32: Steps
Name Configuration There are two types (found in the authentication type of WPA-PSK/WPA2-PSK): Encryption TKIP 3.8.2 Steps Follow the steps described below: Log in to the Web configuration page. For the procedure, refer to 2.3 "Establishing Configuration Environment." Select Basic > Wireless Lan in the navigation tree to display the Wireless configuration page. - Page 33 Figure 3-6 Configuring the mode of WEP-64Bits/WEP-128Bits Figure 3-7 Configuring the mode of WPA-PSK/WPA2-PSK Configure the wireless MAC address filter in the Figure 3-8. Then Click Submit.
- Page 34 Figure 3-8 Configuring the wireless MAC address filter...
-
Page 35: Chapter 4 Other Settings
Chapter 4 Other Settings 4.1 Configuring the QoS Quality of Service (QoS) is a measure of network performance that reflects the network's transmission quality and service availability. & Note: QoS does not create additional bandwidth for your wireless LAN; it helps control the allocation of the bandwidth. -
Page 36: Changing The Ip Address Of The Lan Of The Hg520S
4.2 Changing the IP Address of the LAN of the HG520s You can access the Web configuration page of the HG520s through the IP address of the LAN of the HG520s. The IP address of the LAN of the HG520s is configured by default, you can change it as follows: Log in to the Web configuration page of the HG520s. -
Page 37: Changing The Administrator Password Of The Hg520S
4.3 Changing the Administrator Password of the HG520s The Web manager of the HG520s provides the password protection function to prevent illegal users from changing the configuration of the HG520s. The username and the password of the HG520s are configured by default. To change the administrator password, follow the steps: Log in to the Web configuration page of the HG520s. - Page 38 1. Using the Reset button Follow the steps: Find the Reset button in the rear panel of the HG520s Use a pin to press the Reset button and then release it after 3 seconds. 2. Using the Web Manager Follow the steps: Select Tools >...
-
Page 39: Chapter 5 Troubleshooting
Chapter 5 Troubleshooting 5.1 Quick Failure Location Problem Solution Ensure that the power adapter matches the HG520s. The Power Ensure that the HG520s is connected to the power indicator is not on supply properly. Ensure that the Power button is pressed. Ensure that the ADSL line is connected properly. -
Page 40: Faqs
Problem Solution Ensure that all the previous problems are addressed. Ensure that the PVC parameters provided by the ISP are not changed. Otherwise, restore the default settings. Ensure that the dial-up software is correctly installed and set properly on your computer. The Internet Ensure that you have entered the right username cannot be... - Page 41 Find help on http://www.huawei.com or contact your ISP for help. 2. What to do if the username and the password of the Web configuration page are forgotten? If the username and the password of the Web configuration page are forgotten, configure the HG520s to the default factory settings. Use the default username and password to access the Web manager.
-
Page 42: Chapter 6 Technical Specifications
Chapter 6 Technical Specifications Main Technical Specifications ITU G.992.1 (G.dmt) Annex A ITU G.992.2 (G.lite) Annex A ADSL standard ITU G.994.1 (G.hs) ANSI T1.413 Issue 2 Standard ITU G.992.3 (G.dmt.bis) Annex A ADSL2 standard ITU G.992.4 (G.lite.bis) Annex A ADSL2+ standard ITU G.992.5 Annex A The maximum downstream rate G.dmt... -
Page 43: Chapter 7 Appendix
Chapter 7 Appendix 7.1 Default Factory Settings 7.1.1 Common Default Parameters Item Default Value Username of administrator admin Password of administrator admin IP address 192.168.1.1 Subnet mask 255.255.255.0 DHCP mode None Enable 7.1.2 Default PVC Parameters Sequence No. Mode Bridge Bridge Bridge Bridge... -
Page 44: Abbreviations
7.2 Abbreviations ADSL Asymmetric Digital Subscriber Line Asynchronous Transfer Mode DHCP Dynamic Host Configuration Protocol DSLAM Digital Subscriber Line Access Multiplex Internet Protocol IPoA Internet Protocol over ATM Internet Service Provider Local Area Network Point-to-Point Protocol PPPoA PPP over ATM PPPoE PPP over Ethernet Permanent Virtual Channel...