Table of Contents
Advertisement
Advertisement
Table of Contents

Related Manuals for Husqvarna Regina Gastronome QSG1000X

Summary of Contents for Husqvarna Regina Gastronome QSG1000X
- Page 1 12/03 ZS2083...
- Page 2 Thank you for choosing our product. From now on, cooking will always be pleasantly creative with your new cooker. We recommend carefully reading all the instructions in this manual, which includes detailed information about the most suitable conditions for using the cooker correctly and safely.
-
Page 3: Table Of Contents
Contents 1. Warnings for safety and use ________________________________ 5 2. General information ______________________________________ 6 Technical service __________________________________________________________ 6 3. Description of controls_____________________________________ 7 The front panel ____________________________________________________________ 7 4. Using the cooking hob ___________________________________ 13 Switching on the burners ___________________________________________________ 13 Switching off the burners ___________________________________________________ 13 5. - Page 4 Contents 11. Special maintenance ____________________________________ 25 11.1 Removing the oven door ___________________________________________________ 25 11.2 Cleaning the inside oven fan ________________________________________________ 25 12. Installation ____________________________________________ 26 12.1 General warnings _________________________________________________________ 26 12.2 Electric connection ________________________________________________________ 26 12.3 Power consumption of the ceramic hob________________________________________ 28 12.4 Ventilation in rooms with gas appliances_______________________________________ 28 12.5 Gas connection __________________________________________________________ 29 12.6 Gas regulations __________________________________________________________ 31...
-
Page 5: Warnings For Safety And Use
Warnings 1. Warnings for safety and use THIS MANUAL IS AN INTEGRAL PART OF THE APPLIANCE. IT SHOULD BE KEPT IN GOOD CONDITION AND CLOSE TO THE APPLIANCE FOR THE WHOLE LIFECYCLE OF THE COOKER. WE RECOMMEND READING THIS MANUAL VERY CAREFULLY BEFORE USING THE COOKER. -
Page 6: General Information
Warnings DO NOT USE ANY PAN OR ACCESSORY THAT EXCEEDS THE OUTER PERIMETER OF THE HOB. THE RATING PLATE WITH THE TECHNICAL DATA, SERIAL NUMBER AND THE BRAND IS CLEARLY VISIBLE ON THE BACK OF THE APPLIANCE. THE PLATE MUST NEVER BE REMOVED. THE APPLIANCE SHOULD ONLY BE USED BY ADULTS. -
Page 7: Description Of Controls
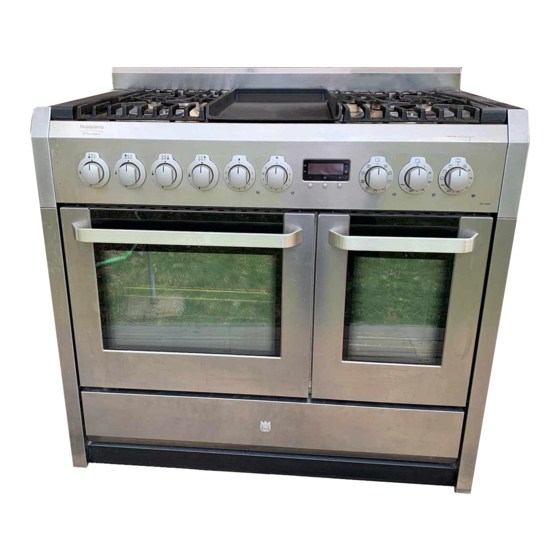
Instructions for the user 3. Description of controls The front panel All the commands and controls for the cooking hob and oven are on the front panel. THE CONTROL PANEL DESCRIPTION OF HOB CONTROL KNOB The flame is ignited by simultaneously pressing and turning the knob anticlockwise to the low flame symbol . - Page 8 Instructions for the user DESCRIPTION OF FRY-TOP CONTROL KNOB The fry-top is equipped with adjustable heat settings. The entire cooking surface can be used, or only one of the two halves, front or rear. The knobs that regulate the energy individually control the temperature of the two heating elements.
- Page 9 Instructions for the user DESCRIPTION OF SYMBOLS ON THE FUNCTION SWITCH KNOB SWITCHES ON THE OVEN LIGHT GRILL-FAN ELEMENT UPPER AND LOWER UPPER AND LOWER HEATING ELEMENTS HEATING ELEMENTS – FAN UPPER HEATING ELEMENT HEATING ELEMENT-CONVECTION LOWER HEATING ELEMENT DEFROST GRILL ELEMENT DESCRIPTION OF AUXILIARY ELECTRIC OVEN KNOB Some cooker models are equipped with an auxiliary electric oven with natural...
- Page 10 Instructions for the user THE ELECTRONIC TIMER COOK TIME END TIME COUNTDOWN TIME DECREASE CONTROL SELECTOR CONTROL INCREASE CONTROL The time of day must be set before the main oven will operate manually. SET THE TIME OF DAY The oven has a 24 hour clock. When the electricity supply is first switched ON, the display will show 12.00 and the 'Time' ( ) indicator neon will flash as Fig.
- Page 11 Instructions for the user TO CANCEL THE COUNTDOWN If you change your mind and want to cancel the 'Countdown', press the Selector Control button until the 'Countdown' indicator ( ) flashes and then the decrease control (-) until 0.00 shows in the display as Fig. 5. The 'Countdown' indicator ( ) will continue to flash for a few seconds and then return to the time of day.
- Page 12 Instructions for the user B) TO SET THE TIMER TO SWITCH OFF ONLY i) Ensure the electricity supply is switched ON and that the correct time of day is displayed, e.g. 10.00 a.m. as Fig. 9. ii) Place food in oven. iii) To set the length of cooking time, press the Selector Control button until the 'Cook Time' ( ) indicator is...
-
Page 13: Using The Cooking Hob
Instructions for the user 4. Using the cooking hob Make sure that the flame caps, the burner caps and the pan supports are fitted correctly. During normal operations, the appliance heats up considerably. Caution should therefore be used. Do not allow children to approach the appliance. Do not leave the cooking hob unattended while it is on. -
Page 14: Using The Fry-Top
Instructions for the user 5. Using the fry-top During normal operations, the appliance heats up considerably. Caution should therefore be used. Do not allow children to approach the appliance. Do not leave the fry-top unattended while it is Before switching on the fry-top The first time it is used, the fry-top griddle may develop an acrid or burnt smell caused by oily residue from manufacturing that may give unpleasant odours or flavours to food. -
Page 15: Using The Ceramic Hob
Instructions for the user 6. Using the ceramic hob During normal operations, the appliance heats up considerably. Caution should therefore be used. Do not allow children to approach the appliance. Do not leave the ceramic hob unattended while it is on. General warnings The first time it is heated, the ceramic hob may develop an acrid or burnt smell caused by oily residue from manufacturing, which disappears completely after repeated use. -
Page 16: Using The Electric Oven
Instructions for the user 7. Using the electric oven When the oven or grill is operating, the outer surface and oven door can become very hot. Keep children away from the appliance. Do not allow children to sit on the oven door or play with it. Do not use the door as a stool. -
Page 17: Cooking With The Ventilated Grill
Instructions for the user Cooking with the ventilated grill Turn the function switch knob to position ; turn the thermostat knob to set maximum temperature value (MAX). Cooking with the grill Turn the function switch knob to position ; turn the thermostat knob to the maximum temperature (MAX). -
Page 18: Using The Auxiliary Oven With Natural Convection
Instructions for the user 8. Using the auxiliary oven with natural convection When the auxiliary oven or grill are operating, the outer walls and oven door can become very hot. Keep children away from the appliance. Do not allow children to sit on the oven door or play with it. Do not use the door as a stool. -
Page 19: Cooking Suggestions
Instructions for the user 9. Cooking suggestions Suggestions for using the hob burners correctly The diameter of the base of cooking utensils Burner Utensil diameter should fit the diameter of the burner used (see (in cm) adjacent table). The burner flame must never be wider than the diameter of the utensils. - Page 20 Instructions for the user 9.4.2 Convection cooking With this type of cooking, the food is heated by preheated air that is circulated in the oven thanks to a fan located on the rear wall of the oven. Heat rapidly and evenly reaches all parts of the oven, thus enabling different food to be cooked at the same time on different shelves.
- Page 21 Instructions for the user 9.4.7 Recommended cooking tables Cooking times vary according to the nature, type and quantity of the food. We recommend monitoring your first attempts and checking the results, as similar results are obtained by cooking the same dishes in the same conditions. The following three tables (I, II and III) provide guidelines. TABLE OF CONVECTION AND TRADITIONAL COOKING TIMES (I) POSITION OF GUIDE TEMPERATURE...
-
Page 22: Cleaning And Maintenance
Instructions for the user 10. Cleaning and maintenance Before cleaning or carrying out maintenance, switch off the power supply to the appliance and close the gas tap. Do not clean the surfaces of the appliance when they are still hot. 10.1 Cleaning stainless steel surfaces To clean and preserve the stainless steel surfaces and remove the toughest stains, always use specific products, provided they do not contain chlorine-based abrasives or acid substances,... -
Page 23: Cleaning The Igniter Plugs And Thermocouples
Instructions for the user 10.5 Cleaning the igniter plugs and thermocouples In order for the igniter plugs and thermocouples to operate correctly, they must be kept clean at all times. Check them frequently and, if necessary, clean them with a damp cloth. Any dry residue should be removed with a toothpick or needle, taking care not to damage the insulating ceramic part. -
Page 24: Replacing The Oven Light Bulb
Instructions for the user 10.9 Replacing the oven light bulb Proceed as follows: • open the oven door; • unscrew the glass safety cap anticlockwise; unscrew the bulb and replace it with another one for high temperatures (300°C) with the following characteristics: Voltage: 230 V / 50 Hz Power:... -
Page 25: Special Maintenance
Instructions for the user 11. Special maintenance Periodically, it is necessary to maintain or replace some parts that are subject to wear and tear. Specific instructions are given below for each type of maintenance. Before carrying out maintenance, switch off the power supply to the appliance and close the gas tap. -
Page 26: Installation
Instructions for the installer 12. Installation DIMENSIONS OF THE COOKERS 12.1 General warnings The following operations must be carried out by a qualified installing technician. The installing technician is responsible for correctly installing the appliance according to current safety standards. Before using the appliance, remove the protective plastic on the control panel, stainless steel parts, etc... - Page 27 Instructions for the installer Before making the electric connection, make sure of the safety of the earth. Make sure that the fuse and the home wiring system are able to withstand the appliance load. The yellow/green earth cable must not be interrupted at any point. The electric cable must not come into contact with parts whose temperature is more than 50°C higher than room temperature.
-
Page 28: Power Consumption Of The Ceramic Hob
Instructions for the installer 12.2.3 Replacing the electric cable To replace the electric cable, it is necessary to access the terminal board. It is located on the back of the appliance, at the top left, as shown in the figure. To replace the cable, proceed as follows: •... -
Page 29: Gas Connection
Instructions for the installer If this is the only gas appliance in the room, it is necessary to install a hood so as to expel vitiated air naturally and directly, with a rectilinear vertical duct at least twice as long as its diameter and having a minimum section of at least 100 cm For the essential air intake into the room, it is necessary to prepare a similar opening of at least 100 cm... - Page 30 Instructions for the installer It is possible to connect the gas in the following ways: • using iron or copper rigid pipe; • using uninterrupted stainless steel flexible pipe with a mechanical fitting conforming to standards regulations in force (maximum length of extended pipe 2000 mm). The pipe should be connected straight to the elbow of the ramp;...
-
Page 31: Gas Regulations
Instructions for the installer 12.6 Gas regulations If the cooking appliance is set up for a different type of gas than that available, its injectors must be replaced, the minimum flow regulated and the rubber-holder changed. In order to replace the injectors in the cooking hob, it is necessary to carry out the following operations: •... -
Page 32: Connecting To Lpg
Instructions for the installer GENERAL INJECTORS TABLE POWER Watt CONSUMPTION BURNERS TYPE OF GAS mBar NOZZLE NO. POSITION TYPE MAX. MIN. MAX. RAPID 3000 286 l/h SEMI RAPID 1750 167 l/h AUXILIARY 1000 95 l/h NATURAL GAS TRIPLE-RING 3300 1300 314 l/h FISH KETTLE 1900... -
Page 33: Final Operations
Instructions for the installer 13. Final operations Make sure that the gas pipes and electric cables are not crushed or obstructed. 13.1 Positioning and levelling the cooker After connecting the gas pipes and electric cables, level the cooker using the four adjustable feet. If during the positioning the appliance need to be dragged, make sure that the feet are screwed tight. - Page 34 Notes ______________________________________________________________________ ______________________________________________________________________ ______________________________________________________________________ ______________________________________________________________________ ______________________________________________________________________ ______________________________________________________________________ ______________________________________________________________________ ______________________________________________________________________ ______________________________________________________________________ ______________________________________________________________________...
- Page 35 Notes ______________________________________________________________________ ______________________________________________________________________ ______________________________________________________________________ ______________________________________________________________________ ______________________________________________________________________ ______________________________________________________________________ ______________________________________________________________________ ______________________________________________________________________ ______________________________________________________________________ ______________________________________________________________________...
- Page 36 Husqvarna Hushållsprodukter www.husqvarna.se...