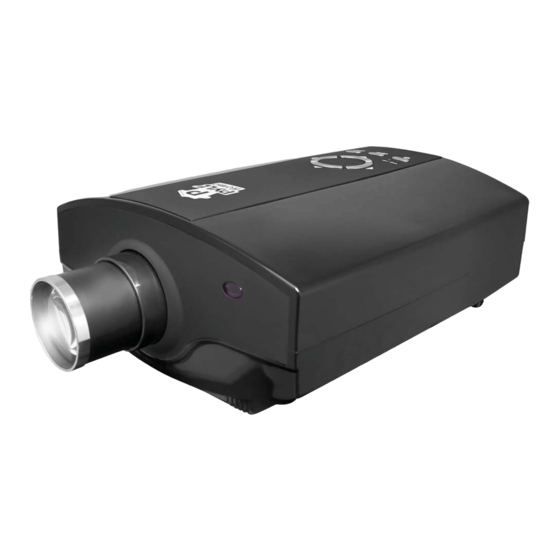
Summary of Contents for Pyle PRJ3D69
- Page 2 Please read this manual carefully so that you can understand and use the projector correctly. After reading, please save this manual for future reference. The specifications are subject to change without notice. The manufacturer is not responsible for typographical errors, incorrect images, product descriptions and specifications.
- Page 3 Remote Control Power Cord (2 m) Paired Composite, Analog Audio cable. (1.5 m) Owner’s Manual Warranty Card Batteries for Remote Control To project a clear image it might be necessary to adjust the contrast ratio, brightness, focus and keystone. The image may look blurry or skewed without these adjustments.
- Page 4 Section 1 Set up……..…………………………………….. 4 Section 2 Connecting Devices…………………………… 5 Section 3 Remote Control Operation…………………… 6 Turning on the Projector………….…………… 7 Section 1 Turning off the Projector……………….……… 8 Section 2 Adjusting the Picture of the Projector……..… 8 Section 3 Adjusting the Quality of the Picture …………. 8 Section 4 Input Menu ………………………….……..…..
- Page 5 There are two methods to project this projector, please choose the best method base on the condition of the place. 1. Table top: Place projector on table or shelf keeping the projector in line with the screen. 2. Suspended: Hang the projector from the ceiling with appropriate ceiling mount.
- Page 6 Please turn off the power of the projector and signal before connecting a VGA source while the power is on may result in operational errors. Please confirm the type of connector fits the inpu t on the projector, the projector can be damaged if the wrong connector is inserted. Set projector to the “VGA”...
- Page 7 The Infrared portion of the remote control should point to the remote sensor of the projector for proper remote control operation. The range of the remote sensor is 18'±5% feet with a 30±10% degree range. Do not drop or expose the remote control to physical impact. Do not get the remote control wet or place it on wet objects.
- Page 8 and move to the next higher or lower item in the menu. -Press these buttons to increase or decrease the sound volume level and directly choose the item in the menu. --/-- -Select the channel rapidly. -Call: -Press this button to view the current signal input and current channel number.
- Page 9 1. Turn off the power of the video source equipment, which is connected to the projector. 2. Press the POWER button on the projector or STANDBY/ON button on the remote control. 3. The projector lamp will turn off ,the exhaust fan will continue to run for up to 3 minutes in order to cool the projector lamp and extend lamp life.
-
Page 10: Operation
If the projector distance is out of range, the projector will be not able to focus. If it is hard to get correct focus, please confirm the distance of projector from the screen. Under the situation of menu off, Press the “PC/AV” button of projector or remote control to choose the signal of one of the AV /S-VIDEO /YPbPr /VGA /HDMI . - Page 11 5. Press [ ] button or [ ] button, adjust picture’s contrast. 6. Press [MENU] button twice to turn back to “menu function window” Operation 1. Press “MENU” button on the control board, it will show “menu function window” on the screen. 2.
- Page 12 Operation 1. Press “MENU” button on the control board, it will show “menu function window” on the screen. 2. Press [ ] button or [ ] button, move cursor to “Picture”. 3. Press [ ] button to enter “picture” menu function. 4.
- Page 13 3. Press [ ] button or [ ] button, move cursor to “PICTURE SWAP” ] button, move cursor to “PICTURE SWAP” 4. Press [ ] button or [ ] button, choose appointed function. 5. Press [MENU] button twice to tu rn back to “menu function window”.
- Page 14 This function can adjust the size of the image “Zoom” menu is divided 9 grades, you can choose the right grade to gain the best size (The grade 9 is 16:9 screen). Operation 1. Press “MENU” button on the control board, it will show “menu function window”...
- Page 15 Please verify that the image source is working. Please check the cable between signal source and projector is connected or not. Verify the Input settings match signal of the input port. Adjust the focus if image is blurry. The projection angle is too large or distance is too long. Inspect lens for dust or debris.
- Page 16 Power on and is on working No image, no signal, need switch the signal. Alarm signal (indicate it will be power off), turn off after power off. Turn on it when it gets cool. It is on working Press “power” button to sleep Signal stopping It is switching the signal Power off...
- Page 17 This product is not designed for continuous use. In the case of continuous use, the lamp’s lifetime will shorten. Please replace the lamp when you meet these problems. The lamp burn out, but other parts are normal. The image becomes darker or unclear. If above phenomenon has occurred, we suggest you replace the old lamp as soon as possible.
- Page 18 The specifications are subject to change without notice. The specifications are subjec 7” (Diag) TFT LCD 4 : 3 or 16 : 9 HD 1080P; 1080i; 720P; 720i; 480P; 480i Adjustable Focus Manual Focus 1,000:1 1700 ANSI Lumens TrueColor 16.7 Million colors Power Amplified Stereo Speakers 25dB - 50dB AC 90-120V 60HZ, 2A...


