Table of Contents
Advertisement
Advertisement
Table of Contents

Summary of Contents for Vixen Polarie
- Page 1 Polarie Star Tracker User's Guide...
- Page 2 Read through this manual before use. Always keep the instruction manual near your Polarie to ensure quick answers to any questions. This instruction manual describes necessary precautions for the safe use of the product to prevent possible injuries to yourself and others, as well as damage to the equipment.
-
Page 3: Table Of Contents
ÅE Å E Å E Å E Å E Å E Å E Å E Å E Å E Å E Å E Å E Å E Å E Å E Å E Å E Å E Å E Å E Point the Polarie to the South Celestial Pole ÅE Å... -
Page 4: Before Use
BEFORE USE The Polarie box contains the parts listed below. Make sure that your box contains all these parts. Checking Contents If purchased the Polarie as a package with the tripod Polarie M-178V Tripod with QHD-43 Ball head Polarie User's Guide (This manual) -
Page 5: Parts Descriptions
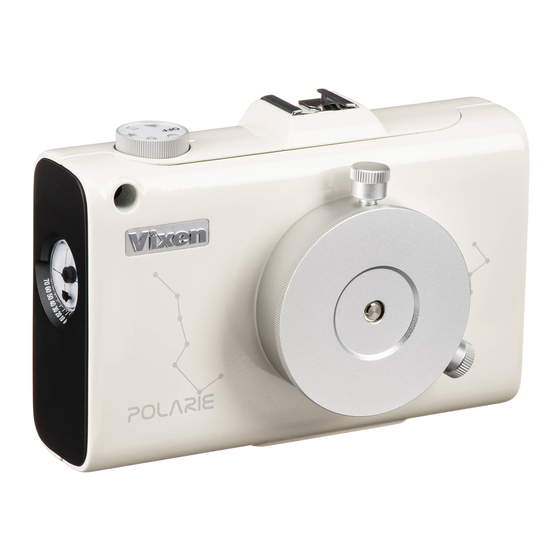
BEFORE USE Parts Descriptions Polar Sight Hole Compass(Inside) Mode Dial Accessory Shoe [Off the cover] Battery Compartment Cover Battery Compartment Polar Sight Hole (Field of View: 8.9 degrees approx.) Mode Dial Polar Axis Scope Setting Hole (Inside) ņ ņņņņ ņņņņ Tilt Meter Camera Mounting Block N-S Change Switch... -
Page 6: M-178V Tripod For Polarie
BEFORE USE M-178V Tripod for Polarie (If purchased as a package) Ball head adapter 1: QHD-43 Ball head adapter 2: QHD-33 Ball head adapter (Velbon QHD-43) Standard UNC 1/4” thread is pre-installed on the tripod. Geared elevator Ball head adapter... -
Page 7: Mode Dial
Tracking in northern hemisphere : Illuminated in red Tracking in southern hemisphere : Illuminated in green Star-Scape Photography The Polarie allows you to not only take pinpoint photos of stars and constellations but also to create “star-scape” photos in night-sky Wide-Field astrophotography vs. Star-Scape photography... -
Page 8: Requirements And Useful Items
BEFORE USE Requirements and Useful Items A table below shows necessary equipment and items that are useful for astro-photography with the Polarie. Essential : Needed subject to conditions : Useful : Need Item Description Need Item Description Polarie Shutter Release Ultra-small and handy star tracker. - Page 9 BEFORE USE Requirements and Useful Items (1)It is strongly recommended that your camera have functions that satisfy the following specifications. A bulb shutter mechanism is needed for long exposures. If it is not available on your camera, both an ISO speed setting faster than 3200 and a shutter exposure time setting longer than 30 seconds are required.
- Page 10 PREPARATION Batteries for the Polarie Polarie works with 2 AA alkaline batteries which are sold separately. An external power supply is available for the Polarie using the USB-minib plug (DC4.4V to 5.25V)*. *Sanyo Lithium Ion batteries with USB output (Eneloop KBC-L2B) is approved for use with Polarie as of Nov. 2011.
- Page 11 Setting up the Polarie This manual describes Polarie which comes with the M178-V tripod as a package. You may occasionally find descriptions in the text not relevant to your model. You should refer to the instruction manuals for your camera and tripod with this manual.
- Page 12 SETTING UP Attach another ball head adapter to the camera mounting block. Attach the camera onto the ball head-mounted Polarie. Make sure Push the 1/4” thread screw protruding from the center on the that the camera is installed securely on the ball head adapter with the underside of the camera mounting block so that the 1/4”...
-
Page 13: Using The Polarie
It is essential that the rotation axis of the earth's axis. North or south celestial pole Polarie is set to be parallel to that of the diurnal motion of the stars. This is called polar alignment. Set a shutter exposure time,... -
Page 14: Find Polaris Using A Compass And The Latitude Of
Polaris comes into the field of view of Unlock the ball head and tilt the the polar sight hole. Polarie so that the built-in tilt meter Latitude points your latitude. Next, bring Polaris to the center of the polar sight's field of view and firmly lock the pan head again. -
Page 15: Find Polaris From Cassiopeia And The Big Dipper
Find Polaris using the guide map below. You will find it easier with Turn the Polarie toward Polaris and look through the polar sight the help of a compass since Polaris is located in the north. -
Page 16: Using The Polarie In The Southern Hemisphere
Using the Polarie in the Southern Hemisphere Octans is a constellation located near the south celestial pole and it can be used to align the Polarie in the southern hemisphere. Unlike Polaris which is a bright 2nd magnitude star adjacent to the north celestial pole, Octans is made up of dark stars about 5th magnitude on average. -
Page 17: Find Octans Using Small Magellanic Cloud And The Southern Cross (Crux) As Pointers
Point the Polarie to the South Celestial Pole Uncover the cap on the back side of the Polarie and remove the front camera mounting block to make a wide look-through hole so that you can secure about 14 degrees of field of view. -
Page 18: Basic Camera Settings
Switching ON the Polarie Set camera's various modes, shutter exposure times and lens aperture Turning the mode dial to power up the Polarie and selecting a mode values. For details refer to instruction manuals of your camera. for your planned imaging. -
Page 19: Star-Scape Photography Mode
: Star-Scape Photography Mode If this mode is selected, the Polarie tracks stars at half the speed of the diurnal motion of the stars. The terrestrial objects are trailed less as compared with images taken by wide-field photography at a given exposure time. Short exposure times will allow you to take images with no star trails. -
Page 20: Wide-Field Astrophotography Mode
:Wide-Field Astrophotography Mode If this mode is selected, the Polarie follows stars at the same speed as the diurnal motion of the stars. It is suitable for capturing dark stars and faint celestial objects. It is possible to avoid star trails but the terrestrial objects are trailed in long exposure. - Page 21 SPECIFICATIONS Polarie Star Tracker Type U l tra compact (equat orial) t racking plat f orm Tracking Mode C e l est ial t racking rat e. 1/ 2 of celest ial t rack ing rat e. S olar t rack ing rat e (Mean solar t ime).
- Page 22 SPECIFICATIONS Tripod for Polarie (If purchased as a package) Model M-178V Tripod legs 4-section legs Minimum tripod length 555mm (22”) Working height Adjustable from 540mm to 1,780mm (21.2 to 70 inches) Elevator pole extension Geared part : 200mm (7.9”), Friction up and down part (Center column) : 290mm (11 4”)
- Page 23 APPENDIX Using an optional Polarie Polar Axis Scope Your polar alignment on the Polarie can be improved with use of the dedicated polar axis scope sold separately. Parts Descriptions Eyepiece of the polar axis scope Time graduation circle (6x20 scope with 8-degree...
- Page 24 APPENDIX Using the Polarie Polar Axis Scope in the Northern Hemisphere Point the Polarie in the direction Rotate the diopter Rotate the diopter Example: If your location is Tokyo, which has a longitude of 139° E, of north using its polar sight...
- Page 25 Look through the polar axis scope and confirm that Polaris can be seen somewhere in the field of view. Readjust the orientation of the Polarie by slowly loosening the pan head grip of your tripod so that is set at a designated...
- Page 26 Southern Hemisphere Set up the Polarie mounted on the tripod on a level ground Position of where you can see Octans in the sky. Point the Polarie in the Polaris in 2011 direction of south by using the compass. Precession Refer to set up procedures 2, 5 and 6 that are described for the use in the northern hemisphere.
- Page 27 Match with the orientation of the four stars Mach with each other Note: Take much care not to lose the balance of the Polarie when you loosen the lock of the pan head grip. Slowly remove the polar axis scope from the Polarie and...
- Page 28 59ki-11- Å i80000094Åj -2S-84- Å imizÅj ÅiMÅj (k)