Table of Contents
Advertisement
Available languages
Available languages
Advertisement
Table of Contents

Related Manuals for GE Spacemaker WSSH300


Summary of Contents for GE Spacemaker WSSH300
- Page 1 Safety Instructions Owner’s Manual & Installation Instructions Operating Instructions WSSH300 Installation Instructions Troubleshooting Tips Consumer Support ® NERGY ® NERGY 134867100 175D1807P580 49-90312-1 01-07 JR...
-
Page 2: Important Safety Information
The instructions in this manual and all other literature included with this washer are not meant to cover every possible condition and situation that may occur. Good, safe practices and caution any appliance. -
Page 3: Proper Installation
PROPER INSTALLATION This washer must be properly installed and located in accordance with the Installation Instructions before it is used. Install or store where it will not be exposed to temperatures below freezing or exposed to the weather. YOUR LAUNDRY AREA... -
Page 4: When Using The Washer
Do not slam the washer door closed or try to force the door open when locked (Door Lock light ON). This could result in damage to the washer. -
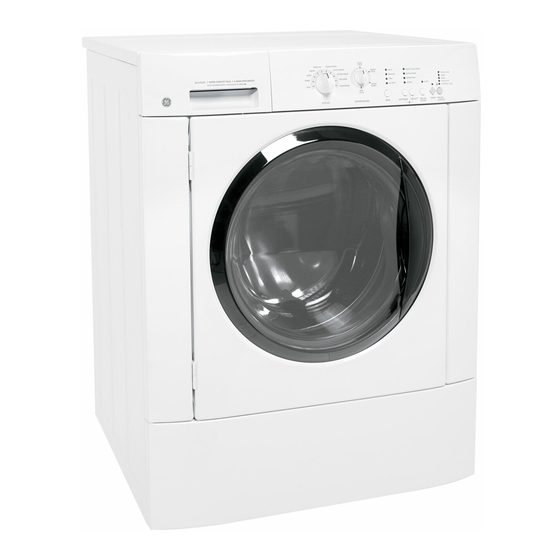
Page 5: About The Washer Control Panel
START/PAUSE CANCEL Start the washer by closing the door and pressing the START button. To stop the washer, press the PAUSE CANCEL button. Press the START button to restart. I The washer will not operate with the door open. I The door will automatically lock during the entire wash cycle. -
Page 6: About The Washer Features
The light turns OFF at the end of the cycle. Control Lock To prevent accidentally starting or stopping the washer, press OPTIONS and SELECT at the same time until the Control Lock indicator is lighted. To unlock the controls, press OPTIONS and SELECT again. - Page 7 Fill to the maximum fill line (MAX.) for large loads. If the dispenser drawer is pulled out more than 1-1/2” when the washer is in operation, the washer will shut off. The DOOR LOCK indicator light will turn off and the door will be unlocked.
-
Page 8: Loading And Using The Washer
Moving and Storage: Ask the service technician to remove water from drain pump and hoses. Do not store the washer where it will be exposed to the weather. When moving the washer, the tub should be kept stationary by using the brackets and bolts removed during installation. See Installation Instructions in this book. - Page 9 Dispenser Drawer Area: Detergent and fabric softener may build up in the dispenser drawer. Residue should be removed once or twice a month. I Remove the drawer by first sliding the safety latch to the right, then pulling Lock tab is visible only after drawer has been pulled out I Remove the inserts from the bleach and fabric softener compartments.
-
Page 10: Fabric Care Labels
About the washer features. Fabric Care Labels Below are fabric care label “symbols” that affect the clothing you will be laundering. WASH LABELS Machine wash cycle Normal Water temperature DRY LABELS Tumble Heat setting High Special instructions BLEACH LABELS Bleach... -
Page 11: Installation Instructions
Installation Instructions If you have any questions, call 800.GE.CARES (800.432.2737) BEFORE YOU BEGIN Read these instructions completely and carefully. IMPORTANT – • instructions for local inspector’s use. IMPORTANT – • governing codes and ordinances. Note to Installer – • Be sure to leave these instructions with the Consumer. -
Page 12: Location Of Your Washer
ANSI A119.1 and National Mobile Home Construction and Safety Standards Act of 1974 (PL93-383). Stacked Installation If a stacked washer/dryer installation is desired, you MUST use Stacking Kit WE25X10020. This kit is available through your GE retailer. ROUGH-IN DIMENSIONS ″ ⁄ (9.5 cm) ), located 3″... -
Page 13: Unpacking The Washer
Base Shipping Plug 4. Carefully return the washer to an upright position. 5. Carefully move the washer to within 4 feet (122 cm) of the final location. 6. Remove the following from the back panel of the washer: 4 shipping bolts 4 spacers 1 metal “P”... -
Page 14: Electrical Requirements
POWER SUPPLY – 2-wire, with ground, 120-volt, single- phase, 60-Hz, Alternating Current. OUTLET RECEPTACLE – Properly grounded 3-prong receptacle to be located so the power supply cord is accessible when the washer is in an installed position. GROUNDING REQUIREMENTS WARNING: Improper connection of the equipment grounding conductor can result in a risk of electrical shock. -
Page 15: Installing The Washer
Turn the water on and check for leaks. Installation Instructions 5. Carefully move the washer to its final location. Gently lift up on the front of the washer and slide back. NOTE: Do not use the dispenser drawer or door to lift the washer. -
Page 16: Replacement Parts
14. Place these instructions in a location near the washer for future reference. REPLACEMENT PARTS Cable Tie If replacement parts are needed for your washer, they can be ordered by visiting our Website at ge.com or by calling 800.GE.CARES. -
Page 17: Before You Call For Service
• Make sure hoses are connected to correct faucets. • Turn off the water source and remove the water connection hoses from the upper back of the washer. Use a brush or toothpick to clean the screens in the machine. Reconnect the hoses and turn the water back on. - Page 18 • Add one or two similar items to help balance the load. What To Do • Make sure washer is level and rests firmly on the floor. • Press the PAUSE button to stop the washer, open the door and redistribute the load evenly. Close the door and restart.
- Page 19 What To Do • Add one to two similar items. • Redistribute load. • While this is not caused by the washer, you can slow the pilling process by washing garments inside out. • Use correct amount of detergent. • Use hottest water safe for fabric.
- Page 20 Error Codes If the washer stops, an error code flashes and the signal beeps periodically, press PAUSE/CANCEL. Consult the Error Code Chart below for the possible cause and solution. If Control Lock is on when an Error Code occurs, the controls will unlock.
- Page 21 Notes.
- Page 22 Notes.
- Page 23 This warranty is extended to the original purchaser and any succeeding owner for products purchased for home use within the USA. If the product is located in an area where service by a GE Authorized Servicer is not available, you may be responsible for a trip charge or you may be required to bring the product to an Authorized GE Service location for service.
-
Page 24: Consumer Support
Caution must be exercised since improper servicing may cause unsafe operation. Contact Us If you are not satisfied with the service you receive from GE, contact us on our Website with all the details including your phone number, or write to: General Manager, Customer Relations Register Your Appliance Register your new appliance on-line—at your convenience! Timely product registration will allow for enhanced... - Page 25 Instrucciones de seguridad Instrucciones de operación Instrucciones de instalación Consejos para la solución de problemas Soporte al consumidor ® NERGY NERGY ® 134867100 175D1807P580 49-90312-1 01-07 JR ge.com Manual de propietario & Instrucciones de instalación WSSH300...
- Page 26 INFORMACIÓN DE SEGURIDAD IMPORTANTE. LEA TODAS LAS INSTRUCCIONES ANTES DEL USO. ¡ADVERTENCIA! SEGURIDAD DEL CALENTADOR DE AGUA En determinadas condiciones, en un calentador de agua que no se haya utilizado durante un mínimo de dos semanas se puede producir gas hidrógeno. El gas hidrógeno puede resultar explosivo en determinadas circunstancias. Si el agua caliente no se ha utilizado por dos semanas o más, prevenga la posibilidad de sufrir daños o lesiones abriendo todos los grifos de agua caliente y dejándola correr durante varios minutos.
- Page 27 INSTALACIÓN CORRECTA La lavadora se debe instalar y colocar correctamente de acuerdo con las instrucciones de instalación, antes de utilizarla. Instale o almacene la lavadora en un lugar donde no esté expuesta a temperaturas por debajo del punto de congelación o expuesta a la intemperie. ZONA DE LAVADERO Mantenga las zonas debajo de los electrodomésticos y en torno a ellos sin materiales...
- Page 28 INFORMACIÓN DE SEGURIDAD IMPORTANTE. LEA TODAS LAS INSTRUCCIONES ANTES DEL USO. AL UTILIZAR LA LAVADORA No abra nunca la lavadora mientras esté en movimiento. Espere a que se detenga por completo para abrir la puerta. Utilice este No mezcle blanqueadores clorados con electrodoméstico amoniaco o ácidos como vinagre o sólo para el uso...
-
Page 29: Ajustes De Control
El panel de control de la lavadora. Puede ubicar el número de modelo en la parte superior del interior de la abertura de la puerta. Ajustes de control Despachador automático y pestillo de seguridad El pestillo de seguridad se desliza hacia la derecha para abrir el cajón. (El pestillo se cierra automáticamente hacia la izquierda). - Page 30 Funciones de la lavadora. Señal Cuando la Señal esté en la posición ON (Encendido), emitirá un sonido al final del ciclo. Extra Rinse (Enjuagado extra) (disponible en algunos ciclos) Use esta función cuando desee un enjuagado adicional para eliminar los restos de suciedad y detergente en cargas sucias.
- Page 31 Cajón dispensador de productos de lavado Abra lentamente el cajón dispensador deslizando el pestillo de seguridad hacia la derecha, después abra el cajón hasta que se detenga. Tras añadir los productos de lavado, ciérre el cajón dispensador. Si cierra el cajón demasiado rápido, puede provocar que la lejía y el suavizante se administren antes de tiempo.
-
Page 32: Carga De La Lavadora
Al mover la lavadora, la cuba debe mantenerse estable utilizando los soportes y los pernos que se han extraído durante la instalación. Consulte las Instrucciones de instalación en este manual. Si estas piezas no están disponibles, se pueden solicitar a través del sitio Web www.ge.com o llamando al 800.GE.CARES. - Page 33 Zona del cajón dispensador de productos de lavado: El detergente y el suavizante pueden acumularse en el cajon dispensador de productos de lavado. Los residuos deben eliminarse una o dos veces al mes. I Retire el cajón deslizando el pestillo de seguridad hacia la derecha y tirando Lock tab is visible only after drawer has been pulled out I Extraiga los accesorios de los compartimentos para lejía y suavizante.
- Page 34 Funciones de la lavadora. Etiquetas de cuidado de tejido A continuación se muestran “símbolos” de etiquetas de cuidado de tejido que afectan a las prendas que se lavan. ETIQUETAS DE LAVADO Ciclo de lavado en máquina Normal Planchado permanente/ Temperatura del agua ETIQUETAS DE SECADO Tumble...
-
Page 35: Instrucciones De Instalación
Instrucciones de instalación Si tiene alguna pregunta, llame a 800.GE.CARES (1.800.432.2737) ANTES DE COMENZAR Lea detenidamente todas las instrucciones. IMPORTANTE – • instrucciones para uso del inspector local. IMPORTANTE – • los códigos y ordenanzas regulatorias. Nota al instalador –... -
Page 36: Ubicación De La Lavadora
1974 (PL93-383). Instalación apilada Si desea apilar su lavadora/secadora, DEBE emplear el Equipo de instalación apilada WE25X10020. Este equipo está disponible a través de su distribuidor de GE. DIMENSIONES APROXIMADAS ″ ⁄ (70.5 cm) 24″... - Page 37 Instrucciones de instalación CÓMO DESEMPACAR LA LAVADORA ADVERTENCIA: y las bolsas de plástico una vez que desempaque la lavadora. Los niños podrían usarlas para jugar. Las cajas cubiertas con alfombras, edredones o láminas de plástico podrían cerrarse herméticamente y provocar asfixia. Coloque todos los materiales en un bote de basura o bien colóquelos en un lugar inaccesible para los niños.
-
Page 38: Requisitos Eléctricos
Instrucciones de instalación REQUISITOS ELÉCTRICOS Lea detenidamente todas las instrucciones. CIRCUITO – circuito derivado de 15 amperios individual, correctamente polarizado y conectado a tierra, con interruptor o fusible de retardo de 15 amperios. ALIMENTACIÓN ELÉCTRICA – corriente alterna de 60 Hz, monofásica, de 120 voltios, con conexión a tierra, bifilar. -
Page 39: Instalación De La Lavadora
Instrucciones de instalación INSTALACIÓN DE LA LAVADORA 1. Deje correr un poco de agua de los grifos de agua caliente y fría para purgar las tuberías de agua y eliminar las partículas que puedan obstruir los filtros de la válvula de agua. 2. -
Page 40: Piezas De Repuesto
14. Coloque las instrucciones en un lugar próximo a la lavadora para futuras consultas. Abrazadera de cable PIEZAS DE REPUESTO Si se necesitan piezas de repuesto para la lavadora, se pueden solicitar en Estados Unidos a través del sitio Web ge.com o llamando a 800.GE.CARES. - Page 41 Antes de llamar para solicitar servicio… Consejos para la solución de problemas ¡Ahorre tiempo y dinero! Consulte primero las tablas de las páginas siguientes y quizás no necesite llamar al servicio. AGUA Causas posibles Fugas de agua Las tuberías de toma de agua o la tubería de desagüe no se han conectado correctamente Puede que la tubería de desagüe...
- Page 42 Antes de llamar para solicitar servicio… OPERACIÓN Causas posibles La lavadora se detiene La lavadora usualmente se detiene durante el ciclo entre los diversos pasos de lavado La lavadora no está La lavadora está desconectada en funcionamiento El suministro de agua está cerrado • Abra por completo las llaves de paso de agua fría y caliente. El interruptor/fusible se ha quemado/saltado Los controles no se han...
- Page 43 RENDIMIENTO (cont.) Causas posibles Las prendas están La carga es muy reducida demasiado mojadas La carga está desequilibrada Formación de bolitas Resultado de un deterioro normal • Mientras no se produzca por la lavadora, se puede hace en las prendas de polialgodón y tejidos voluminosos Prendas oscurecidas o No hay suficiente detergente...
- Page 44 Antes de llamar para solicitar servicio… Códigos de error Si la lavadora para, un código de error destella y la señal hace un “bip” periódicamente, presione PAUSE/CANCEL. Consulte la Carta de código de error abajo para la causa y la solución posible. Si el Bloqueo de control está activado cuando se produce un Código de error, los controles se desbloquearán.
- Page 45 Notas.
- Page 46 Notas.
- Page 47 GE, podría tener que hacerse cargo de los costes de envío o bien podría solicitársele que lleve el producto a una centro de servicio de GE autorizado para realizar la reparación. En Alaska, la garantía excluye el costo de envío o las visitas de servicio a su casa.
-
Page 48: Soporte Al Consumidor
Solicite una reparación El servicio de expertos GE está a tan sólo un paso de su puerta. ¡Entre en línea y solicite su reparación cuando le venga bien 24 horas al día cualquier día del año! O llame al 800.GE.CARES (800.432.2737) durante horas normales de oficina.