Table of Contents
Advertisement
Advertisement
Table of Contents

Related Manuals for Motorola CPEo 450 Series


Summary of Contents for Motorola CPEo 450 Series
- Page 1 CPEo 450 Series User Manual User Manual...
-
Page 2: Table Of Contents
Contents Chapter 1: CPEo 450 User Guide Overview..........................1-1 Powerful Features in a Single Unit ..................1-2 Bottom Side Panel LED Indicator ..................1-2 Bottom Panel ........................1-3 Operating Information......................1-4 Chapter 2: Installation Overview..........................2-1 Chapter 3: Configuration Before you Begin ......................... 3-1 Logging in to the CPE...................... - Page 3 EU Declaration of Conformity ..................... 8-3 Caring for the Environment....................8-4 Disposal of Motorola Equipment in EU Countries............... 8-4 Disposal of Motorola Networks Equipment in Non-EU countries ........8-4 CMM Disclosure ........................8-4 Copyrights and Trademarks ....................8-5 Copyrights ........................... 8-6 Usage and Disclosure Restrictions ..................
-
Page 4: Chapter 1: Cpeo 450 User Guide
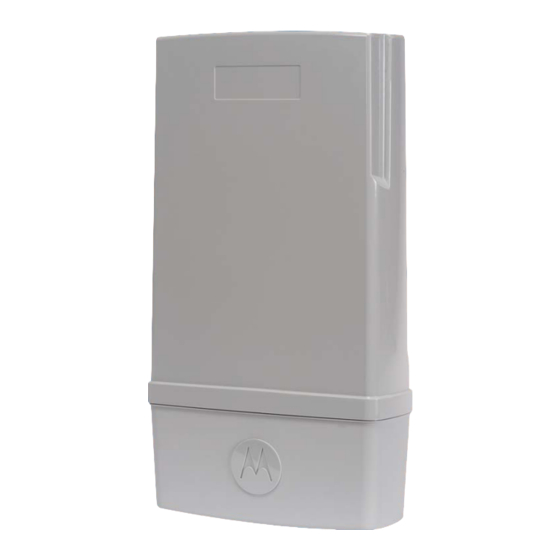
CPEo 450 User Guide Chapter 1: CPEo 450 User Guide Overview Thank you for purchasing the Motorola CPE Outdoor (CPE 450) device. The CPE 450 allows you to connect to the wireless world easily and seamlessly, offering you broadband data and Voice over Internet Protocol (VoIP) calls. -
Page 5: Powerful Features In A Single Unit
CPEo 450 User Guide Powerful Features in a Single Unit The CPE device provides the following features: • WiMAX standard based Authentication • WAN DHCP Client • LAN DHCP Server • Home Gateway Functions • Firewall Protection • Port Forwarding Bottom Side Panel LED Indicator The WiMAX Wireless Broadband Outdoor Subscriber Unit (OSU) contains five LED indicators on the Bottom side of the unit. -
Page 6: Bottom Panel
CPEo 450 User Guide Table 1-1 LED Indicator Interface Item Description Power Status The LEDs are: • On - power to the CPE is on. • Off - power to the CPE is off. Initializing Status The center LED flashes when the CPE is initializing. Signal Strength •... -
Page 7: Operating Information
CPEo 450 User Guide Table 1-2 Port Descriptions Port Description RJ 11 Port VoIP phone port RJ 45 Port Ethernet switch port and AC Power supply Operating Information Temperature Range and power rating for the WiMAX Wireless Broadband Outdoor Subscriber Unit (OSU): Operating temperature for the units is -40c to +55c. -
Page 8: Chapter 2: Installation
Installation Chapter 2: Installation Overview The CPE 450 is an outdoor unit and the hardware installation is beyond the scope of this document. A separate installation document is included with the device. Before installation, check that you have received the following items with your 450: •... - Page 9 Installation 68P09306A78-A FEB 2010...
-
Page 10: Chapter 3: Configuration
Address field. If you still cannot access the CPE, refer to the chapter titled: Configuring TCP/IP for more information. 3. The Welcome to Motorola WiMAX CPE screen is displayed and prompts you for a password. 68P09306A78-A FEB 2010... -
Page 11: Setup Wizard And Authentication
Configuration Figure 3-1: Login Screen 4. Enable or disable password protection. The default password is Motorola. Do NOT reset password. If you forget your password, you will not be able to log in and reset the device to the factory default password. - Page 12 Re-type your new password in the Confirm New Login Password box. • Click Next. If you forget your password, you can reset it back to the default (motorola) password. To reset the password, press and hold the reset button on the back of your CPE for 5 or more seconds.
- Page 13 Configuration • The Wizard button starts the set-up wizard over again. • The Refresh button refreshes the screen with the current status. • The Auto Refresh button allows the web browser to automatically refresh at the interval determined in the Control Panel menu. Figure 3-2: Status Screen Restart Button Figure 3-3: Restart Button...
-
Page 14: Chapter 4: Basic Configuration
Basic Configuration Chapter 4: Basic Configuration Once the CPE setup has been completed, you can log in to your CPE from any computer on your home network. To log in type the device name in the address bar on your computer. The default device name is mywimax. This section describes the PERSONALIZE, INTERNET, and STATUS Menus that are available. -
Page 15: Password Tab
Basic Configuration Password Tab The password tab allows you to enable/disable password protection. You can also change your password here. Be sure to click the Apply button when finished. Table 4-1 Password Tab Field or Button Description Enable Login Password Protection Checking this box requires login password protection. -
Page 16: Restore Factory Settings Tab
Basic Configuration Restore Factory Settings Tab The Restore Factory Settings Tab resets your CPE to the manufacturers default settings. Be sure to click the Apply button if you are sure that you want to reset factory settings. Table 4-4 Restore Factory Settings Tab Field or Button Description Restore Factory Settings... -
Page 17: Wimax Security Tab
Basic Configuration WiMAX Security Tab WiMAX Security Tab The WiMAX Security tab contains your authentication method. Check with your The WiMAX Security tab contains your authentication method. Check with your service provider to determine a user name and password are required for service provider to determine a user name and password are required for authentication purposes. -
Page 18: Dynamic Dns Tab
Basic Configuration Table 4-6 Firewall Tab (continued) Field or Button Description Web Login Port from Internet Choose a port number to connect to when logging in from a network other than your own. The default is 8080. Enable ping from Internet Enables the CPE to respond to a ping from the Internet. -
Page 19: Network Tab
Basic Configuration Figure 4-3: Status Menu Network Tab The Network tab provides any status associated with your WiMAX Wireless Broadband connection. Telephony Tab The Telephony tab provides any status associated with your telephony connection. Telephony Menu The telephony menu allows you to manage your Voice over Internet Protocol (VoIP) services. -
Page 20: Account Tab
Basic Configuration The Telephony menu provides the following tabs: • Account • Ring Tone • Caller ID • Call Forwarding • Voice Mail • Special Numbers Figure 4-4: Telephony Menu Account Tab Please consult with your service provider for these settings. The Account Tab contains the following settings: Table 4-8 Account Tab Field or Button... -
Page 21: Ring Tone Tab
Basic Configuration Table 4-8 Account Tab (continued) Field or Button Description Confirm Line 1 Password Reenter your Line 1 password exactly as entered in the field from the previous step. Line 2 User Name If Line 2 is an active VoIP, enter the User Name as provided by your service provider. -
Page 22: Call Forwarding Tab
Basic Configuration Table 4-10 Caller ID Tab Field or Button Description Enable Line 1 Anonymous Incoming Call If Line 1 is your active telephone port, Rejection check this box if you would like to reject telephone calls from anonymous incoming callers. The default is checked. - Page 23 Basic Configuration Table 4-11 Call Forwarding Tab (Continued) Table 4-11 Call Forwarding Tab (Continued) Field or Button Description Line 1 No Answer Forwarding to Number If “Line 1 No Answer Forwarding to Number” is checked, enter the telephone number you would like to forward calls to when there is no answer on Line 1.
-
Page 24: Voice Mail Tab
Basic Configuration Voice Mail Tab The voice mail tab allows you to see the status of your voice mail. Please contact your service provider to activate the voice mail feature if it is not already active. The Voice Mail Tab contains the following: Table 4-12 Voice Mail Tab Field or Button Description... - Page 25 Basic Configuration Table 4-13 Special Number Tab (continued) Table 4-13 Special Number Tab (continued) Field or Button Description Call Hold Dial this number to place your current call on hold. Automatic Recall Activate Dial this number to automatically call back the last number dialed when that number becomes available.
- Page 26 Basic Configuration Table 4-13 Special Number Tab (continued) Field or Button Description Calling Number Delivery Blocking Dial this number to block your number from appearing on the Caller ID of the people you call. Your calls may appear as “Private” or “Anonymous”. Line Blocking Deactivate Dial this number to unblock your telephone number from appearing on...
- Page 27 Basic Configuration 4-14 68P09306A78-A FEB 2010...
-
Page 28: Chapter 5: Advanced Configuration
Advanced Configuration Chapter 5: Advanced Configuration The Advanced Configuration section describes the Port Forwarding, Local Address, and Control Panel menus. Port Forwarding Menu Port forwarding enables you to direct incoming traffic to specific LAN hosts (computers on your network) based on the protocol and port number. It is used to play Internet games or provide local services (such as web hosting) for a LAN group. -
Page 29: Forwarding Tab
Advanced Configuration Table 5-1 Port Forwarding Menu Field or Button Description Enable UPnP IGD Enables the Universal Plug and Play (UPnP) Internet Gateway Device (IGD) profile to allow certain Windows applications to set up the port forwarding rule dynamically when NAT is enabled on this device. -
Page 30: Local Address Menu
Advanced Configuration Local Address Menu The Local Address menu allows you to configure your Local Area Network (LAN) connections. The Local Address menu provides the following tabs: • DHCP Server • Lease Status • Lease Reservation Figure 5-2: Local Address Menu DHCP Server Tab The DHCP Server tab enables Dynamic Host Configuration Protocol (DHCP) server functionality on the LAN, allowing the router to dynamically assign lease IP... -
Page 31: Lease Status Tab
Advanced Configuration Table 5-3 DHCP Server Tab Table 5-3 DHCP Server Tab Field or Button Description Enable DHCP Server If selected, the DHCP server on the gateway assigns IP addresses to the computers and other hosts on your network if they have DHCP enabled. By default, the gateway server is enabled. -
Page 32: Lease Reservation Tab
Advanced Configuration Table 5-4 Lease Status Tab (continued) Field or Button Description Remaining Lease Duration Shows the amount of time, in seconds, remaining in the lease. Click the Apply button once you have made changes. Lease Reservation Tab This tab allows you to manage the lease reservation so that the same client receives the same IP address each time. -
Page 33: Software Tab
Advanced Configuration Figure 5-3: Control Panel Menu Software Tab The Software tab manages the software on your CPE device. It is also where you can upgrade device software. Use the BROWSE button to browse your computer for additional software packages. Once you have located the software package/update you would like to add to your device, click the Upgrade button. -
Page 34: System Tab
Advanced Configuration System Tab This tab allows you to manage additional features of your CPE device Table 5-6 System Tab Field or Button Description Language Used in User Interface Select the desired language for the user interface. The default language is English. Enable WiMAX Radio Interface Check this box to enable the WiMAX Radio Interface. - Page 35 Advanced Configuration 68P09306A78-A FEB 2010...
-
Page 36: Chapter 6: Configuring Tcp/Ip
Configuring TCP/IP Chapter 6: Configuring TCP/IP This section contains two examples of configuring TCP/IP in a Windows environment. Most computers already have the TCP/IP configuration enabled. Use the following procedures to verify that the configuration is set up. Configure all client computers on your network for TCP/IP (the protocol that controls communication among computers). - Page 37 Configuring TCP/IP Double-click the Network and Dial-up Connections icon to display the Network and Dial-up Connections window: Figure 6-2: Network and Dial-up Connections In the steps that follow, a connection number like 1, 2, 3, etc., is a reference that is displayed on computers with multiple network interfaces.
- Page 38 Configuring TCP/IP Figure 6-3: Local Area Connection Click Properties. Information like the following window is displayed: Figure 6-4: Properties 68P09306A78-A FEB 2010...
- Page 39 Configuring TCP/IP If Internet Protocol (TCP/IP) is in the list of components, TCP/IP is installed. You can skip to Step 10. Figure 6-5: Select Network Connection Type If Internet Protocol (TCP/IP) is not in the list, click Install. The Select Network Component Type window is displayed: Click Protocol on the Select Network Component Type window and click Add.
- Page 40 Configuring TCP/IP You might have to use the scroll bar to locate the Internet Protocol (TCP/IP) setting. Click Internet Protocol (TCP/IP). Click OK. The Local Area Connection number Properties window is re- displayed. 10. Be sure the box next to Internet Protocol (TCP/IP) is checked. 11.
-
Page 41: Configuring Tcp/Ip In Windows Xp
Configuring TCP/IP Configuring TCP/IP in Windows XP On the Windows , click Start to display the Start window: Figure 6-8: Windows XP Start Window Click Control Panel to display the Control Panel window. The display varies, depending on your Windows XP view options. If the display is a Category view as shown in Figure 6-9, continue with Step 3. - Page 42 Configuring TCP/IP Figure 6-9: Control Panel Click Network and Internet Connections to display the Network and Internet Connections window: Figure 6-10: Network and Internet Connections 68P09306A78-A FEB 2010...
- Page 43 Configuring TCP/IP Click Network Connections. Skip to Step 6. If a classic view like Figure 6-11 is displayed, double-click Network Connections to display the LAN or High-speed Internet connections. Figure 6-11: Control Panel Classic View Right-click the Local Area Connection. If more than one connection is displayed, be sure to select the one for your network interface.
- Page 44 Configuring TCP/IP Select Properties from the pop-up menu to display the Local Area Connection Properties window: Figure 6-13: Local Area Connection Properties On the Local Area Connection Properties window, select Internet Protocol (TCP/IP) if it is not selected. Click Properties to display the Internet Protocol (TCP/IP) Properties window. 68P09306A78-A FEB 2010...
- Page 45 Configuring TCP/IP Figure 6-14: Internet Protocol (TCP/IP) Properties 10. Be sure Obtain IP address automatically and Obtain DNS server address automatically are selected. 11. Click OK to close the TCP/IP Properties window. 6-10 68P09306A78-A FEB 2010...
-
Page 46: Chapter 7: Troubleshooting
Troubleshooting Chapter 7: Troubleshooting Power • Check that the AC power adapter is properly plugged into the electrical outlet and into the CPE. • Check that the electrical outlet is working. A Computer Cannot Log On to the CPE Check that the Ethernet cable is properly connected to the CPE unit and the computer. - Page 47 Troubleshooting 68P09306A78-A FEB 2010...
-
Page 48: Chapter 8: Important Safety And Legal Information
Important Safety and Legal Information Chapter 8: Important Safety and Legal Information Your Motorola WiMAX Wireless Broadband Outdoor Subscriber Unit (OSU) is designed and tested to comply with a number of national and international standards and guidelines (listed below) regarding human exposure to RF electromagnetic energy. -
Page 49: Fcc Regulatory Information
Important Safety and Legal Information FCC Regulatory Information The 2.5 GHz WiMAX device (Model Name: CPE 25450) complies with Part 15 of the FCC Rules. Operation is subject to the following two conditions: (1) this device may not cause harmful interference, and (2) this device must accept any interference received;... -
Page 50: Ic Radiation Exposure Statement
Important Safety and Legal Information IC Radiation Exposure Statement: EU Declaration of Conformity Table 8-1 For the following equipment: WiMAX 3.5 GHz (Model Name: CPE 35450) Is herewith confirmed to comply with the requirements set out in the Council (European Parliament) R&TTE Directive (1999/5/EC). -
Page 51: Caring For The Environment
Hazardous Substances (EU RoHS) directive. Please do not dispose of Motorola Networks equipment in landfill sites. In the EU, Motorola Networks in conjunction with a recycling partner will ensure that equipment is collected and recycled according to the requirements of EU environmental law. -
Page 52: Copyrights And Trademarks
Motorola, Inc. does not assume any liability arising out of the application or use of any product, software, or circuit described herein;... -
Page 53: Copyrights
Motorola products shall not be deemed to grant either directly or by implication, estoppel, or otherwise, any license under the copyrights, patents or patent applications of Motorola, as arises by operation of law in the sale of a product. Usage and Disclosure Restrictions License Agreements The software described in this document is the property of Motorola, Inc. - Page 54 MOTOROLA and the Stylized M Logo are registered in the US Patent & Trademark Office. All other product or service names are the property of their respective owners. © 2010 Motorola, Inc.